Making Kitchen Knives – Part 4 – Heat Treatment

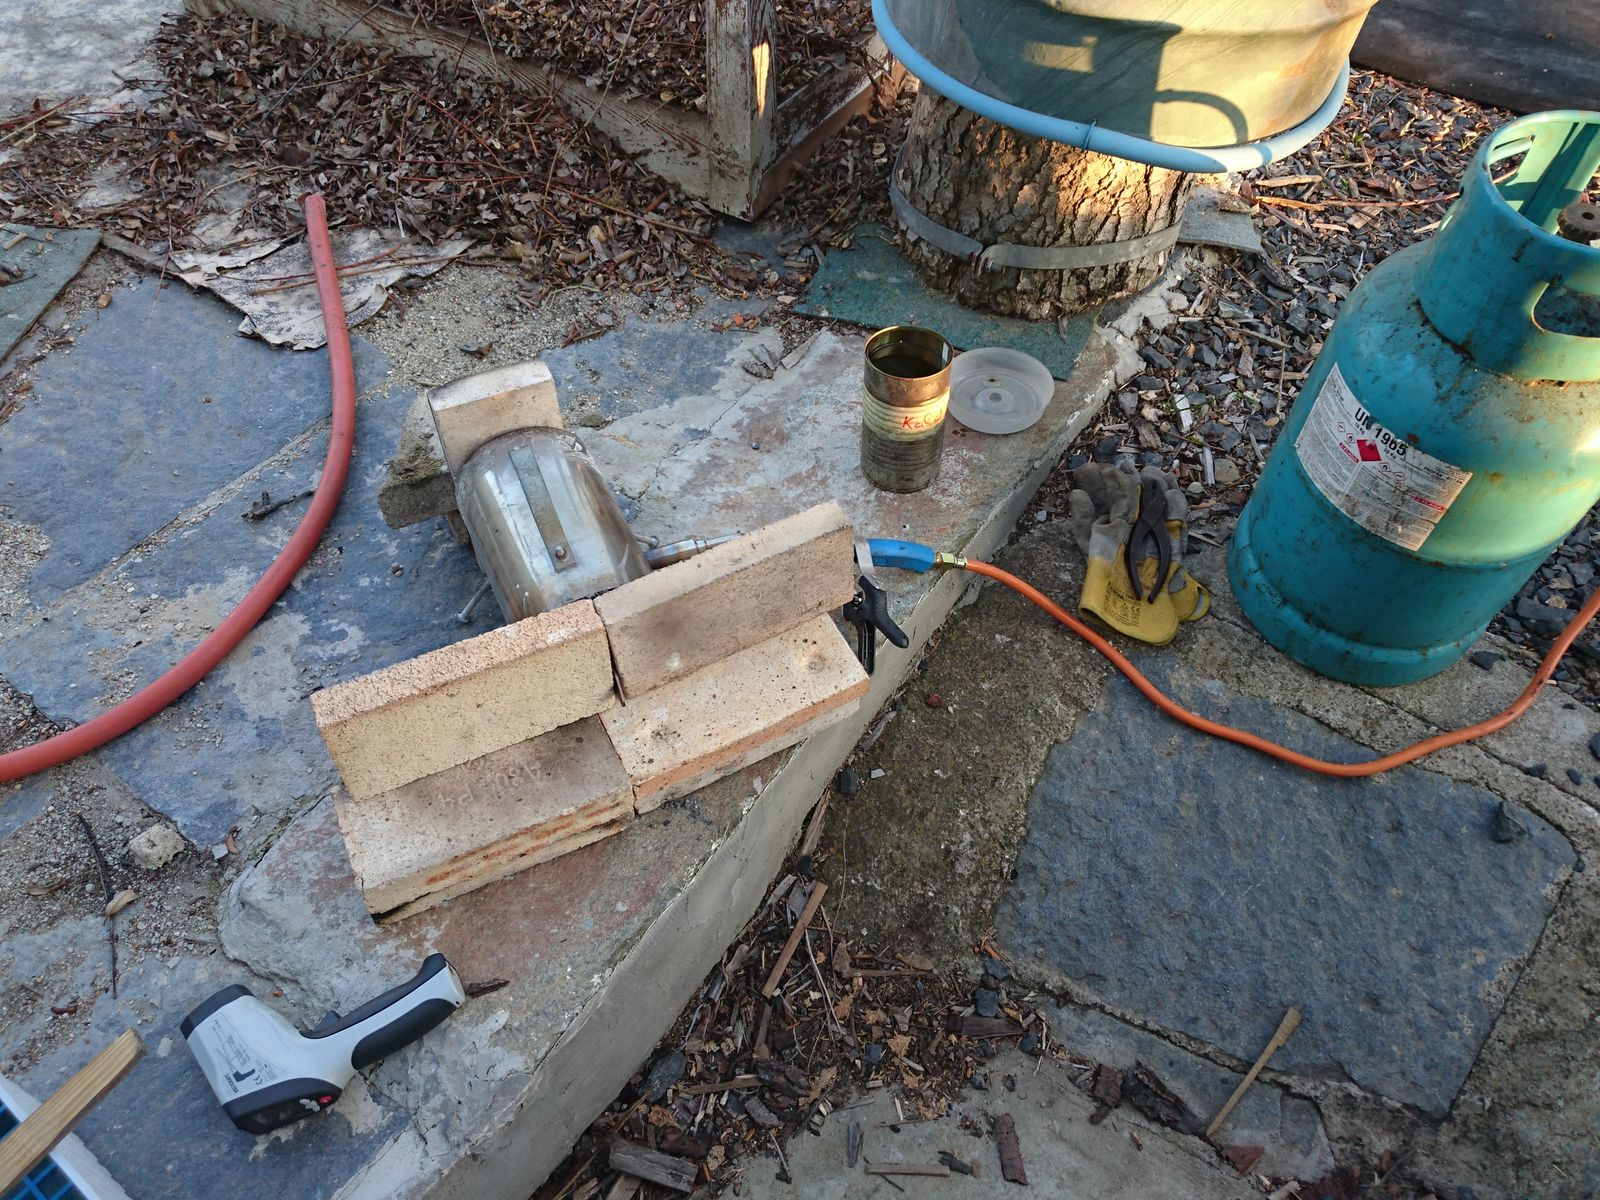
This is when things did go a bit pear-shaped, although I learned that only today. You have seen my “equipment” before, but not in detail. Now you can see it in detail. An IR thermometer on the left, small insulated chamber with gas burner in the middle, a can of sunflower oil, and of course gloves and pliers.
©Charly, all rights reserved. Click for full size.

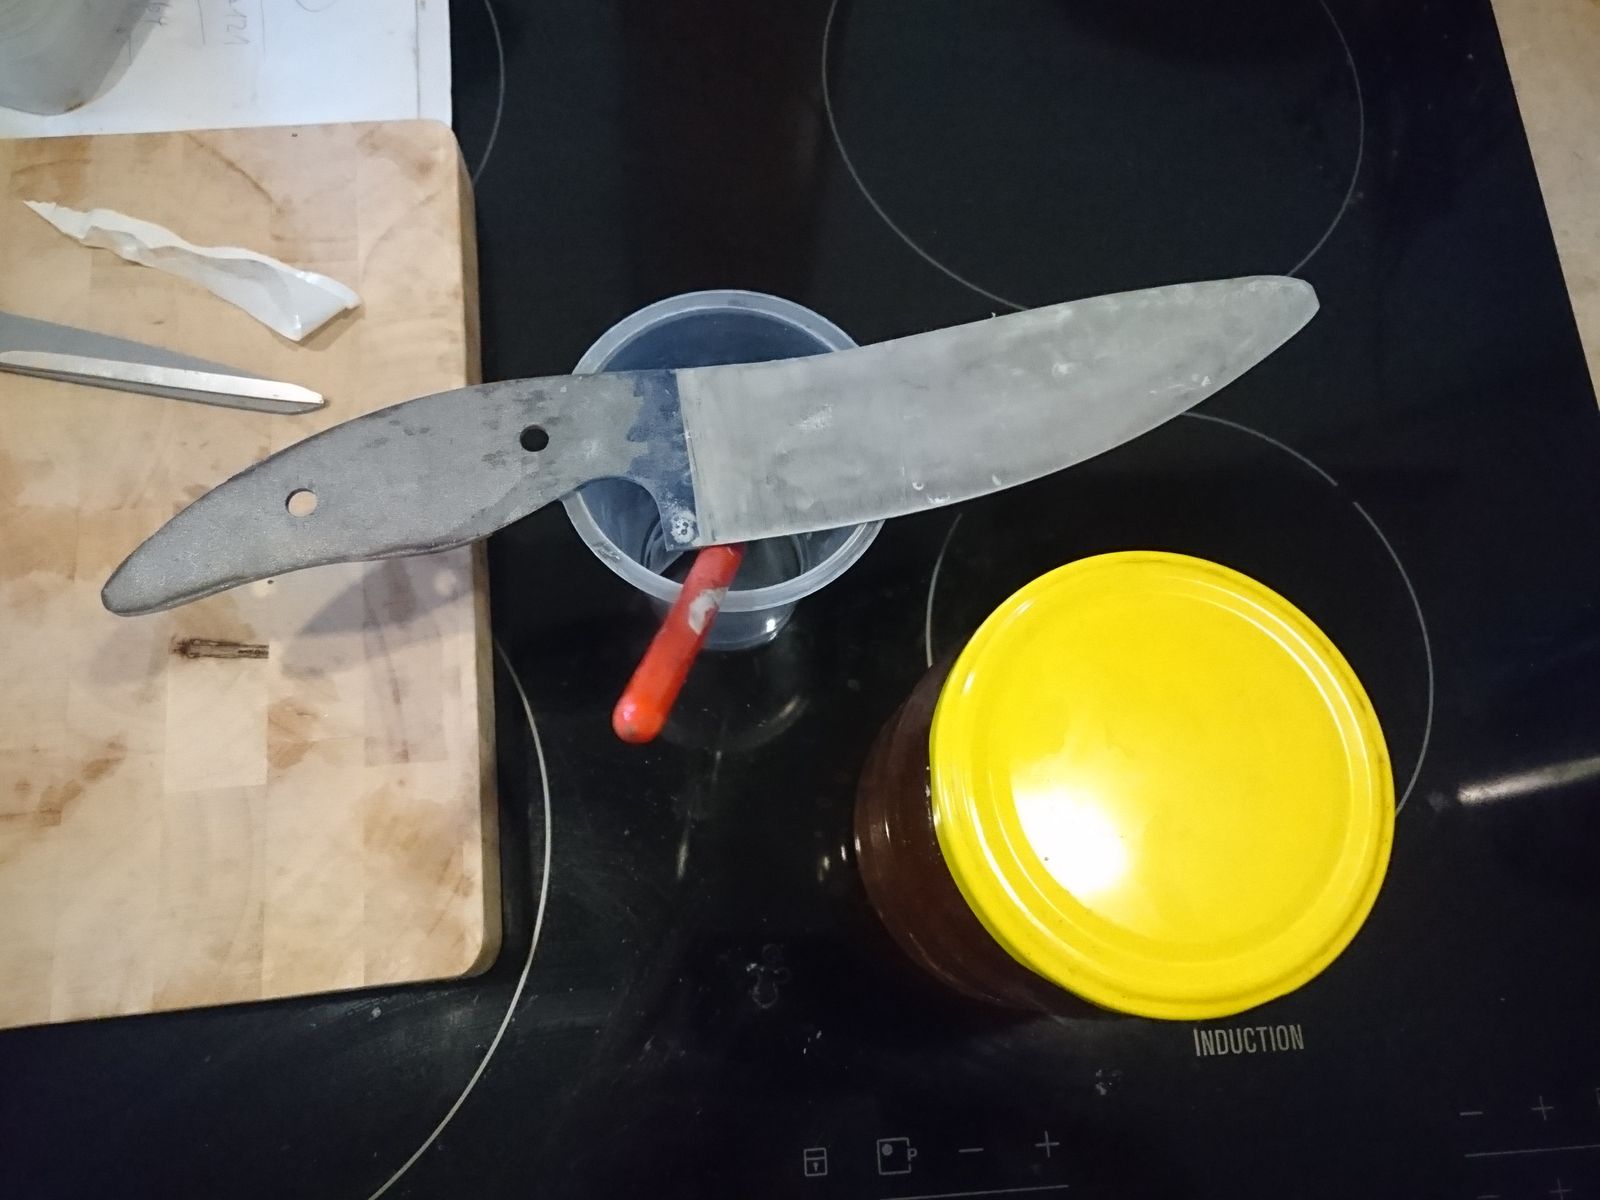
With a blade this thin I have to somehow prevent carbon loss, because I cannot simply ground away a few tenths of a mm afterwards. There would be barely any blade left if I did that. So, as you can see on the last picture in previous post in the series, I tried to coat it with an experimental solution to prevent said carbon loss as an alternative to the rather expensive stainless steel foil. It worked and did not work at the same time and the knife is now in a stage when it will be crap no matter what I do. I am going to finish it anyway, just to get the measure of time, but this step was a definitive flop. Which I did not expect, because I heat-treated two knives from this steel without problems.


Firstly the gas burner has trouble reaching the necessary temperature of 1.050°C that this steel requires. It can reach them with success (the blade that I have given to my mother was hardened this way), but it takes a long time and it is difficult to heat up the blade evenly. I thought that I have reached the right temperature and quenched the blade OK, which was confirmed by subsequent scratch test with my impromptu gauges. However, as it turned out, the scratch test only passed because the protective coating has made a thin but hard layer on the surface that was bugger all to remove.
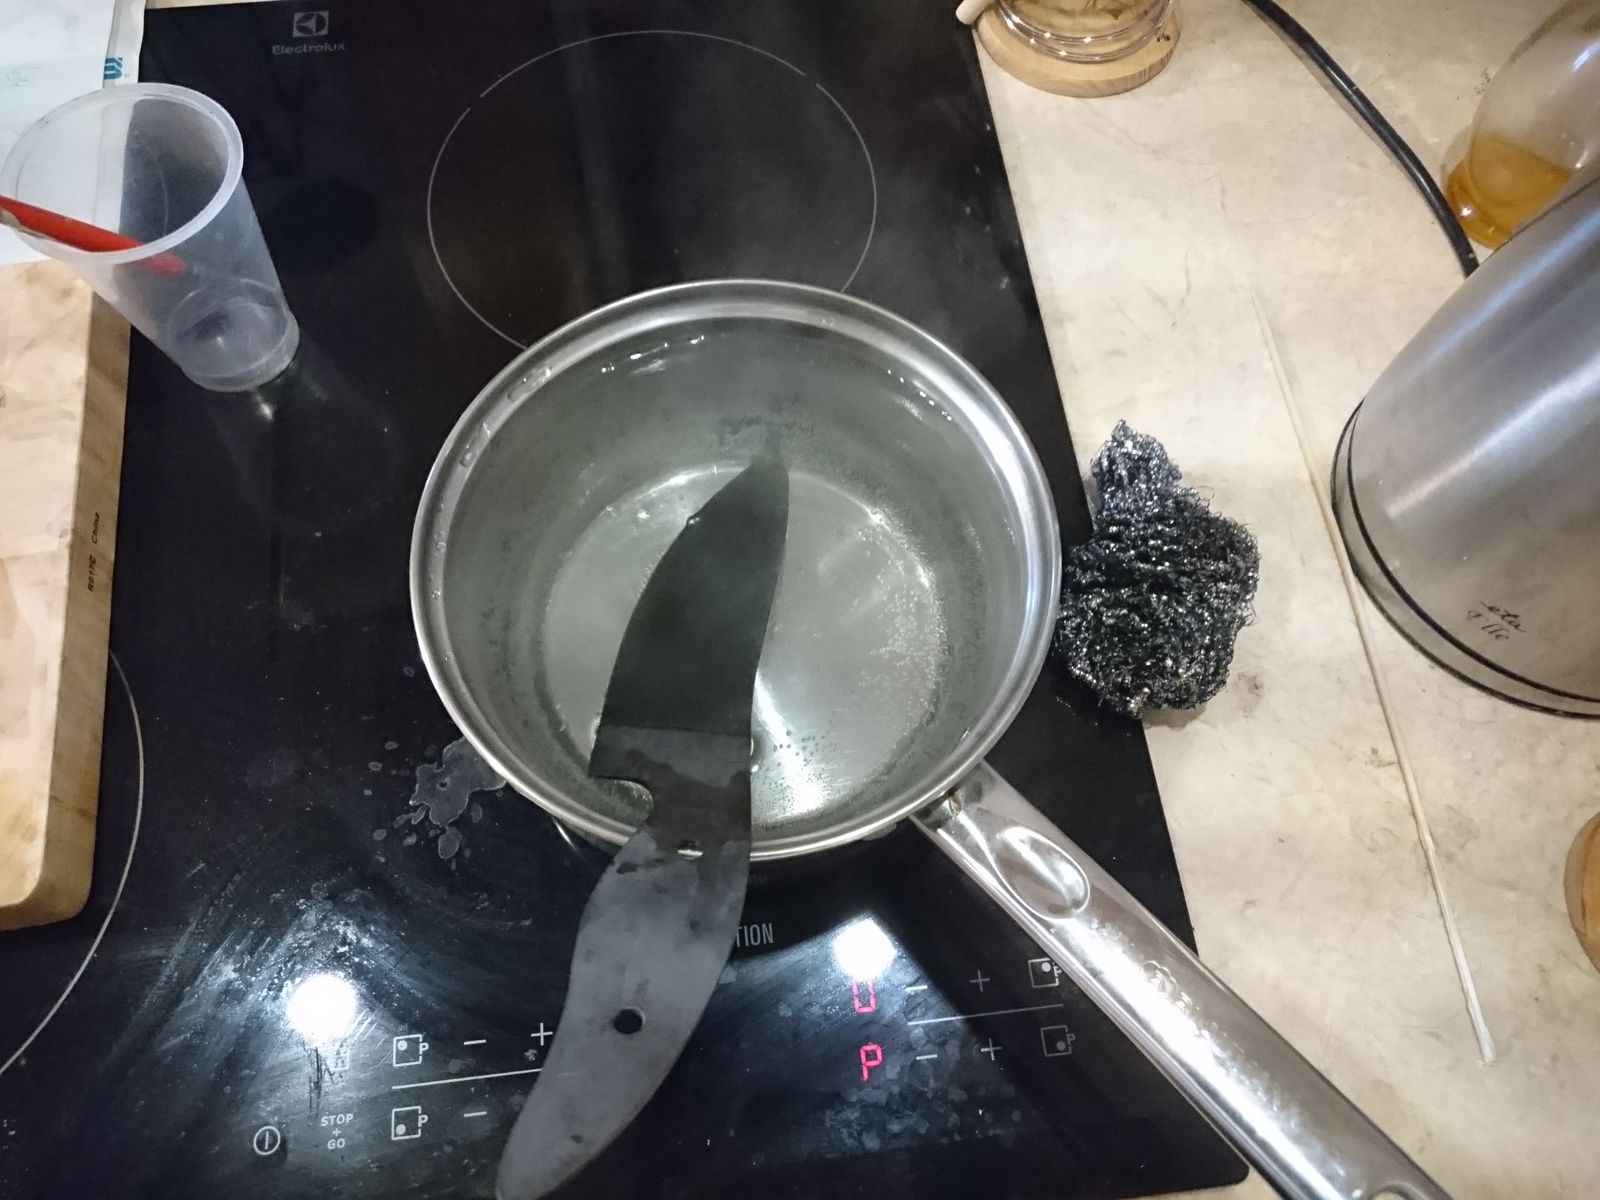
©Charly, all rights reserved. Click for full size.

I hoped it would dissolve in hot water – that was the intention – but it did not. It was extremely difficult to clean off in the following step and after I measured the hardness on polished blade (properly – I found out we have HRC measurement at work), it had only about 50-51 HRC. That is weaksauce for a kitchen knife, although it would be OK for a machete. The blade is hardened, just not to its fullest potential. It will cut fine, but it will require more maintenance, so I will probably keep this knife for myself and not give it to anyone. Bugger.

In addition to above mentioned quality problems, this whole step took me more than 1 hour, and I am not counting the 1 hour in baking oven at 150°C, because that does not require my personal presence and thus does not de-facto cut into manufacturing time (and I can load the baking oven with 10 knives at once should the need arise).

At this moment, I do not see any way how to reduce that time. Making more knives at once might help a bit, but for that I would need to set-up heating with charcoal. If I do that, I  estimate that I could harden about 5-6 knives in one go, but that one go would take probably about 3-4 hours of constant work. So a saving of 15 minutes, or 25% time per blade could perhaps be reached on this step, but it is questionable.

A heat treating oven would of course completely change this whole equation, but that would be a big investment – they start at 3.000,-€. Should I ever have to produce knives for sale, a heat treating oven would be a definitive must, or I would have to simply send knives for heat-treatment. Right now I will try to do the heat treatment again by myself, and the next batch of knives will be split 50/50. One half hardened with the use of stainless steel foil, one half with modified coating, and I will either set-up a bigger gas burner, or use charcoal.

This step is put in the “high hanging fruit” basket. There is potential for significant time-saving here, but it is very difficult to reach with my current equipment.

A Stunning Little Dragon

These incredible photos were sent to us by Avalus. The first time I saw them I just sat there scrolling back and forth taking in more and more detail.  The first shot is all about camouflage, but after that it’s all about standing out. It’s a wonder filled study of a beautiful creature. Avalus says,

this encounter I found the most impressing. It was a really large dragonfly, just sitting on a mossy patch of sidewalk in the botanical garden of my University. She did not mind me in the slightest and I could take pictures from a few centimetres away. 

She did stick her abdomen in the moss repeatedly, so maybe she layed eggs? There was a pond-flowerbed maybe 20 cm away.

The finger is for size, I did not touch her.

As you can see in picture 11, it is a beauty and a beast (if you happen the be a insect)!

Avalus, thank you so much for sharing.


libelle 1, ©Avalus, all rights reserved

[Read more…]

Making Kitchen Knives – Part 3 – Basic Grind

This is the part where work on more blades in parallel is no more possible, but I have tested an improvement that I have hoped for to both save time and increase precision. Grinding symmetrically free hand a blade mere 1,8 mm thick would not be easy. My previous knife of this type was made from 2,5  mm steel and I messed up the grind. I have spent more time correcting my messed up grind than I liked to and in the end I had to opt for a blade without a clear transition between the blade and a ricasso.

©Charly, all rights reserved. Click for full size.

I wanted to do better this time, so I have built an experimental jig. As you can see on the picture, it is a simple 30×50 mm block of hardwood (a leftover from building the belt grinder). Two screws hold the knife on the smaller side, and three screws are right on the edge opposite the knife. Those three screws pop out a bit out of the wood and by how much they pop out is how big an angle I have between the blade and the platen on the belt grinder.

©Charly, all rights reserved. Click for full size.

I did not make a picture on the belt grinder, but you can see on the right the jig with a blade put against a machinist’s square. The advantage of this setup is that if I want, for example, ~0,3 mm thick edge before hardening and with the blade being ground all the way to the back, I know that I have to set the jig so that there is ~0,70 mm between the square and the back of the blade. Which is exactly what I have done, only without measuring, only eyeballing the gap and deciding “yup, that is what I want”.

The jig is set up so that I can screw the blade in two mirroring positions, but I did not bother too much with precision, because I did not know yet whether it will work or not.

It worked, but the imprecision was abit of a problem, as well as the way the blade is fixed. Two main problems occurred:

  1. The tip of the blade lay on the supporting table. That proved to be a problem, because it got snatched by the belt and dragged into the gap between the belt and the table. It messed up the grind in split of a second and I have spent no trivial ammount of time correcting it.
  2. Changing the blade on the jig took way too much time, even with accu-screwdriver. Part of the problem was the imprecision, because I had to monkey with it each and every time to get it right.

So a more precise jig that allows fro quicker change is required, and it also should hold the blade at least a few mm above the supporting table for better control. As a proof of concept it worked, it did indeed improve precision, but there is potential

During the grind I have made one time-wasting mistake, but I did not know at the time it is such. After I have established the grind with ceramic belts which go up to 120 grit, I continued to 240 grit on Zircon-carbide belts. As it turned out,  I could have spared myself those zircon belts alltogether, but more about that next time.

©Charly, all rights reserved. Click for full size.

I forgot to make a picture of the ground blade, but here you can see it as it went into the next step in the process. You can see that I have managed nice clean line all the way to the back of the blade, which I was previously not able to do free hand.

The time spent with this was about 1:15, or 75 minutes. From that time I have spent approximately 10-15 minutes monkeying around with fixing the blade on the jig, and another 5-15 minutes changing belts on the grinder. I also wasted some time correcting messed up grinds. I think that a better jig and above all not going above the ceramic belts should cut this time in maybe a half, but probably not more – it is fidly work and probably the biggest factor is experience. I remember Walter Sorrels saying in one of his videos that he manages this in 10 minutes, but only because he has been doing it for years.

Right now I am putting it into the “low hanging” fruit basket, because I think I can easily get a significant 15-20 min improvement through better jig and not going too fine with the belts. The rest is, unfortunately, entirely dependent on how fast I will scale the learning curve.

Progress

I poured another batch of resin last night.

I stirred it, and I stirred it, and then I stirred it some more and it went much better.

First you can see my prepared wood pieces. I wrapped some laminated foil around them and secured it with tape. That was a good idea.

Wooden dowels

Beech and fir, broken off and wrapped.
©Giliell, all rights reserved

My workspace all set up before the pouring. I used the little cups from a sweet to dye some resin.

work surface with equipment for resin

©Giliell, all rights reserved

That’s waht it looked like afterwards

Messy workspace

©Giliell, all rights reserved

Oh, wait, did you want to see the results?

[Read more…]

Making Kitchen Knives – Part 2 – Draw, Drill, Cut

©Charly, all rights reserved. Click for full size.

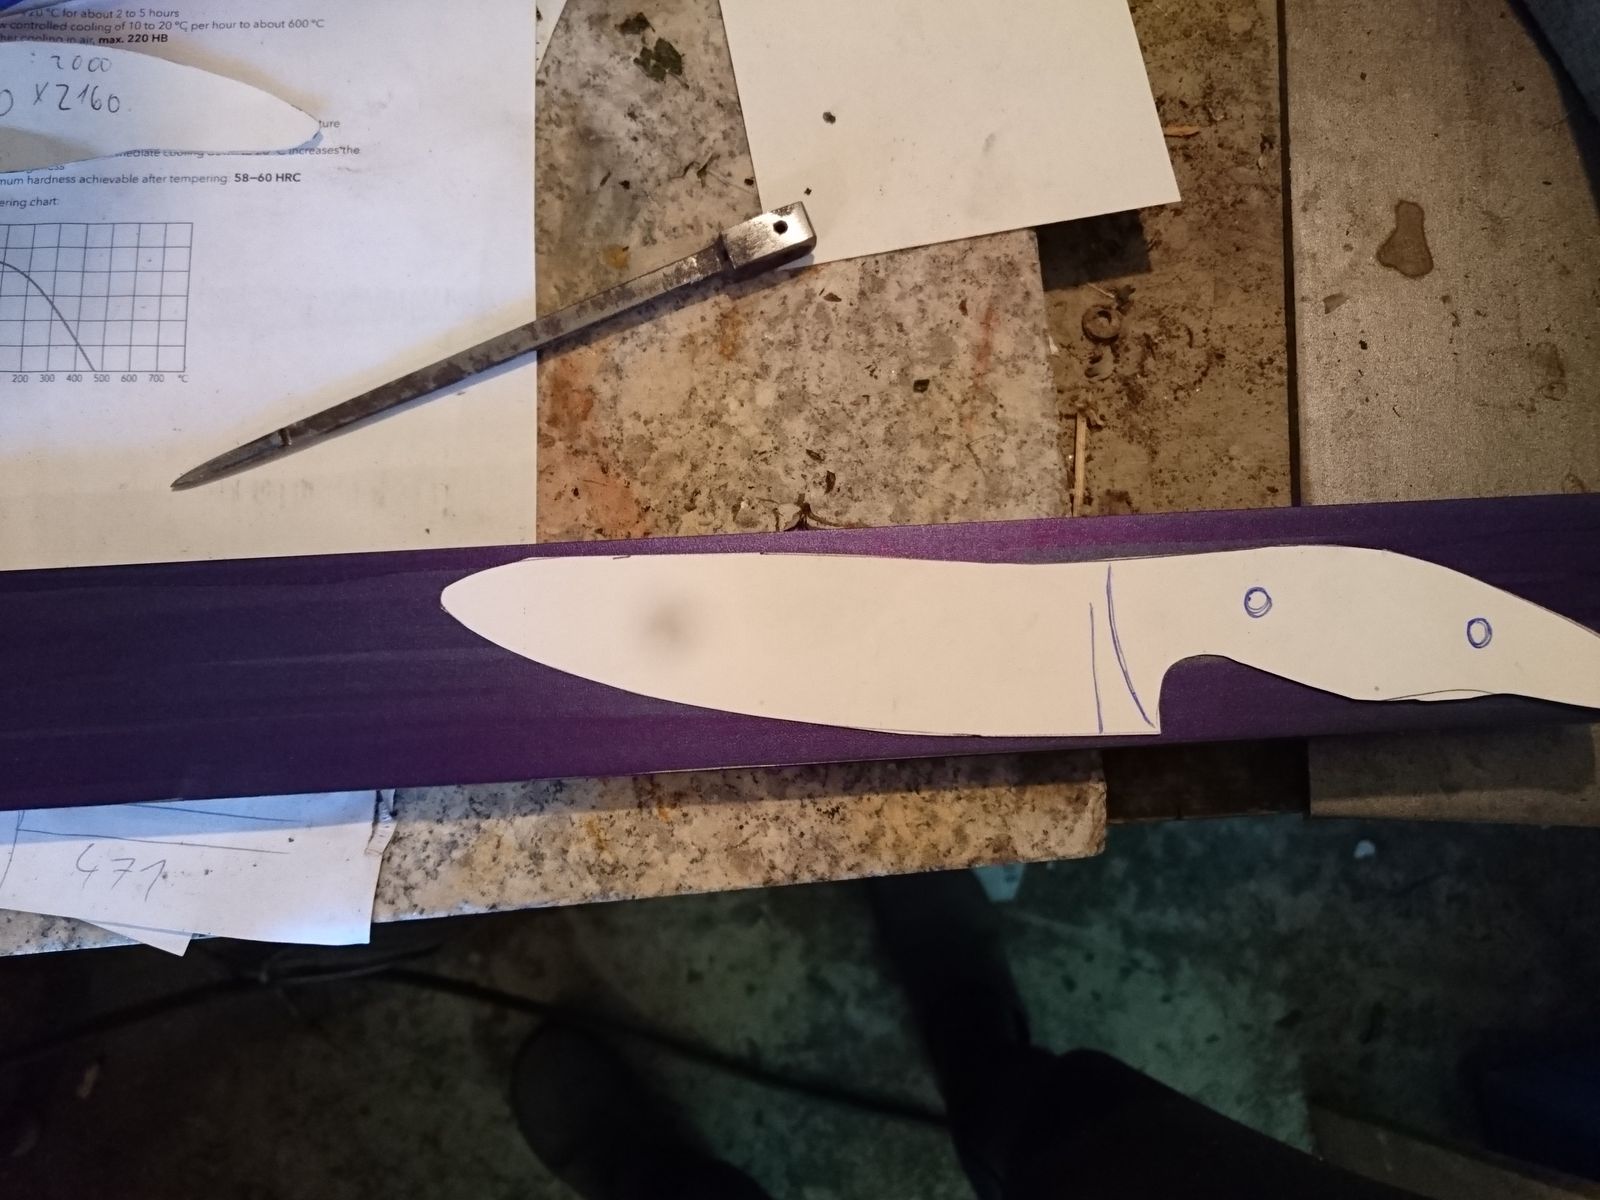
Each bar I have is big enough for two knives, but I cannot simply halve them – there is nearly 10 cm overlap towards the tips. That way I get longer knives whilst wasting less material. I have made a new paper template and here you can see how I laid it on the bar. To draw the outline I covered the whole bar in blue color using very thick (1 cm) marker. A much cheaper and more readily available option to machinist’s blue. You can also see that  I have lost my drawing needle somewhere in the 10 square meters of my shop so I have made a new one from an old shuttle bobbin. I hope I won’t lose it too.

When doing this I have wanted to test an idea how to improve my process already, so I have made another template which allowed me to mark not only the two holes for pins, but also a hole at the center of the finger groove. Unfortunately I did not make a picture of that.

©Charly, all rights reserved. Click for full size.

But here you can perhaps see why the third hole. After marking the hole positions with a center punch, I proceeded to the drill. But instead of a normal drill bit, I have spanned in it a step drill which allows me to drill holes from 4 to 22 mm. So I drilled 6 mm holes for pins and an 18 mm hole where the finger groove is. That way I do not need to mess around with some improvised way to grind a nice tight radius that I need. This is a big time and hassle saving in itself.

This is also first significant change in design to the prototype that I have given to my mother. She did not exactly complain, but she commented that a deeper finger groove would be more comfortable. So I am making the groove deeper and therefore the handle inevitably skinnier in this part.

©Charly, all rights reserved. Click for full size.

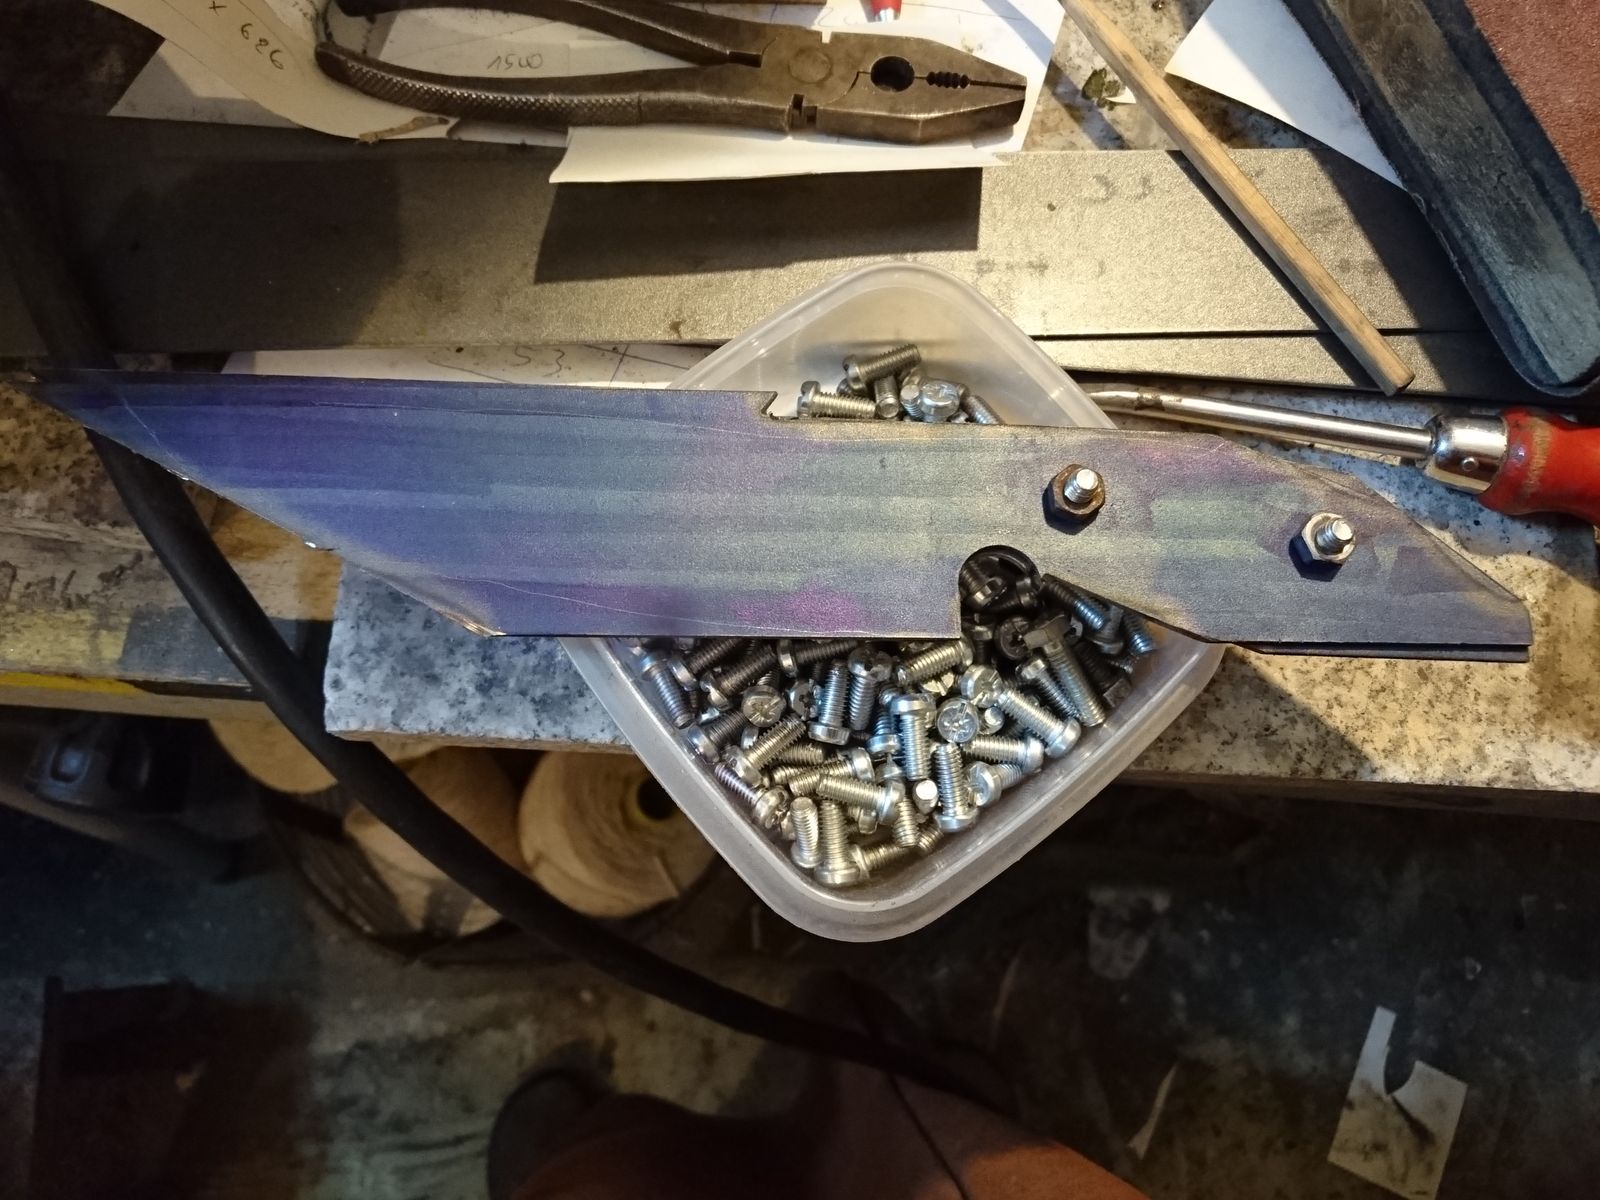
I have marked and drilled both halves, then I cut the bar diagonally with an angle grinder. Using an angle grinder I have also cut excess metal on both knives since I live by the rule – if you can cut it, do not grind it.  After that I have tried another time-saving measure that I have thought up in my idle time – I have connected both knives with screws through the pin holes. With that I proceeded to the belt grinder to grind the outline of the blades.

It worked very well and I had outlined two knives very quickly, in fact these three steps took a lot less time than I expected – just one hour overall. And I even see big time-saving potentials here:

  1. For drilling I could make a template for guiding 6 mm drill bit instead of punching the holes for each blade separately. So for next run I will first fish around in my scrap pile if I find a scrap piece of the right shape and size. Then I can stack and drill more pieces in one go. I will lose some time by stacking, but save time drawing and punching. Also next time I will first drill all stacked pieces with a 6 mm drill bit for the finger groove as well. That means changing the bit once, but I think it will be more than made up by the time saved from drawing and punching.
  2. I can probably stack at least two, maybe even five, pieces before cutting all the excess with the angle grinder.  Five pieces would be 9 mm thick, and an angle grinder should be able to grind through that without big trouble and without too much reduction in speed. And I will waste less time per blade by repositioning the piece in the vice for each cut.
  3. Ditto for the belt grinder. A new 40 grit belt should be able to grind five pieces at once with only marginal reduction in speed. That would also improve reproducibility.

So I am putting this in the “low hanging fruit” basket, since the 30 minutes per blade is significant 10% of my goal time and I estimate I can cut that easily down to half or maybe even less.

Verschlimmbessern

Verschlimmbessern, verb, German: Making something worse by trying to improve it.

I tried to somehow righten the mistakes I made with the first bracelet, but instead made matters worse, though I think it would have come to this eventually anyway. But I learned quite some things.

bracelet with matte top

Cut off top section

bracelet

Sticky front

I tried to cut off the sticky top section, round the edges and then polish it up to shine again. This didn’t work well for several reasons.

Most importantly:  If your resin didn’t cure properly, there’s not a lot you can do. Reflect on what you did wrong. Do better next time.

The soft spots were all over, and when I cut off the top, the fine dust stuck to the soft spots and made them matte. And since the whole thing isn’t as hard as it should be, it moved quite a lot so the resin and the stones separated in places, leaving more matte spots.

Another lesson: you cannot get around very fine wet sanding paper. All my mats and polishing stuff were still way too coarse to make it shine again. This will be very important since one of the projects that I’ve planned involves makeshift moulds* and requires grinding and polishing.

*Resin Obsession can speak many words to the wise about not being too ambitious in the beginning, but nobody ever accused me of being wise.

Even When Not in Doubt Marcus Knows

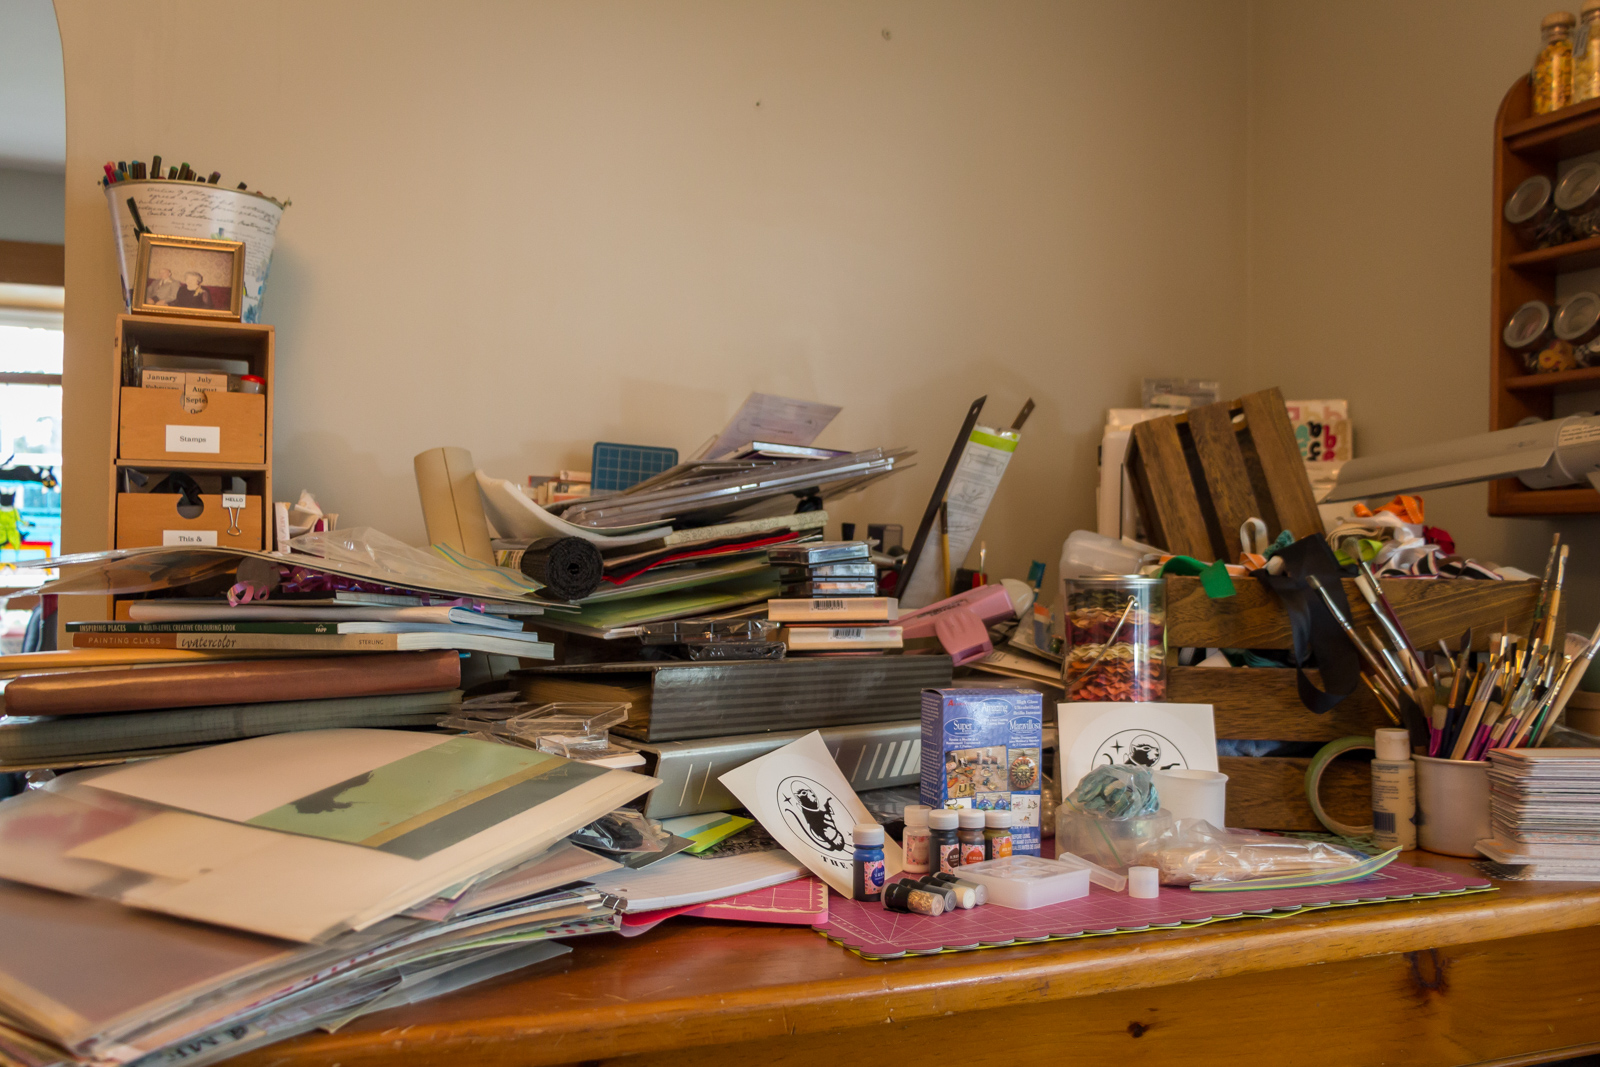
Yesterday Giliell posted about the wonderful gift of acrylic casting supplies that she received from Marcus, noting that she’d been considering trying this art form.  Well, I received the same gift from Marcus last week and I wasn’t even thinking about trying resin casting. Marcus just knows. He knows that I have a large collection of seaglass and that this is the perfect medium to pair with them. I can’t wait to try it, but I’ve been rearranging my cabinets and my work table is buried under a ton of paper crafting crap right now so I haven’t gotten past the gazing in wonder at it all yet. Well, I have watched a few how-to videos (link below) that have given me lots of ideas for using seaglass and more. I love the bracelet Giliell made and it’s made me even more anxious to try it. Alrighty then…time to clean up the mess and play. Tune in over the weekend to see if I can make something as pretty as Giliell did. Thanks, Marcus. You definitely spread sunshine.

Resin Obsession (a very good site)

Wow, Thank you Marcus

Yikes! The bigger picture (my work table is under there somewhere)


Making Kitchen Knives – Part 1 – In the Beginning…

… there was a bar of steel.


After a short break due to harvest I have started two knife making projects and I will share the progress on them as I go along.

The first one is about developing a viable process for making small-batches of kitchen knives.

The knife that I have given my mother for Christmas has proven itself to be an excellent cutter. It held an edge for half a year and still shaved hair when my mother requested honing the edge because it had a few blunt-ish spots. The handle does not show any sign of deterioration too. And it is used daily, by at least two people, on everything from fine chopping veggies to de-boning chicken. So I think that with some adjustments (mostly making it look prettier) it might be a saleable product.

I reckon (I will not bother you with the math and reasoning, some of it has solid rational basis, some of it I pulled out of my nether regions) that in order to be able to eventually barely survive whilst making knives, I would have to be able to make a passable kitchen knife in under five hours spending with the fun work, i.e. manual labor. The lower the better. Rest of the working day would in such a case be eaten by the unfunny part of the job, the actual business of business.

But developing a viable production process is something I have a professional experience with and so I want to have a go at it, even though right now making knives is just a hobby. And I will be sharing with you all the failures as well as the improvements in trying to achieve my time goal.

The first step is straightening the steel. For this project I am using N690 steel 1,8x50x500 mm and all the steel bars had a slight bend to them that had to be corrected. Currently the only way for me to do this is to use a vice and three thick screws. Had the plates had a kink, I would place the middle screw straight on that kink and bend it with ever-increasing pressure until after taking the steel out of the vice it would be straight-ish. However these did not have a kink, they were nearly universally bent in a very slight regular arc.  To straighten that, I first tried to bend the bars slightly at multiple points. It worked, but it was time-consuming and unreliable. Later I have tried to close the vice only slightly on the steel bar and then pulling it through the screws – essentially using it as an improvised roll bender. That worked much faster and reasonably well.

Even soo, all in all it took me less than 1 hour to straighten 12 knives worth of steel. That is less than 5 minutes per knife. I think that building a small roll bender specifically for straightening these thin long bars should not be difficult and it could potentially shave off quite a reasonable chunk off of that too. But right now, I am putting this into the “high hanging fruit” basket, since despite the clearly impromptu setting it takes only about 2% of my time goal. That means, I will ignore this step in the process for now and not bother about improving it.

For the first knife made let’s write down 5 minutes for this step and move on to the next.

Spring Tulips from Down Under

I never tire of autumn colours, but the sight of these gorgeous tulips sent in by David from Australia made me more than a little nostalgic for the season of new growth. The white ones in particular caught my eye. They look so fresh and crisp. David Says,

It may be Autumn/Fall up North, but here in the South, Spring has sprung, The Grass has riz. Shot these tulips last week in Bendigo, (https://en.wikipedia.org/wiki/Bendigo)

such a lovely sunny day it was impossible to shoot without humans getting in the pics. Enjoy.

Thanks, David. I am enjoying and so will everyone else.

©David Brindley, all rights reserved

[Read more…]

Youtube Video: Pictish Crossbow – discussion and shooting

I would love to someday to build a crossbow. It definitively is on my ever growing to-do list.

Not that I feel particular inclination to be armed, but the simple yet not easy to make mechanism of a crossbow (or even a bow) intrigues me.

Tod Todeschini not only makes crossbows, he also likes to share his extensive knowledge about them. Here he uses that knowledge to speculate a bit about how pictish crossbows could look like.

Equus

One thing people may or may not know about me: I luuuuuurrrrve horses. Sorry not sorry, I do. And while some of us have had very varied experiences with them, I would like to share something that tends more towards the wondrous grace and amazing beauty of this magnificent animal.

Mari Lwyd by Rhyn Williams, at DeviantArt

Okay, okay, that’s not the subject of this post, but seeing as Halloween season is approaching fast, here’s more info via HyperAllergic on the Mari Lwyd phenomenon. (Very pagan, and I love to see these spooky traditions still maintained today.)

Anyway.

So, in short, I am both happy and sad: I recently discovered a new documentary series on HORSES! on the CBC (Canadian Broadcasting Corporation, ha) website.

Here’s the trailer:

And oh my gosh, it’s horses, and wild scenery, and people, and dramatic music and slo-mos, and wow! I thought it was a four-part, but it’s a three-part mini-series (part one, part two, part three). Why so sad? Because the videos are only available in Canada (as anyone not in Canada might have already discovered by clicking those links). The CBC does have a youtube channel, but it’s been no more helpful, because from what I can tell, this hasn’t been posted yet (or maybe it’s because I haven’t subscribed).

The article that led me to this find is here, unfortunately for some reason I cannot find the actual article on my computer so you have to settle for the mobile version.

Our ancestors settled every corner of the planet on foot. But when we harnessed horsepower — roughly 6,000 years ago — the human story changed forever. For clever-but-slow Homo sapiens, the strength and speed of horses was a perfect complement. Horses transported us, pulled our loads, plowed out fields, herded our livestock, and carried us into battle (or sped us away from danger). In ways no other animal could, horses were our constant and irreplaceable companion.

In the age of machines, we still talk about “horsepower.” But horses have lost their central place in human life; we now keep them as pets and companions.

But while their importance in the human world is fading, there are some horse cultures that survive today. In Equus: Story of the Horse, we meet some of them.

The documentary visits Kazakh nomads, the Yakuts of Northern Siberia, the Blackfoot of the Western Plains, and the Bedouin. Some of those horses (the northern ones) are seriously cute.

In honour of all horses who inspire us (in one way or another), here’s a fusion of Mongolian throat singing and traditional Latvian folk music. It is quite something. Don’t forget to enjoy the gorgeous scenery, too!