The Greater Gardening of 2026 – Part 53 – Total Tomatoes

This year, the tomatoes were not particularly successful. As I mentioned, I made some kind of unknown mistake early on, and all the seedlings were rather tiny and sickly when I was planting them out. Most of them caught up somewhat, but then the weather was way too hot, and they stopped growing again. And I sacrificed some tomato-growing space for the loofahs (which were a success) and for bell peppers (which failed completely). And when it stopped being too hot for the tomatoes to grow, it very quickly became too cold. So I had to deal with a lot of green tomatoes, again.

© Charly, all rights reserved. Click for full size.

I wrote about three methods of doing this last year, but I only demonstrated the dig-out one. I used that this year for some of the plants that were outside again, and I did manage to save about 8 kg of tomatoes this way. Almost all of the green fruit you see in the picture ripened in the end, and only a handful spoiled and had to be thrown away.

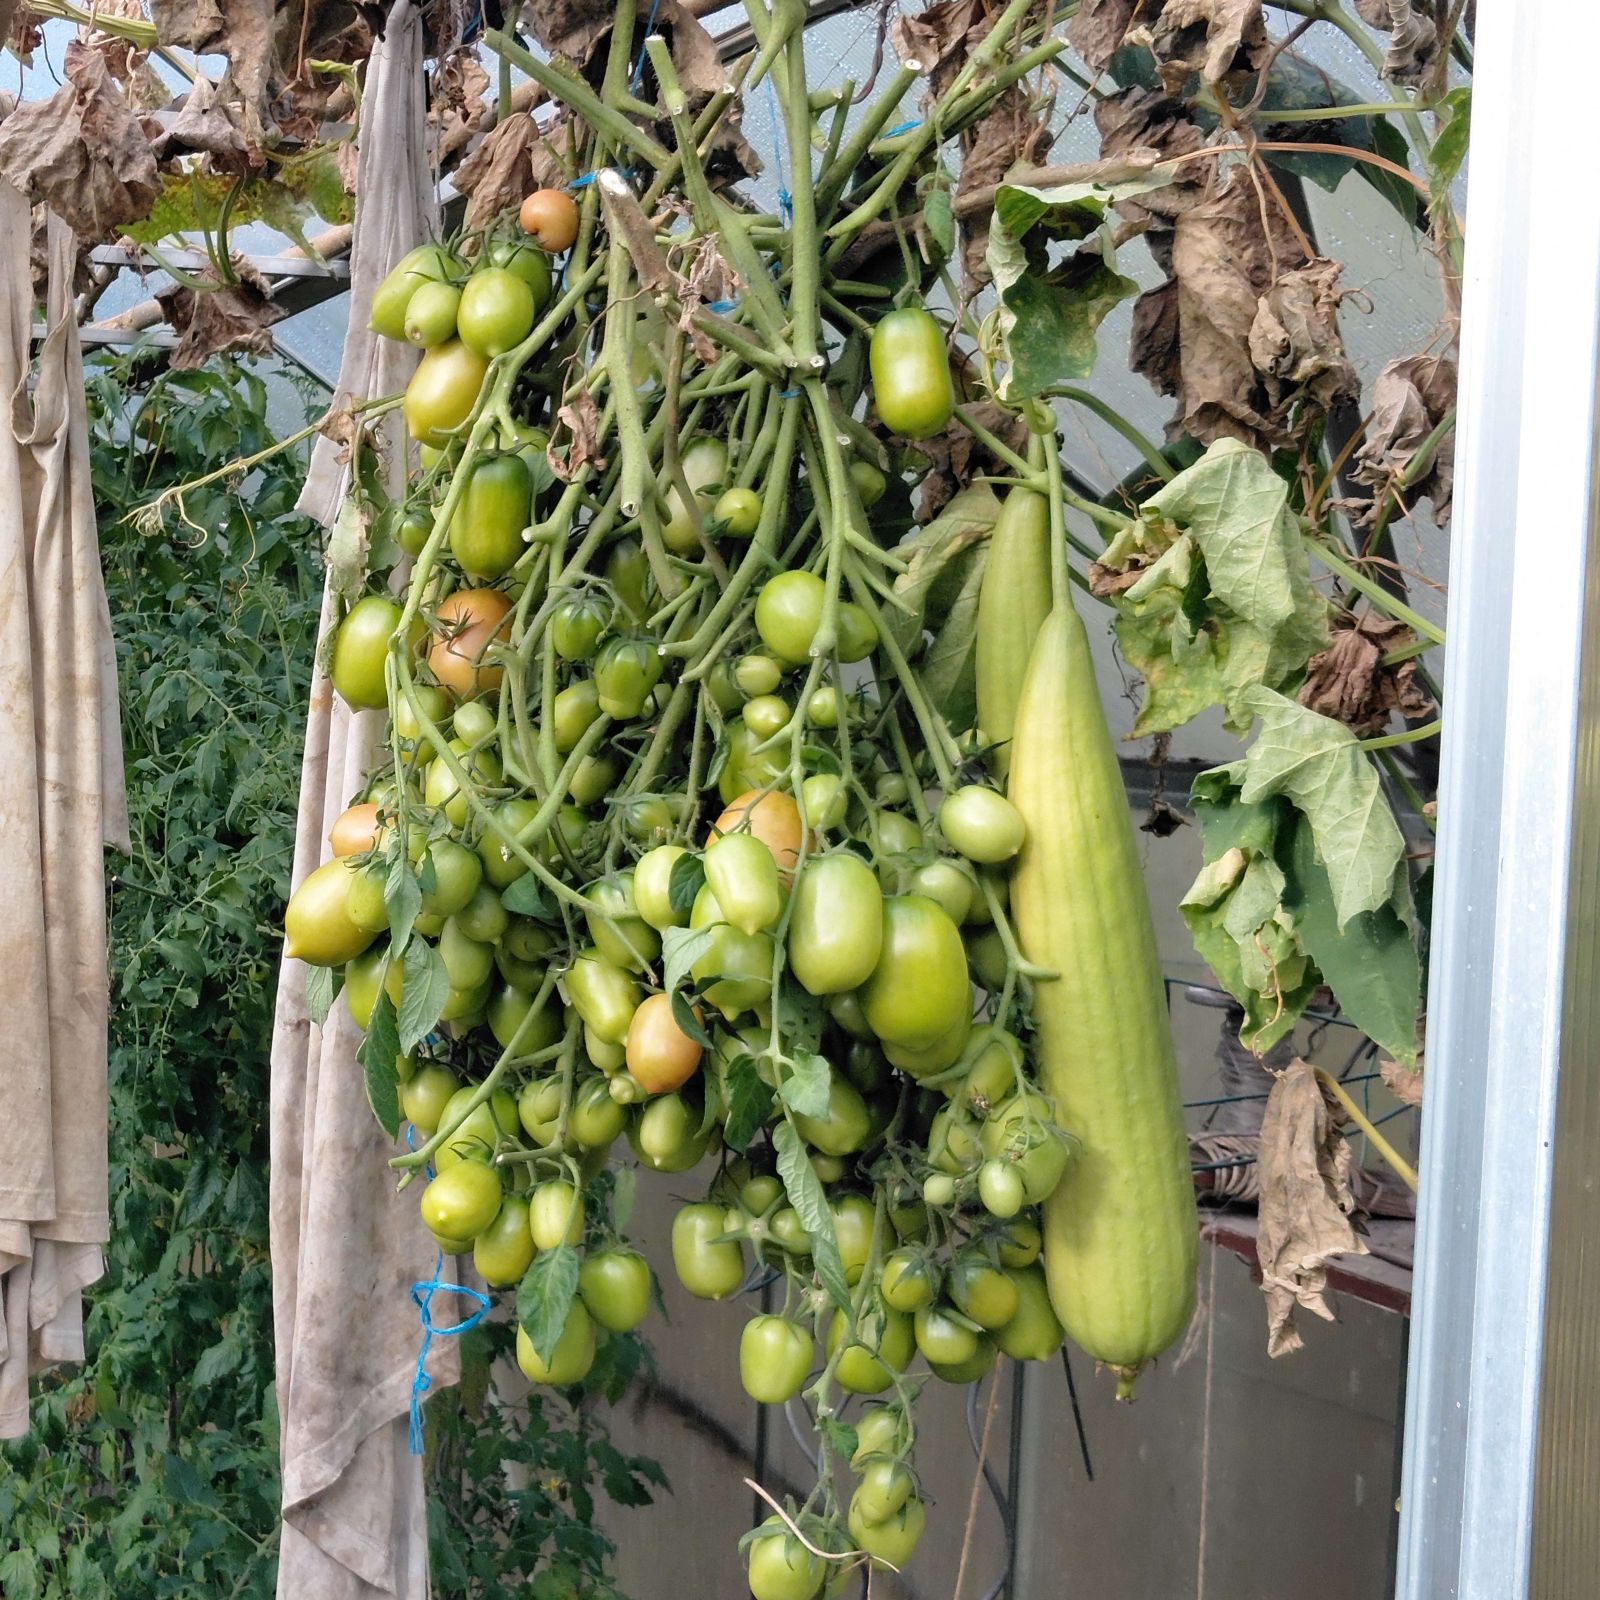
However, I tried new trellises this year, and I couldn’t dig out those plants. They were intertwined with the trellises. So, I used the second method: I cut the whole clusters, and I hung them in the greenhouse.
© Charly, all rights reserved. Click for full size.

That was almost a month ago, when the weather was still somewhat sunny and warm during the day in the greenhouse, but cold-ish at night. That way, the fruits continued to photosynthesize, without drying too quickly.  Last week the temperatures plummeted, so I took them indoors.

© Charly, all rights reserved. Click for full size.

I already harvested and ate some, but as you can see, quite a lot are still ripening. At a rough guess, at least 3/4 of that initially green mess has become edible in due time.

Overall, I got over 20 kg of tomatoes, so we are stocked up on tomato concentrate for another year. And we still got some canned sauce from last year. So not a roaring success, but not a failure either.
The Greater Gardening of 2026 – Part 53 – Germinating Grains

I started slowly peeling the grains off the cobs of my corn harvest. From the small or otherwise inferior ears, it goes directly into a beaker marked “Food”, but the rest is being sorted by color into different beakers. Yes, I could not resist the compulsion to sort the seeds by color. So far, I have these:

white, yellow, orange, blood red, bright red, pink, brown, light lilac, dark lilac, grey, black(dark grey)

There is also one ear with some green and blue seeds. Really. Unfortunately, the colors are a bit wonky and it is only a few grains, so these colors will be rare.

And then there is a separate beaker with an assortment of seeds that have either pastel colors or do not have a uniform color (marbled).

I did not know that corn can come in so many diverse colors, and I am both thrilled by it and disappointed by the lack of proper greens and blues.

After I am done, I will sort the biggest seeds of each color into tiny transparent bags and store them in a jar in my dark cellar. The plan is to sow the same amount of each color to get the widest possible color spread the next year.

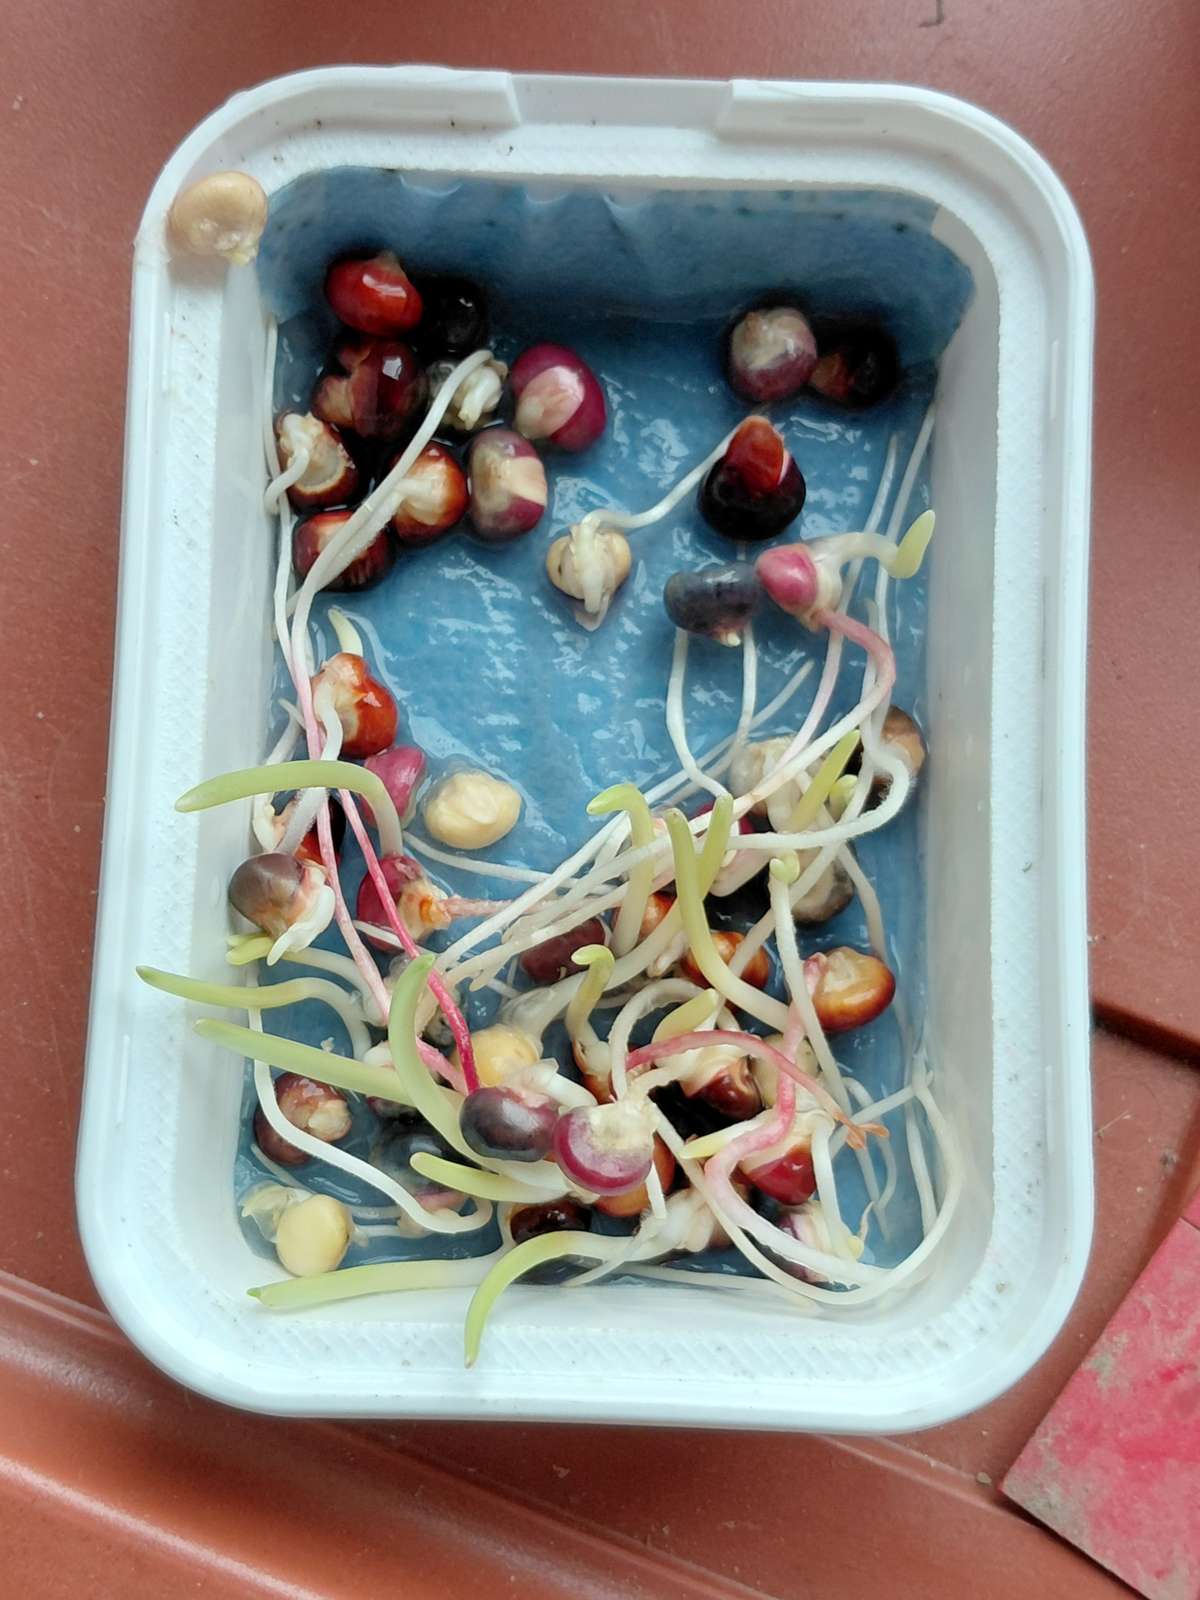
But before I started all this, I took two seeds from each ear I estimated as ripe, and I put them to a germination test.

© Charly, all rights reserved. Click for full size.

I tested 48 seeds overall, and 35 germinated within a few days. That is 73% germination rate, which is about the same that the bought seed had this year. I was hoping for a higher rate, but I can work with this. I plan to sow the seeds in pairs spaced about a palm-width apart, and when they emerge, pull and discard the second one. With this germination rate, that should ensure that in most spots (over 80%) at least one should germinate, thus minimizing empty places, as well as selecting for a fast germination trait. The downside is, of course, that I need to put aside twice as many seeds as I intend to sow. However, since I intend to sow them at the right time next year, not a month late, I should get even better results for the following season.


The Greater Gardening of 2026 – Part 51 – Colorful Corn

The Painted Mountain corn produced some good-sized ears, despite being sown a month late. And some of those ears did start to dry out on the stalk outdoors. Not all of them, though. Nevertheless, when the first morning frost came last week and the plants died, I harvested them and brought them indoors to dry out and, hopefully, ripen.

© Charly, all rights reserved. Click for full size.

I hung them on the clothes drying rack and blew room-temperature air on them during the day. As the husks dried, I slowly peeled them away. When they were all dry, I ripped them off.

© Charly, all rights reserved. Click for full size.

They are beautiful indeed, although the pollination was a bit patchy. Which is to be expected – I planted about 60 seeds, but only about 40 germinated and grew to full size. So the growth wasn’t large or compact enough for proper pollination. And the late sowing was a problem as well, of course.

I will now wait until they are completely dry. Then I will strip the seeds from the cobs and test germination. I have zero experience growing corn for seed, so I don’t know whether anything I have done so far is good or bad for the seeds’ viability. Still, at least ten big ears were almost fully pollinated and already drying out when I harvested them, so I am hopeful that those seeds will be viable.

If they are viable, I would consider this a success, because I need “only” about 700 seeds for next year to sow a large area I already prepared for them. And 700 seeds would be rather expensive to buy – they cost 5€ per packet of 100 seeds. Plus, if these are viable despite very late sowing and very early harvest, it would mean they are now selected for a short vegetation period, which is exactly what I need. We shall see. I will, of course, let you know.

The Greater Gardening of 2026 – Part 50 – Ridiculous Roots

This was a first year of growing carrots in my newly established raised beds, which I filled with soil that was specifically targeted towards root vegetables – sandy, with zero stones. When I pulled all the roots, I filled the wheelbarrow completely, just like last year.

© Charly, all rights reserved. Click for full size.

That does not look so bad, does it? Well, I was not disappointed, but I was not thrilled either. There was no rodent damage; in that regard, the raised beds did exactly what was expected of them.
© Charly, all rights reserved. Click for full size.

But nearly all the roots are multifurcated, some in quite humorous ways that will be bugger all to process. Many roots have some slug damage, especially above ground. And some roots are split lengthwise – probably a result of a combination of heat stress and drought. The raised beds were in partial shade, but since the soil is deliberately sandy, I had a bit of trouble keeping the carrots suitably watered during the heatwaves.

© Charly, all rights reserved. Click for full size.

I didn’t get the behemoths that I had last year, but most of the roots are still of respectable size. Just the funny shapes will be difficult to process.

© Charly, all rights reserved. Click for full size.

With 11 kg overall harvest from this one raised bed, I cannot really complain. Really the only issue I have is the funny shapes, which, again, will be bugger to process.

For now, they are in a covered bucket outside where it is cold. At the nearest opportunity, they will be processed, i.e., dehydrated. In combination with butternut squash, we should be set with beta-carotene for a year.


The Greater Gardening of 2026 – Part 49 – Sure Slight Soybean Success!

I dried, shelled, and weighed all the soybeans that I harvested.

© Charly, all rights reserved. Click for full size.

Not a particularly good result; I harvested 30% of what I had sown. So, from that point of view, it is a failure. However, the bought seed had an abysmal germination rate; most of it has rotted in the ground (over 95%). So I took 20 of these seeds – 10 of the biggest and 10 of the really small and still slightly green – and I put them on a wet towel to test the germination rate.

© Charly, all rights reserved. Click for full size.

This morning, 19 out of 20 germinated. The last one germinated in the evening too. So I am at the very least hopeful that I managed to grow reliable seed for the next year. However, I will probably do things differently next year. I won’t sow a big dedicated soybean patch; I will sow it around the edges of all the grain patches that I will be growing. And at least for some of them, I won’t sow them directly in the ground – I will try to first grow small plants in pots and then carefully transplant them, just as I usually do with runner beans, bush beans, and pole beans. If all that fails again and I get less than I have sown, then I will at least know I cannot grow this crop at all.

The Greater Gardening of 2026 – Part 48 – Winter Wheat

In a way, this article could count towards next year’s gardening. I have sown wheat on the biggest continuous patch that I have.

© Charly, all rights reserved. Click for full size.

The upper half is sown with spelt, the lower half with durum wheat. Why these two species? Because they are significantly more expensive than ordinary wheat.

I am not 100% sure both are winter varieties; I assume they are, because for both species the winter variety is the rule and the spring variety is the exception. If none survive the winter, they will still serve as cover crops, and I can always sow/plant something else in their stead in the spring.

But growing wheat on this large-ish scale poses a problem, one I also encountered with the naked oats (which I plan to grow next year too) – how to separate the grain from the chaff. I will still have too little to thresh with a flail on the ground, so I wanted to build a bucket with a DIY drill attachment for threshing small amounts. I tested a functional idea with the oats already, and I was all set to build it over winter. However, that might not be necessary anymore, for I had a stroke of luck!

© Charly, all rights reserved. Click for full size.

This is a grain shredder. My father exchanged it for something when I was a kid with an acquaintance at work, who was moving away and therefore did not need it anymore. Then, another neighbor borrowed it to shred grains for cows and chickens, in exchange for allowing my father to mow grass for his rabbits on part of his meadow. And then we all kinda forgot about it.

The neighbor is retired now, and he no longer has either cattle or poultry. And his wife put her foot down – unneeded junk must out, and the grain shredder should be either tossed or returned. We met at the doctor’s when my mother went for her flu shot, and he broached the subject – do I want the shredder back, or should he toss it?

My mind immediately went to using it to thresh the grains I plan to grow next year, and I said I’d gladly take it back.

© Charly, all rights reserved. Click for full size.

The machine is very old. The motor has Azbuka inscriptions, so it might have been built in the USSR. It was certainly built during the time of the Iron Curtain, because we got it during that regime. It possesses a truly mighty induction motor for a domestic utensil. And it also was in possession of a no-longer-used type of wall plug. I had to change it for a modern version (I also added the wheels when I was at it).

The rewiring, although simple in principle, was not painless. The machine was tripping the breaker, so I was suspecting I wired the plug wrongly. Luckily, an old friend was willing to assist me via WhatsApp, and he confirmed that I did wire the machine correctly, so maybe it was tripping the breaker for one of two reasons: 1 – the startup current was too high, or 2 – the residual current was too high due to the machine being too old. I despaired, but since I was assured the wiring was OK, I tried to plug the machine into the Variable Frequency Drive I use to regulate the speed on my belt grinder.

And to my joy, the machine worked. The VFD starts the motor slowly, the machine no longer trips the breaker, and I can regulate the speed from 5% all the way to 100%. I hope it keeps working for some time.

© Charly, all rights reserved. Click for full size.

The principle is simple: inside the drum are two sets of blades: two rotate with the edge, two with the flat, and an outlet is covered with a sieve. Since I can regulate the speed, I can stir the grains relatively gently, as well as bash them to the point of breaking if I want to. For threshing, I will probably remove the sieve completely. And if I somehow manage to grow a lot of grain, I can use a fine sieve to make whole-grain flour too.

This was truly a stroke of luck that does not happen often. I am glad I have honest neighbors.

The Greater Gardening of 2026 – Part 47 – Acceptable Agrie

I wanted the title to be “Amazing Agrie”, but alas, the variety fell just short of my standard for that.

© Charly, all rights reserved. Click for full size.

Some plants were still green, but I decided to harvest them all anyways to curtail  the ongoing pest damage. There was less of it than in other varieties, but it was still substantial, and even some tubers in storage have some wireworm holes that I hope won’t lead to too much spoilage before we manage to process them.

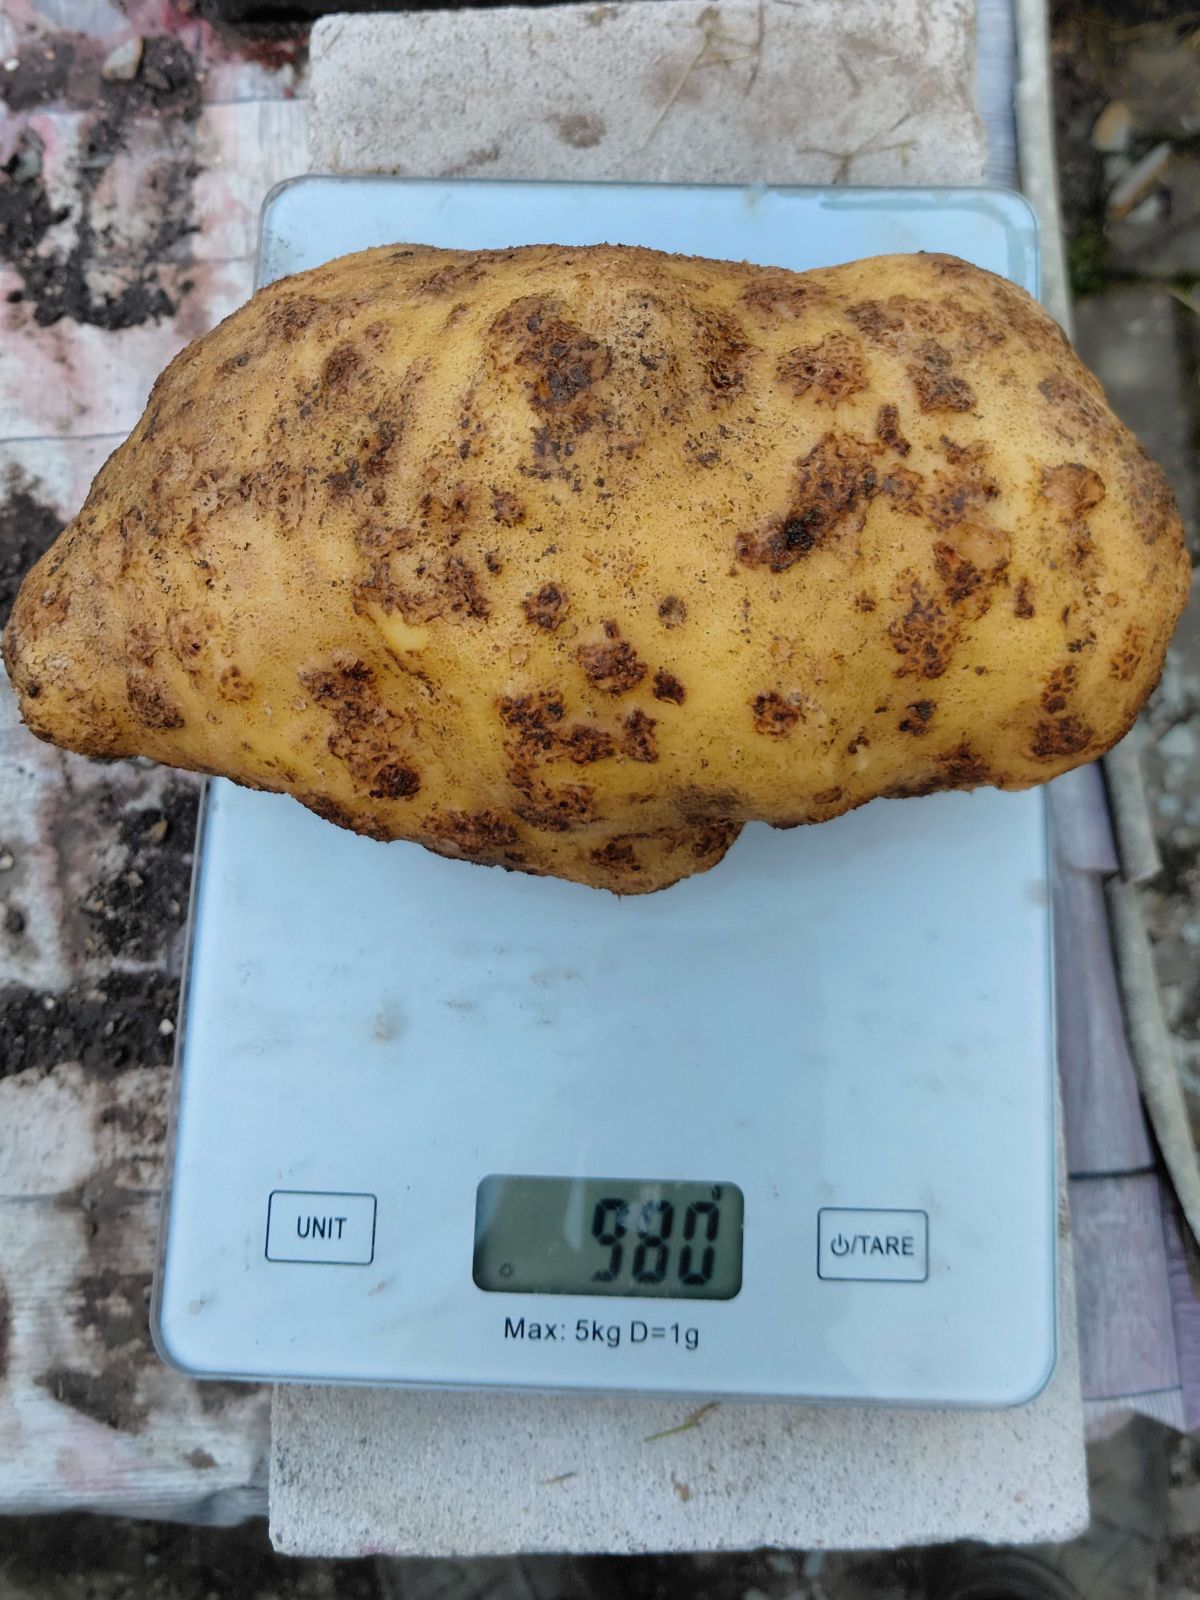
As far as tuber size goes, the variety performed extremely well. I did put aside 100 pieces of circa 50 g tubers as eventual seed for next year, but I had trouble finding enough such tubers – most were significantly bigger.  But all show signs of drought stress – some are split, some are bumpy and knobbly, and all are warty and crusty. All these three issues are due to heat and drought. Still, I did get a lot of very big tubers over 500 g, and several over 750 g.

© Charly, all rights reserved. Click for full size.

And the record holder for this year is a tuber mere 20 g shy of a full kilogram. Impressive indeed.

Judging by this variety alone, my intelligence must be abysmal, since the old Czech saying goes, “The dumber the peasant, the bigger the potatoes.” But I personally think that saying is more an expression of folk envy than of folk wisdom.

So why do I not consider them amazing? The overall harvest was just about 80 kg, circa 4 kg per m², so not much more than the other varieties.

As far as cooking goes, all four varieties that I grew this year are extremely tasty in all uses, and all are very well suited for potato pancakes, bramborák, and Czech potato dumplings.

I will write about dehydrating them in a separate post.

The Greater Gardening of 2026 – Part 46 – Some Slight Soybean Success?

You might remember that I hoped to get at least some soybeans, despite the bought seeds’ abysmal germination rate. And it looks like I might have.

© Charly, all rights reserved. Click for full size.

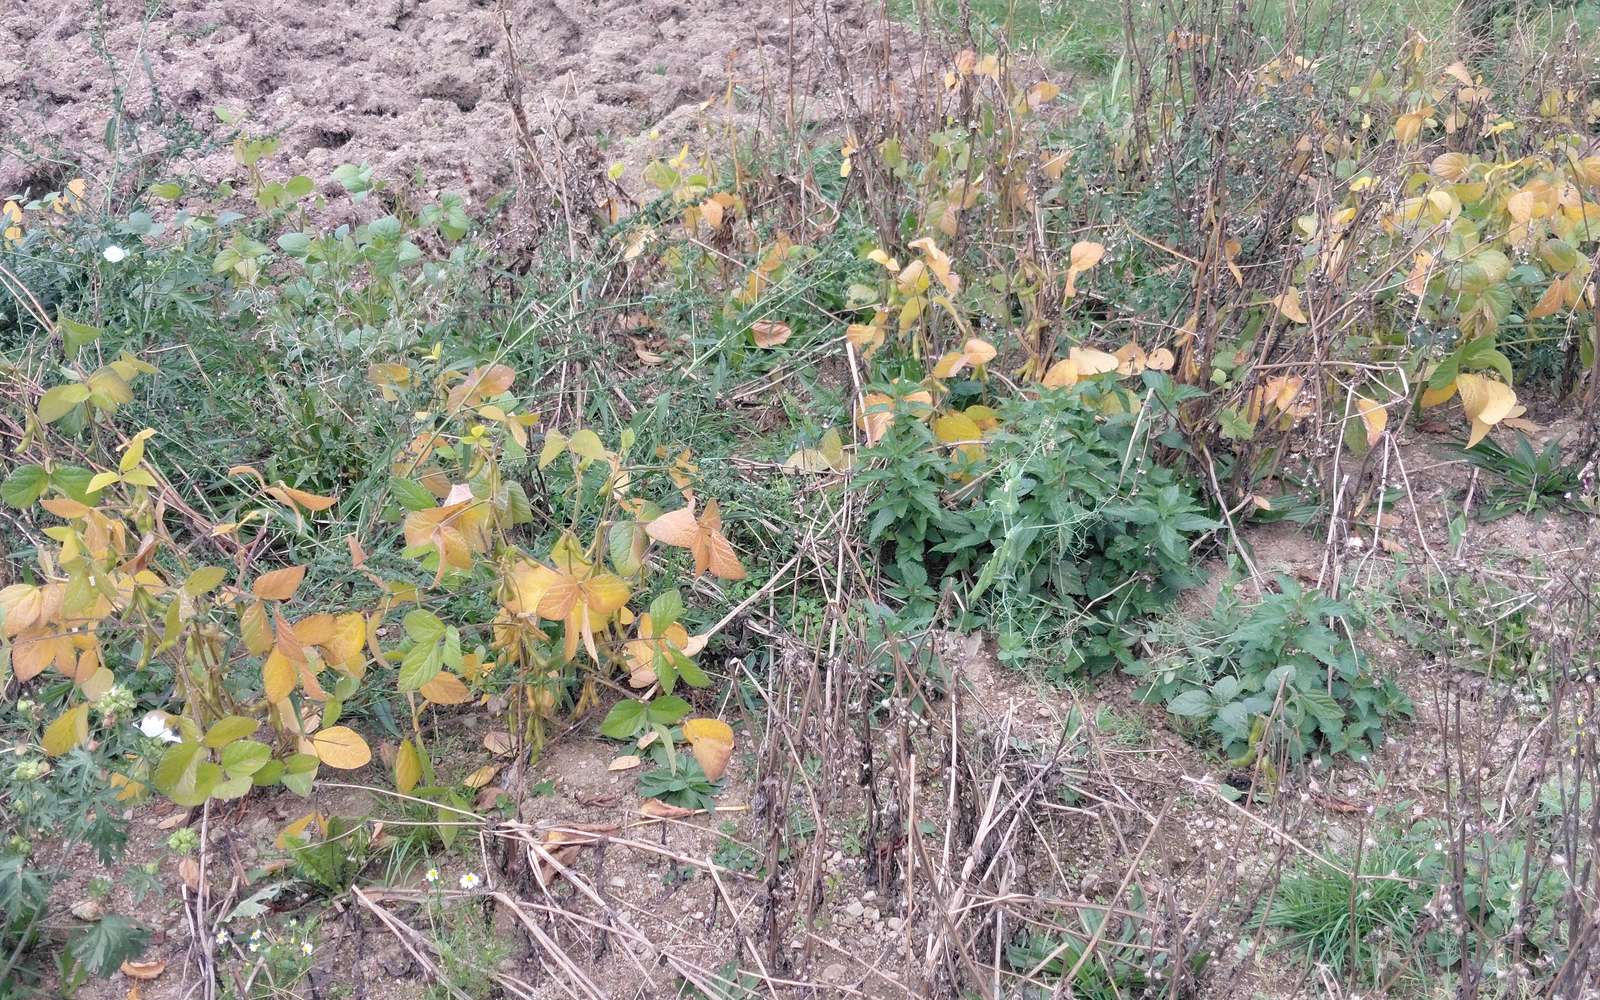
The annual weeds that have overgrown everything died off, but the soybean plants still managed to cling to life. And this week, they started to turn yellow. We might get a frost any day now, so I decided to call it quits and harvest them all. I need to mow all of the garden and prepare the beds for winter anyway, so I cannot wait much longer.

© Charly, all rights reserved. Click for full size.

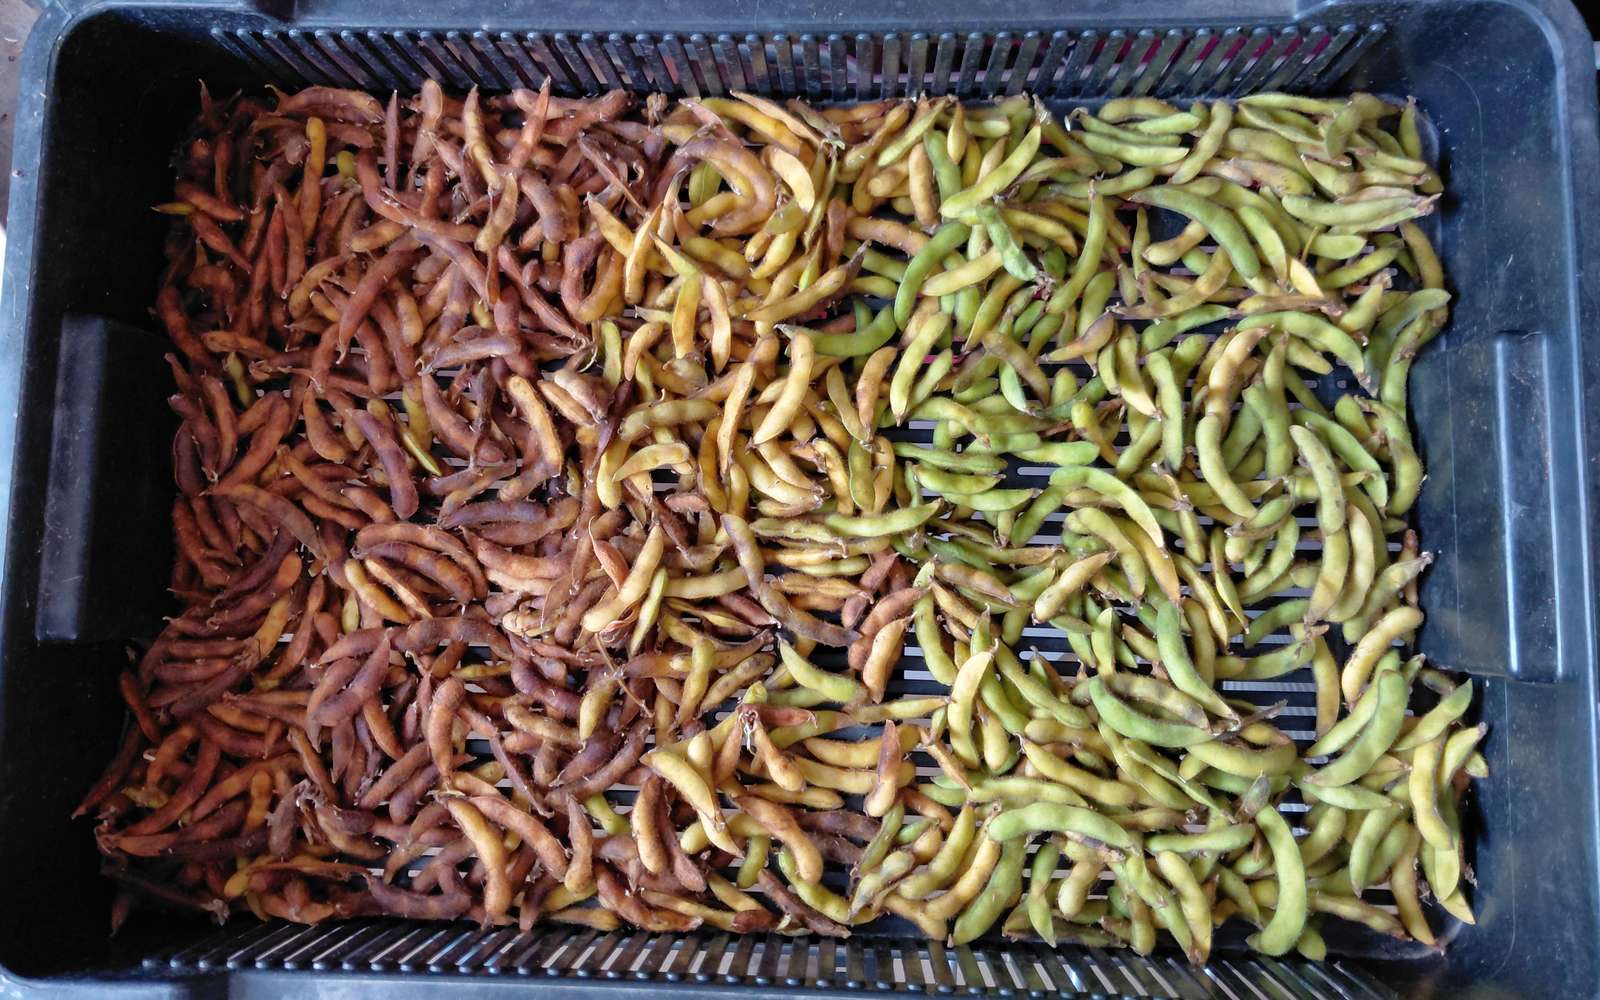
I put all the harvested pods into a tray, and I am drying them slowly indoors at room temperature. If they behave like other legumes with which I have experience, most of these should fully ripen now and be viable. After they dry, my father will shell them, and I will run a germination rate test. If they fail the test, they should still be good to eat. And if they germinate at a reasonable rate, I will have my own seed for the future. Which would be great. I will tell you the results, when that time comes.

The Greater Gardening of 2026 – Part 45 – Pumpkins & Pattypans

I harvested my summer squash a few weeks ago.

© Charly, all rights reserved. Click for full size.

There are 12 kg of produce in that picture, and only the white pattypan squash are worth speaking of. We converted them mostly into ersatz sauerkraut. One measly zucchini, two small marrows, and a handful of apple-sized green pattypan squash are all I got from the rest. The single yellow pattypan plant made a lot of female flowers, but they were all infertile for some reason, so any fruit that started to develop quickly started to rot.

I had not a single Hokkaido squash. All the plants remained stunted the whole summer, if they survived at all.

Luckily, all that failure was compensated by the butternut squash.

© Charly, all rights reserved. Click for full size.

The plants covered the trellises from top to bottom and produced, on average, almost two fruits per plant.

© Charly, all rights reserved. Click for full size.

I harvested nearly all of them this week. The plants started to die off due to powdery mildew, an inevitable outcome of the way-too-hot summer. I did not do much to try to combat it; it wasn’t necessary, since most of the fruit was at full size already.

© Charly, all rights reserved. Click for full size.

I got 37 squash so far, with a total weight of 56 kg. There are probably still about 4 kg of unripe squash outside, still somewhat growing, so I will probably get to 60 kg total. We already ate some, and we gave some away too, since there is no way we can manage to eat and process all this.

© Charly, all rights reserved. Click for full size.

I got two huge baskets of mushrooms in exchange for four of them, which is nice. I made smaženice from those in the picture (mostly blushers and parasols). The rest were mostly boletes, which I dehydrated. I do not have time to go mushroom picking this year, so this came in handy. Our stockpile of dehydrated mushrooms was starting to dwindle, and this replenished it for at least two years.

Now I will probably have to quickly process some of the remaining butternuts too, because about 50% developed brown spots on the skin. I have no experience with these, and I cannot find reliable information on how they affect their shelf life. Thus, I will probably do my best to freeze, dehydrate, or can all the affected fruits ASAP, with setting one perhaps aside to see how it goes.

Salmon Steak With Butternut Squash

I wasn’t planning to write about this, but when I arranged the final product on my plate, I thought I might want to share it, so I snapped a quick picture with my phone.

© Charly, all rights reserved. Click for full size.

After eating the meal, I obviously decided to share it, since you are reading this. I really enjoyed it; I will definitely cook it again, and I’ll improve it. Here is the recipe:

Squash: Cut the fruit lengthwise, deseed, and peel it. Cut into ca. 12 mm (Ann Halfaninch) slices. Cook until soft on low/medium heat in steam to prevent it from dissolving into mush. This will take about 20 minutes, about the time it takes to make all the rest.

Horseradish paste: Wet dehydrated horseradish powder with freshly squeezed lime juice to make a very thin paste. A teaspoon of horseradish powder is enough for two steaks.

Salmon Steak: Salt both sides, wait a bit for it to release juice, then sprinkle both sides with equal amounts of crushed Basil, Rosemary, and Oregano, as much as can stick to the surface. Heat olive oil in a pan to ~180°C (356 Freedummheit), sear on both sides, then lower heat to medium/low and slowly fry both sides until cooked through, without overtly charring the outside. A lot of the spices will fall off; that is why an excess was added at the beginning. Once the steak is done, put it on a warm plate, skin-down, and spread the horseradish paste on the surface while it is still hot.

Sauce: Finely cut small red onions and brown them in hot olive oil. Add a few cut cherry tomatoes, salt, about a spoon of soy sauce, and a sprinkle of white pepper, and stir on medium heat until the tomatoes dissolve. Thicken the sauce with one small slice of cooked squash.

Serving: Put the squash slice and sauce on the plate beside the steak. Pour a bit of olive oil on the squash and sprinkle with salt. Enjoy!

I did enjoy it indeed; that’s why I am sharing it. But I think it could be significantly improved. Butternut squash is a bit bland, and olive oil with a bit of salt didn’t quite cut it; the accompanying sauce was good, but still too mild-flavored for the squash. So next time, I will add a fifth part to the dish – aioli.

The Greater Gardening of 2026 – Part 44 – Black Beans?!

This is what standard runner beans from plants with red flowers look like:

© Charly, all rights reserved. Click for full size.

There is also a variety with white flowers and pure white beans. I tried to grow a few of those last year, but the germination rate was very poor, and I got barely fifty white seeds to plant this year, hoping to get more for the future. However, as readers will remember, last year I was growing the ordinary variety too, to fill the empty space due to the aforementioned poor germination of bought seeds. I was aware that I would get some hybridization, because I had that before. The result of hybridization last time was plants with half red, half white flowers, and seeds that looked just like the standard, except the pink/lilac colored parts were light brown/beige.
This year, I only planted white seeds, and I was surprised to get some plants with full red flowers from them. Well, I am even more surprised now.

© Charly, all rights reserved. Click for full size.

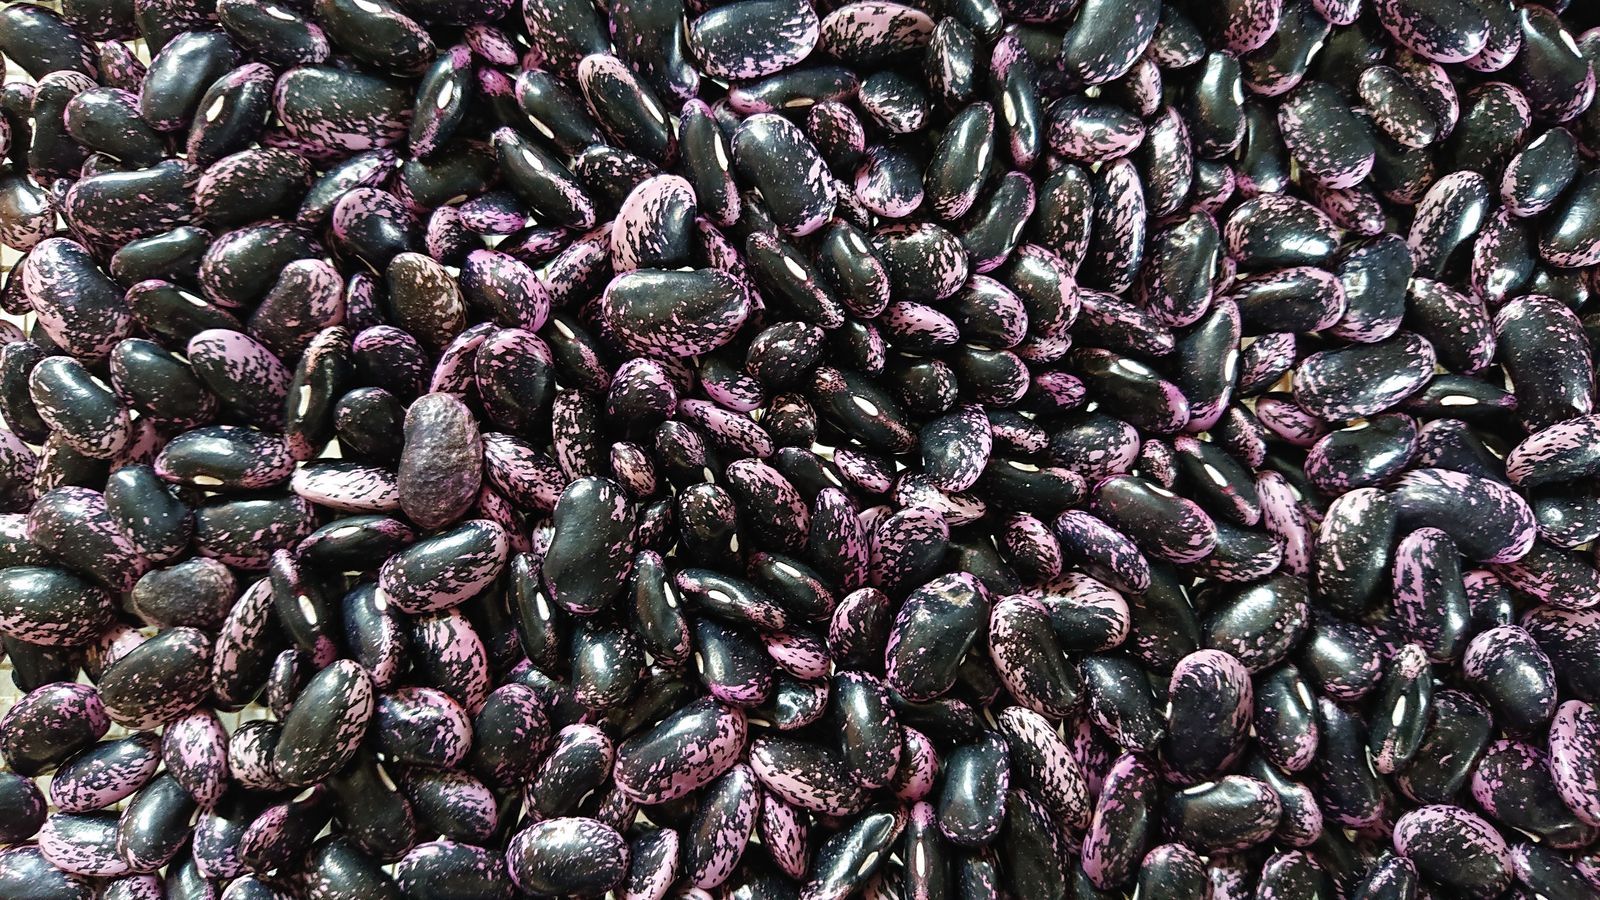
So far, I got a handful of “standard” lilac-black seeds, a lot of pure white seeds, and a bunch of pure black seeds. I have never seen pure black runner beans before, so I asked Google. Varieties with this color do exist, but on a cursory search, they are only grown in the UK and not sold in CZ.

Which is curiouser and curiouser. If I get enough black seeds, then next year I will sow only them, and we shall see what comes of it. I will probably have enough white seeds to save for the future. I also might try to grow all three varieties at once, each in a different part of the garden. That will reduce cross-pollination, but it will not eliminate it. It is a bugger. I wanted to grow two runner bean variants – white and red – in alternate years. And now I have one pure red strain in the cellar, white seeds that are somewhat unpredictable mongrels, and an intriguing new black variety that will probably throw some unexpected curveballs too.

I know that my pure red strain should remain viable in the jars in the cellar for at least two more years, so there is no big rush to renew those. I think I can afford to experiment. Especially since no matter what I do, the remaining beans will be perfectly edible. The worst that can happen is I won’t get pure color strains, but a technicolor seed roulette.


The Greater Gardening of 2026 – Part 43 – Disappointing Dali

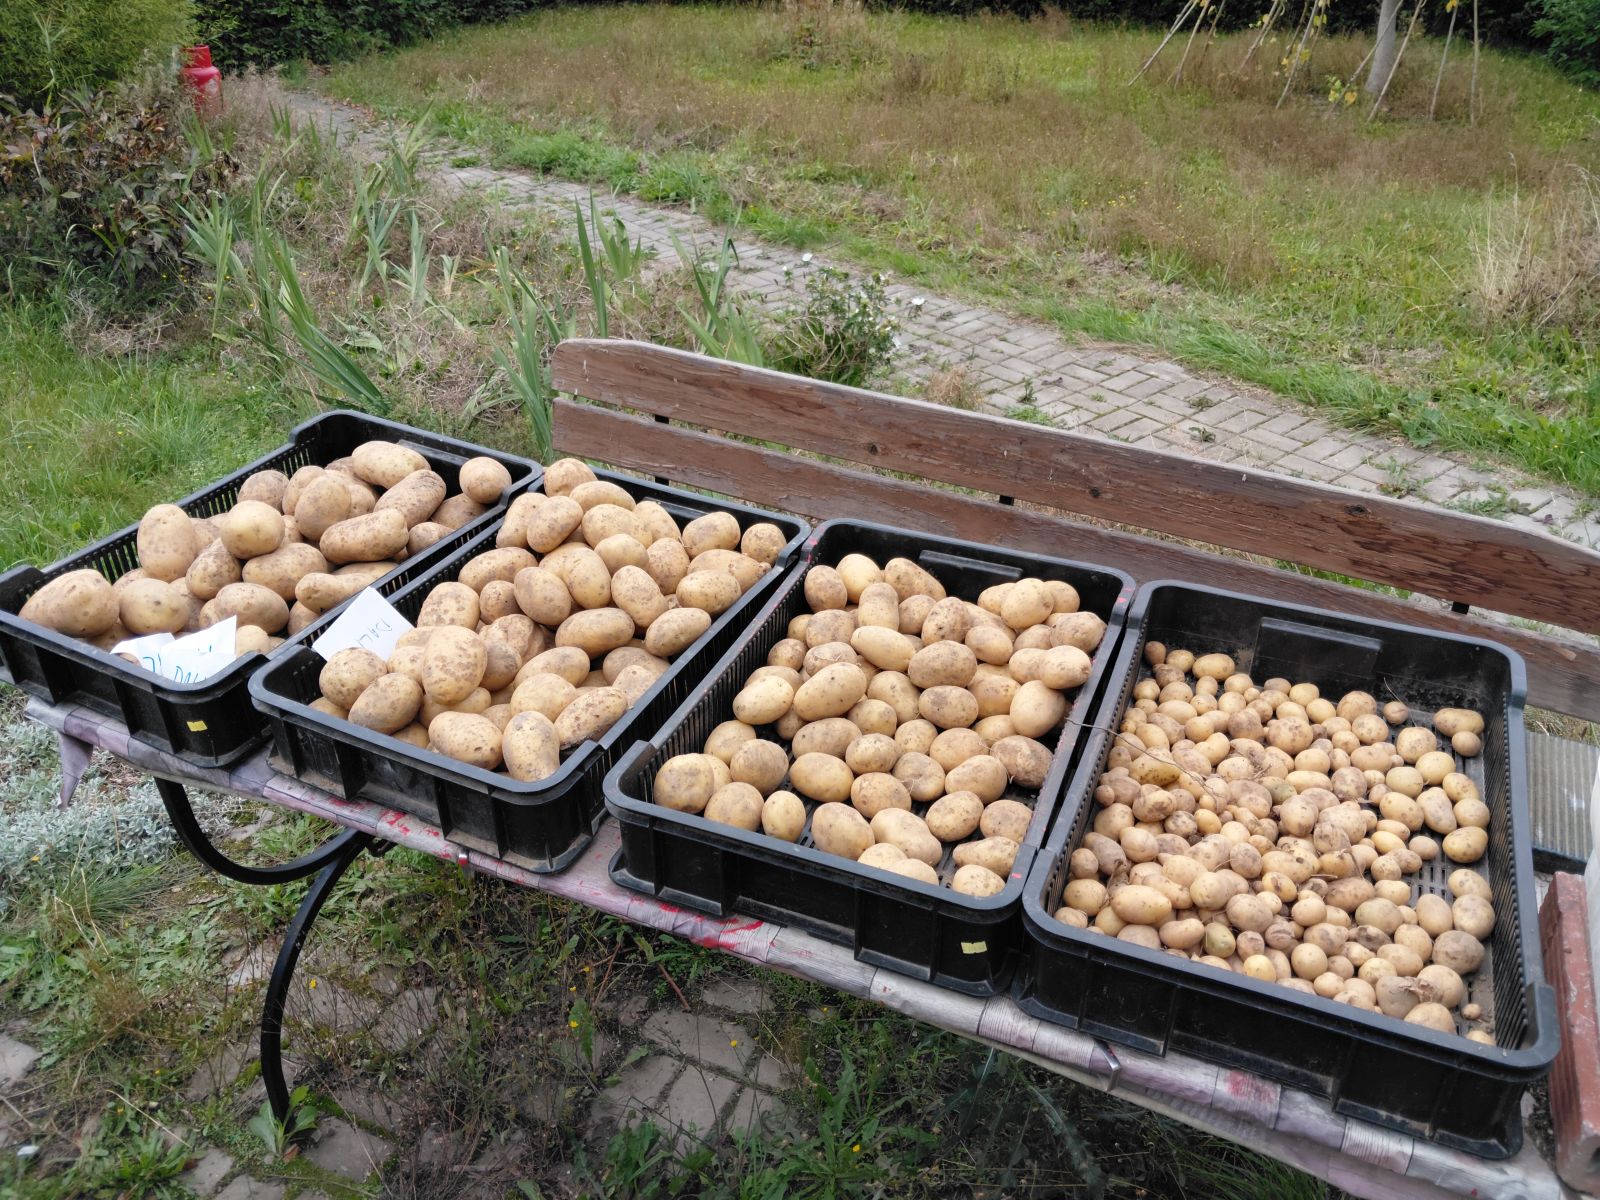
I harvested the third potato variety that I grew this year, and as the title says, I was disappointed.

© Charly, all rights reserved. Click for full size.

There were a lot of big tubers in there and an acceptable amount of small & tiny ones; the size distribution was not an issue. In fact, I could barely put aside 100 pieces of ~50 g seed potatoes for next year since most tubers were significantly bigger. I am still not fully decided if I will plant this variety next year, but since it does reasonably well in the Ruth-Stout method too, I am still considering it. If I decide against it, we can eat those taters too.

© Charly, all rights reserved. Click for full size.

The worse-than-expected problem was pest damage. Not only did I get approx. 9 kg of tubers damaged badly enough that they need to be processed asap; there were several spots with dead stalks above the ground, but no tubers underneath. They were all eaten by mice/voles. Based on how often that happened, I estimate the damage to be 10-15 kg, plus whatever we will have to cut and throw out of this bucket.

There is no late blight on the tubers; they look mostly reasonably nice and healthy. But the overall harvest was less than expected.

© Charly, all rights reserved. Click for full size.

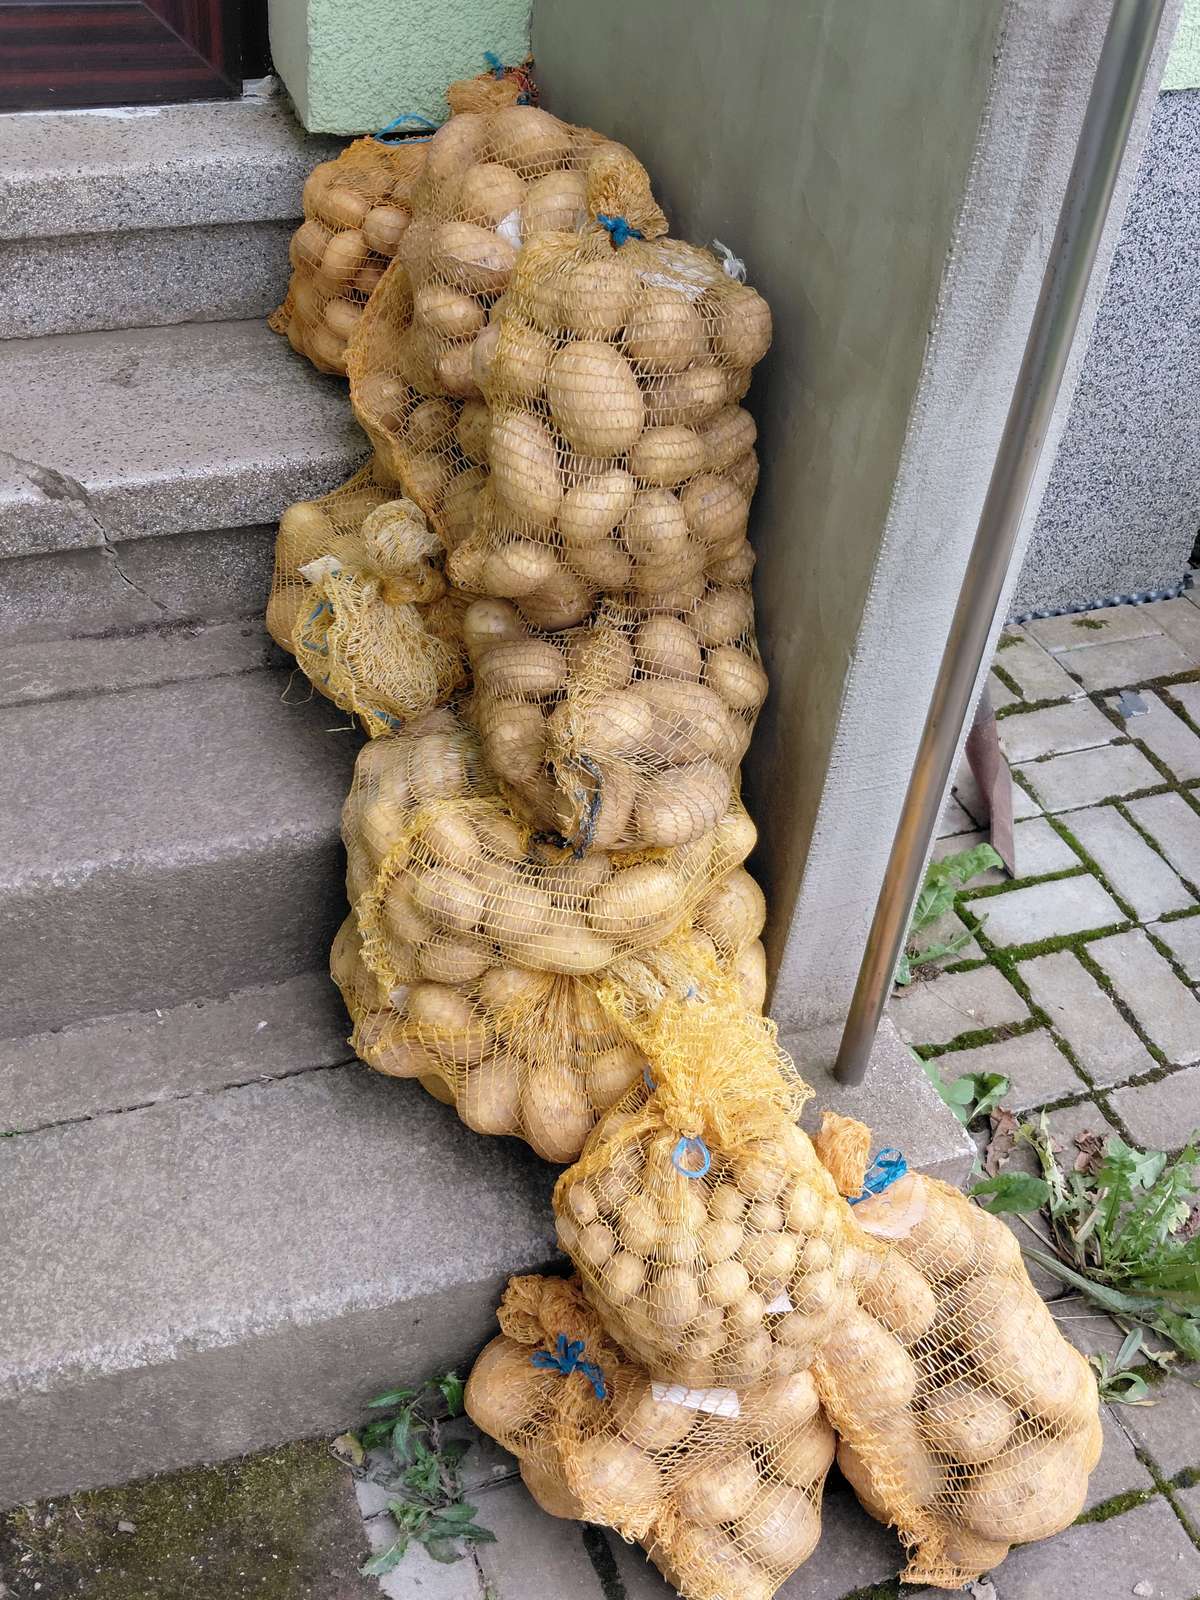
I got circa 65 kg of tubers for storage. This is about the same yield per seed as what I got from Bellarosa and Camel, despite longer vegetation time. And I can confidently blame it all on effing rodents.

BTW, you can see a mouse trap under the weighed bucket. I’ve already caught two mice in my garden shed, and I’ll probably need to set traps more aggressively during the winter. A working cat would help a bit, but then I would need to buy feed for the cat, so the savings would be essentially nil.

The Greater Gardening of 2026 – Part 42 – Topsoil Tilling Tiles Trouble

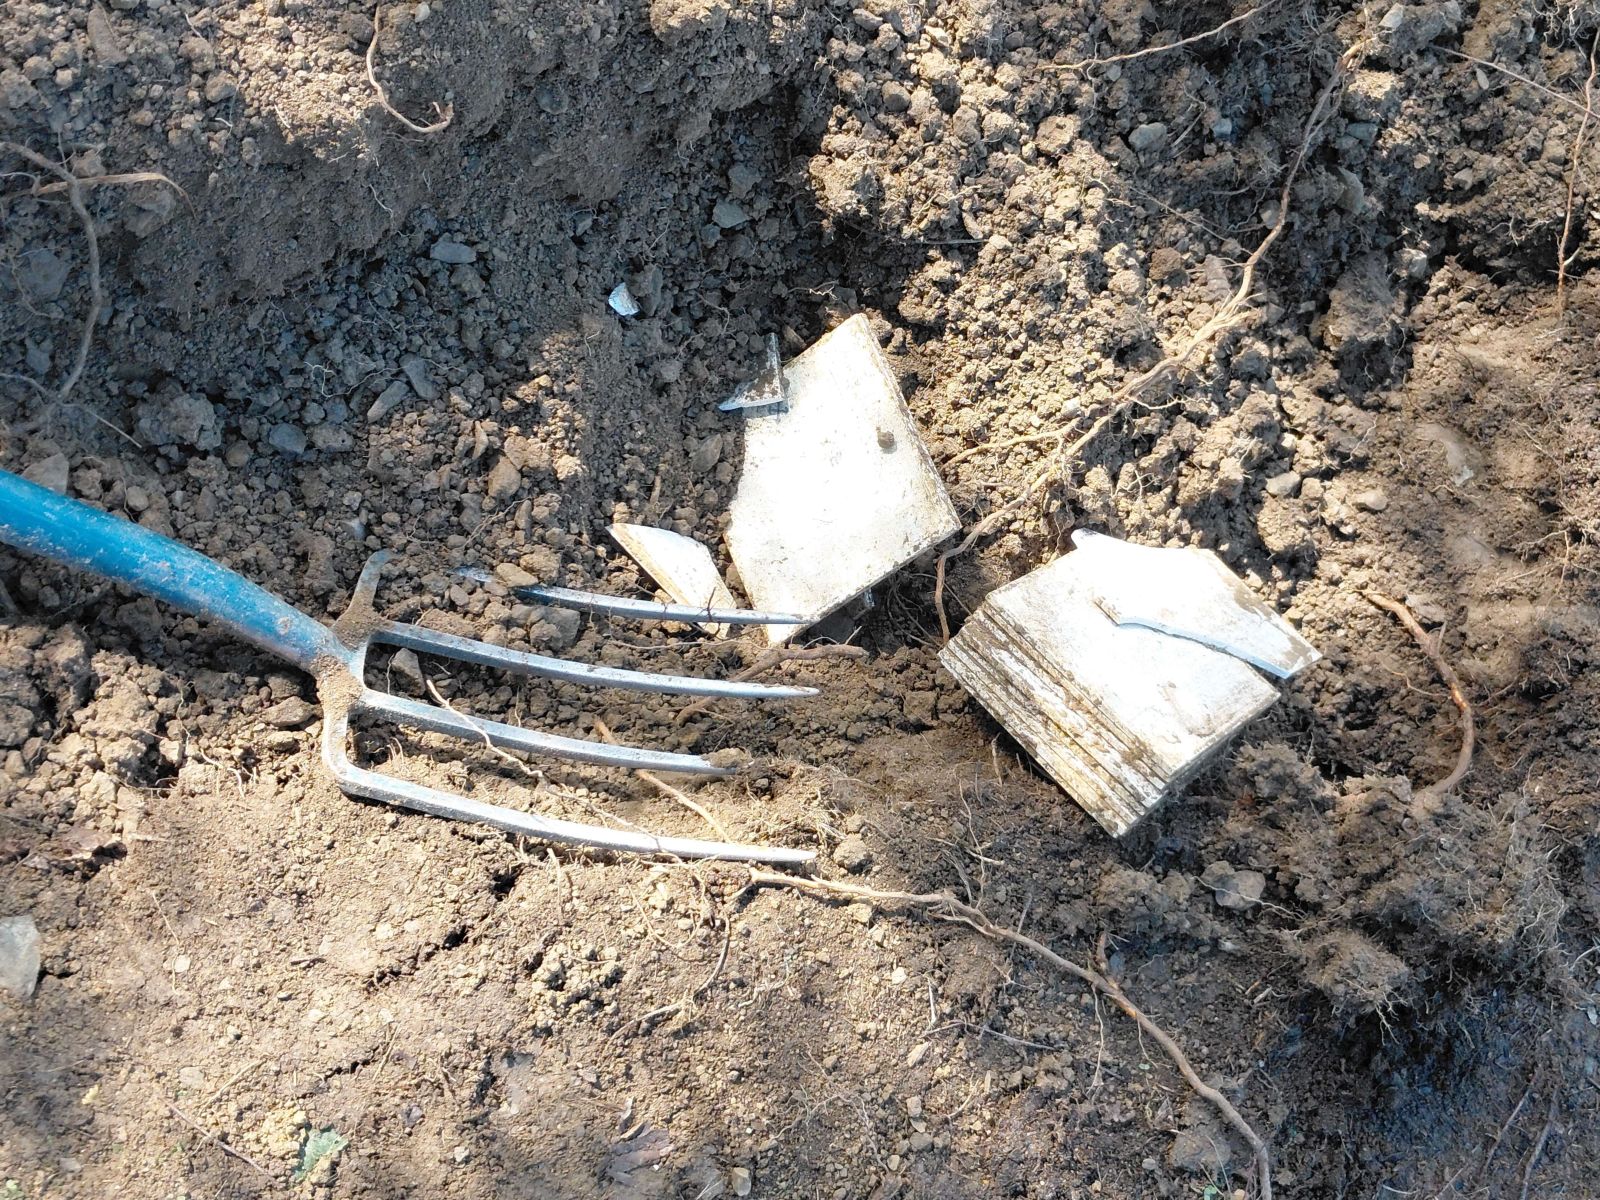
Just after I wrote my answer to dschultz under my last post about why I am inflicting the double-dig torture on myself with my heavy clay soil, I went to my garden to till another row on the potato patch, when suddenly the garden fork hit resistance just barely 10 cm under ground. As I do in such a case, I tried to reposition it to work around the obstacle, expecting it to be a larger stone or maybe a half brick. Occasionally, I dig out even a whole brick, and the biggest thing I dug out so far was a ca 30×40 cm phyllite paving stone. But I could not find the edge, and when I did, I could not get the fork deep enough to lever the seemingly big thing out. Then I managed to pry several small pieces off.

© Charly, all rights reserved. Click for full size.

It turns out that just under the surface were buried several white tiles. I did not think much of it at that moment; an occasional tile or a piece of ceramics is not uncommon. And I continued to search with the fork and pry the tiles out.

© Charly, all rights reserved. Click for full size.

Then a whole stack of tiles came out, and several more after that. At this point, I decided to put the tiles into a separate bucket.

© Charly, all rights reserved. Click for full size.

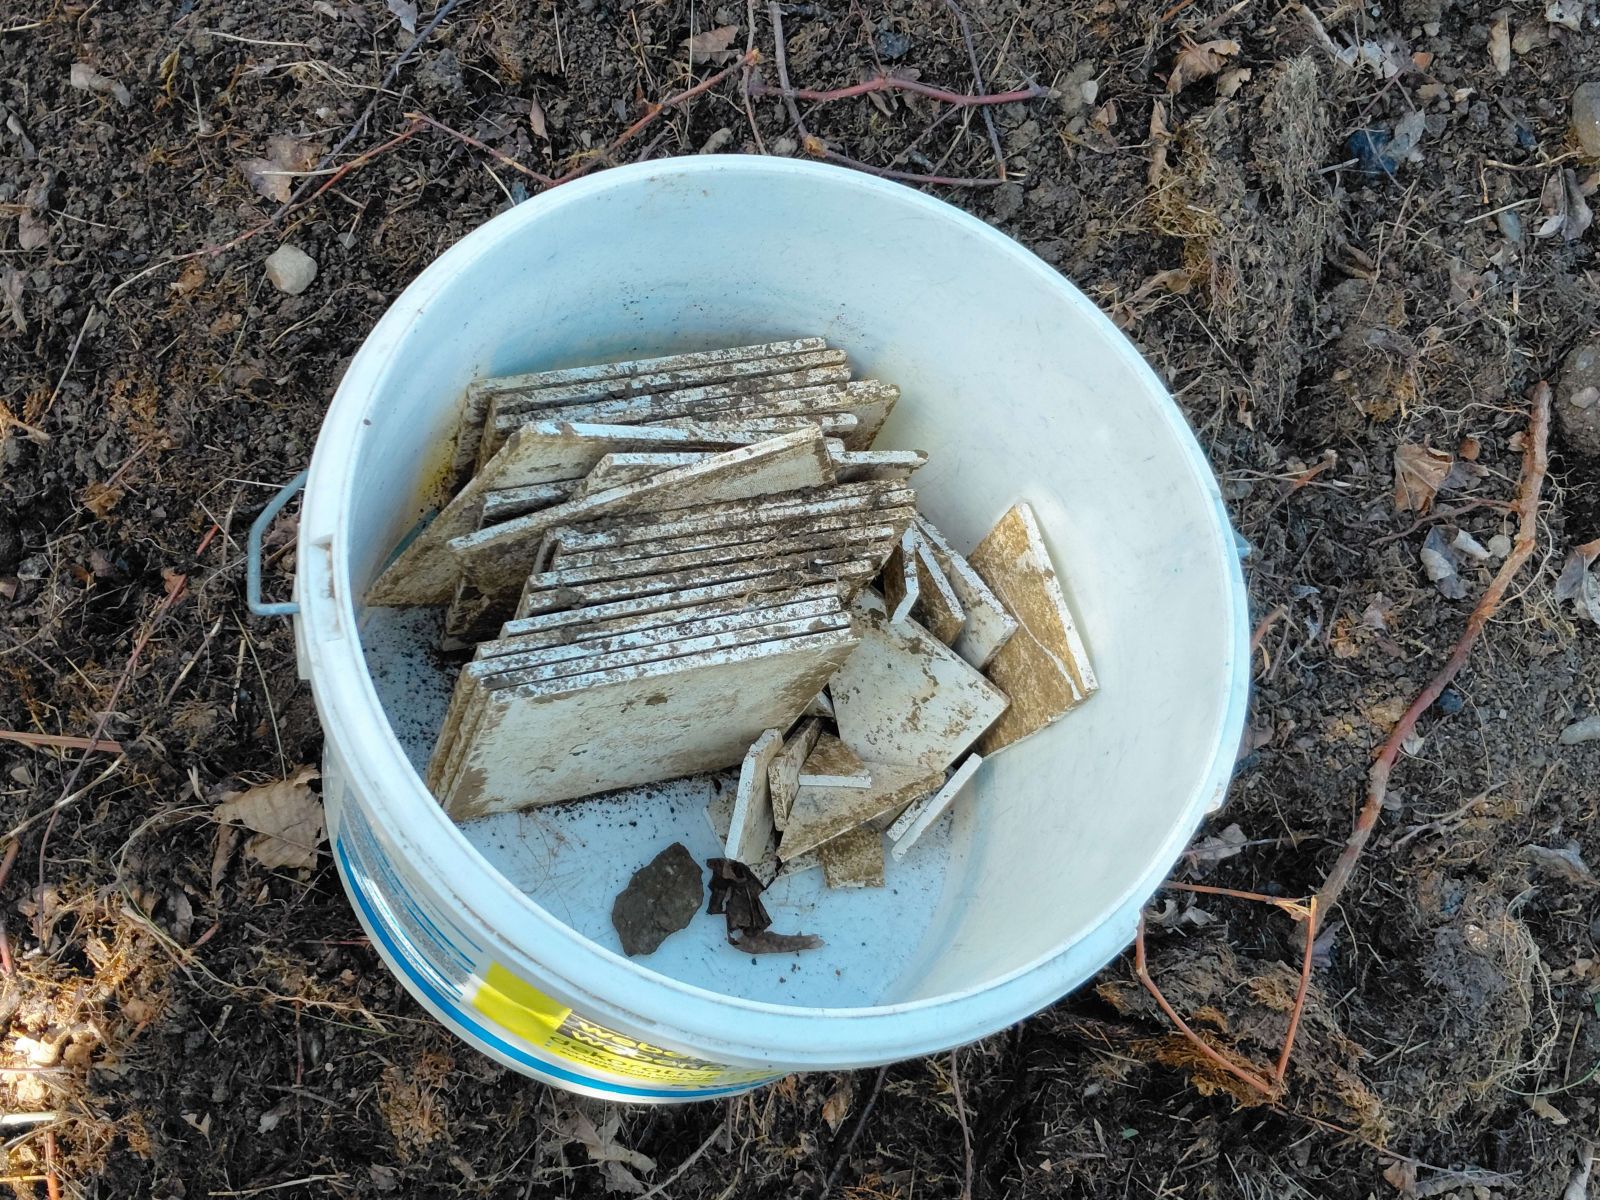
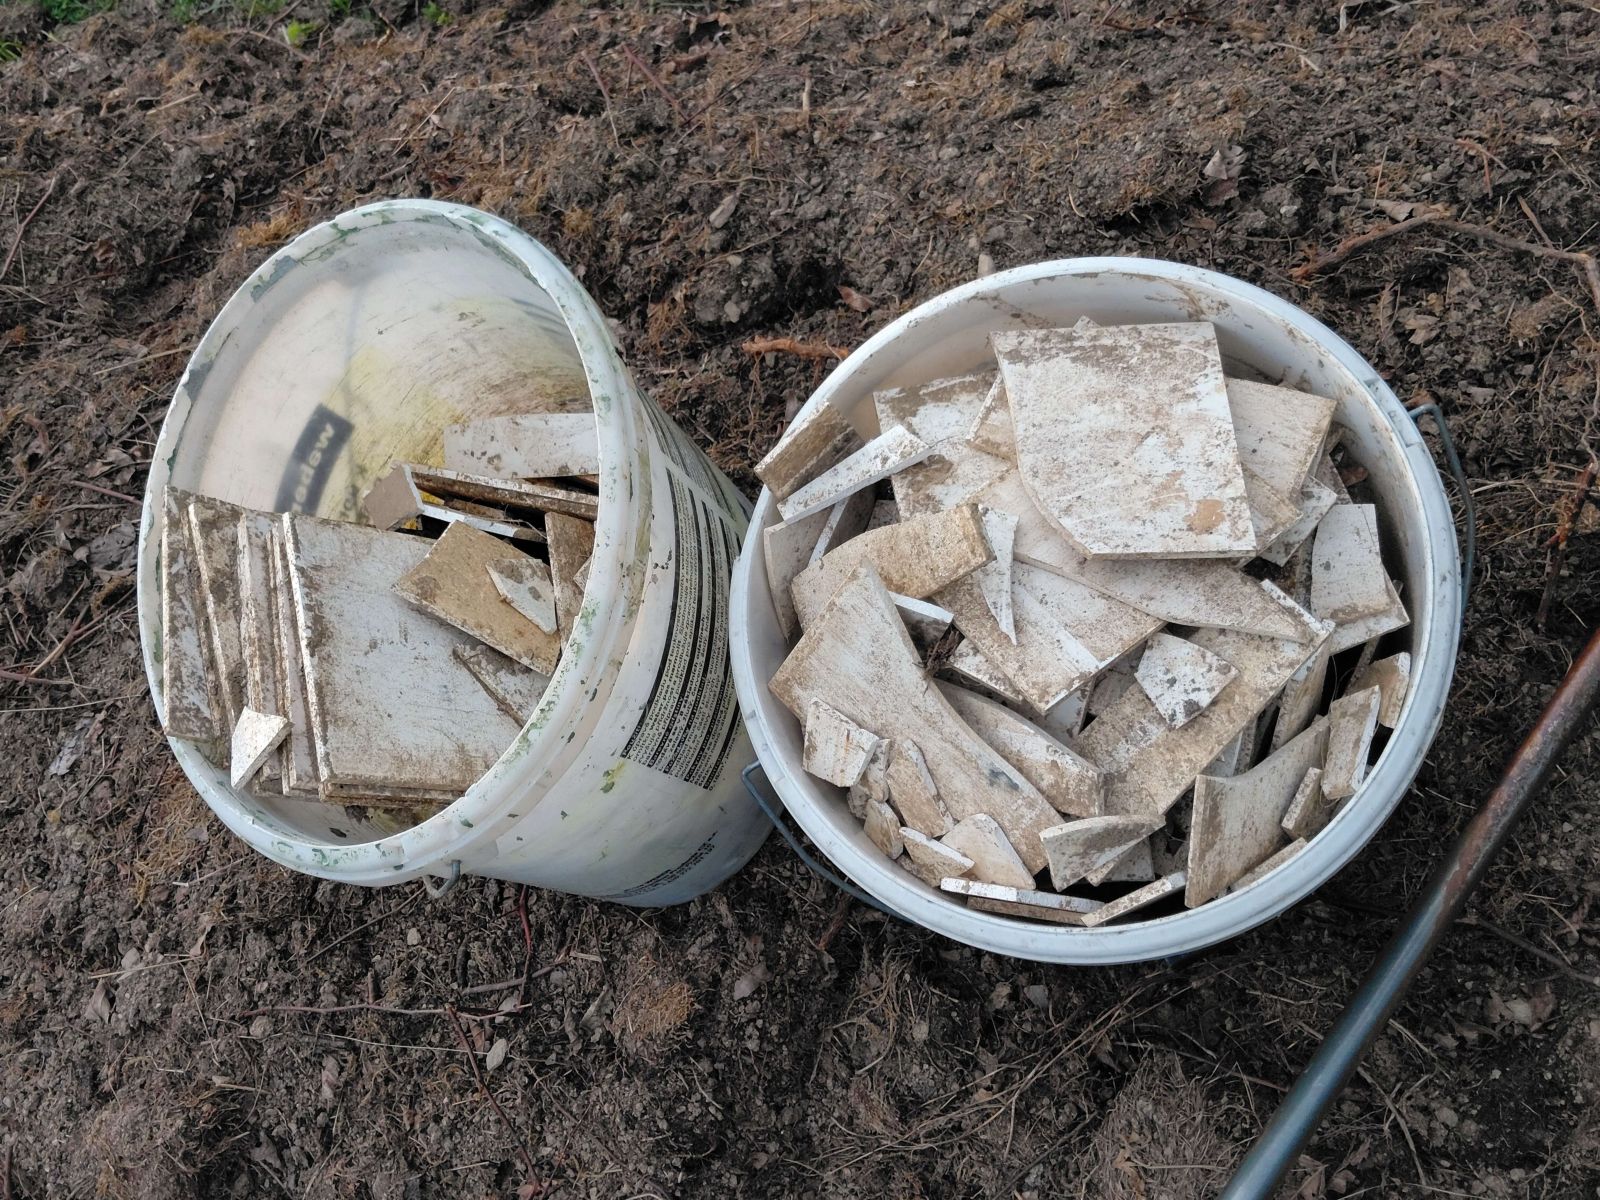
I thought, maybe I will fill the whole bucket, and I did not want these tiles to be completely mixed with the stones I sort out of the soil, because the tiles are not as useful as, for example, road pothole filler. I was wrong about the bucket.

© Charly, all rights reserved. Click for full size.

I almost filled two 10-liter buckets with these pure white tiles. There were several stacks buried in that place. And, funnily enough, it appears they were at the edge of the onerous piece of land. After this, the soil became suddenly less stony and much easier to till.

I already had proof that I was not working on a natural topsoil, but these tiles are definitive proof that something other than grass was on this piece of land before my time, probably before my grandfather got the house after WW2. I do not have a way to identify the age of the tiles. I did not look for any manufacturing markings yet, but they are definitely older than 50 years, since my whole life there was nothing but grass in this part of the garden.