By now you’ve probably forgotten about Maat’s “chopzilla” seax blade. Rest assured, I did not. [stderr][stderr]
It sat on the assembly table for almost a year, glaring reproachfully at me with little glinty eyes.
Let me explain how that happened. The blade came out heavier than it probably should have been, and that meant it needed an appropriately heavy handle to counter-balance it; a handle that was strong and tough and suitable for serious chopping. Maat and I did some sketches and mostly what he approved of was a set-up with a big front bolster, not quite a guard, and a matching pommel and some spacers. So far, so good.
My first plan was to cast the bolsters and spacers in bronze. I made a few attempts by pressing wood forms into sand and pouring bronze; the results were iffy. Worse, some of the resulting bronze was crumbly. That’s unacceptable. Then, I cooked up the idea of making the bolsters out of a sandwich of silver and bog oak. I made a prototype, but it blew apart under the stress of the belt sander. So that left me with a couple options: 1) solid silver, 2) solid wrought iron, 3) solid nickel silver. Silver is not fun to saw. Wrought iron is incredibly not fun to saw – not only is it tougher than an evangelical preacher’s heart, it’s full of silicates that rapidly dull saw blades. Also like an evangelical preacher’s heart. So, I got a bar of 1/4″ nickel silver, and slowly hacksawed pieces of it off over time. Then rough-shaped them and eventually started to realize I had a problem.
First off: nickel silver is great stuff. It’s strong, it’s cheap, it shines beautifully, and it works like a dream – compared to wrought iron. Compared to brass or copper? Not so good. The main problem with all of these options is that they heat up when you start to grind on them. So does steel, of course. But you can grab your handle and start shaping down to the metal and suddenly the wood (which doesn’t heat up much) is smouldering where it’s up against the nickel silver. That also means your epoxy is kaput – you melted it, and it appears that epoxy’s cross-linking doesn’t recover from that; some epoxies get gooey and stay gooey. You have to change your mind-set from “I’m grinding steel and it’s OK as long as it’s below 900F” to “I’m grinding mixed materials and I need to put it down every 3 seconds and take a couple shuffle steps around the room before I pick it back up.”
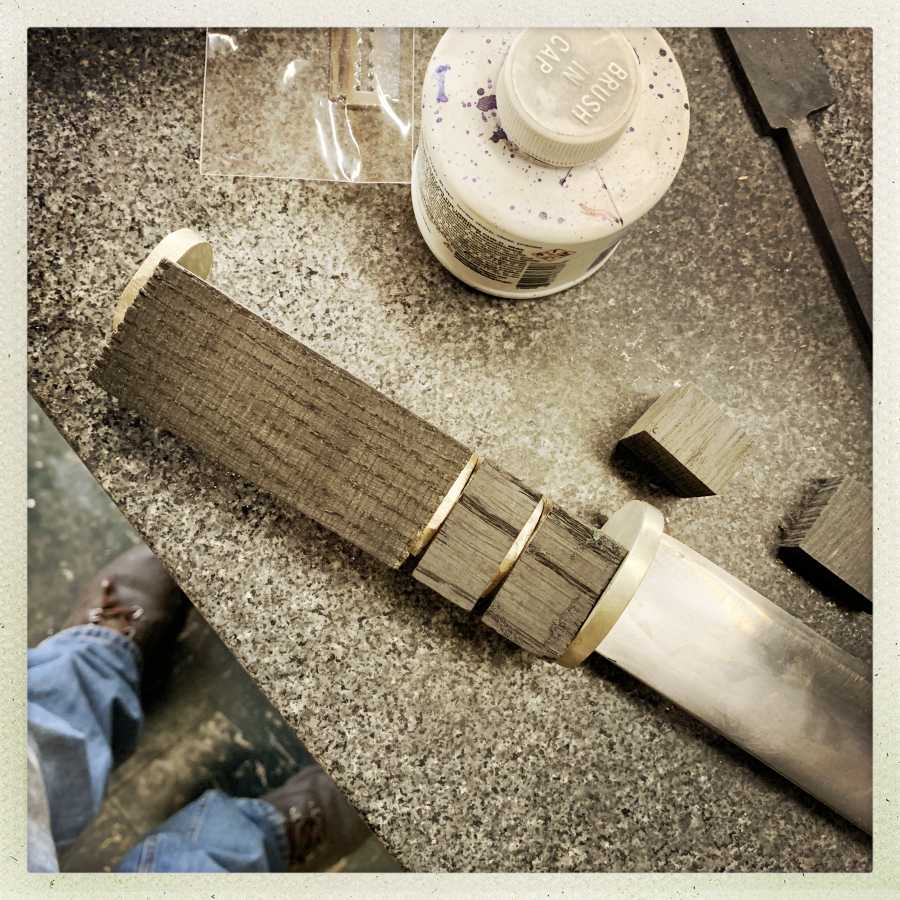
But that’s not really where I screwed up. The problem is, once I had all the materials fitted to the tang, I realized that I couldn’t just glue it all up and grind it to shape – I’d inevitably hit the bolsters with the sand-belt and they’d instantly have permanent chew-marks in them. So, what do you do?
You put epoxy between the pieces, so that they are glued to eachother but not to the tang. Then, you carefully pull them off the tang and bolt them together so they can handle the stress of grinding. And you absolutely cannot overheat the epoxy because, if you do, the pieces will spin and you’ve lost the consistent shape to the handle.
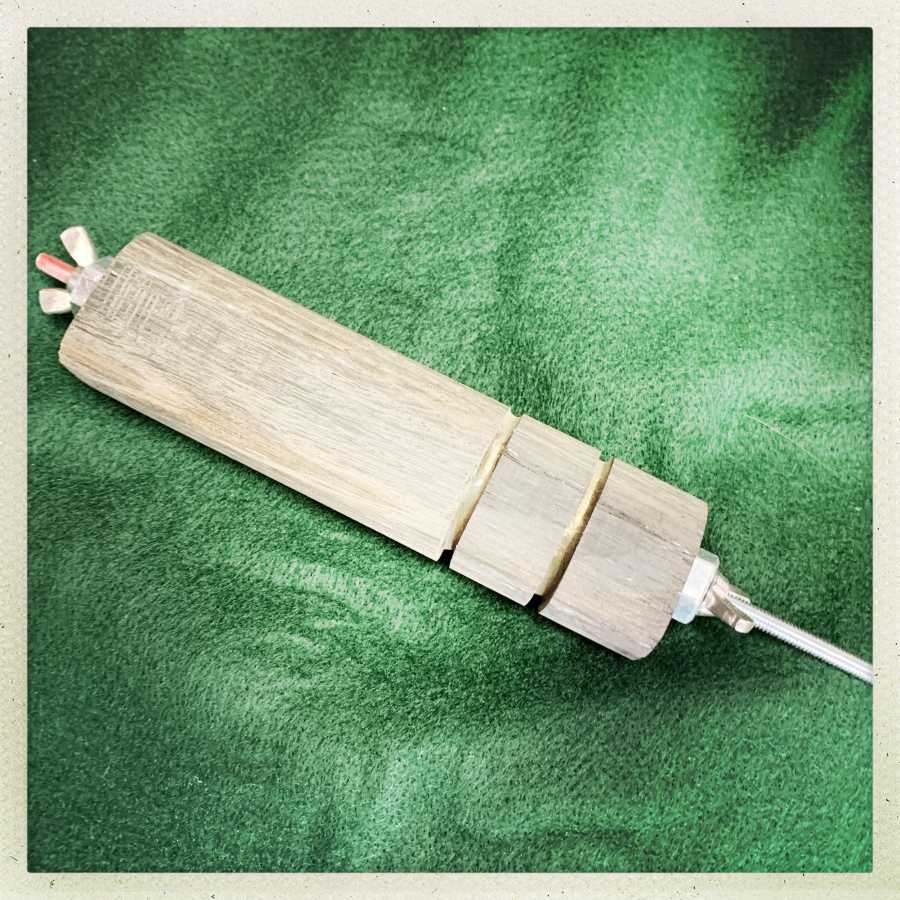
Once that’s all shaped down and fine-sanded, you put a bunch of epoxy on the tang, put a bunch of epoxy up the hole in the handle, and tap it all into place. Then, you have to fit the end-cap. Fortunately, I remembered to thread the end of the tang (10/32 thread) and drill and tap the pommel before all the epoxy got all over everything. Putting the pommel on was – interesting – I had to make it tight but not strip the threads out of the nickel silver, yet the pommel had to align correctly with the handle. How did I do that? I shaved a few thousands off of the end of the handle until it came out at the right place, and did a lot of cursing. If you had been watching me work from a distance, you would be reasonable to assume that it was the cursing that was the critical part of the assembly process; there was a lot of cursing.
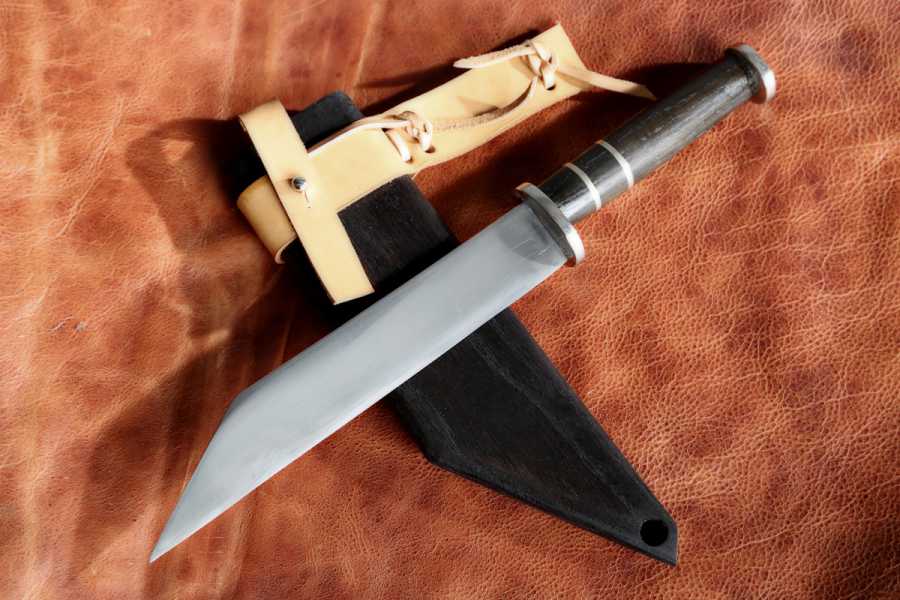
Finally, it was all done and I spent a week rubbing oil into the wood every morning until it cured hard and glossy. The scabbard is something I sort of threw together out of some oak scraps I had lying around, cut on the bandsaw, and the hanger was added for the sake of simplicity and safety. Maat does woodcarving and leatherwork so I figure that the case will either serve as a starting-point or storage while he comes up with his own set-up.
All in all, this project was a ton of fun and it was less disturbing than I expected, to have a guest in the forge. I’m not much of a team player so I was worried, but everything seems to have turned out fine. I’m relieved to finally have this off of my bench; I know it took much longer than it should have, but I didn’t want to just throw things together – I had to wait until I had the right components, the right plan, and then it was deceptively easy.
I love the way this turned out, it looks great! The layers of nickel in the wood are really nice.
What an interesting series of problems to have to solve to come up with the final product.
It looks like a serious piece of kit, very sturdy with a simple elegance.
The planning and considering and altering the plan and considering again iteration is something I am very familiar with from knitting. I can rarely find a pattern that does just what I want partly because I prefer to knit top-to-bottom and most patterns do the reverse. And partly because I prefer to knit in the round rather than knitting several flat pieces which are then sewn up and again most patterns do the latter, I hate sewing up and am never satisfied with the result so try to avoid it if at all possible, which it usually is with enough thought.
Dear Jazzlet, you should learn how to do double knitting! No more sewing pieces together and no more seams! And you only use two needles. It’s the best.
Nice, looks good!
Where did the balance point end up?
It looks like a serious chopper, especially if the point of balance is around 1/4 to 1/3 of the blade from the guard. The long handle with nice pommel would allow for a safe grip towards its end, making chopping even more formidable.
Kestrel I shall look double knitting up, but knitting in the round also means no seams, and as I use a circular needle for bigger garments I only have one needle! I have a set of knitpro pins and wires (plastic in reality) so you can make pretty much any size loop with any size pins, and increase or decrease the size of the loop or change the size of the pins as necessary. Although I don’t find managing five needles a problem for small items like gloves and socks, in fact I find knitting with five pins rather satisfying, I’m not sure why, maybe because it reminds me of my grandmother and great aunt who taught me to knit and in wnter always wore beautiful twin sets they had knitted themselves.
Beautiful lines and nice contrasts. The round handle looks graceful set up against the powerful straight blade. I also like the look of the dark bog oak next to the shiny silver.
It’s interesting to hear about the failures and how you overcome them.