There really isn’t any part of the forging process that is more important than any other; you don’t end up with a finished sword without executing the other steps correctly, too.
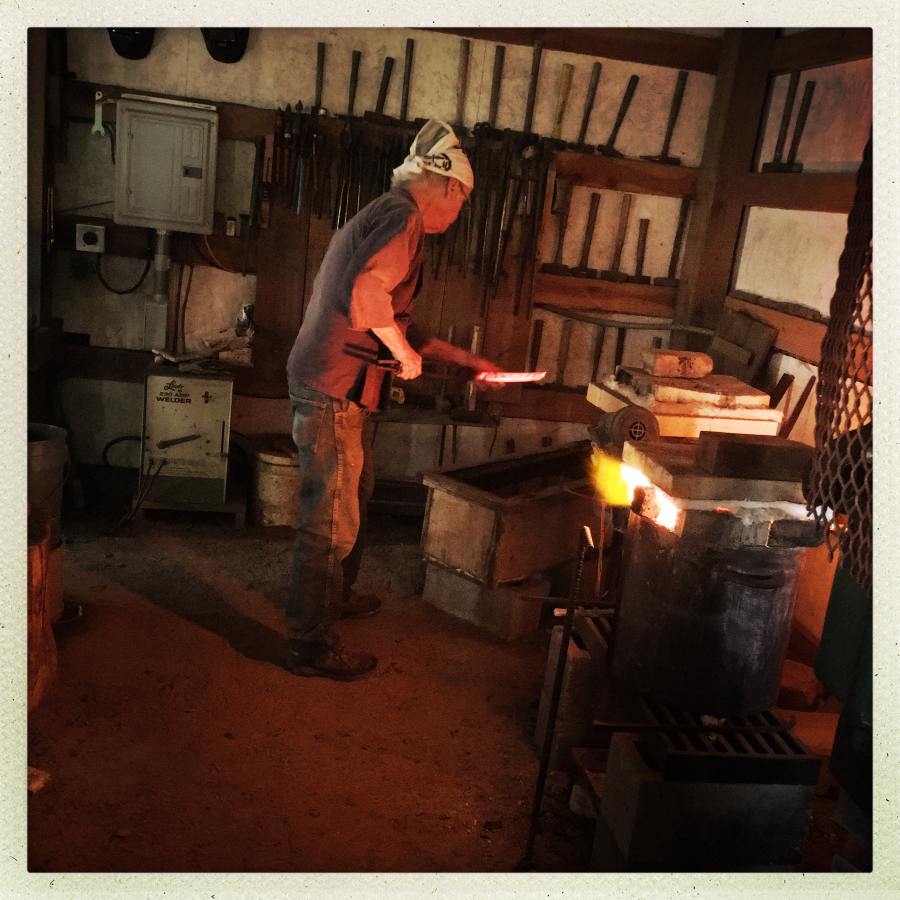
This morning, the clay had dried on the blade. We had some coffee and talked for a while, then Gabriel fired up the forge and we set everything up. I put my DSLR on a tripod so I could use its video mode to record the quenches.
I started kicking myself pretty quickly because I realized I should have traced an outline of the un-quenched blade, so I could compare it with an outline post-quench.
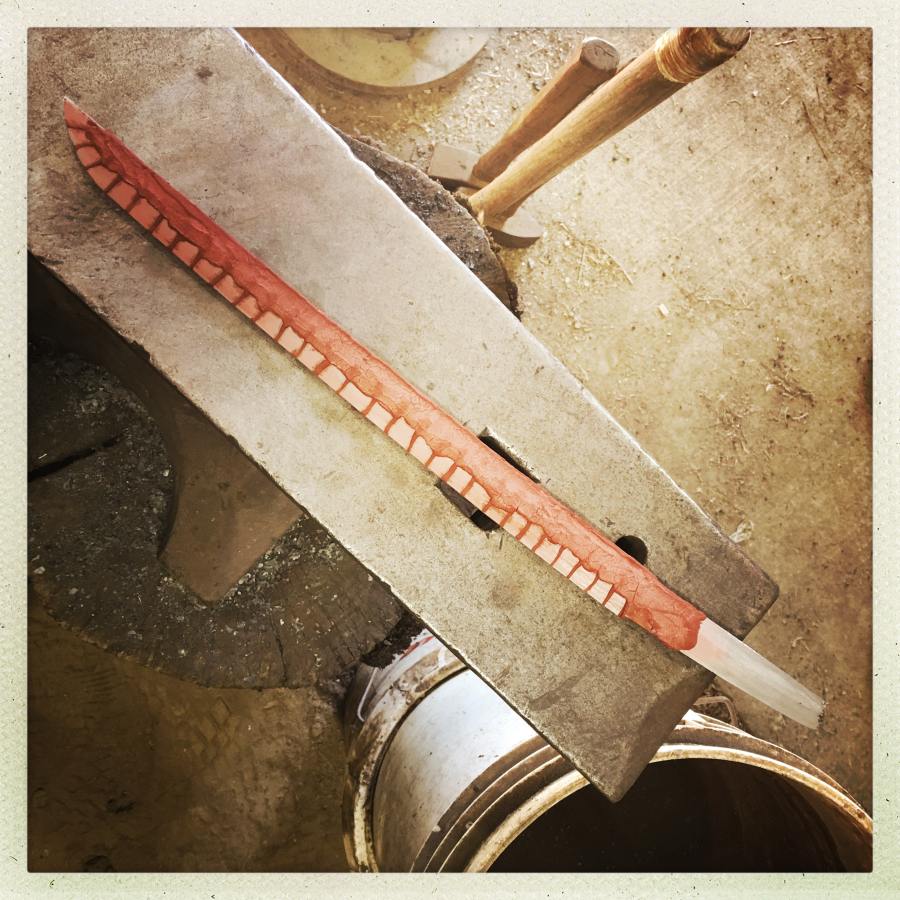
The blade looks really neat with the clay on it, while it’s hot for the quench. The metal glows through the clay. Then, a hiss and some steam. There is all sorts of thermodynamics going on inside there; the inner part of the metal cools slower than the exposed edge, of course, and so does the insulated back. I found some diagrams that illustrate how the thickness of the clay affects the development of the martensite in the edge:
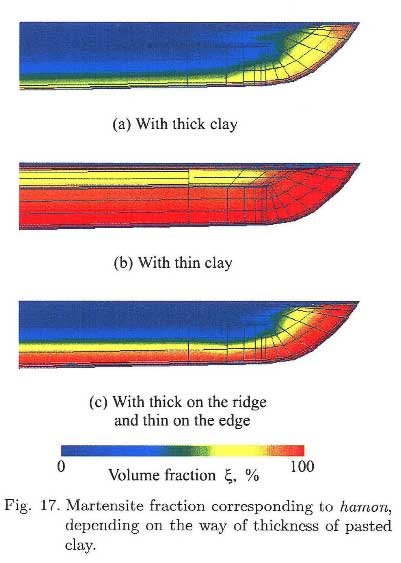
[source]
After that, we clean the clay off and it’s back to grinding!
The blade is not fully ground to shape before quenching, because it would be thinner and more likely to distort; the thickness also affects the quench – a thinner edge would possibly over-harden.
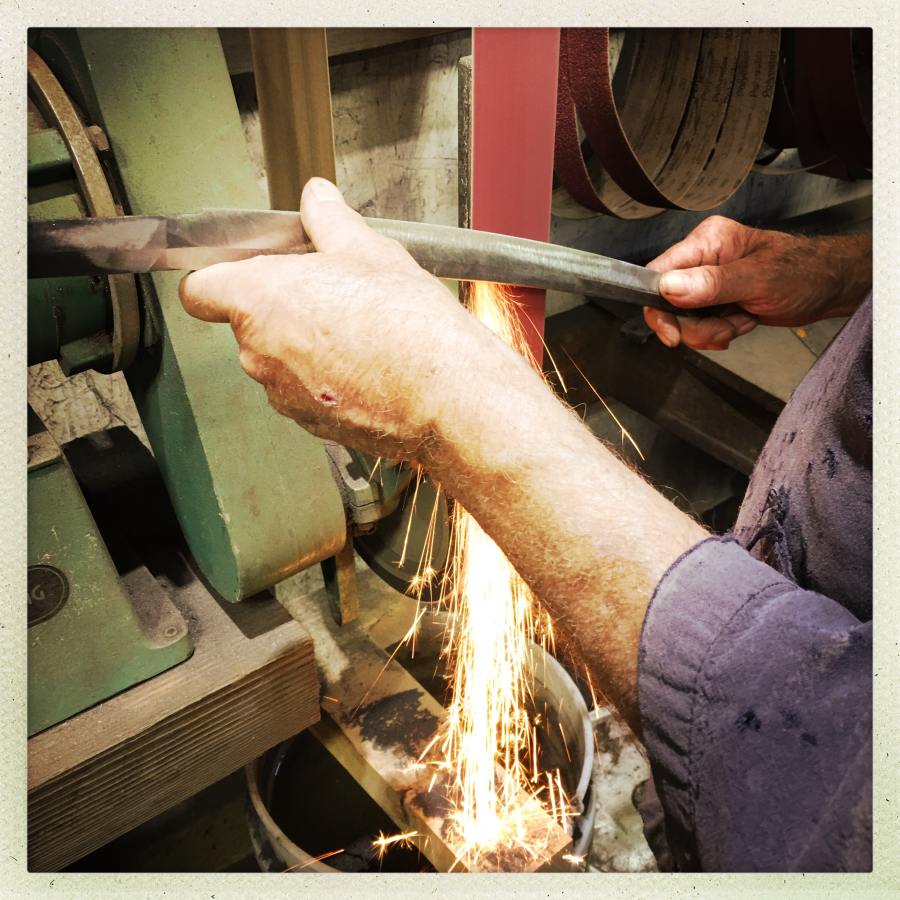
Post-quench, we tweak and correct the shape of the blade, as we bring the sides in and thin the edges more; it’s a constant process of grind, examine, think, grind, examine, think. Having Michael there is tremendously comforting – when we get to the spots that are tricky (usually, that means the tip) we can ask for help.
My blade turned out to have a slight bend in the tang: it was simultaneously twisted and curved. Michael put it in a vise and used a slotted wooden wrench to just bend it very slightly. Immediately, it was obvious how the curve at the tang had visually thrown the whole back out of line – that meant my natural tendency was going to be to grind the whole thing straight, which would thin it out down the entire length. I was frustrated a lot of the time because I could see what was happening, and could reason where I needed to be grinding, but I just couldn’t get the blade on the belt at exactly the right place and angle. Michael, with decades of practice, just positions the blade on the grinder exactly where it needs to be, every time. Every so often, we’d hit a good pause-point and take the blades to Michael who’d do a couple easy-looking clean-up passes – big, smooth grids – that would suddenly make the whole thing look much better. It was a bit discouraging that I couldn’t do that, but a lot encouraging that I hadn’t gotten my grinds so far out of line that it wasn’t fairly close.

Right after Michael did a clean-up pass before switching to a finer grit
Most of the grinding was done with 38-grit belts, which remove metal fairly aggressively. They also remove flesh and fingernails fairly aggressively; at some point I brushed the edge of my right index fingernail on the belt and now there is a neat flat spot. Another fraction of a second and there would have been a slightly hot, very bloody hole.
When the blade has been evenly thinned down so that the edge is very straight and thin, but not sharp – it’s about the thickness of card stock – it’s time to switch to a finer grit: 80 grit. The 80 grit belt doesn’t remove metal as fast but it has a different effect: you can see every mistake much more clearly. So it’s back to the grinder!
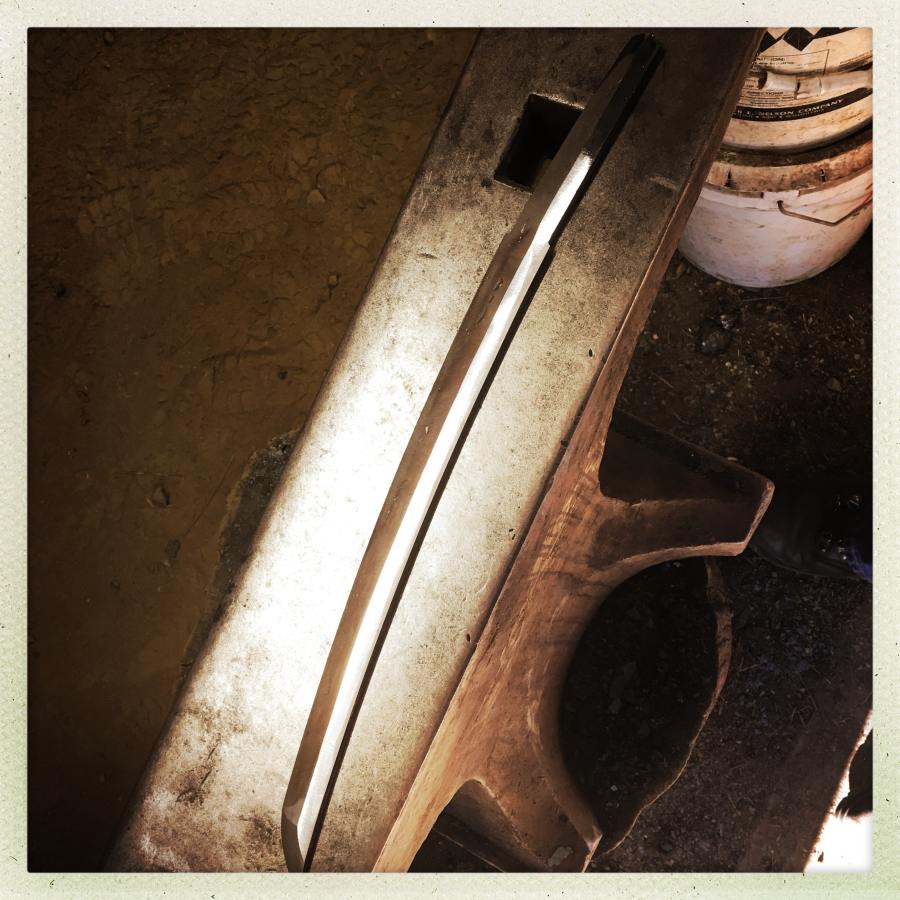
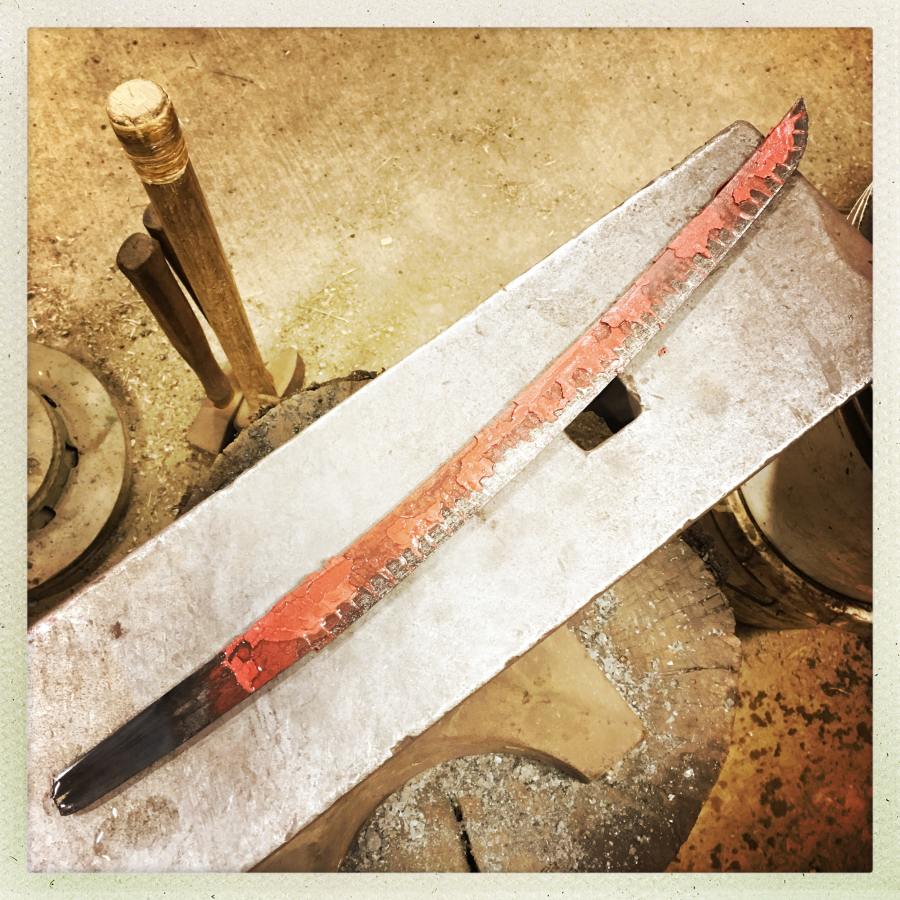
(That’s a bit of water back by the tang – not cracks!)
It’s pretty exciting. It’s beginning to look more and more like a samurai sword blade. Now, for fun, scroll back to the top and look at the curvature difference between the quenched blade and the forged blade. When you look at the blade, unless the grind marks are aligned, it becomes very easy for the different orientations of the grind marks to fool your eye about the blade shape.
Tomorrow we’ll be doing a bit more clean-up grinding using the 80 grit belts, then switching to stones. It’s an endless process of refining the lines and buffing out scratches. Several times, when the blade came right off the belt, I could see the temper-line on the edge, and I’m very, very happy with it.
Silly question, how are you going to get this masterpiece home? It’s not the kind of thing you’d want to hide in your suitcase.
Wow! The quench came off great, and it looks so beautiful, Marcus! You must be proud. I would be.
Also, I love the look of it with the clay on. That’s doing things with my imagination, it wants to play…
Look at the lovely, beautiful curve! Congratulations on a good looking blade. Also, sympathies on the flat spot on the finger. When I am holding metal against the grinder I wear heavy leather gloves. Partly for not wanting to polish off my skin and partly so I don’t burn the crap out of myself. :-D
@Lofty: I don’t know of course, but I’m pretty sure one can get a tube for mailing a map, and put it in there and mail it through the USPS. It’s not inherently dangerous in and of itself, it won’t explode or anything. They should not mind shipping it in the least.
Congratulations on succesful quench. Hopefully no hair cracks show up later during polishing. I know I am a gloomy pill, but Murphy’s law is real. I cant wait for seeing the hamon on a polished blade. Do you plan to only polish it the draditional way, or will you also etch it so the hamon and the damascus pattern come out more?
Polishing blade with stones is extreme pain in the nether regions. Or any polishing with stones for that matter. It takes forever.
So I am extremely happy for my out-of-scraps-build belt-grinder and I am currently christening it by making my first knife with it. Although there is a very real risk of overheating the edge and I will have to work on a solution for that. But nowadays work that took me maybe 20-50 hours in the past and caused me extreme pain in my fingers (on this knife ) is finished within 2 hours.
As for wearing gloves when working on belt grinder, I do not wear any. The risk of abrading or burning my finger is real, but so is the risk of loose glove finger tip getting caught between the wheel and belt and ripping the whole finger off, hovewer minor a risk that might be. My father was a foreman at loom factory and he has some horror stories to tell about people whose loose clothing or hear got caught on spinning machinery. My belt grinder already ate a drop of blood that every tool requires.
@Charly: yeah, my equipment is significantly different… but basically, you just can not polish sterling silver with your bare hands. It heats up VERY hot, and the entire piece heats up, you can just really burn the living crap out of yourself, so for my work, one must wear gloves.
Your knife is **gorgeous**, wow! Really beautiful work!
Charly, that is a stunning knife! Rick is like you, bare fingers around grinders, and he has a bad habit of fucking up his fingers in them, too.
Lofty@#1:
Silly question, how are you going to get this masterpiece home? It’s not the kind of thing you’d want to hide in your suitcase.
Technically, it’s a “beginnerpiece”…
I am going to velcro it to one of the legs of my steel Manfrotto tripod (which I brought for time-lapsing) and it’ll ride home in checked luggage protected by the tripod legs. I hope.
Caine@#2:
The quench came off great, and it looks so beautiful, Marcus! You must be proud. I would be.
Thank you! I’m pretty happy with it, but I’m never proud of anything I make – the best I usually muster is a sense of satisfaction and a big list of things I know are wrong with it. I’ve been that way all my life; the only jobs I’m proud of are the ones that can be decisively and quickly crushed, and this is not one of them. I’m going to be tweaking this thing for a long time.
kestrel@#4:
When I am holding metal against the grinder I wear heavy leather gloves. Partly for not wanting to polish off my skin and partly so I don’t burn the crap out of myself. :-D
I learned not to wear gloves when I was grinding knives in high school – with a blade you have to worry about ruining the temper, which means you can’t get it hot enough that it oxidizes the carbon. I’m not ruining this!
When working on a blade, you’ve usually got a bucket of water to dunk it into any time it starts getting hot.
Charly@#5:
Congratulations on succesful quench. Hopefully no hair cracks show up later during polishing. I know I am a gloomy pill, but Murphy’s law is real. I cant wait for seeing the hamon on a polished blade. Do you plan to only polish it the draditional way, or will you also etch it so the hamon and the damascus pattern come out more?
Thank you. No cracks; it’s much more solid than a rock, the whole blade. That’s one thing about metal rope damascus – it’s very very tough.
Tomorrow’s final installment has the beginning hints of hamon; I eventually intend to get it to a 6000 grit finish, though I probably will never send it to a professional polisher. I’m going to just use wet stones though I may hit a bit of it with a felt wheel if I get to 6000 grit.
The inner structure of the damascus is pretty visible in the metal; Gabriel just extra-twisted the wire rope before forming the bars we started with, so there was no doubling and folding. The metal has a lovely inner structure that’s already pretty visible.
Polishing blade with stones is extreme pain in the nether regions. Or any polishing with stones for that matter. It takes forever.
Yup. But it’s hard to make a mistake at that speed, and you don’t have to worry about a buffing wheel throwing a wakizashi blade into your thigh. Which is something I am honestly scared of. I had a sweet little drop-point I was making once, got caught on the buffing wheel, and went across the room and stuck in a cinderblock wall where it hit. That was sobering. I try to avoid machine buffing since then. Satin finish good!
So I am extremely happy for my out-of-scraps-build belt-grinder and I am currently christening it by making my first knife with it. Although there is a very real risk of overheating the edge and I will have to work on a solution for that.
Dunk in a water bucket? I’ve always done it that way. As soon as I see steam I know I need to dunk it again.
My father was a foreman at loom factory and he has some horror stories to tell about people whose loose clothing or hear got caught on spinning machinery.
Dog, yes. That’s a serious thing. The Bells have vertically set-up 72×2 belt sanders (a Burr King and another similar rig) and I touched the belt with my hair for a fraction of a second. Yipe! I’m especially attuned to that after getting my hair stuck in a drill press in 8th grade (I still have a scalp because the chuck race neatly sheared the chunk of hair and left me with a big patch missing) I’m sure your dad saw some horrible stuff. Worst story like that I ever heard was from a friend who worked on an offshore oil platform and someone got their sleeve caught on the bore and went into the collar.
Lovely knife! Did you do the carving on the blade with a chisel?
@marcus
I found out that when polishing with trizac belts that is no longer sufficient, because I have to dunk it almost every second at lower (finer) belts. I am thinking about getting an electrician to fix frequency changer to it, so I can regulate belt speed. It will be expensive, but still cheaper than bought belt grinder and time is money. Like you, I could polish a blade with wet stones when in high school, but nowadays in order to get anything done in the little time I have, things have to move fast.
No, I glued packing tape on it, cut the design with knife point and then etched it in salt bath with 4.5 V battery with blade as anode and a piece of graphite as catode.
That he did, and he warned be about such things ever since I was a kid. Even so I had my own accident, two years ago. When I was making my workbench and sanding the surface flat, by handheld belt sander’s switch got stuck and did not turn off when I let go of it. And I was tired so I was not as cautious as I should be and did not wait for it to switch off, I just let go off the switch and startet to put it aside – and it caught untucked shirt. Luckily I did not get hurt, but the belt sander shaved of teeth in the gear. And I learned my lesson – ever since then I tuck in all ends and I always wait for any device to stop spinning before moving it.
Charly@#12:
I found out that when polishing with trizac belts that is no longer sufficient, because I have to dunk it almost every second at lower (finer) belts. I am thinking about getting an electrician to fix frequency changer to it, so I can regulate belt speed.
I suspect heat build-up is always going to be a problem; slowing the belt down doesn’t increase your blade’s ability to shed heat any. The reason I always went with water is because it actually takes a fair amount of energy when the water turns to steam, and gets rid of it very conveniently. A better heat sink system is hard for me to imagine – air alone isn’t fast enough. With something like a milling machine you can squirt coolant at the work-piece as it’s being ground, but that’s because the machine “knows”” where the contact-point is going to be, at all times. Now I’m mentally picturing a mist-squirter that velcros to the back of a finger, and aims a little jet of coolant water at the back of the knife whenever there’s pressure on the fingertip… Nope. Fun to think about, though. I believe some high-speed grinders use diamond impregnated steel surfaces that are tunneled to flow water through them to remove heat. Sandpaper and water also can be a problem.
The wakizashi blade has a pretty substantial thermal mass, so it would take long grinds with 80 grit before it even began to warm up a little. And it has lots of surface area for the water to boil off of and remove heat when it does.
I’ve done smaller knives and I just resort to putting something soothing on my headphones, and doing 2 second grind, dip, grind.
No, I glued packing tape on it, cut the design with knife point and then etched it in salt bath with 4.5 V battery with blade as anode and a piece of graphite as catode.
Very cool!
@Marcus
There is a mist cooler system for belt grinders on the market, but I could not fit something like that into my workshop since I lack compressor. If you have some spare time, I think you would enjoy videos from this channel -click-. I certainly do enjoy them and I learned a lot of things that I am now trying to put into praxis.
I think slower belt speed would help, because it would reduce the friction and abrasion, thus giving the blade slitgtly more time to shed the accumulated heat. As it is now, I di as you write – dip, grind, dip, grind-dip-grind. But while at 40 grit the grind took a few seconds and the blade did not heat up significantly, at trizact 6 (equivalent of P2500 grit) the blade edge turned straw just in half a second, and another half a second and it turned blue. So it was more like gr..-dip!,gr..-dip! and I did not even got a chance to run the whole blade along the belt, because it heated locally too fast.
Also slower belt might allow me to use some more agressive water cooling system without throwing water in my face, har and all over.
Charly@#14:
There is a mist cooler system for belt grinders on the market, but I could not fit something like that into my workshop since I lack compressor. If you have some spare time, I think you would enjoy videos from this channel -click-. I certainly do enjoy them and I learned a lot of things that I am now trying to put into praxis.
Oh, cool! Looks like good stuff there.
I’ll trade you favorites – I’m also a fan of Neils Provos‘ work. He’s another IT guy, notable for implementing honeyd when he was at U Mich. I think he went on to Google and made a load of money and now he has serious gear.
I was not aware of the grinder cooler mister systems (they’re about $10 on ebay!) – It doesn’t look like it’d be very hard to drive it with a small PC cooler pump or small fountain pump ($15). I use a foot pedal control on my grinder; they make double-pole models; it’d be a cinch to hook the grinder and a transformer for a mini pump inline. If I ever get back into making thin stuff, I may experiment.
I think slower belt speed would help, because it would reduce the friction and abrasion, thus giving the blade slitgtly more time to shed the accumulated heat.
Yes, anything you can do to push the overheat time back. If you’re getting straw color or blue, you’re normalizing the steel and wrecking the temper (I assume you know that)
rizact 6 (equivalent of P2500 grit) the blade edge turned straw just in half a second, and another half a second and it turned blue. So it was more like gr..-dip!,gr..-dip!
Oh, oog. I’ve never used anything close to 2500 grit.
@Marcus
Thank you very much for the tip. Already I have seen in one video a tip that will help me with my work.
Although tere are times when I thing I only learn to reveal the extent of my ignorance.