As I headed in to the workshop this morning, the big white bird was on station. I tried to get a picture and it flew away, complaining. We have established a routine.
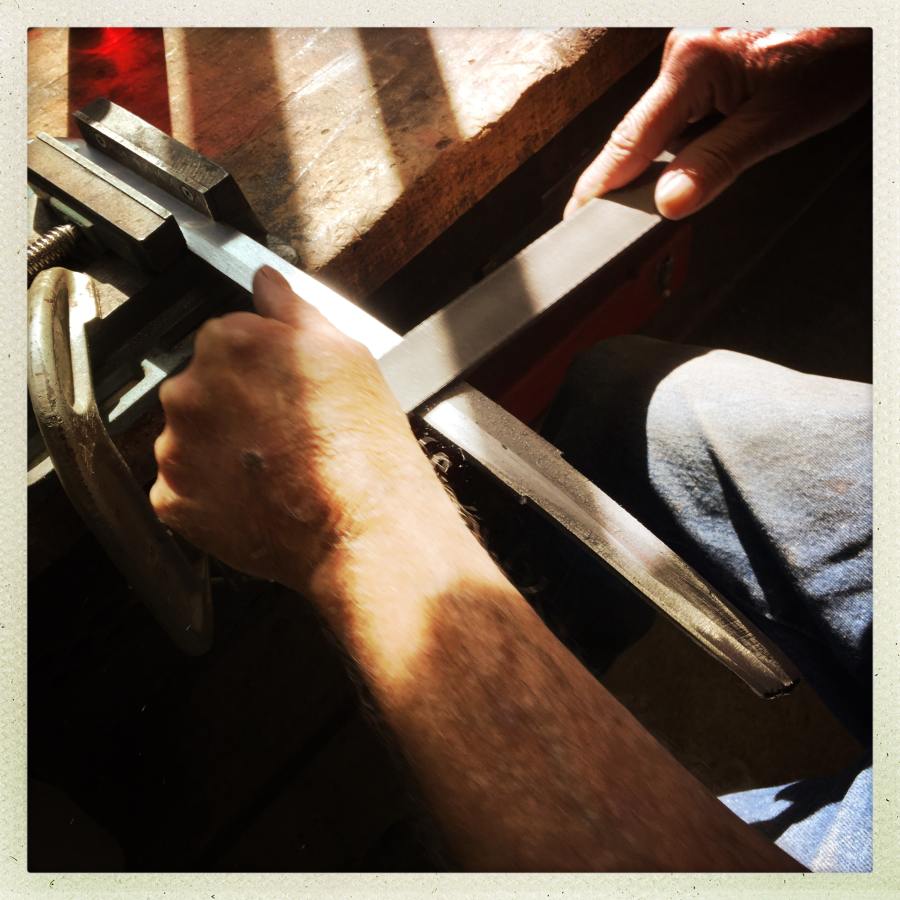
This morning, the state of the blade was this:
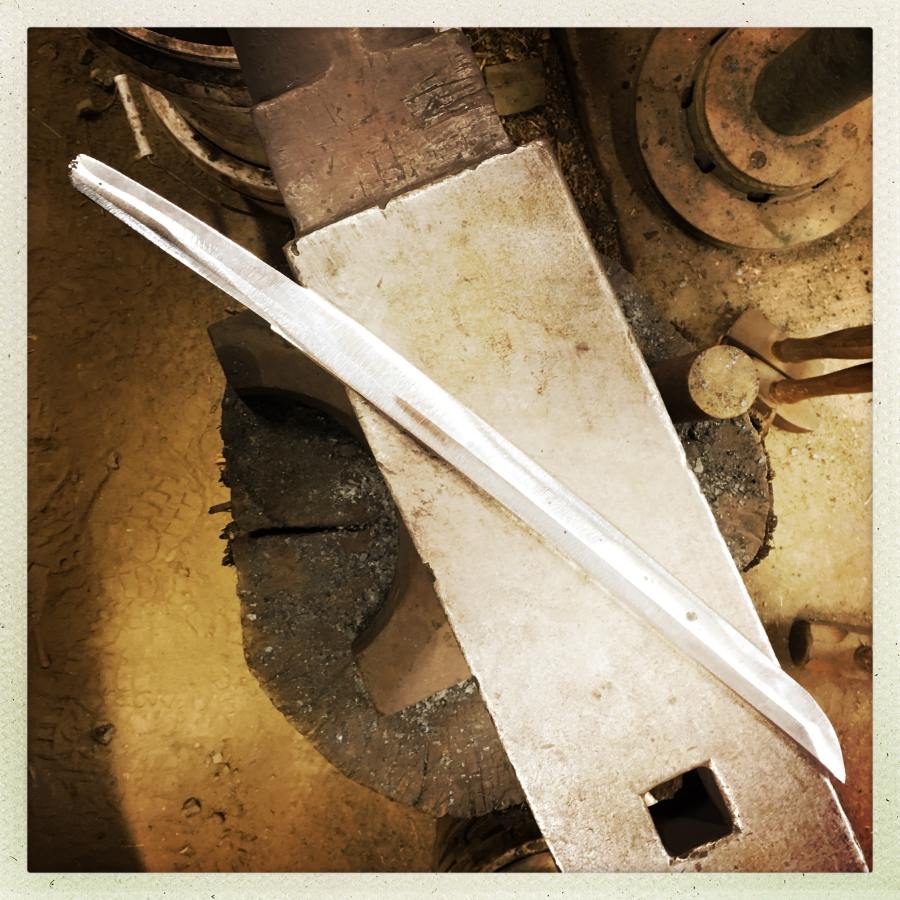
It is now beginning to look like something credible. You can see vertical banding from the grinder/sander, and the grind-lines are sharp but not perfectly harmonized. Today gets spend addressing that with successive passes with files. In traditional Japanese shops, we’d be using a thing called a Sen – a draw-knife that’s sort of like a spoke-shave. Michael explains this as a “one-toothed rasp,” which is pretty funny.
The metal is still soft, so a crosscut file removes it pretty quickly. Working at an angle to the scratches from the grinder, we use big flat files to clean up the planes even more. Basically, the process is to keep cleaning up the planes, forever, with successively finer adjustments.
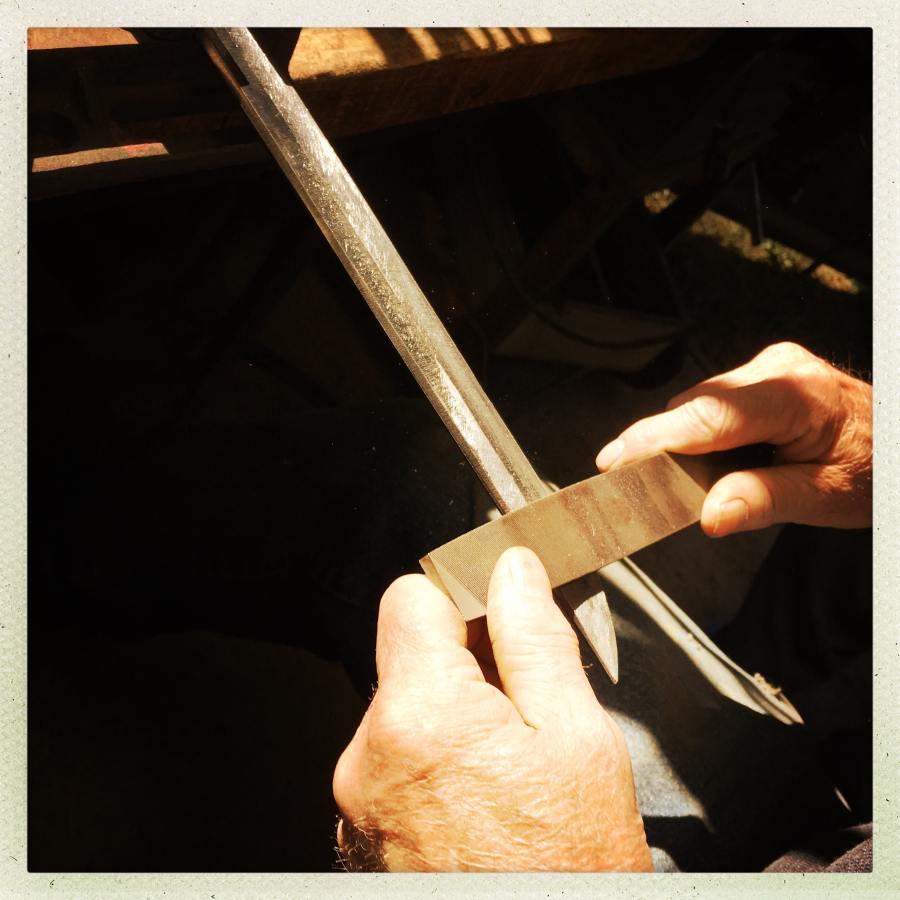
Those are Michael’s hands; showing me how it’s done
After the crosscut file has been used to refine the lines and remove scratches, then we switch to a flat file, held across the blade, and stroked straight along the planes to refine them further. It’s really cool the way this works; you’re shaving the metal very flat, very quickly. As the lines get refined it becomes easier to find places where it’s obviously wrong, in which case we sometimes run to Michael and get advice about where to remove things – I noticed at one point that the sword was kind of chunky – the tip was the same thickness along the back as near the guard and it needed to taper slightly – so Michael took it back to the grinder and did a few magically clean passes, which I cleaned up with the files, and it immediately looked lighter and better.
This continues off and on all day. Changes to the blade are slight but noticeable; it keeps getting more and more sword-like. I took a break and went over to the clean-work shop and did a few pictures of some of the pieces that are there.
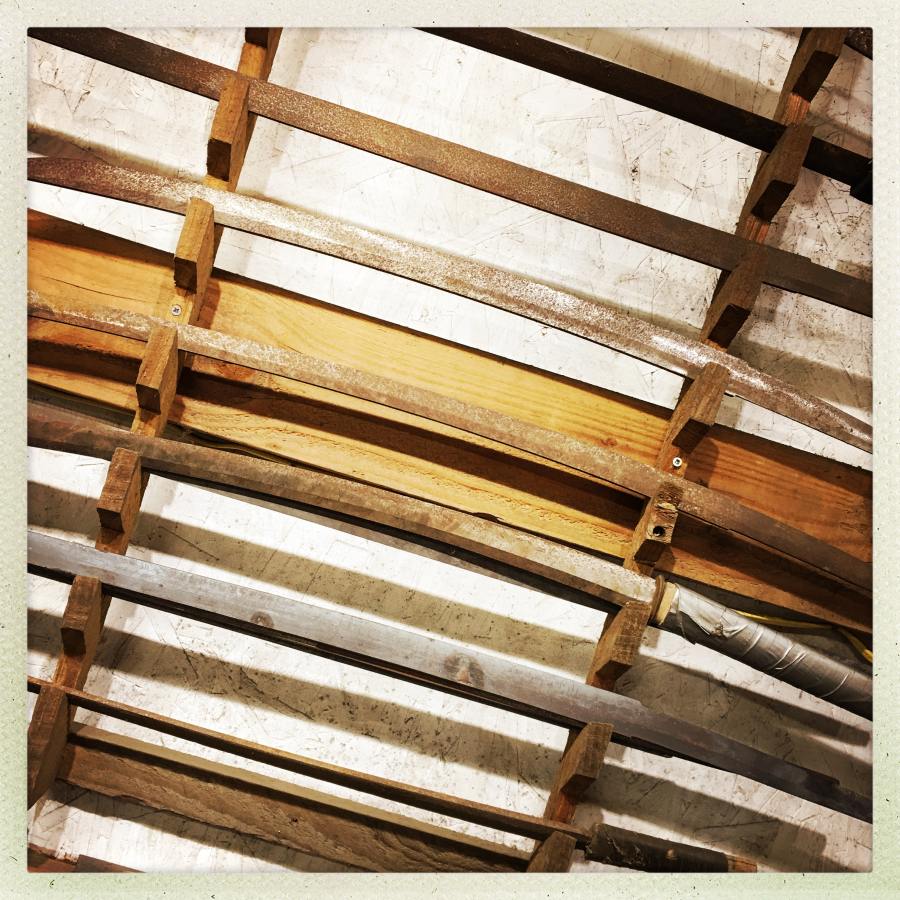
There are blades everywhere. Some just standing up in corners, some on racks, all in various states of finished or rejection. Blades get made just for testing, or as experiments, and each one has a story. “Oh, that’s one we did for the Forged in Fire show and they wanted us to do a big dramatic quench but we only had time to clay one side of it, so it needs to be normalized and re-quenched.” None of the blades are treated disrespectfully, but when you’re the person who makes them, they aren’t magically inaccessible items; each has a history and a purpose and some of them will never be finished because they’ve got something wrong that doesn’t make them worth completing.
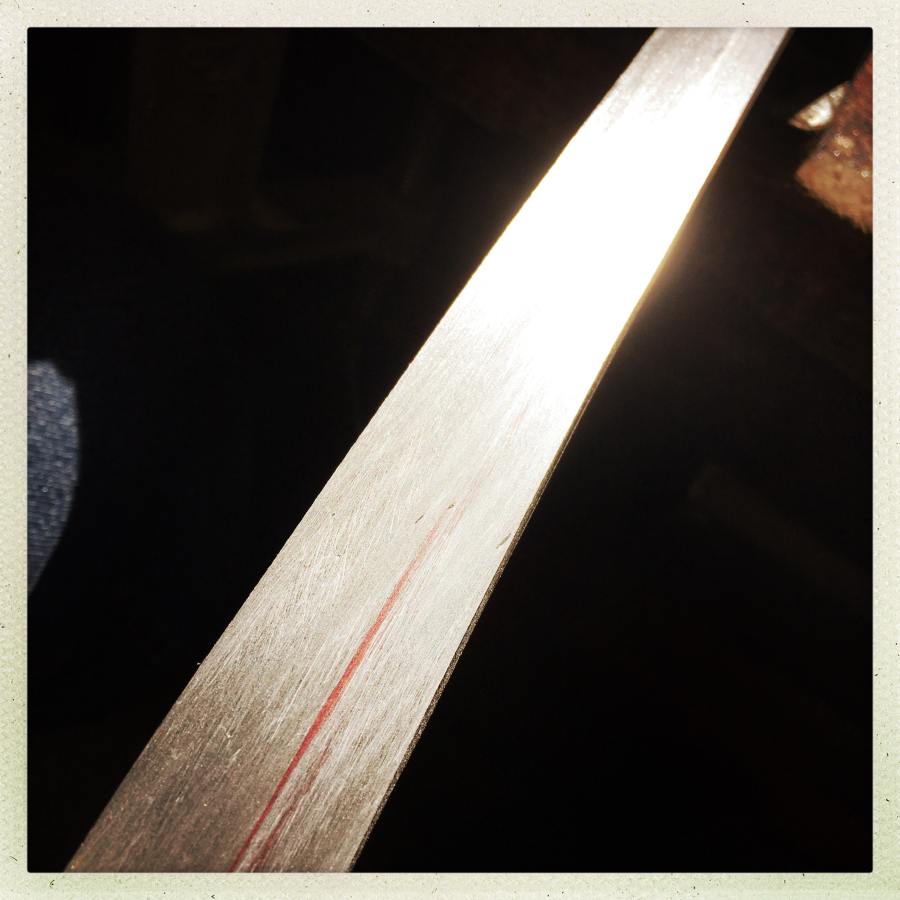
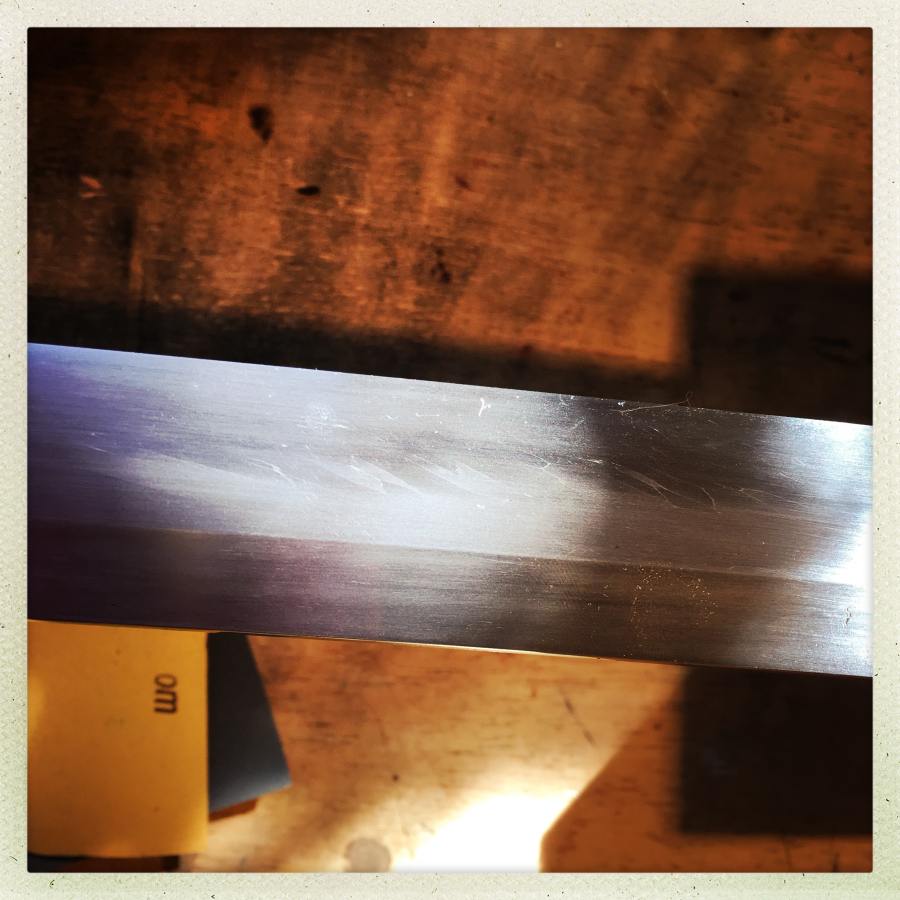
It’s hard to see the lines on the blade, depending on the light, and the angle, so I hit on the idea of putting sharpie along the line, then rasping until it nearly disappears; that way I can see that I’m not rolling over it and flattening it out. Scraping the blade with the file is a lot like a woodworker using a wood-scraper, which can give a pretty fine finish. This is not a fine finish for a Japanese sword, by a long shot, but it’s getting successively better. If I were making a conventional knife I’d probably switch to sanding it with 600 grit wet/dry sandpaper glued to a block, then 1200 grit, then call it a day.
This is from when Michael was demonstrating how to flatten the plane using the file as a scraper. You can see how the grind-lines from the sander are gone, and how much flatter the metal becomes; it doesn’t take much, just a dozen even strokes. We constantly check to make sure we’re not doing one side too much, or moving the line up or down by changing the angle. Since it’s hand-work now, there’s not a lot of error – it’s possible to take off too much, but it would happen slowly. On the grinder a severe error can happen in fractions of a second. With the file, you have time to think. I immediately felt comfortable because I realized I was working with a very predictable rate of change, that inherently tends to make changes toward “flatter and smoother.”
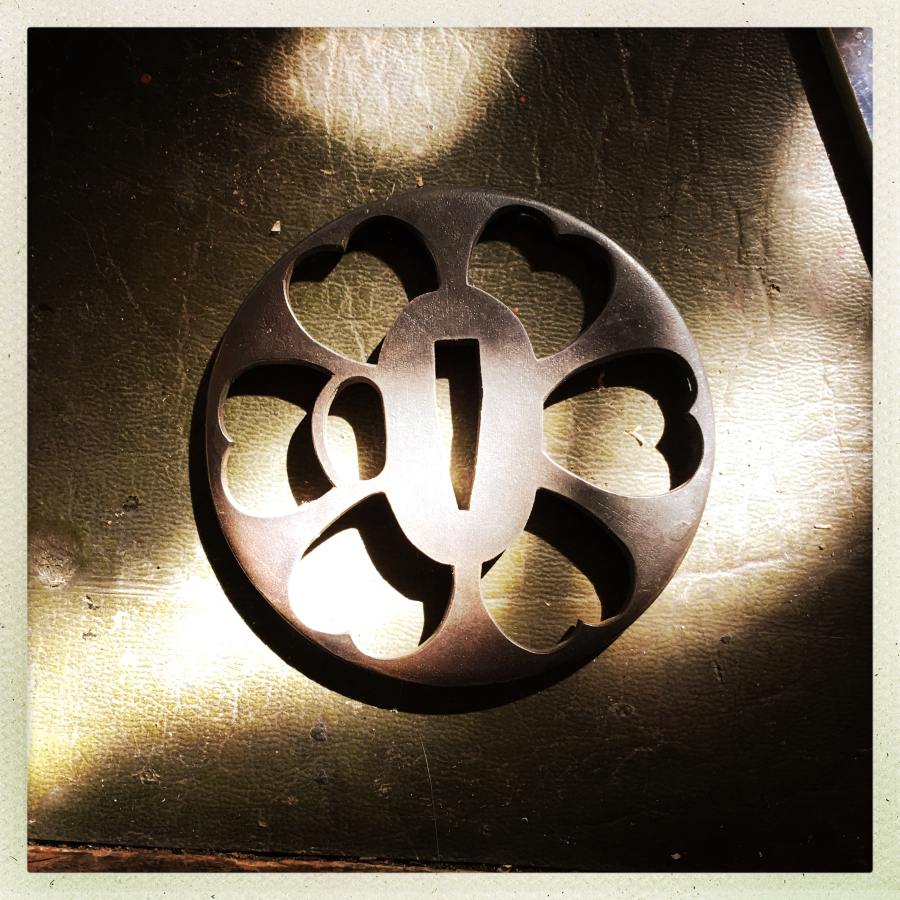
A guard (Tsuba) made by a long-term student
There are so many things to look at! Hours and hours and hours of work, stacked and racked and in the middle of having something done to it.
The (unpolished) temper-line in a wire rope damascus blade made by Michael Bell
At the end of today’s session, we put the refractory clay on that will be used to define the temper-line when the blades are quenched, tomorrow. The clay is a mixture of fire cement (aluminum oxide and binders) with added iron oxide, gooped into a slurry that’s about as thick as toothpaste. The purpose of the clay is to slow the cooling of the back of the blade, which will keep it from hardening; the edge is exposed and will hit the water without anything to slow its cooling. That will cause it to crystallize and form martensite, which is a harder but more brittle form of steel than slower-cooled pearlite. One of the characteristics of a Japanese sword is the cloudy temper-line (Hamon) which is defined by the way the clay is layered to expose or protect.
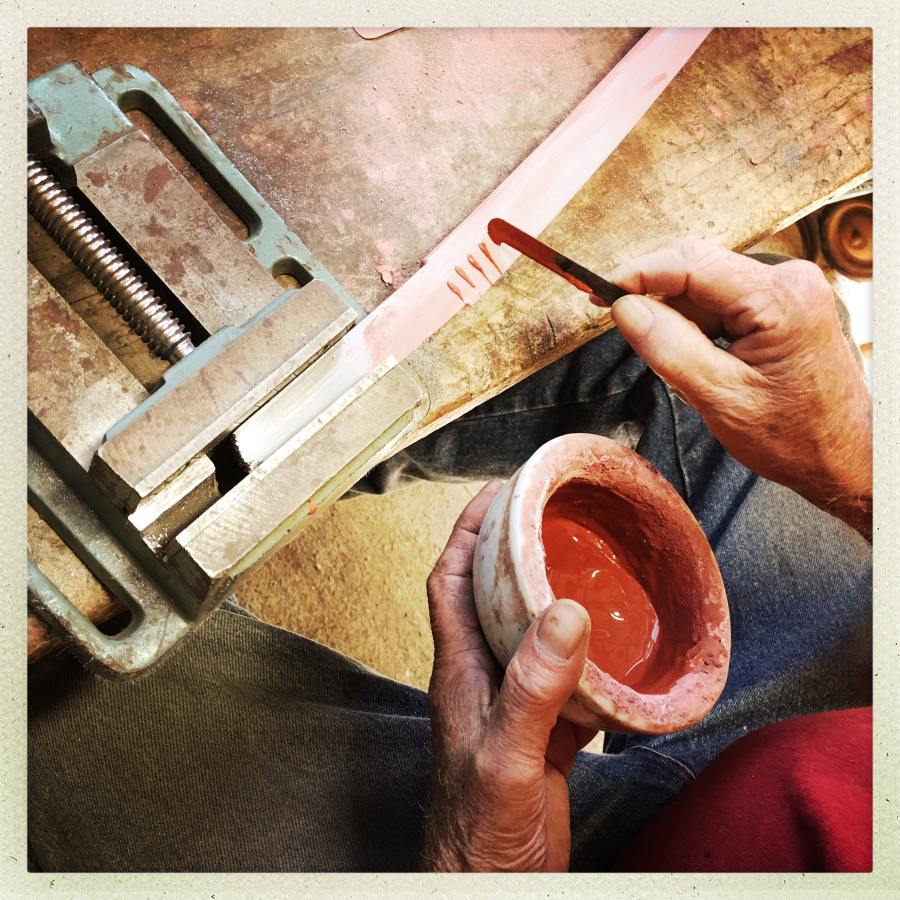
Michael demonstrating how to apply the fire clay on my blade
The preferred technique for putting the clay on the blade is to leave little fringes (the idea being that if a chunk gets knocked out of the edge it will tend to not crack lengthwise since it will eventually reach a fringe/finger of pearlite that won’t crack. I’m hoping that this all theoretical with regard the blade I am making; I do not intend to try to cut any rebar with it.
After the little fringes dry, a second layer is added that covers the sides and the back. Then the blades are stacked in a corner of the shop to dry. Tomorrow, first thing, I’ll get a picture of the fully-clayed blade (I couldn’t both hold it and take a photo) and then we’re going to quench them. That’s a dramatic moment in any sword’s life. As the edge hardens it also increases the curvature of the blade slightly; I assume martensite is larger than pearlite, which means the edge gets bigger, pushing the back into more of a curve. The edge of the blade is internally stressed, like a Prince Rupert’s drop except the stress is all controlled in one axis. How did this technique evolve? Did some ancient swordsmith drop a blade as he was carrying it to the quenching-trough, and half-quench a blade, then figured out what must be happening because the blade distorted?

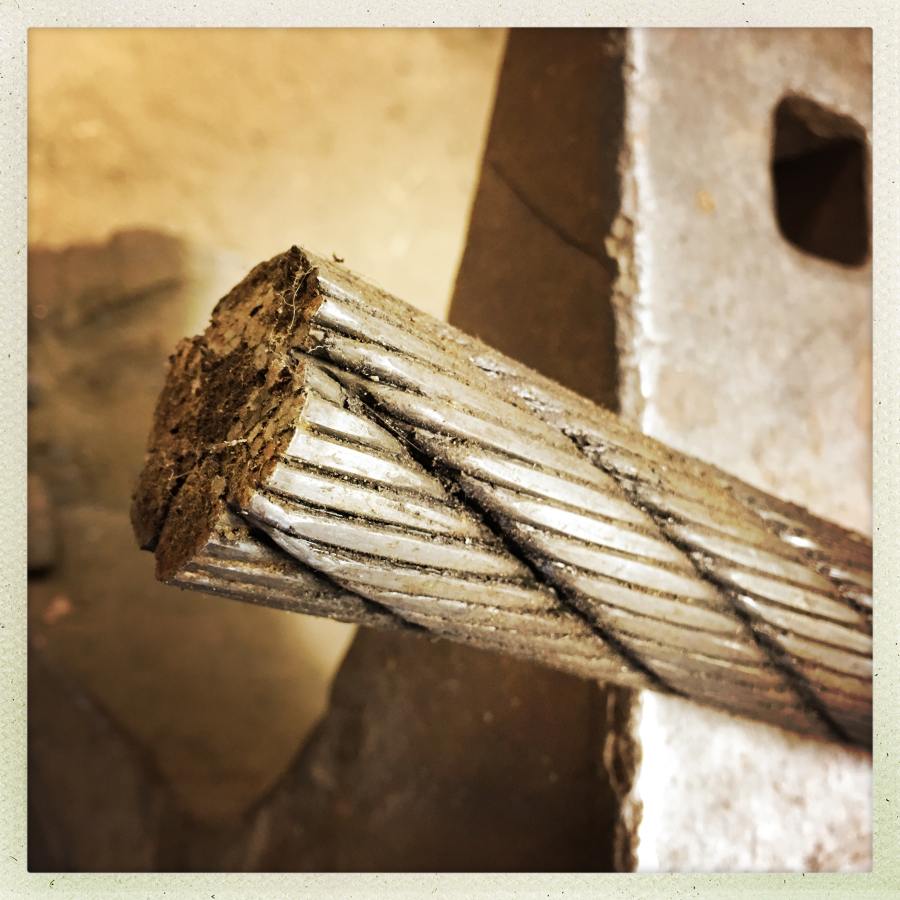
That’s what the wire rope looks like. It’s a bit under 2″ in diameter (about 45mm) and consists of 6 bundles of twisted wire, which are also twisted together.
I mentioned dakotagreasemonkey’s explanation of the difference between wire rope and cable, and we’ve been referring to it as “wire rope damascus” ever since. I don’t know if the entire knife-making community will swing around, or not. They probably won’t switch to metric, either.
I did not know there is a fellow knife-maker around here. After long time I just this year finished building my own hobby-workshop in which I intend to again make knives and carve wood, hobbies I was forced to abandon for nearly fifteen years by now. I would love to have an opportunity like this, to learn directly from a master in their workshop, but I have to do without it and be content by reading and watching videos to get the knowledge and untutored screw-ups to get the experience.
I wish you luck in the quench and hope the edge does not crack! And I eagerly await to read about your progress.
That’s pretty exciting that you will quench today! I am sure it will go well, you have excellent help and a great eye for detail.
I didn’t realize the idea was to have part of the blade soft but it makes perfect sense of course. I know just how brittle metal can become, and when it’s like that it breaks way too easily.
Marcus:
I shook my head and told him, you of all people should know that every group has their own terms. He nodded, then I said “just couldn’t help yourself, could you?” And he just grinned.
All my best hopes for the quench! That’s excitement.
Man, this sounds like an awesome experience. I’ve been hooked on Forged in Fire since I learned of its existence (my favorite competition gameshow of all time, I think), and have watched all episodes so far, including the two in which Gabriel Bell competed. He seems liks a cool guy. And he seems to know what he’s doing, especially when it comes to Japanese blades and bladesmithing techniques; I’m sure you’re learning a lot at Dragonfly.
I don’t have any personal experience with blade making, but found to my surprise that I liked sharp things when I bought a machete in Ecuador to hack through the jungle. I love that blade and treasure it to this day. Swords are less interesting to me because their express purpose is violent; bowies, camp knives, parangs, machetes, they’re more my style because they are, first and foremost, tools (though they have certainly all been used as weapons through the ages). Anyway, this workshop sounds like a tonne of fun, and I am presently looking up similar events that I could attend which are geographically closer to me.
VolcanoMan@#4:
He seems liks a cool guy. And he seems to know what he’s doing, especially when it comes to Japanese blades and bladesmithing techniques; I’m sure you’re learning a lot at Dragonfly.
They’re very knowledgeable, low-key, and gracious. One thing I really appreciate is that they both understand that everyone’s coming with different skills and level of knowledge; there’s no macho bullshit – if you make a mis-grind they go, “sure, that happens. Come on, let’s fix that up!” The switch between do/watch/explain/watch/do has everyone running at their maximum absorbtion capacity. Gabriel also makes delicious coffee.
Swords are less interesting to me because their express purpose is violent
The way I wrap my head around that is best expressed by Lao-Tze (chapter 31): [tao]
I interpret that in line with the Japanese distinction of the “life-giving sword” as opposed to the “life-taking sword” (Yagyu Munenori) – a sword can be used for aggression, to take life – or defensively, to preserve it. While, as Lao Tze says “they are not a wise man’s tools” even a wise man may use them when he has no choice.
Caine@#3:
All my best hopes for the quench! That’s excitement.
Perfect! (happydance)
kestrel@#2:
I didn’t realize the idea was to have part of the blade soft but it makes perfect sense of course. I know just how brittle metal can become, and when it’s like that it breaks way too easily.
I believe that the trick with clay insulation is uniquely Japanese. Other blade-making traditions get the same kind of effect by welding layers of metals that quench differently, then taking advantage of very precise temperatures. So, a Norwegian-style knife would have have a central steel layer that quenches hard more easily than the outer layers – that way the thinness of the exposed edge of the central layer causes it to quench faster and you wind up with almost the same effect. There are a couple tricks that bladesmiths around the world seem to invent over and over, slightly differently – but, since having good blades is a valuable military technology, thee has always been a lot of propagation of techniques.
One cool tidbit Michael dropped at lunch today as we were looking at pictures of Japanese sword-guards: there’s a certain period when the metal-work and carving on sword guards suddenly jumps dramatically in terms of detail. That corresponds to when the Japanese began trading with the Portuguese, who introduced them to lenses.
Charly@#1:
After long time I just this year finished building my own hobby-workshop in which I intend to again make knives and carve wood, hobbies I was forced to abandon for nearly fifteen years by now. I would love to have an opportunity like this, to learn directly from a master in their workshop, but I have to do without it and be content by reading and watching videos to get the knowledge and untutored screw-ups to get the experience.
It’s awesome to build your own workshop. Every bladesmith I’ve ever met has their own personal collection of invented tools; Michael and Gabriel made their own forges, quenching tank, etc. So the shop is full of stuff that is “unique” and other stuff that is produced specifically for knife-makers.
Setting up a shop is a rare pleasure. So satisfying. Especially once you’ve had a chance to figure out your own work-flow and then you can put everything exactly where you need and want it.
Dragonfly Forge does/did offer classes in chisel and small tool-making. I think it’s built on the basic bladesmithing course, which, frankly, catapults you pretty far along the curve right away (I feel like I’ve learned enough that chisels or carving knives wouldn’t be out of reach right now, except for the part of estimating the final curvature of a bi-metal chisel. Yipe!)