Forest Path Statues – Part 1 – Beginning

The location where I spent this spring’s vacation has a very interesting path through the forest – many tree stumps along it are carved into beautiful statues, some somewhat realistic, some completely abstract. I saw an empty truck parked there with link to this website  of  Czech artist Jan Kužel. The style of the statues there corresponds to statues in the forest, so it is reasonable to deduce those statues are at least in part his work. These are done mostly with the use of a chainsaw, which is very impressive.

I checked and double checked and AFAIK Czech Law does not prohibit photographing and sharing of photographs of any art that is permanently displayed on public land with unrestricted access. Which is this case. So the photographs are mine, but the art they are depicting belongs to someone else. I will post only a couple of pictures at a time, because there is a lot of them.

It has begun on a clearing with a simple table and a couple of benches, and a road sign reading “To the Mountains” on the left and “Home” to the right.

©Charly, all rights reserved. Click for full size.

Making a Rondel Dagger – Part 10 – A Bolster and a Guard

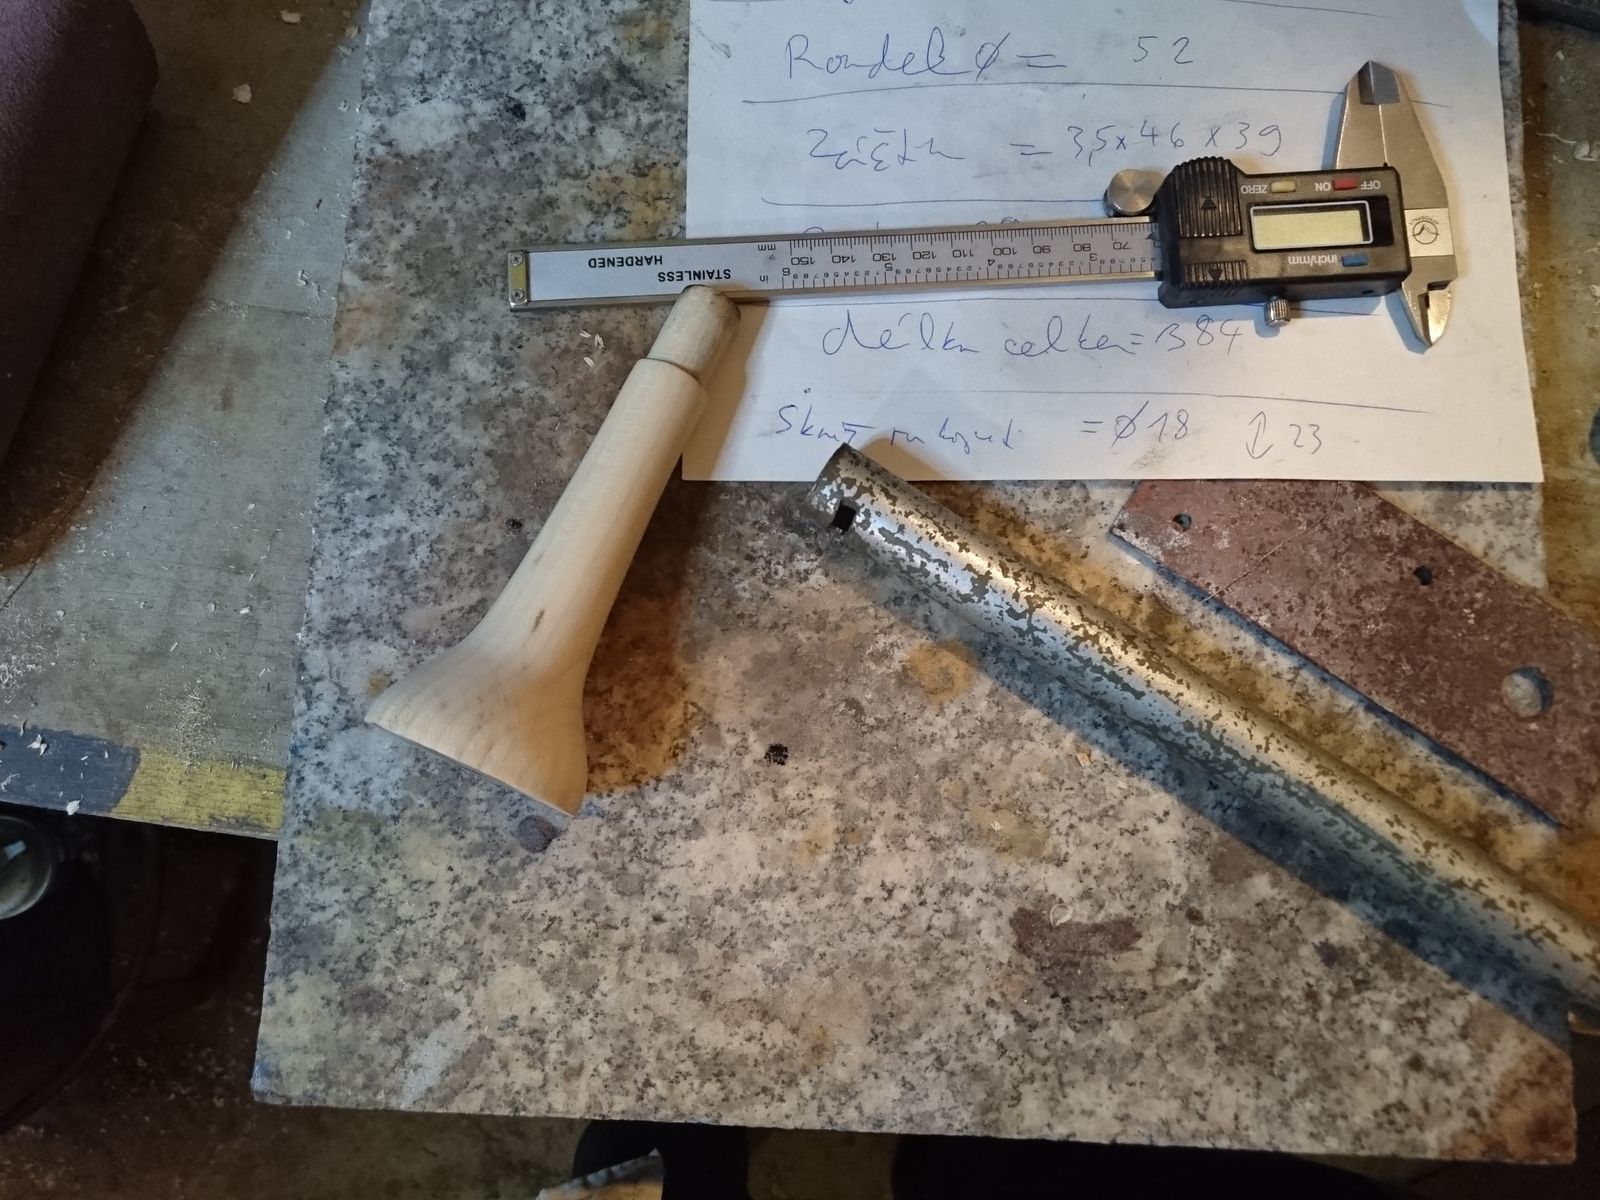
Whilst the blade was the most time-consuming part, in a project like this there is still a lot of metalwork to be done. Once the handle is turned, next step is to make a bolster and a guard, and fit all these four parts together. Precision is important here. Not precision as in adhering to measurements from a drawing, but precision of how the parts fit together. I have made myself a set of measurement from the game 3D model that I aim to get near to, but I will not fuss about getting them exactly.

The bolster I have made from a piece of pipe of unknown origin that has almost the exact diameter that I actually want to have. It is also completely free of rust, which has made me suspicious whether it is not stainless steel. No matter, I have simply cut off a piece and polished it.

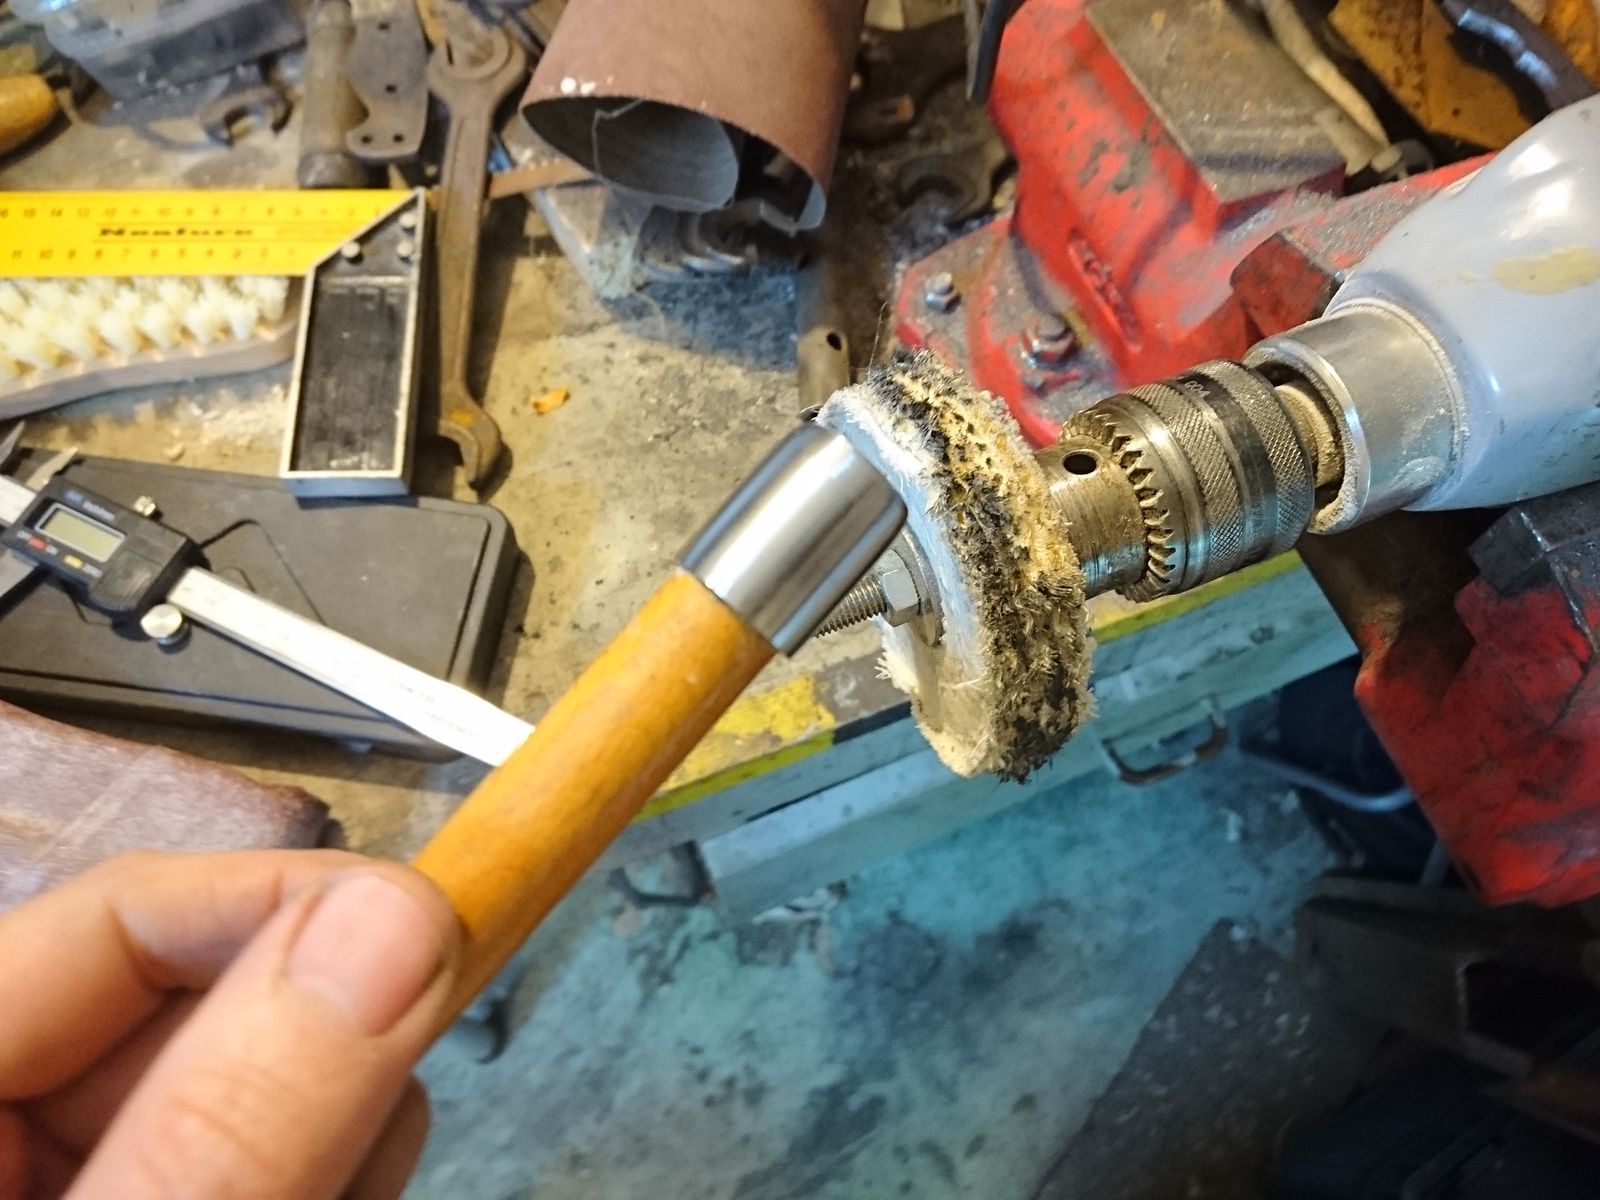
I did not polish it on the belt grinder all the way through the finest belts, but I stopped at around Trizact A16 and I went straight tot he buffer after that. Only I did not use the felt wheel straightaway, but a coarse sisal one with coarse polishing paste, then a felt wheel with medium polishing paste, then felt with fine polishing paste and finally felt wheel with jeweler’s rouge.

In order to be able to work with the piece on the buffer safely I have hammered it on a round dowel. During the polishing I took care to turn it in different angles against the wheel in order to get slightly satin surface – buffing in one direction only makes mirror polish and I did not want that.

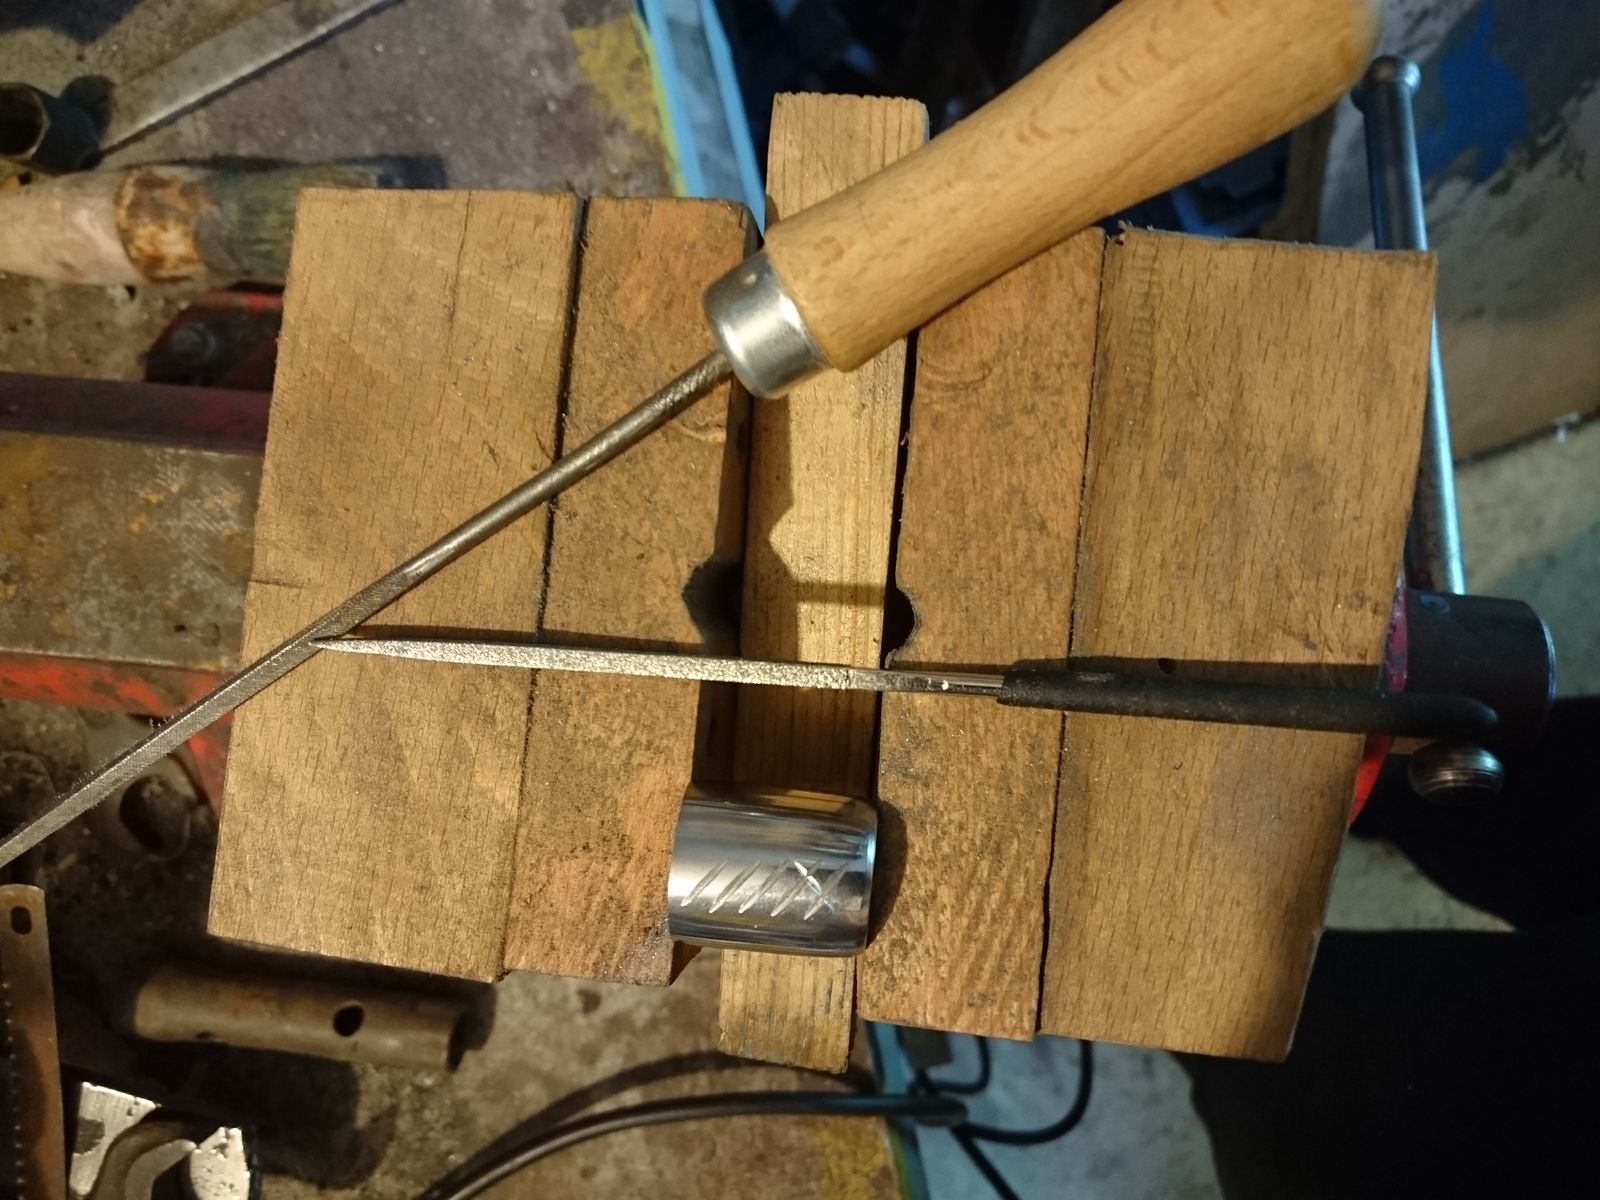
The bolster is not completely round, but very slightly oval. I wanted to be able to feel the edge alignment of the dagger when held in bare hand. To further help with this I have also filed a fine grid of grooves on each side of the bolster. With that done, I could affix it to the handle. For that I have coated the relevant part with hot hide glue, stuck the bolster on there and hammered a few wooden splinters between the bolster and the handle to center it properly and to hold it in place.

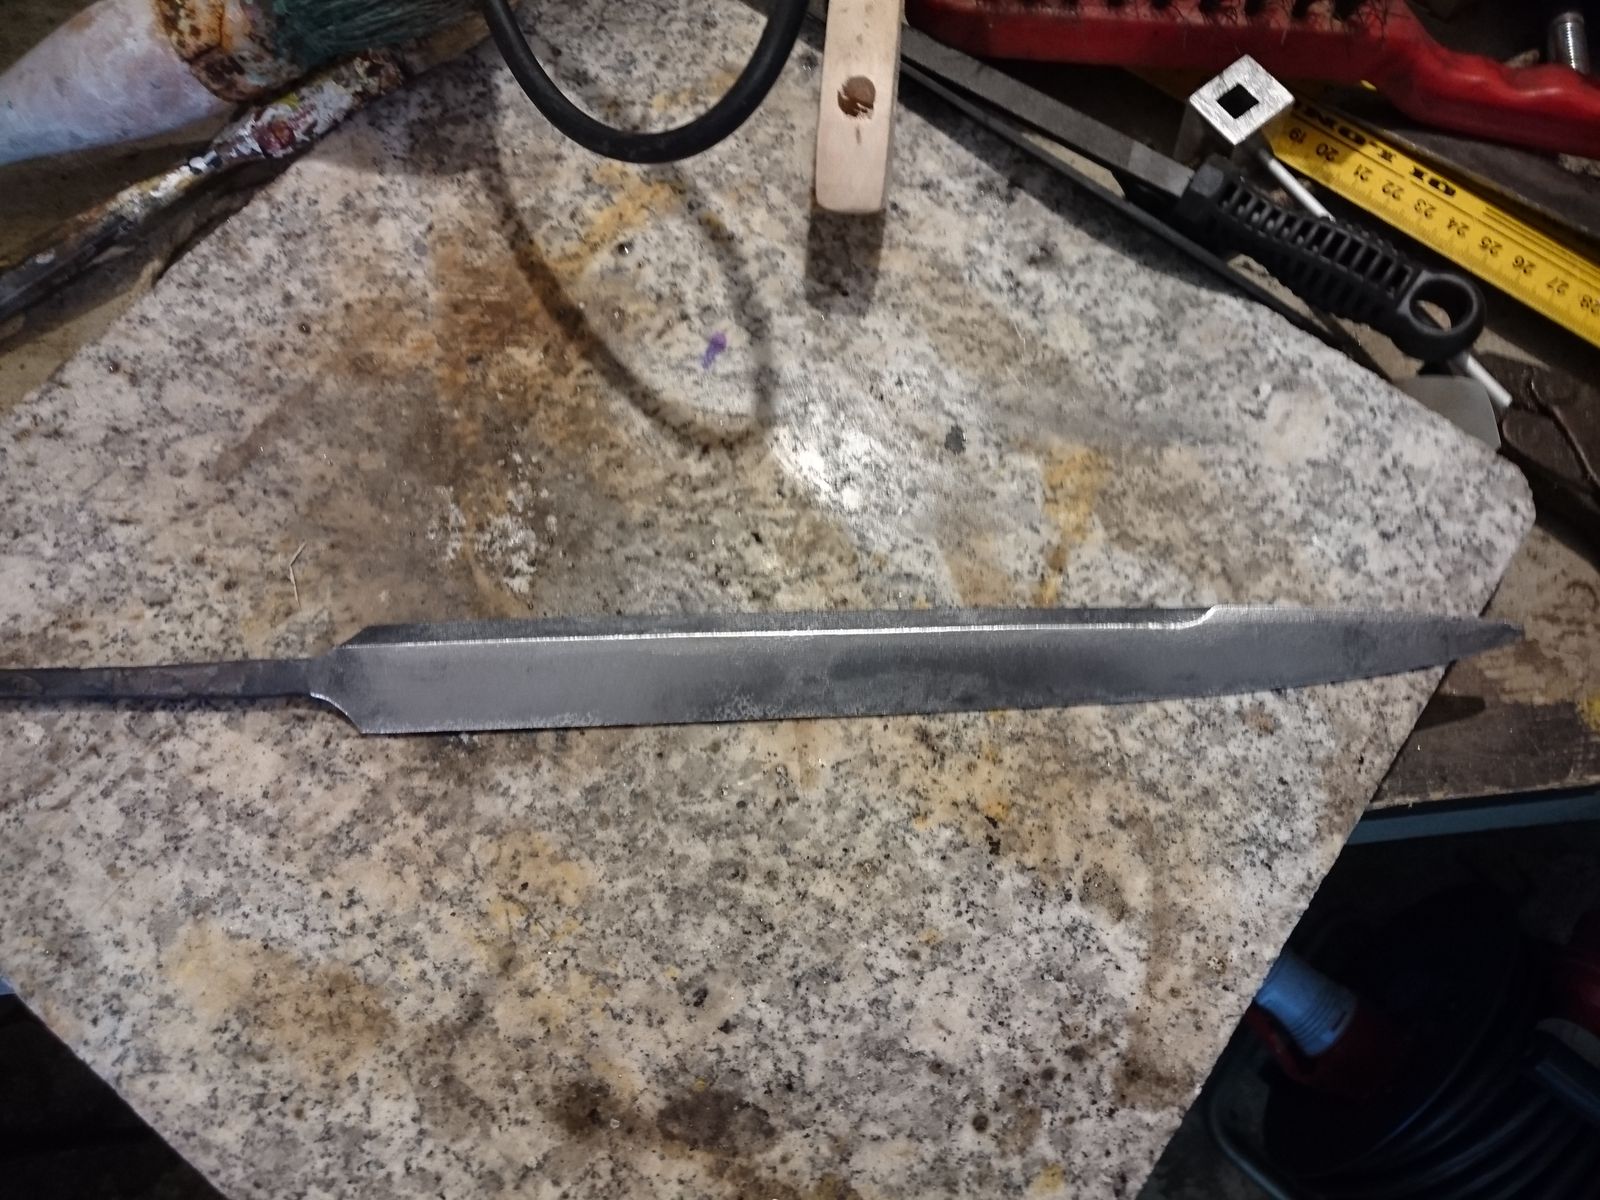
With that done I had to shape the tang on the belt grinder so it was continuously ever so slightly smaller than the blade and square the shoulders (those were round prior to hardening because a sharp edge could lead to the tang breaking of in quench). To protect it from scratches I have covered the whole blade with masking tape. When the tang was shaped, I have affixed the blade in the vice with additional protection of a wet rug, and I shaped the hole in the handle to fit by the previously shown burning technique. I had to be careful for the heat to not overheat the blade base, but to be hot far enough to get a fit where the bolster was mere 3 mm from it.

Next piece in this jigsaw was the guard. I wanted that to be between 3 to 3,5 mm thick, but I had no suitable piece of steel that was not pitted too much. In the end I had to cut a piece of a structural steel V profile that was way too thick. I have spent rather more time on truing it and grinding it down to desired thickness than I wished to. Unlike for the bolster, I had no good and comfortable way to hold on that small flat piece of steel safely, so I nearly ground my finger tips off. Luckily only fingernails got slightly chewed and I have learned how to do this safely later on, when I was polishing it. I have to finish the supporting table for my belt grinder in order to do these finicky things.

When ground to slightly above the desired thickness, I have punched the centre and drawn the design of the guard. I like to make my own tools, and I have indeed made my drawing needle, but I wimped out and bought the compass. The work required to make it might be fun, but it would be way too much time that would definitively be spent better elsewhere.

Next step I have just drilled a 4 mm hole in the center, 0,5 mm smaller than the maximum width of the tang at the blade base. In order to transfer the outline of the blade base onto the steel I have poked a hole with the tang into a piece of paper – Lipton tea box was the right thickness and firmness.

Cutting the hole for the tang I have done with a fret saw. In the past I broke a lot of blades whilst doing this, but it seems I have finally learned how to do it properly this time. I broke none and it was done in lickety-split. Note the aluminium covers for the vice jaws. These are important, because I need the piece to be held firmly and safely, but I do not wish the hardened jaws of the vice damage the soft steel of the worked piece.

After cutting the rough outline of the hole came of course the most difficult part – fitting and shaping the hole to fit the tang precisely. This took the better part of an hour with fine and diamond files, and another hour or so the final shaping and polishing of the piece to the same finish as the bolster.

Here you can see the face of the guard. The other side, facing the hand, has rounded edges. I was thinking about doing that, then I was thinking about doing both sides flat and in the end I had no choice because before I figured out how to polish it properly, my hand slipped and I chamfered an edge that I did not want to chamfer. I was lucky – the result is comfortable even against bare hand and it looks good. I might however take some more time for polishing this piece. A few hand courses with coarse hematite might be needed, right now it shines a bit like a bare arse among the bushes.

Here you can see the parts assembled. Of course there is a lot of masking tape covering all the bits that I do not want to get dirty or scratched, and most of the focus is on the mess that is my workbench. But you would not expect me to show you pretty pictures at this stage, would you?

The Chains of Intolerance.

Andrew Ellis Johnson, “The ICEman Cometh” (2018, detail), ink, charcoal, wax, graphite.

Andrew Ellis Johnson, “The ICEman Cometh” (2018, detail), ink, charcoal, wax, graphite.

Art and artists most definitely have a place in answering wrongs, great or small, and everything in between. Andrew Ellis Johnson has a searing piece up at Hyperallergic. It’s well worth seeing and reading.

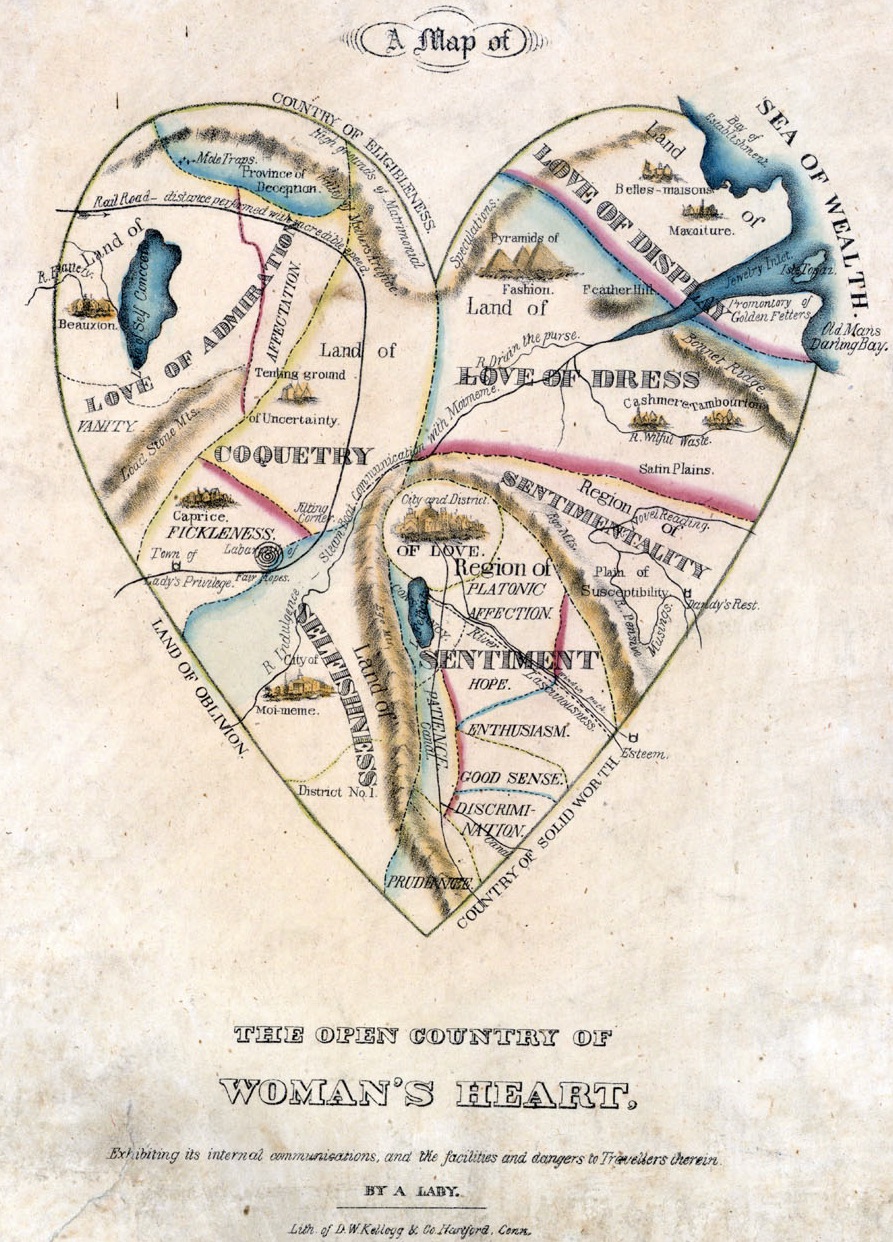
The Open Country of Woman’s Heart & Other Allegorical Maps.

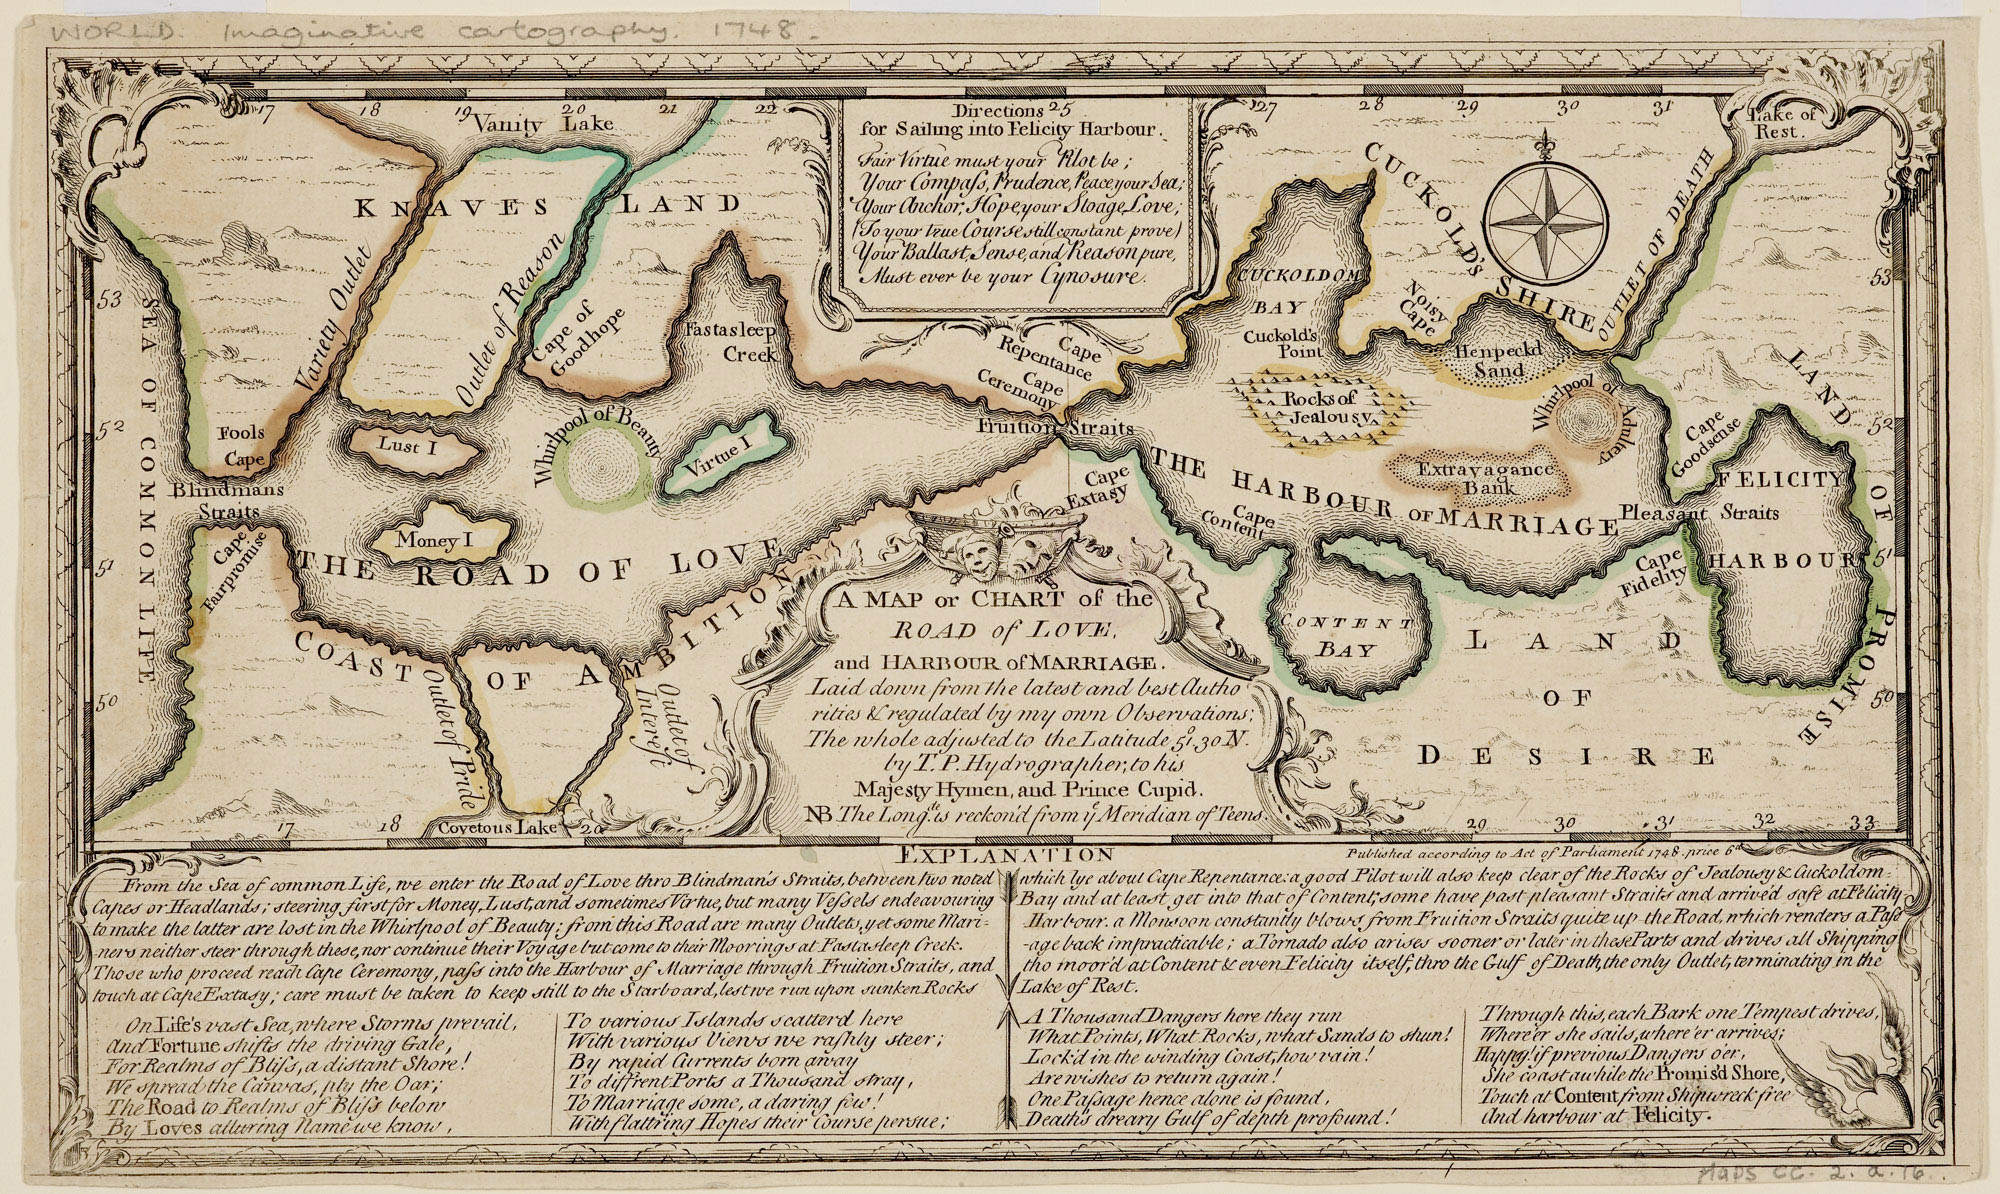
The Public Domain Review has some wonderful and awesome allegorical maps, which clearly show the trains of thought and cultural sentiments of the 18th and 19th centuries. Click for full size.

A Map of the Open Country of Woman’s Heart, Exhibiting its internal communications, and the facilities and dangers to Travellers therein, By A Lady; Lith. of D.W. Kellog & Co, ca. 1830s — Source.

A Map of the Open Country of Woman’s Heart, Exhibiting its internal communications, and the facilities and dangers to Travellers therein, By A Lady; Lith. of D.W. Kellog & Co, ca. 1830s — [Source.]

Thomas Sayer’s A Map or Chart of the Road of Love, and Harbour of Marriage, 1748 — Source.

Thomas Sayer’s A Map or Chart of the Road of Love, and Harbour of Marriage, 1748 — [Source.]

You can see many more of these allegorical maps at The Public Domain Review.

Thankful.

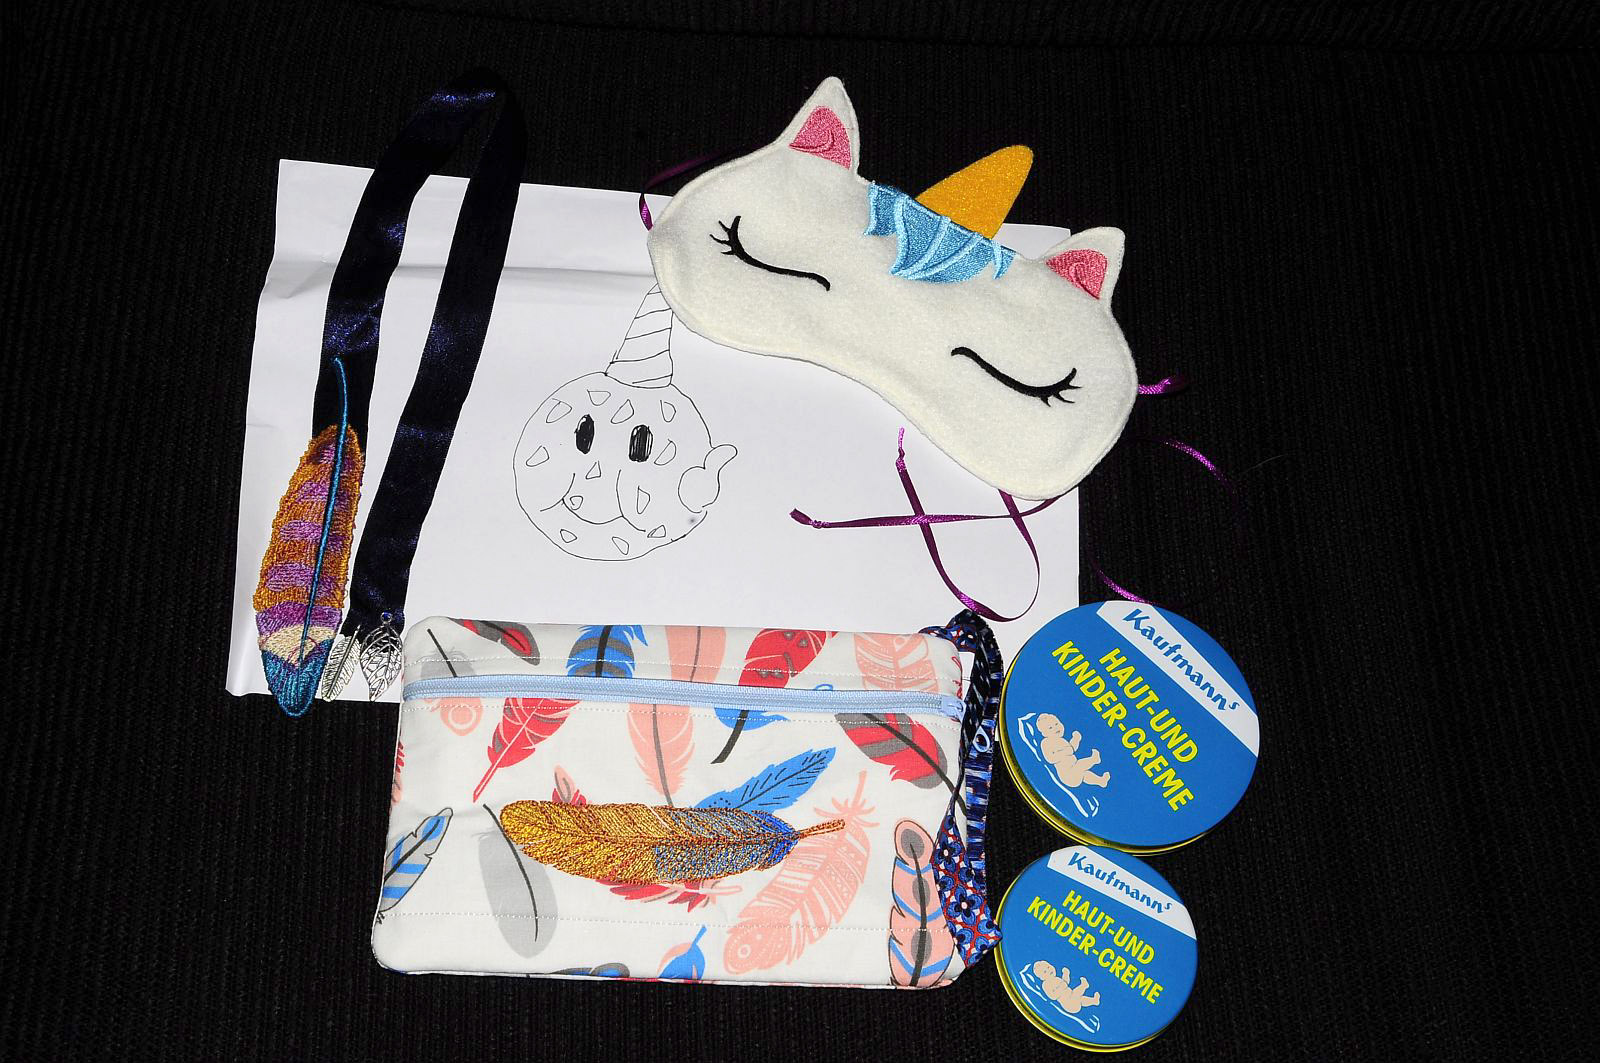
I received another care package, full of wonderful, from Giliell. I love everything, and I am so very thankful. I have the best friends on the planet. The bookmark was put to use immediately, and shortly after that, the bag filled with all the essentials, and I can’t say how much I appreciate that one! I love the embroidery and the fabric, but it’s especially nice because it holds all the important stuff, and I don’t have to haul a purse around everywhere. I used the creme right away too, it’s lovely, and the scent is fine. Thank you so much, Giliell!

A gorgeous bookmark, a sleep mask, small bag, cream, and my very own Cookie Corn. :D

A gorgeous bookmark, a sleep mask, small bag, cream, and my very own Cookie Corn. :D

Packed with the essentials, ready to go.

Packed with the essentials, ready to go.