Here’s a quick update on Jack’s paw.
There’s are a couple things going on in this shot:

First off, I’ve poured a layer of silicone and am letting the bubbles come up, before I bury them in more heavy silicone. That’s a useful trick to remember. Some mold-makers pour a thin sheeting layer, poke bubbles with chopsticks and work silicone into cracks with a chip brush, but in this case the paw shape was very clean because it was formed vertically and there’s next to nothing to trap bubbles under.
Second, you can see a bit of my adjustable mold frame. This is a trick I learned from the good folks at Smooth-on, who teach a terrific 2-day mold-making seminar in Easton, PA, a few hours from my house. I made the frame out of polypropylene butcher block, which is great because nothing sticks to it and it’s incredibly durable. You use 4 clamps to hold the corners and you can slide the pieces in and out to get a precise (rectangular is the only option) shape. The key to this system is having a nice flat base, in my case, a granite counter-top. A bit of vaseline along the bottom of the frame helps seal it.
When it’s cured, you just unclamp the clamps and it comes right off.
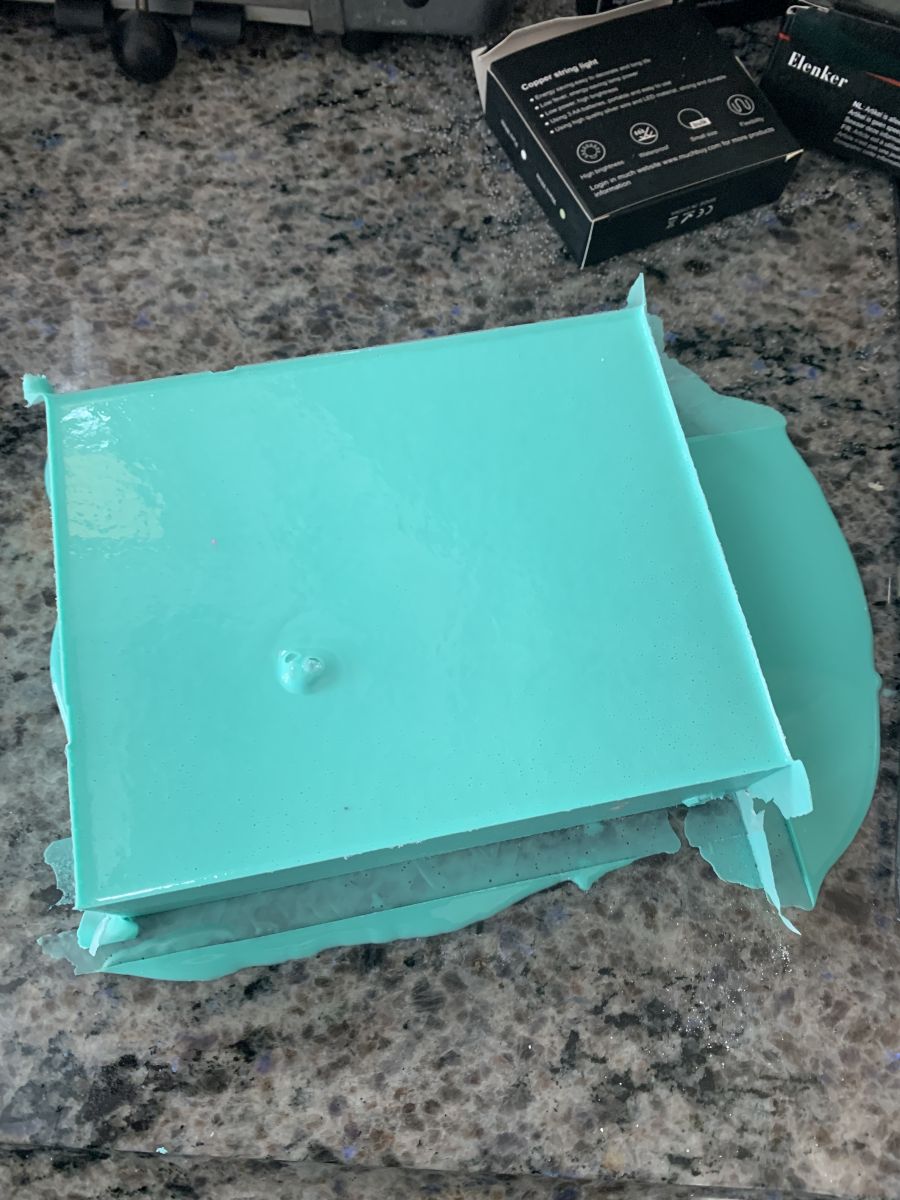
The silicone has about the consistency of cheese (gouda, not brie) and cuts easily with scissors or a knife. It peels right up off the countertop with a tug. In this case, because the plaster at the bottom of the paw was porous, the plaster wound up glued to the countertop, but it came off with some tugging and a bit of a slice along the bottom with a kiridashi.
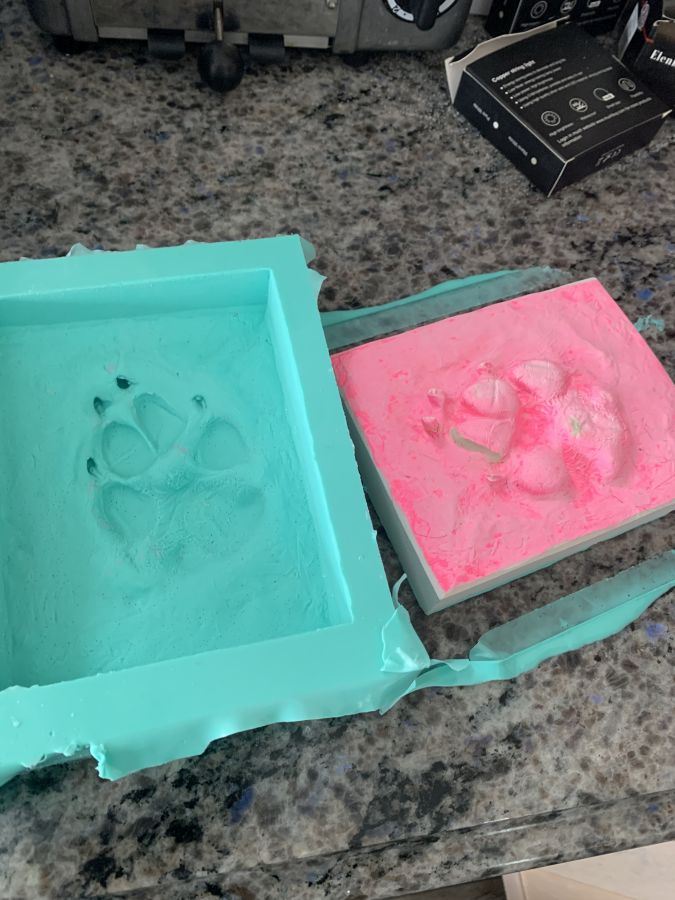
If you look at the plaster, you can see a spot where I put some clay to fix an under-cut. Jack’s paw pad appears to have shifted slightly to the side (dog paws are squishy, that’s how they provide such impeccable traction control) so I packed clay under it.
Then I went down to the basement to grab some urethane plastic to stir some bronze into and … oops, I’m out. So it’s going to have to sit there a few days while UPS does its magic and brings me a sample-size bottle of Smooth-On Color-Pro polyurethane plastic.

You can see I slightly chamfered the edges of the plaster with a kiridashi, to make the casting a bit less edgy.
The fidelity of silicone is so amazing that it feels like it’s molecule-perfect detail. Unlike with other molding materials, you can pretty much indefinitely copy silicone from silicone and it’ll hold its detail. Not that I need a thousand copies of Jack’s paw.
“The fidelity of silicone is so amazing that it feels like it’s molecule-perfect detail. Unlike with other molding materials, you can pretty much indefinitely copy silicone from silicone and it’ll hold its detail. Not that I need a thousand copies of Jack’s paw.”
Very true. I made some molds for tabletop gaming pieces from wood and everytime I use them, I am astonished by the details of texture that got caught.
> The fidelity of silicone is so amazing that it feels like it’s molecule-perfect detail. <
That's why it's used for dental impressions. i remember the days when we had to use "compound" in a copper ring fitted round the tooth.
The compound was basically a hard thermoplastic wax and was a bugger to use.
I can confirm.