This week’s video is short but to the point and packed with interesting stuff.
This week’s video is short but to the point and packed with interesting stuff.
I don’t think I would have the patience or the dexterity to do this type of art, but Kestrel has it in spades. She’s sent us a gorgeous example of the horsehair braiding that she does and I’m in awe. Thanks so much for sharing, Kestrel.
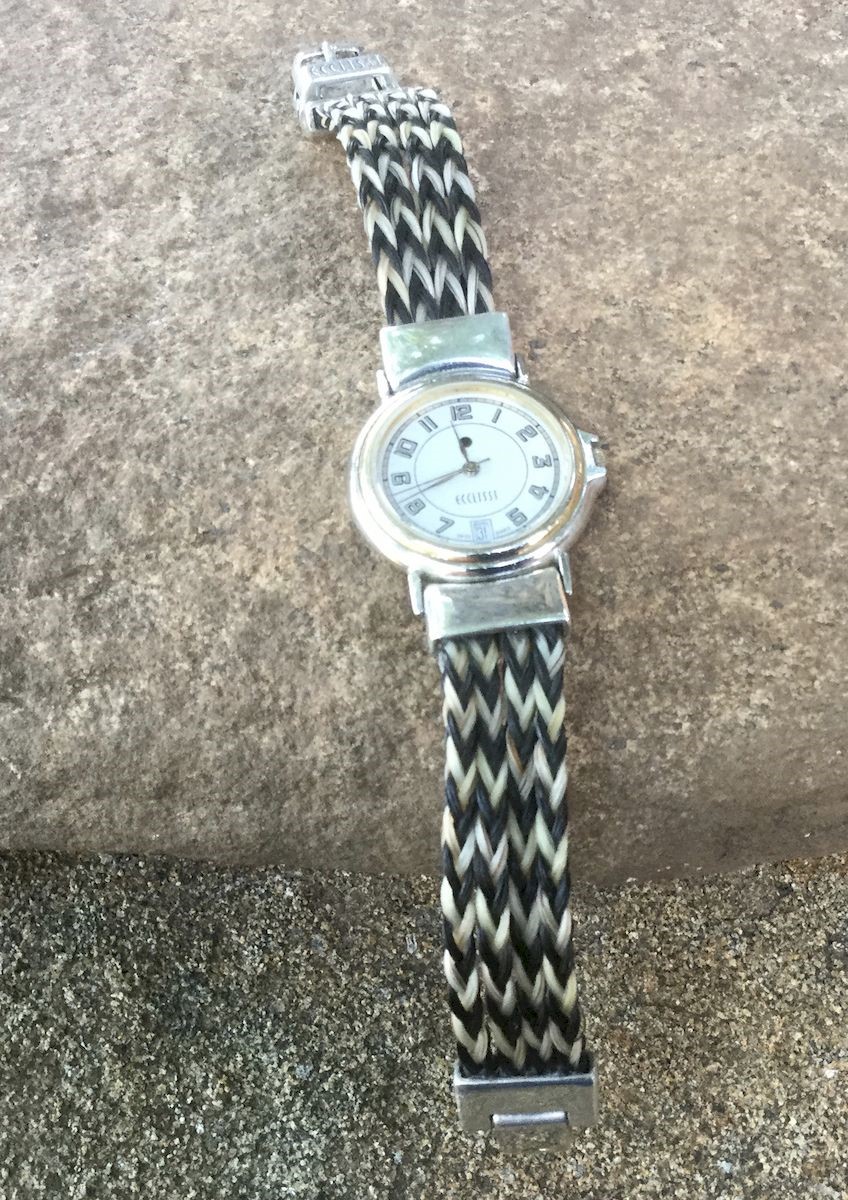
Years ago a lady had me braid a horsehair bracelet for her from her horse. She told me she was really having trouble with a watch that she truly loved: an Ecclissi watch that was just simply falling apart. She told me she had bought it over 30 years ago but loved to wear it. This is how it started out:

©kestrel, all rights reserved
You can see the chains were falling apart. The lady asked me if I could possibly repair it with braided horsehair. She said she would really like it if it looked like twill. I set to work counting hair and working out how to perform this repair.

©kestrel, all rights reserved
The finished watch had 4 bands of 8-strand braiding on each side of the watch. Because I used two different colors I got the twill effect.
©kestrel, all rights reserved
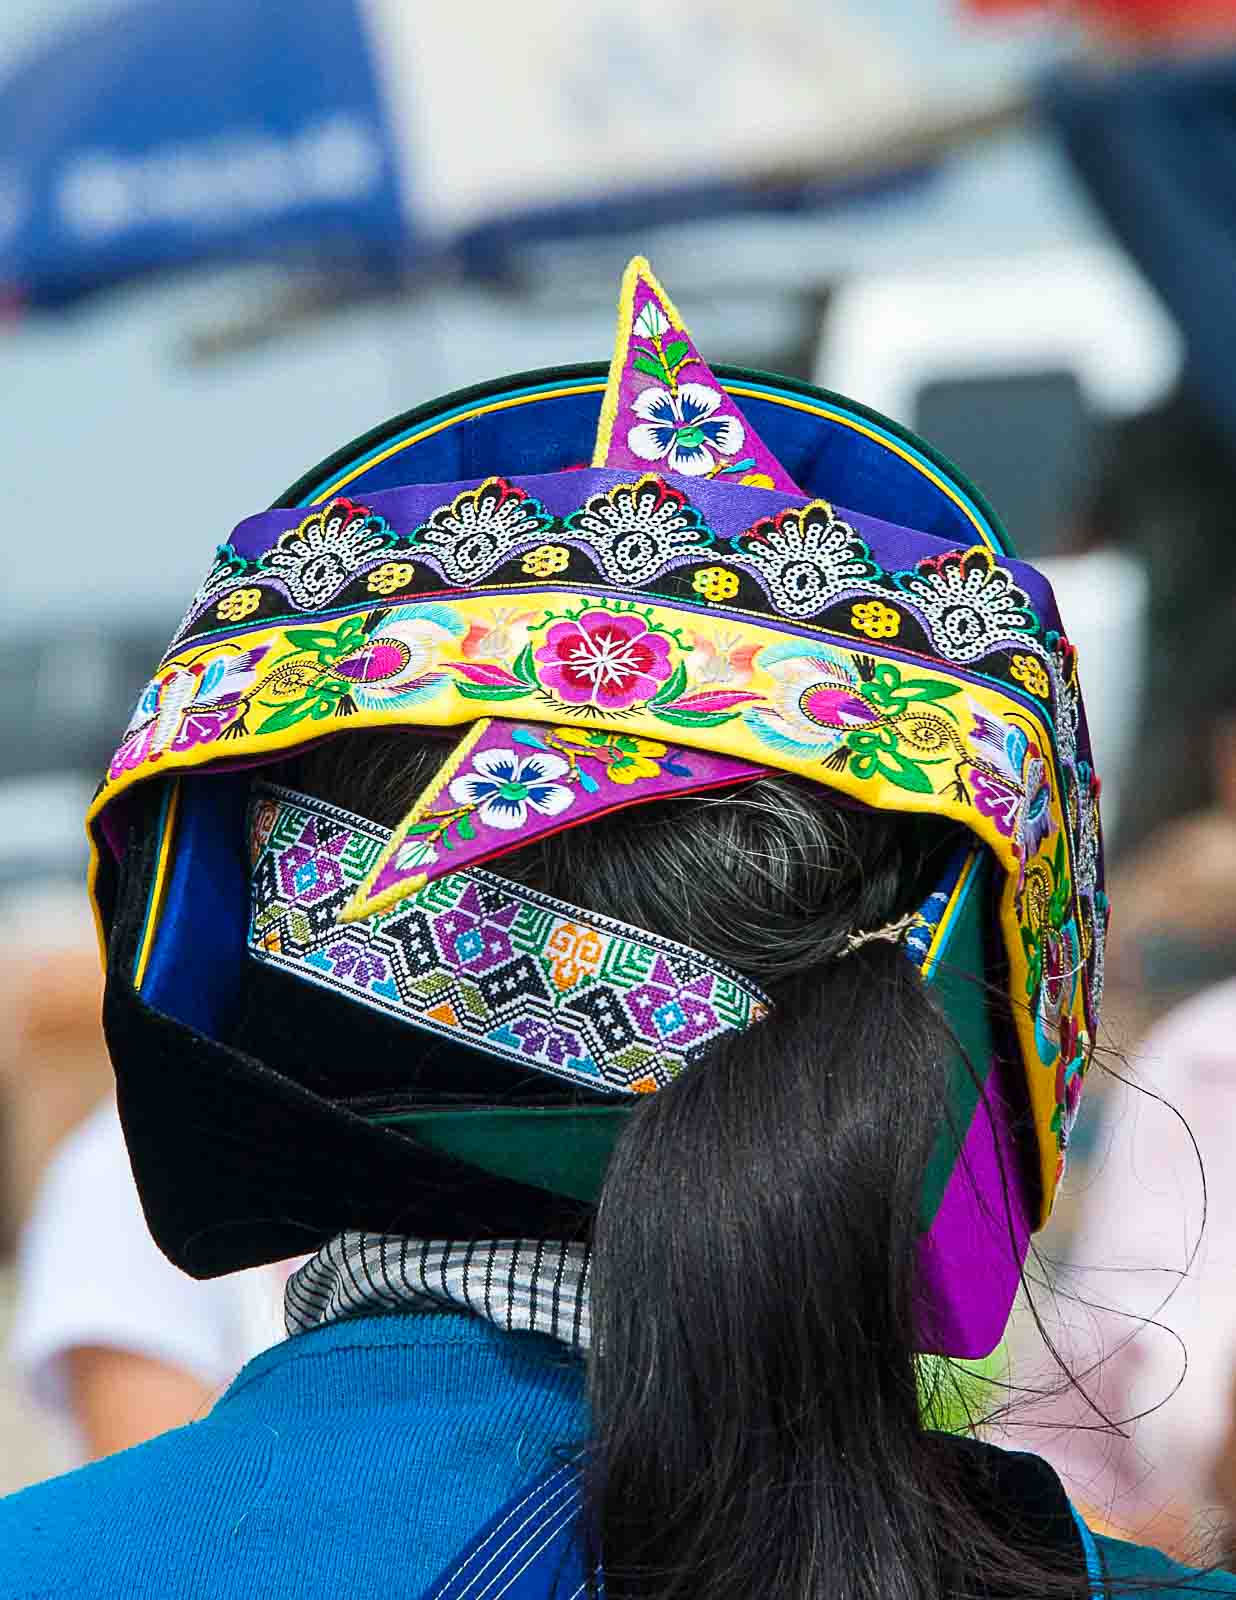
Opus has sent us a special treat… a few pictures taken while he was visiting China. The photos are full of energy and bright, bold colour and I can’t help but think that it must have been very special to see this art with people who understand its true value. Thanks so much for sharing, Opus.
Pictures from Lijiang in southern China. I visited with a couple of fabric artists who wanted to see the work done by local women. We were not disappointed! The woman with the elaborately embroidered headwear is Naxi, best I can remember. Lijiang is on an ancient trade route, the Tea-Horse road, which was used to trade tea from southern China for Tibetan horses.
©Opus, all rights reserved

©Opus, all rights reserved

©Opus, all rights reserved
When I have made my first, very crude, knife some twenty years ago, my friend’s father commented:
Charly, people want it to be handmade, but they do not want it to be immediately apparent that it is handmade.
That advice stuck in my mind so when I have read Feet of Clay from Terry Prattchett much later, following line resonated with me:
The thing looked like the kind of pots Igneous despised, the ones made by people who thought that because it was hand-made it was supposed to look as if was hand-made, and that thumbprints baked in the clay were a sign of integrity.

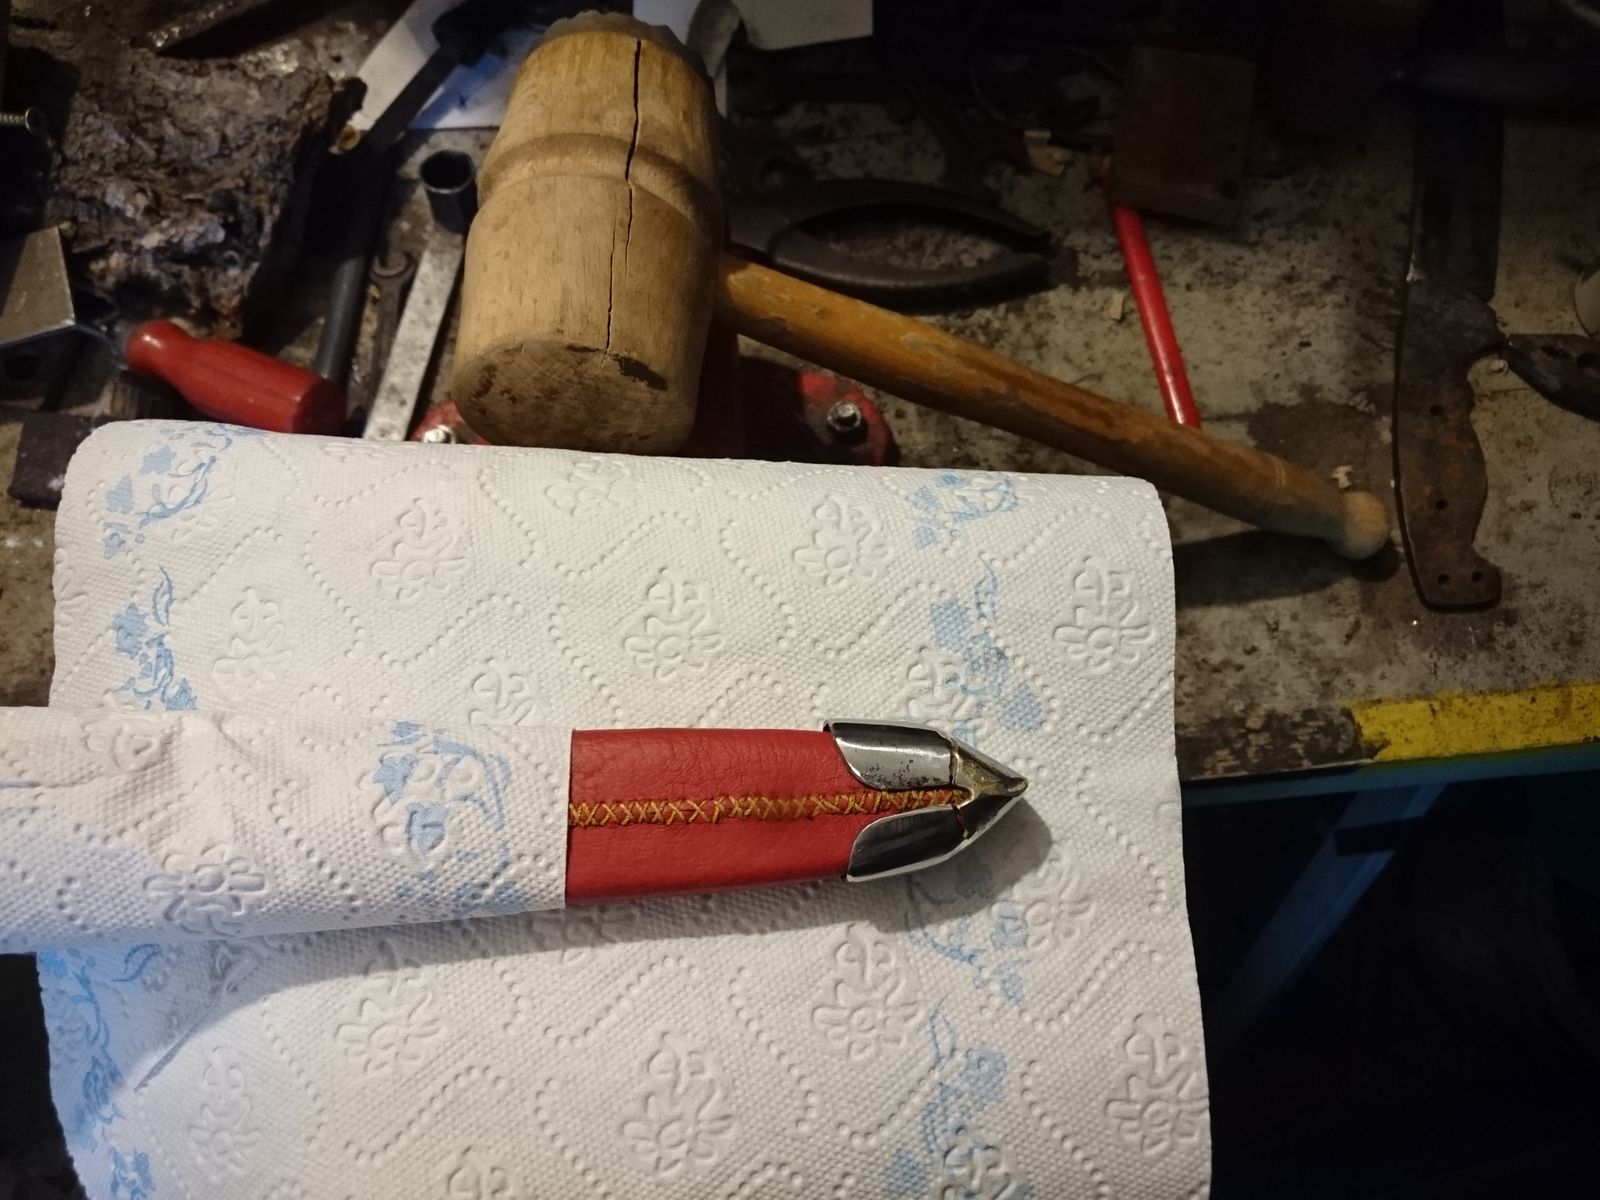
I tried to tie the leather strap as close to how it is done on the in-game model as I could manage. The only significant difference from the game model is the red leather on the scabbard, instead of brown.

If you look closely, here you can see that the hand guard does not stick out symmetrically on both sides of the scabbard.

Overall length ca. 395 mm, blade ca. 257 mm long, 23 mm wide at the guard, single-edged. Good cutting ability although not as good as a dedicated cutting blade would have. It is still a stabbing weapon.

Handle is turned out of maple wood. Rings are allingend perpendicularily to the blade so the shiny lignin spots are symmetricaly with it on both sides of the handle.

Rondel has ten hammered grooves giving it a daisy like look. All metal parts are polished to mirror finish and buffed with jeweler’s rouge.

Although the handle looks massive, the knife is weighed towards the tip when put on a flat surface. I guess it could be thrown, but I do not intend to try it for fear of the blade breaking.

My signature for knives from now on – my initials in Glagolitic script. This is also the writing used in the Witcher games, so it also thematically appropriate.
A short video from michaelcthulum, one of the charity things I was talking about last time. This one is only 13 minutes and be sure to watch it until the very end.
I laughed so hard I nearly fell of my chair. And I sure as hell do not regretting being this man’s patron on patreon.
With the work done, I have to protect both the leather covering of the scabbard and the iron fittings against the elements and medieval appropriate medium for that is so-called dubbin or leather food. Google does yield some recipes, but I did not bother searching for or following an exact recipe much – once I have known the rough composition, I plunged right into it as is my wont.

Ingredients in the mug.
So I took a stainless steel mug, put in it a piece of lard, about the same amount of unrefined beeswax (twenty years old, btw.) and I poured an “adequate” amount of olive oil on top of it. Then I lit the fire and stirred until it all melted together. It was quite interesting to watch – the pig fat dissolved of course first and the big beeswax piece last, but it did not take too long. In fact, it was over in mere minutes. I have measured the temperature and when it all was blended together the liquid had about 80°C. High enough to be dangerous, but not so high as to melt plastic or hiss in contact with water. It remained liquid long enough to touch with bare hand.

Finished dubbin in a plastic container.
Even so when pouring it into a plastic container for keeping, I have put said container in an even bigger one and poured cold water around it just to be sure. As you can see, the liquid has had a honey-like colour that I have found rather pleasing to the eye. It does not smell too bad either and when the product cooled enough to be touched by bare hands, I have simply dipped my fingers in it and applied it to the scabbard in no small amount. In fact I sloshed liberally all over it, making an uneven layer that was in parts over 1 mm thick.
Dubbin applied to the scabbard.
That of course does not look very pretty, so I took a heat gun and melted it all until it sunk into the surface. I was careful however to not heat it too much – just about to melt it and no more. Leather does not respond too well to heat and I did not want to damage it.
When that was done I rubbed the scabbard first with a paper towel which took off some of the excess dubbin, then simply by hand. The dubbin is actually relatively pleasant to touch – not unlike a hand lotion in fact, although it is more solid.
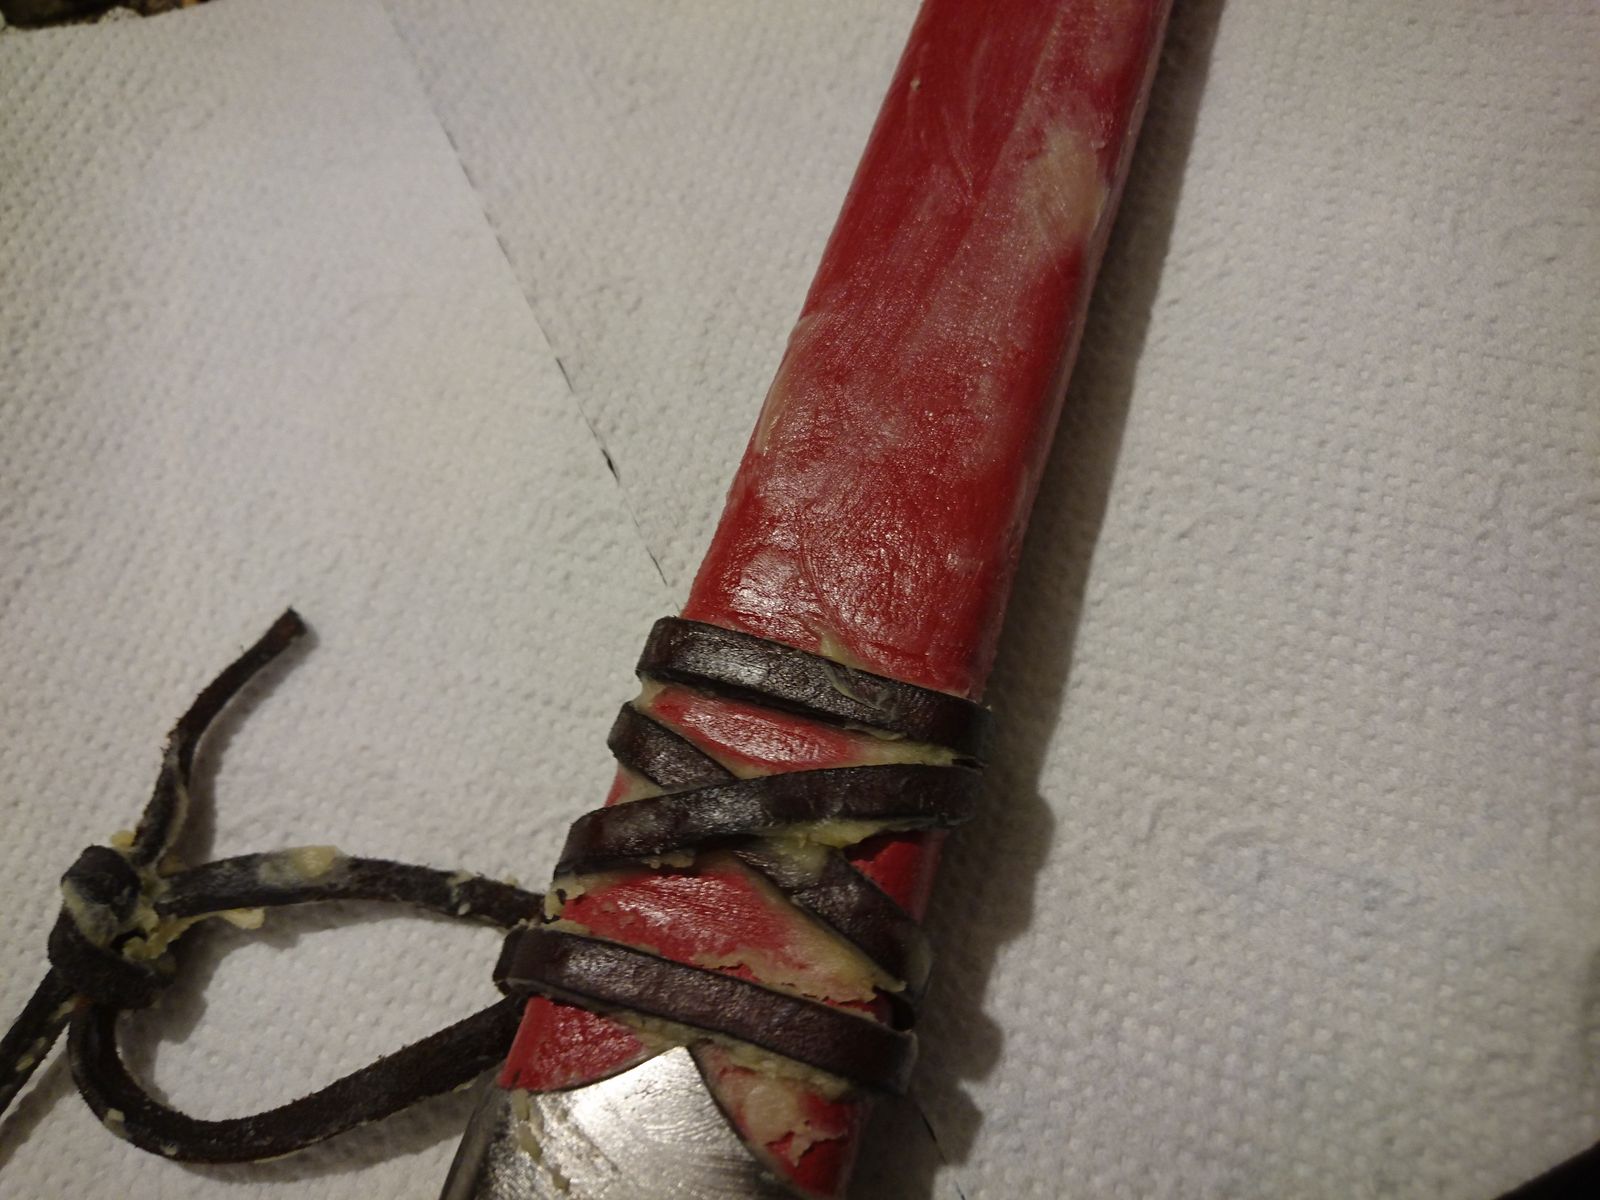
The leather strap tied around the scabbard unfortunately did not survive this – it was made from recycled leather of poor quality and tore off. I have cut a new one and this time I plied it with dubbin before tying it around – and that seemed to have worked rather well. The dubbin made the old leather soft and pliable and also sleek, so it was much easier to pull it through the holes and tie the knots than in my previous attempts.
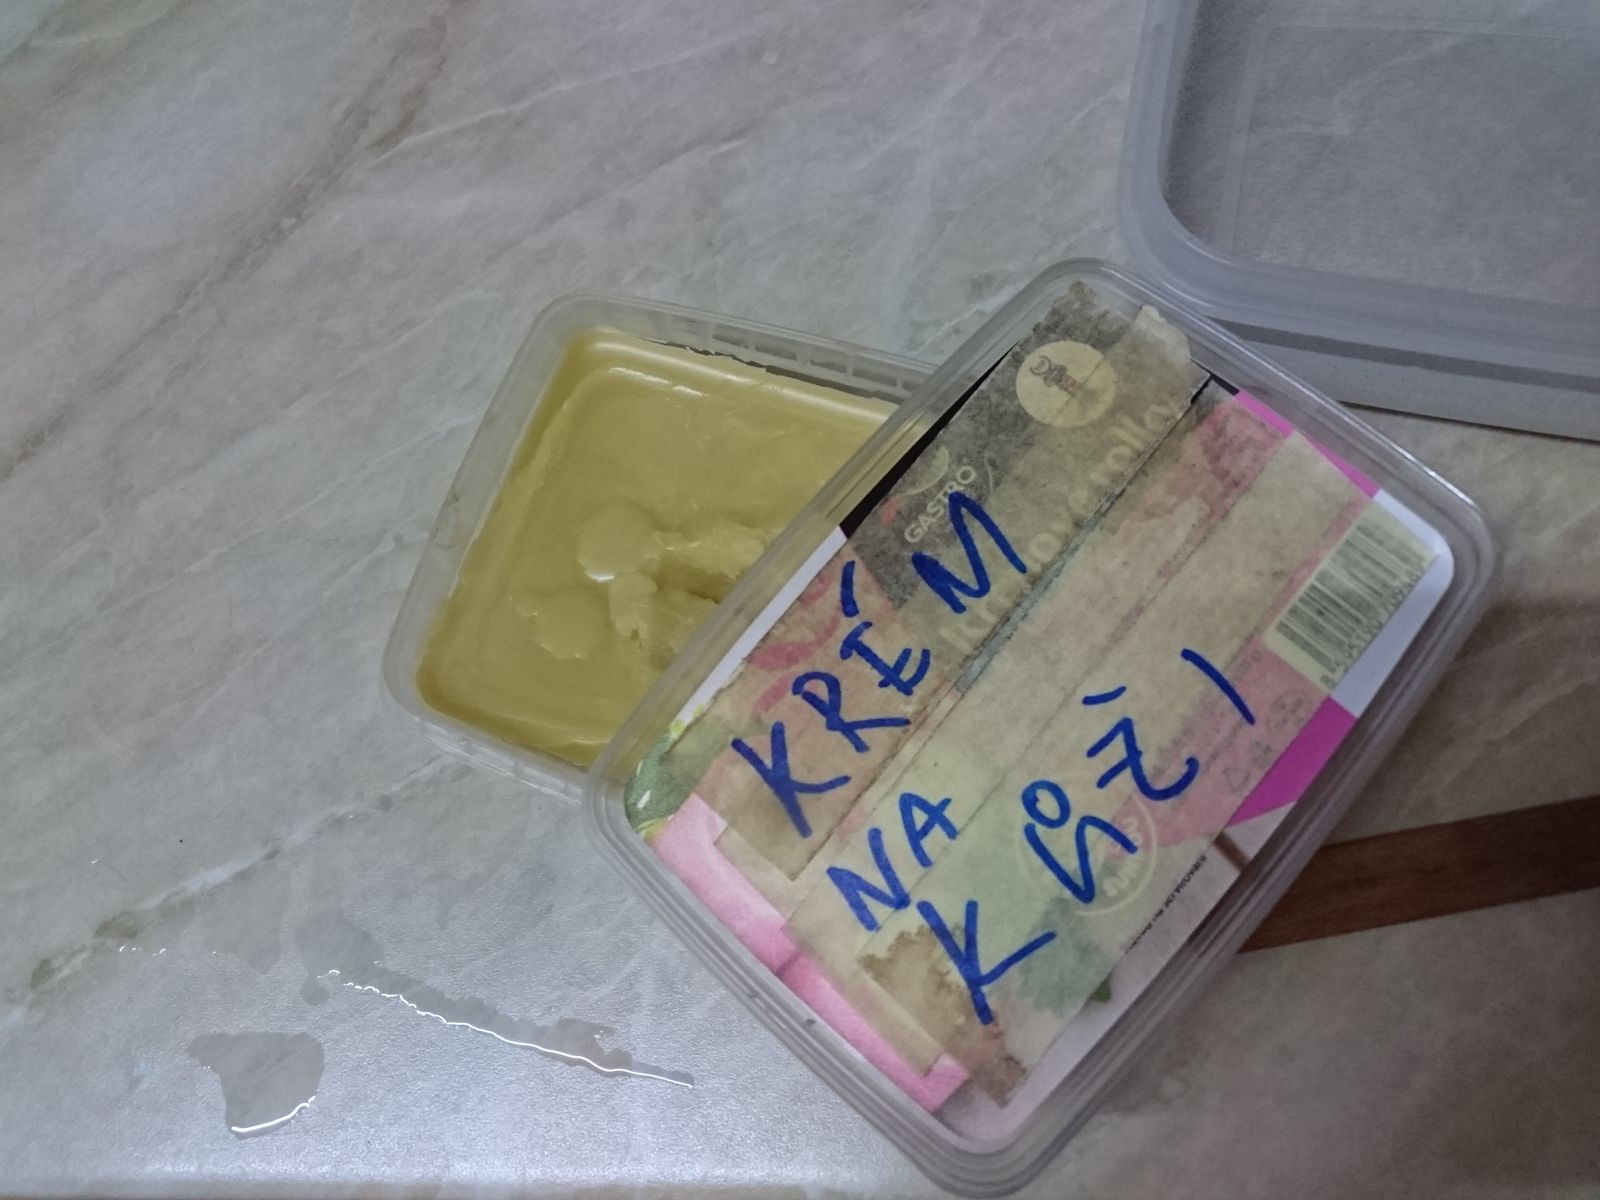
I intend to buy a soft bristle brush at nearest opportunity that will be used for this substance exclusively. It has hardened into a yellow mass that looks like refined beeswax but is much softer to the touch – but not creamy as a hand lotion. I have labeled the lid of the plastic box and I have stored it in my workshop for future use. I think I got carried away a little here and made possibly a life’s worth supply.
If it goes rancid I will let you know. I hope not. And next time you see the “Rondel Dagger” title, there will be pictures, I promise.
Dubbin.
Michael Cthulu is not a smith, he is a welder. And he does not make historically accurate replicas, he makes ridiculous, humongous swords from computer games that have no chance whatsoever to being actually functional in the real world.
But he is entertaining to watch and he has shown some tricks in his videos that are valuable to me in my workshop – like his unique working goggles with replaceable glasses.
He also seems to be a genuinely nice person, at least judging by the ammount of his products he auctions for charity ever since he makes enough money for comfortable living.
Mild content warning – the video takes almost an hour and contains half-naked and very hairy dude in his fifties doing dangerous things with fire, electricity and fast spinning machinery.
I had a very busy Sunday. My vacation is nearing its end and I have been hell-bent on finishing this project already, but things got in the way all the time.
The biggest problem with the chape was that I could not find any information about how to do it properly. There are some pictures of finished products and some info about casting them from bronze, silver etc. but not about how to form one out of steel. So I had to start from scratch.
My first two attempts were completely unsuccessful. I do not even have anything to show you – you are free to imagine some vaguely rectangular and bent piece of metal. What I am going to show you is my third – and final – attempt. I do not call it a success either, but it is at least big enough part of a success to yield a usable product. But I am not satisfied with it and I had to repress the urge to hurl it out of the window with great force.
In retrospect I think my biggest mistake overall was using too thick steel. The shovel that I was recycling was ca 1,5 mm thick and for this purpose probably half that thickness would be appropriate. Unfortunately I did not find any suitable piece of steel in my scrap pile.
 Should anyone wish to avoid some of the mistakes I have made, here is the most important thing I learned: do not try to do it without dies and templates. It is a complete waste of time. Chape is a very complex piece of metal, bent and formed in multiple directions at once.
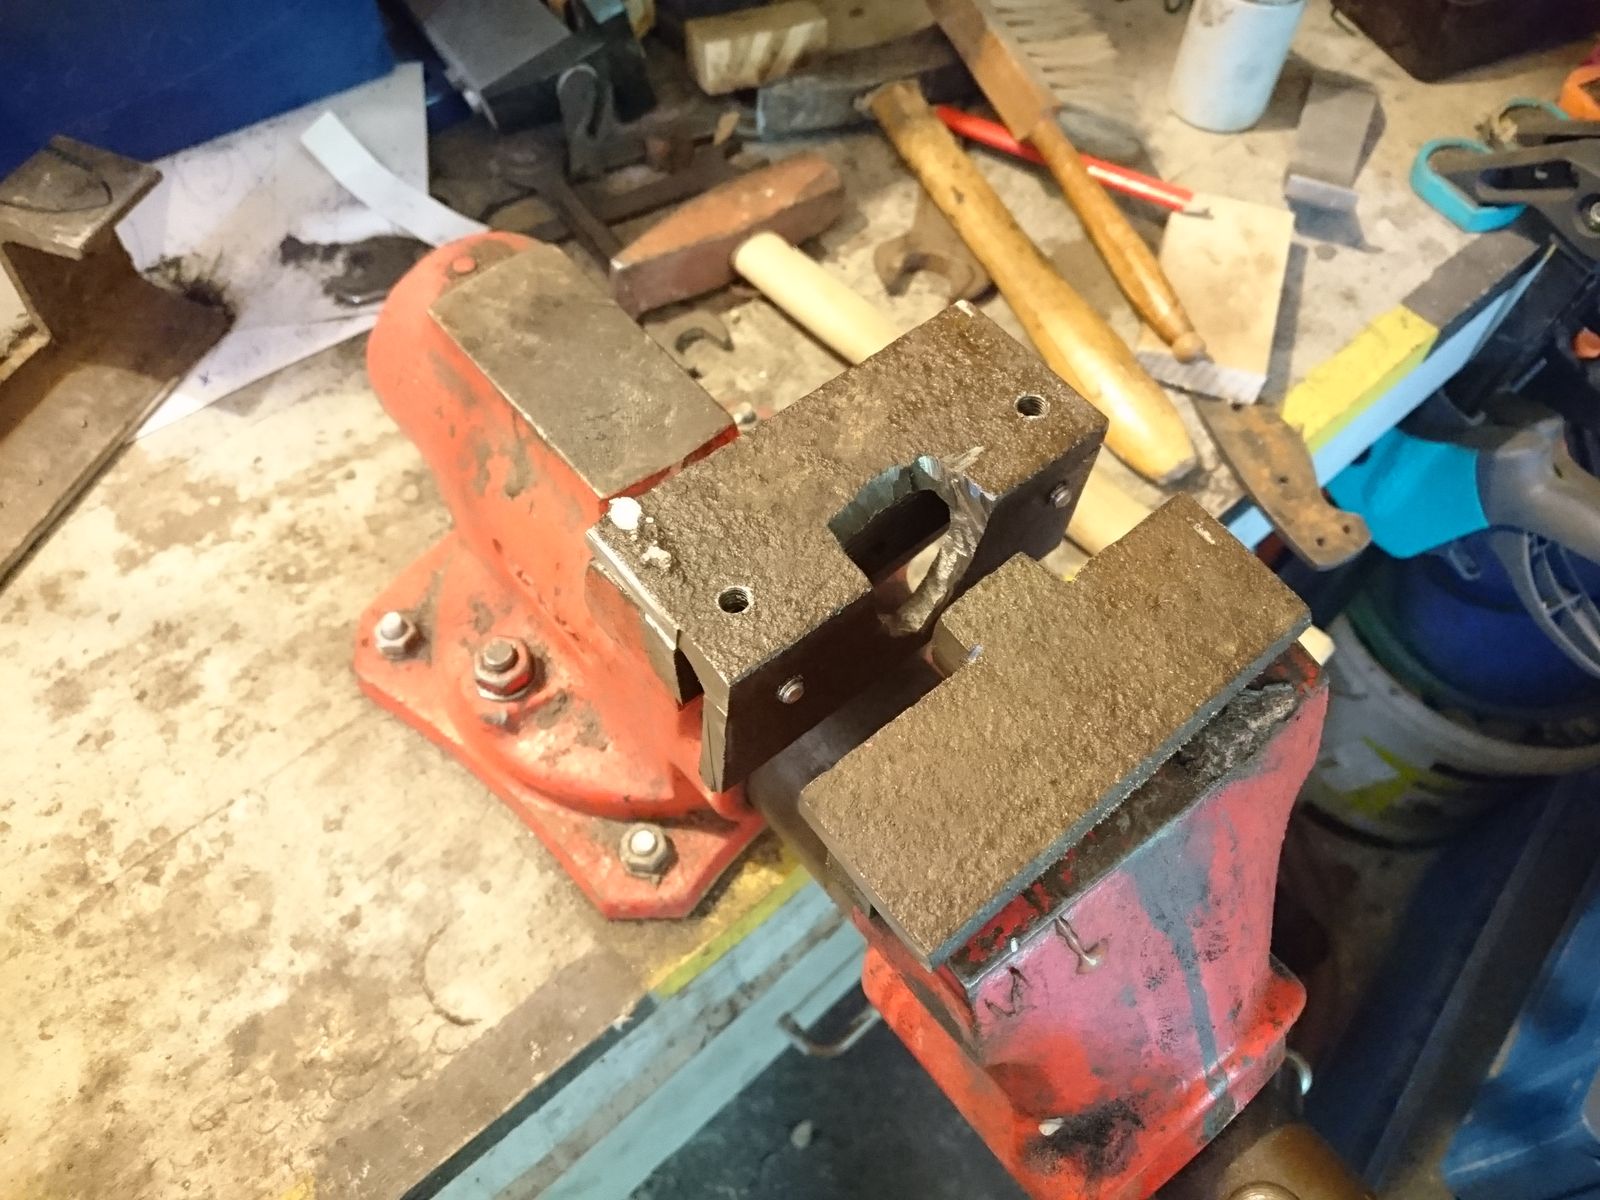
 I wanted only the front face to be pretty, but even that has proved to be beyond being doable without a template, definitively without a skill that I lack. And since I also lack screw press, I had to do with my vice. So I have built a set of jaws – one formed approximately as the tip of the scabbard, and one with a matching hole about 2 mm bigger on all sides. After this I have heated a piece of steel, put it between the jaws and pressed it as quick as possible. After a few repeating and some repairs/adjustment of the jaws I have finally got a shape that at leat partly fitted the tip of the scabbard. I might be on the right track here.
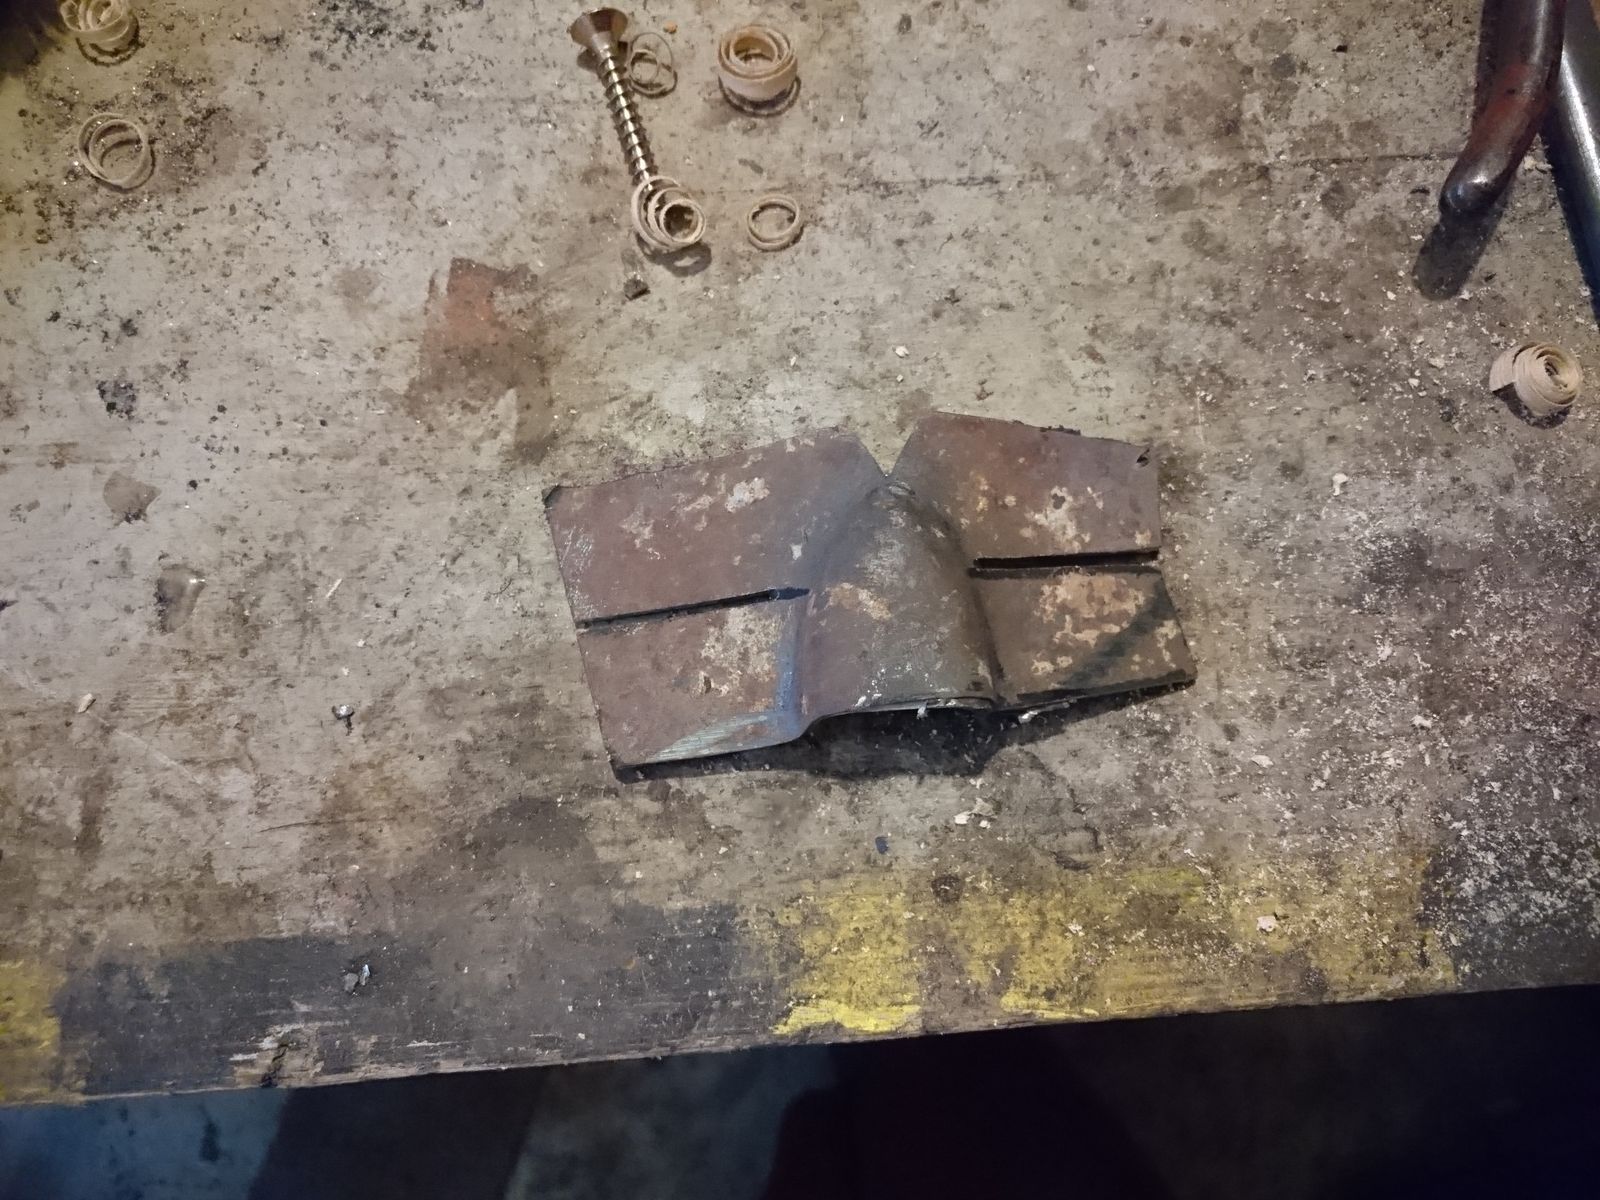
However, after a few presses the metal had nowhere to move – so I have cut it into stripes that I have intended to bend around the scabbard. I have again made the mistake of trying it first without a template. Again, complete waste of time. I have only managed to bend them so they point straight to the back of the chape. I could not achieve the second bend to close the flaps around the backside.
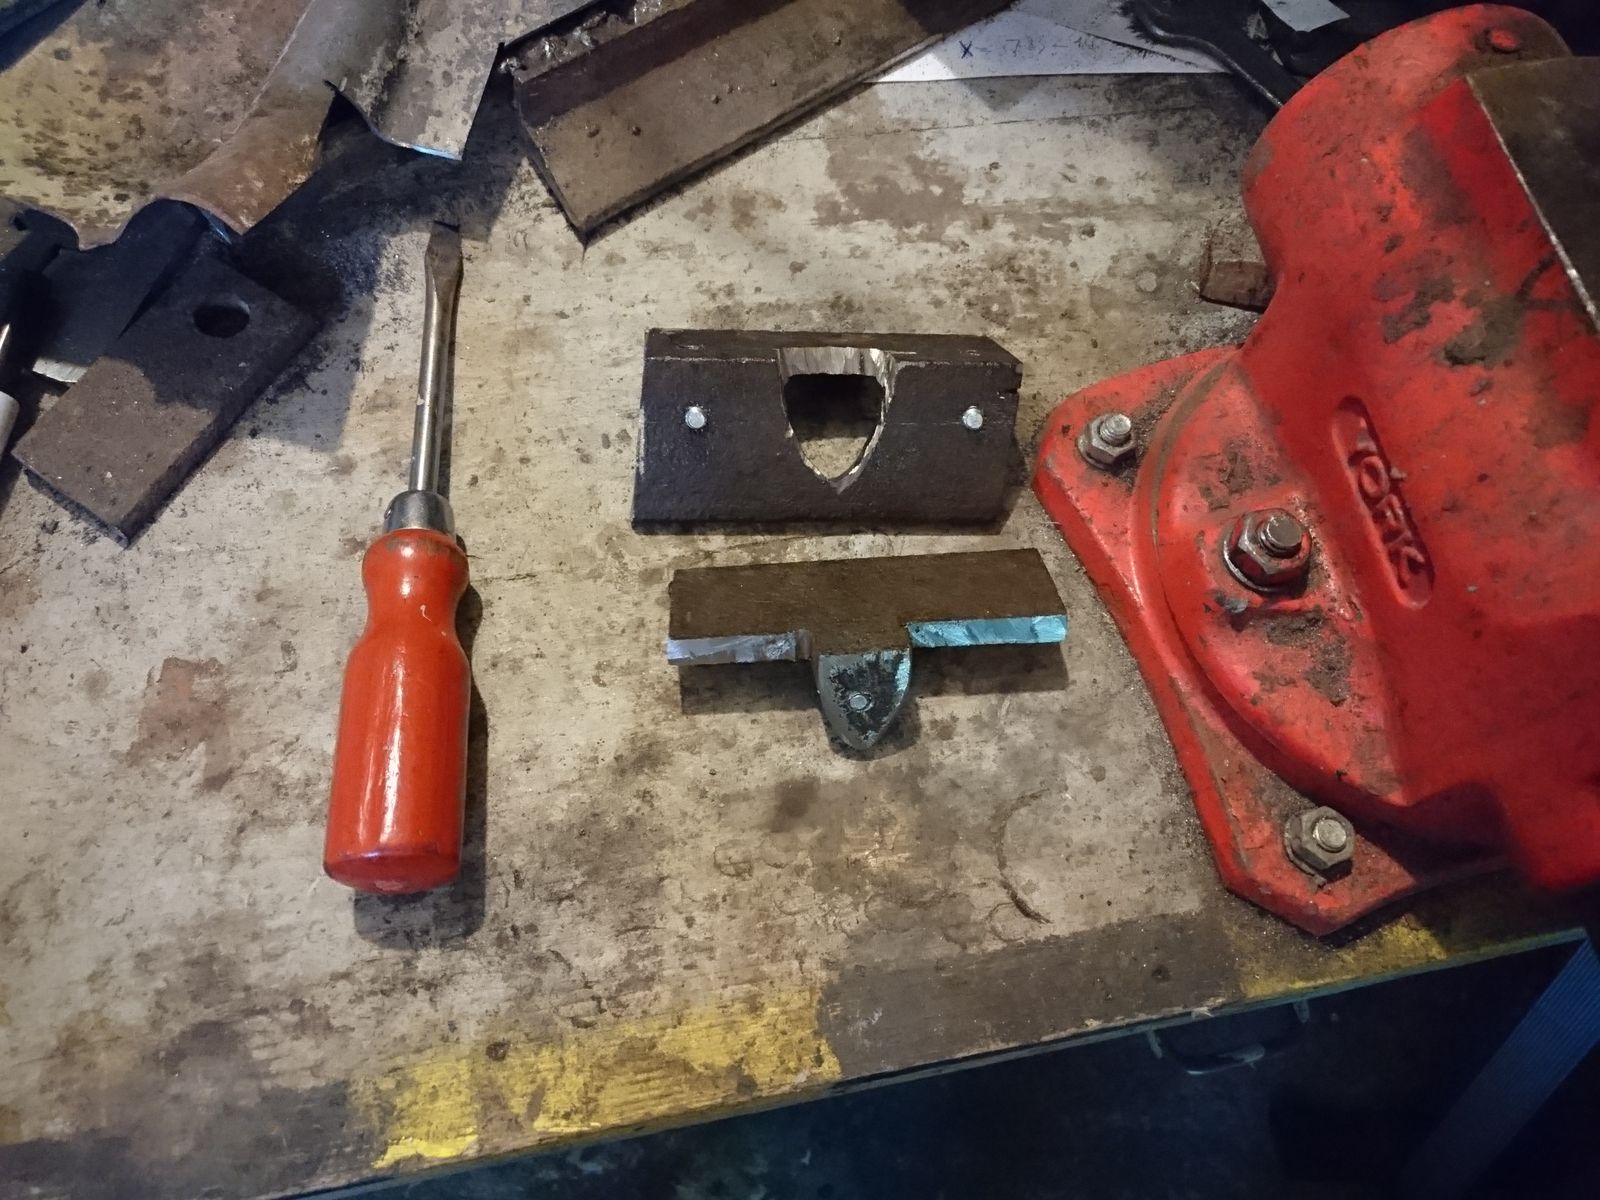
So I had to fish around in my scrap pile some more. Two cuts that were left over from making the jaws have proved to be useful here – when put back to back, they were the same thickness as the wooden scabbard, therefore I reasoned I could make a template out of them.
 So I took an angle grinder to them and made two nearly identical halves that mimicked the wooden scabbard. A few touches with a file were also needed in order to round the edges etc. I am not going to toss these, I am going to keep them as well as the jaws in case I need to do similarly shaped chape again.
I have deliberately made this template so most hammer blows will be perpendicular to the vice jaws. No matter how strongly you close the vice jaws on anything, hammering or filing/sawing it will eventually loosen it or break it. That is actually a reason why specially formed jaws with a groove have to be used for holding round stock.
 With this I was finally able to bend and hammer the steel flaps all around so the fit more or less snugly around the tip of the scabbard. I did not want to close it all the way around and I intended to leave the stitching visible, because it was more or less clear that I will have to hammer and ever so slightly bend the finished chape onto the tip so it holds and does not fall of. However, I wanted to at least braze the gaps on the sides. I failed to do that, because I run out of silver solder and I will be damned if I spend another 10 € on this. At this point, I was starting to hate the thing. So I brazed as much as I could and sod the rest. Here you can see it all black, covered in solder and slag and scale. I have again carefully ground the excess solder with fine file and collected the silver dust, but I still did not feel like experimenting with making solder out of that dust.
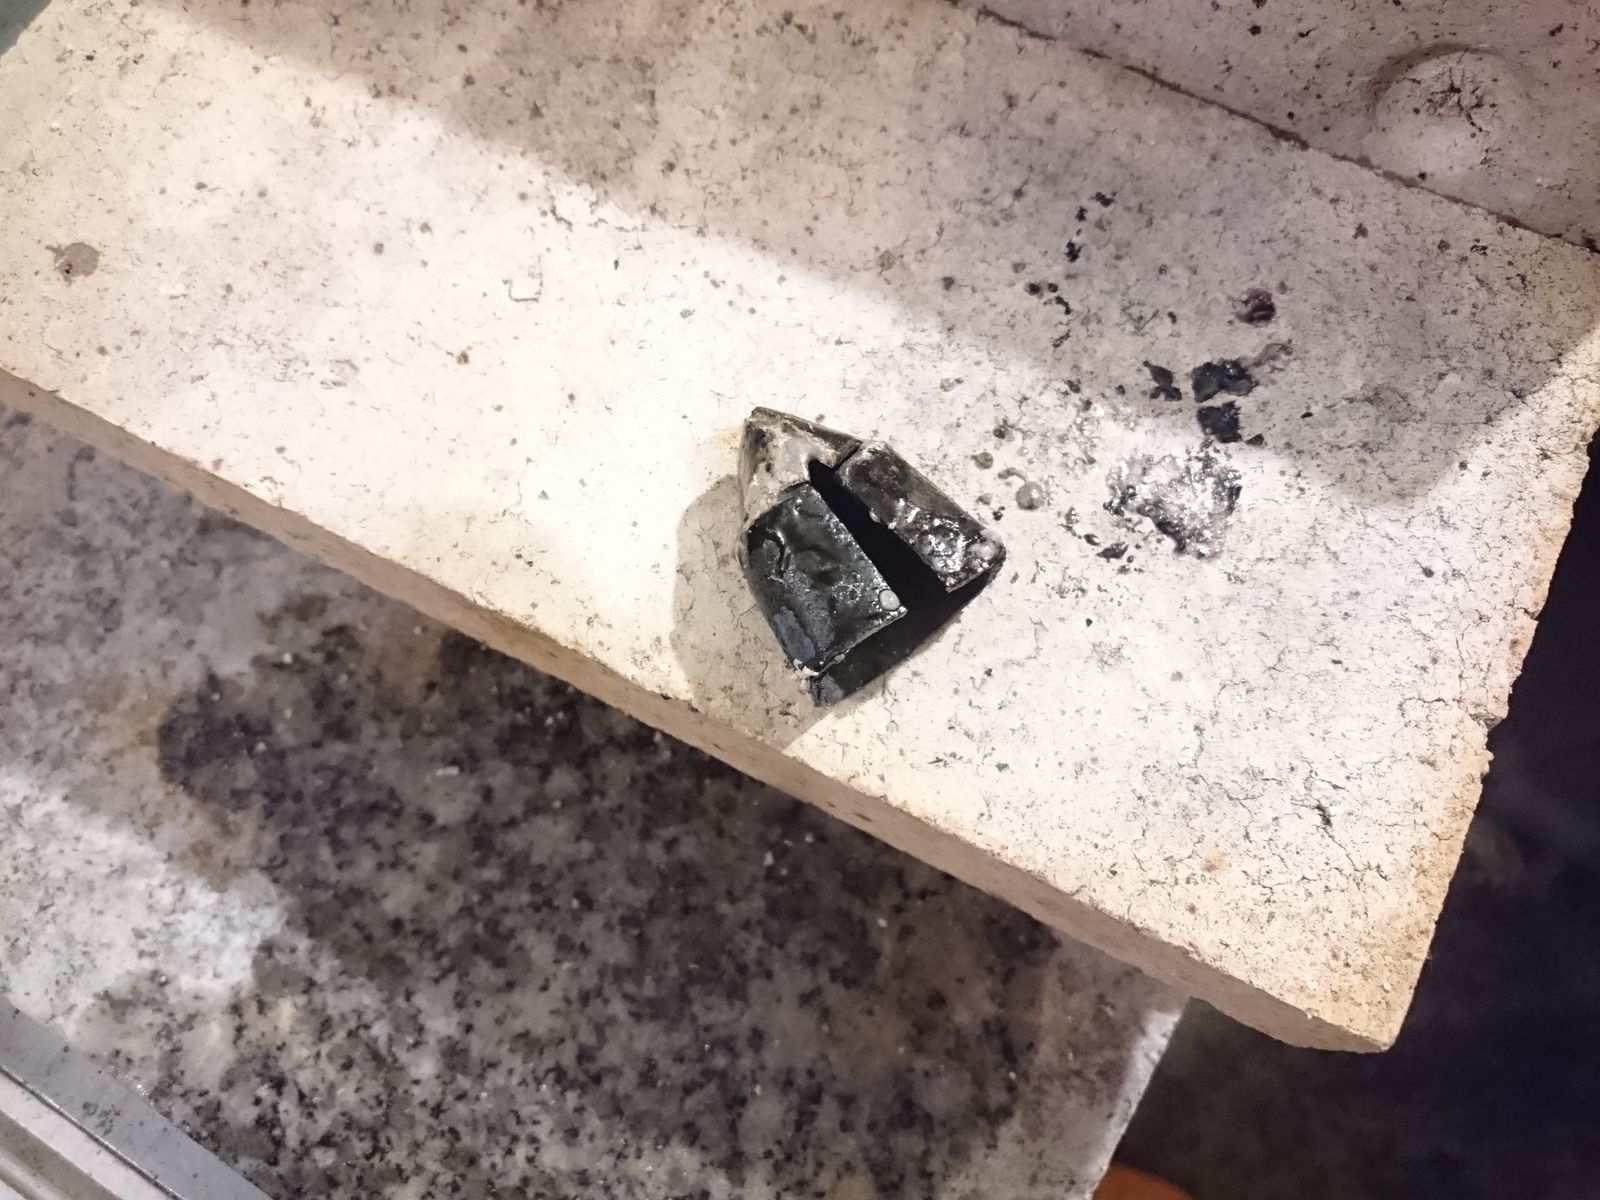
 This is when It I have got the only idea during this whole process that I consider valuable – I have found out that old, nearly worn angle grinder wheels are excellent for scraping of the scale and the slag – both of those are harder than files and they tend to smear abrasive papers. So a bit of water now and then to wash of the dust and a bit of scrubbing with an old wheel and I could proceed to polishing without covering my belts with grime. Polishing I have performed the same way I did with the throat. During this I have found out that the chape is much more asymmetrical than I was hoping for and that there are two poorly brazed spots on the sides. leaving unseemly spots, but as I said, sod it, I am not going to do this thing again.
When the chape was finished, I have put it and the throat on the scabbard and gave both parts a few wallops with a wooden mallet on a wooden board so they hold in place (for the throat I had to put a piece of leather on one side between the backside of the scabbard and the throat for better fit). And then I walloped it all some more so it holds.

 So now the project is almost finished. All that is left to do is to sharpen and sign the blade, tie a leather strap around the scabbard and treat it with dubbin and make pictures. Neither of those things should pose any big problems and except the signing they cannot destroy anything. I hope.
Despite being a non-believer, I do understand the desire to be able to pray – a desire to have some control.
One of the good things about my neighbourhood is that I almost never have to pick up stuff at the post office. Only usually I know that I ordered something, but this time, I was quite surprised when my neighbour rang the bell. Surprise quickly turned into delight when I saw who sent it. Marcus, who has previously sent me some very nice fridge magnets I asked for sent me a surprise parcel.
First, upon opening, it smelled like Christmas, because there was some incense. Did you make that yourself as well, Marcus?
Then I unwrapped a badge (I assume) that is meant to cover the tank lid, but I added it to my office door below the Unicorn sign:

The sign above says “eat my stardust you bores”.
©Giliell
Kid #1 is wondering about the hole in the rat’s belly.
Next there were two gorgeous bracelets. Marcus clearly experimented some more with the resin and the seashells.
The first one is all blue and a soft material:

Yes, that’s also the kitchen floor and my feet. ©Giliell
The second one is clear and blue and has gold speckles and I absolutely love it (I love the other one as well, just for the record).
I had to smooth the edges a little, I guess at what was the top while pouring the resin. This one is solid material.

©Giliell
And there was another fridge magnet, but I decided I needed a necklace to go with the bracelets so I glued an eyelet to the back and added a leather cord.

Not actually the shirt I would wear it with, but I was too lazy to change. I’m looking forward to wearing it to a solid black shirt.
©Giliell
Thank you so much for this wonderful surprise, Marcus. I already wore the first bracelet at work the next day and got many compliments from the kids.
Earlier this summer Marcus Ranum and Kestrel gifted Caine with a very special knife. Marcus custom made the blade and then sent it on to Kestrel who hand wove a beautiful braided leather handle for it. It was a gift that Caine treasured. Today Kestrel is sharing with us the story of how the handle was created. I’ll let Kestrel take it from here:
Marcus made Caine a knife as a gift, but first he sent it to me so I could cover the handle. I chose to use black and red kangaroo leather. Kangaroo leather is incredibly strong and durable, and I knew that Caine would like that color combo.

©Kestrel, all rights reserved
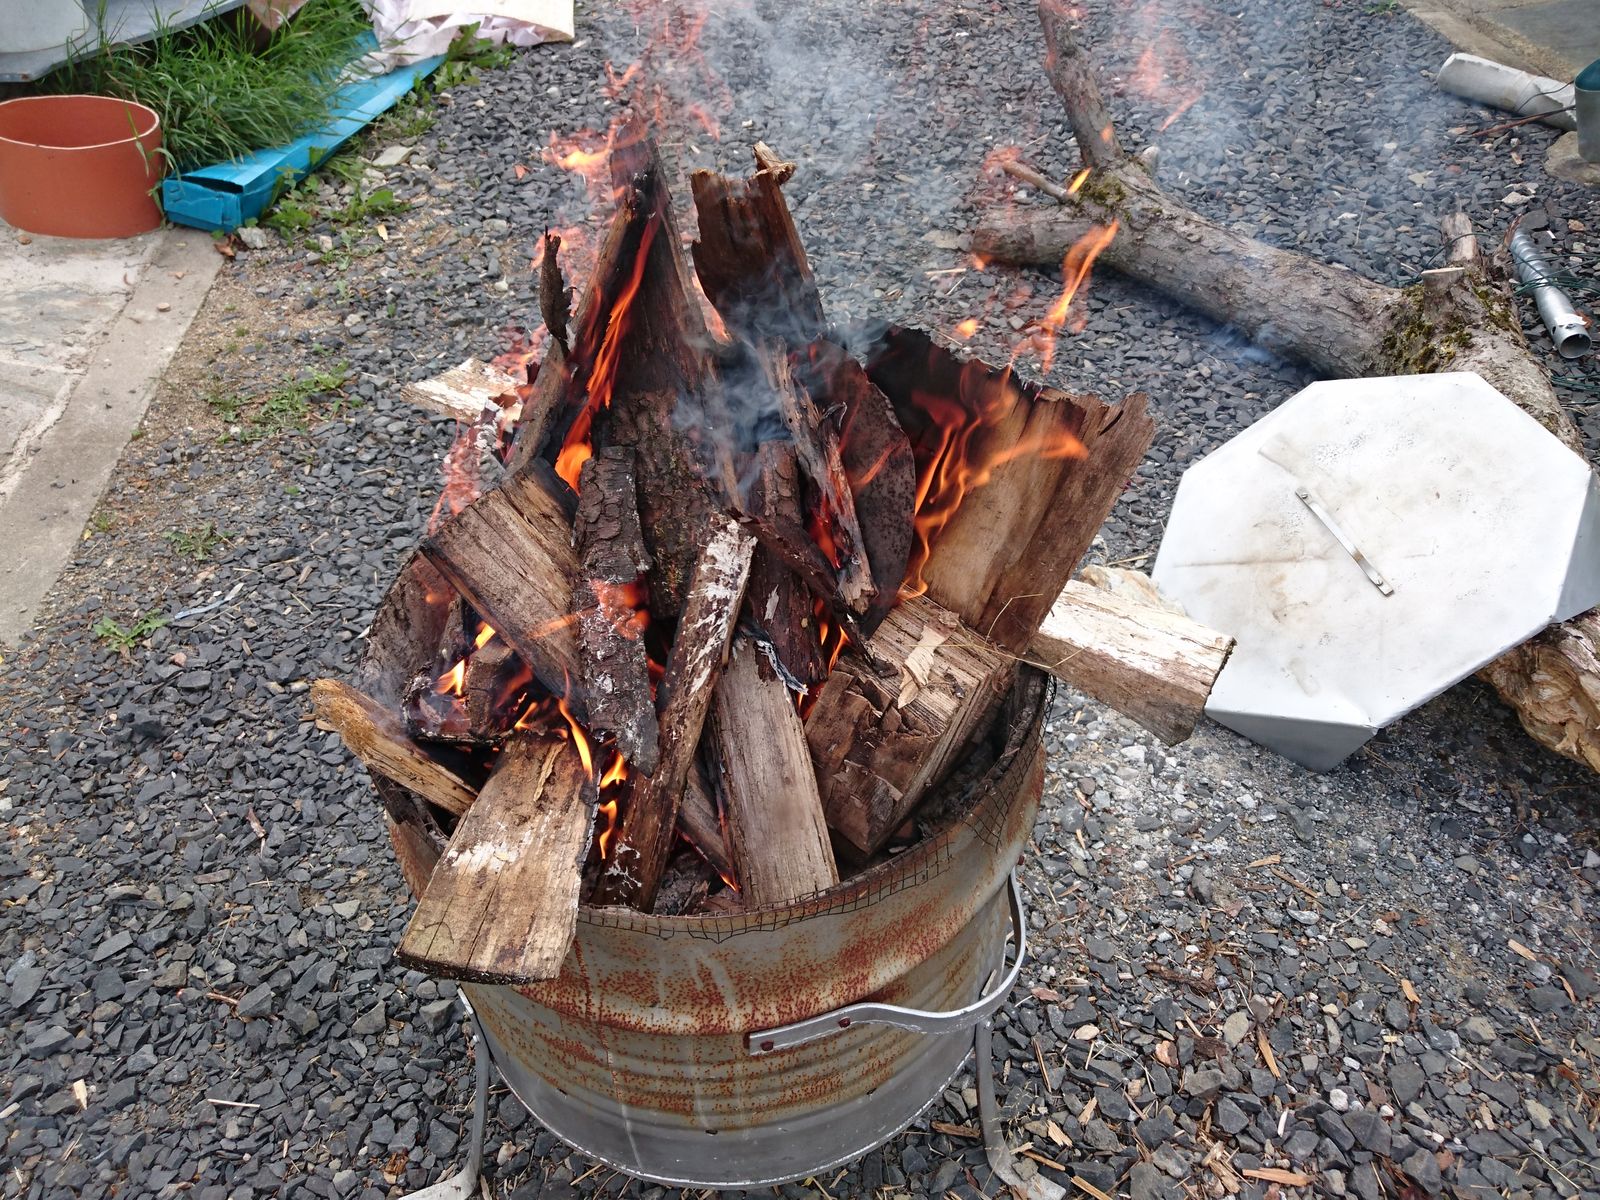 I have decided to make the fittings for the scabbard from the same shovel that provided steel for the rondel. It is good carbon steel of appropriate thickness and I reasoned that after I grind it to remove all pitting from the outer side, it shall be thin just right. However, because I wanted to bend the steel at least in part whilst it is cold, I had to first anneal the shovel – in case you do not know, shovels are hardened and tempered. So I have decided to burn some more rotten wood, bbq dinner and anneal the shovel at the same time. Luckily the droughts in the place where I live are less severe than in the rest of CZ, so we do not have ban on fires (yet). Nevertheless, despite how it might appear, I am actually careful with fire – I always watch the direction in which the wind is blowing, I have water prepared and I douse all coals when I am done. And I have portable fireplace that I position in the middle of a gravel field¹.
 I proceeded to make a paper template by wrapping it around the scabbard and adding about one cm for length. That I transferred onto the shovel and I cut the rough shape with angle grinder.
My improvised bending setup did not work as intended. The main problem being, that this steel proved to be extremely tough and hard, even annealed. I tried and tried, but it just did not work. After a few attempts I gave up and had to think up another way. I have decided that I have to do what I did not want to – forge it hot.
 I could not go outside and make fire, because firstly it was way too hot outside for that and secondly because my improvised anvil for this delicate task was an old annealed file held in a vice. As a source of heat therefore I had to do with handheld propane torch and a few fireclay bricks as an impromptu forge. Unfortunately I forgot to make more detailed pictures of this process so you have to be content with red-hot glowing steel on fireclay brick laid on a granite paving stone laid on wooden bench. I see you cringe with my mind’s eye and I agree. For subsequent works I moved the whole assembly onto the circular saw table (also seen in the picture) which is made from metal and therefore fireproof. Needles to say, bucket of water was on standby the whole time and I checked the workshop a few times after I finished. I do not like doing these things inside, I will have to get some better setup, perhaps a mobile vice? I will have to think about it.
The bent strip did not fit neatly around the scabbard whatever I have done, so I decided in the end to shorten it even more so the ends do not meet, but lay just outside the stitches in leather. And to cover that gap with another slim strip of steel. this proved to be a very good fit all around.
I was thinking about whether to make the throat covered in steel or whether to let it be just the wood and leather on the inside. I decided to go for steel, which of course meant third piece, flat piece covering the throat with cut-out rough shape of the blade. Very rough. I was not even trying to aim for a good fit and I left a good 0,5-1 mm free space on all sides.
 When thinking about how to connect those three parts in the most authentic manner I decided to go for silver brazing. I do not know how much silver is actually in the brazing rod I bought, but it costs 12,-€ a piece. Compare that with brass brazing rods that costs 5,-€ per five (or more) pieces. Whew. But I wanted to first try it with the more expensive silver rod because it has lower melting temperature than brass and my welding, brazing and soldering skills are not top-notch, to put it mildly. I also hoped that the silver solder will have less profound color contrast with the steel than the brass one would have. Which it does, but the color contrast is still very strong.
It took three attempts to braze the thing together with no gaps anywhere and I used up almost the whole rod. Oopsie-daisy, this is proving to be expensive. So when removing all the excess solder, i was filing it carefully and slowly onto a piece of paper and collecting all the silver dust into a little plastic bowl that I later have sealed with a lid. I hope to be able to mix that dust with boric acid and use it for brazing the chape. I certainly would not like to spend another 12,-€ on the chape alone.
As far as I know – and I would love to inspect some medieval originals sometimes – medieval craftsmen did not take particular care about the “back side” of the scabbards and scabbard fittings, or even swords for that matter. After all what is the point in finely polishing something that will not be seen? Today the aesthetics sense is slightly different and people expect things to look just perfect from all angles. I have decided to not overtly polish the back side, but I did somewhat polish and buff it for the sole reason that polished steel resists corrosion better. But, unlike on the front, I did not remove all pitting and I did not bother about some minor file scratches remaining visible there. And here you can see the result of my works these last few evenings. I will buff it with hematite befoe fixing it ont he scabbard for good.

©Charly, all rights reserved. Click for full size.
The most important lesson of this exercise was perhaps that I should do these metal fittings before I shape the scabbard to its final shape and cover it with leather, and not the other way around. In retrospect it seems like something from The Collected Sayings of Captain Bloody Obvious, but fitting a piece of soft wood and leather into a steel tube should be easier than to form a steel tube around a piece of soft wood and leather. I tried to google how to do scabbard throat before I did anything of this, but I do not remember seeing this mentioned anywhere.
Last piece in the mosaic is the chape then. And then there will be pictures.
1 – The bough you can see is one that I “harvested” near the road, where it broke off of an elderly apple tree. The city seemed unwilling to clean it up, so I confiscated it for knife handles.
The heat is killing me. Temperatures outdoor during the day over 35 °C, overnight never lower than 18 °C. Temperatures indoor 28 °C throughout the day and there is nothing I can do about it – if I open the windows wide, the house will be swarmed by mosquitoes in minutes. I have nets, in some windows, and in normal weather those suffice for ventilation. Not in this weather though.
So works on the dagger progresses at a snail’s pace. Not that it matters much, because snail’s pace is also the speed at which linseed oil hardens. But it means it is unlikely I will have anything to post about it anytime soon. However, that does not stop me thinking about stuff and one of the things I am thinking about – will it be fair to say, that the dagger is handmade?
In the past, when I have made a knife, it was truly and undoubtedly handmade. The only electrical tool I had was a drill that I used to make holes for pins. Everything else I had to do manually, with hand-held and hand powered tools, whereas today I have a table top belt grinder, handheld belt grinder, an angle grinder, a lathe, a bandsaw, a circular saw and a jigsaw. And in due course I intend to build a power hammer and a polishing drum.
And I do not spare any of those electrical tools. If I can save time or my muscles by using electricity, I do it without hesitation. But there are some purists, who would argue that therefore things I do are not handmade.
I disagree with that.
The way I see it, these electrical tools are nothing but providers of raw power. They do not provide or increase any skill – all that still has to come from my hands, because ultimately they guide either the tool or the workpiece during work and therefore determine its quality. In fact, some of the tools – especially the belt grinder – require a slightly different set of skills to do the work properly, than doing the same work with bastard file and a set of polishing stones would.
So I think the dagger is handmade. And purists can go and purify themselves.
I aim to one day try and meet this challenge myself, but in a different way.