Not Tacticool, But Hopefully Cool

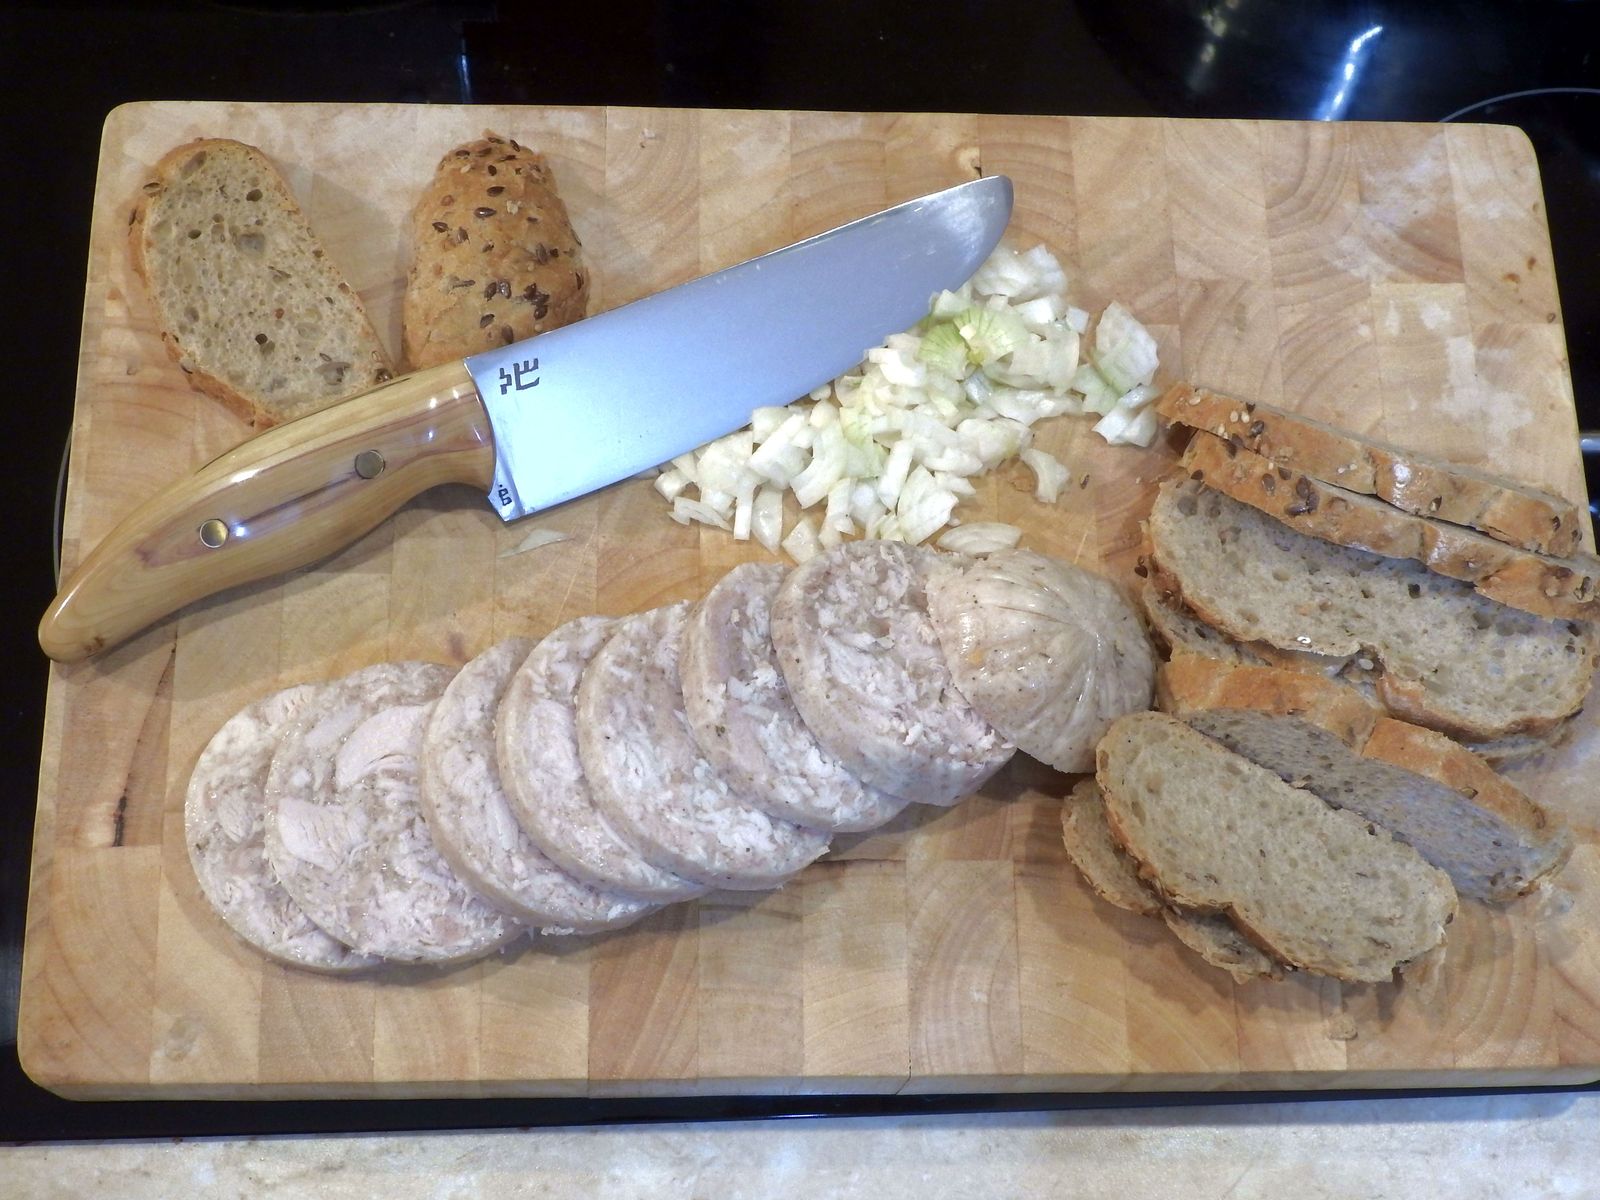
A friend tasked me with making a knife for their spouse. The spouse does not cook, so a kitchen knife was not an option. But they do occasionally go on a camping trip or a forest walk with the kids, so we eventually established that some sort of camping/bushcraft knife would be best.

The ideal material for a knife of this kind would be spring steel, but since it is unlikely that their life will depend on it, N690 should suffice and rust won’t be a problem. So I set to work and I have made this.

© Charly, all rights reserved. Click for full size.

© Charly, all rights reserved. Click for full size.

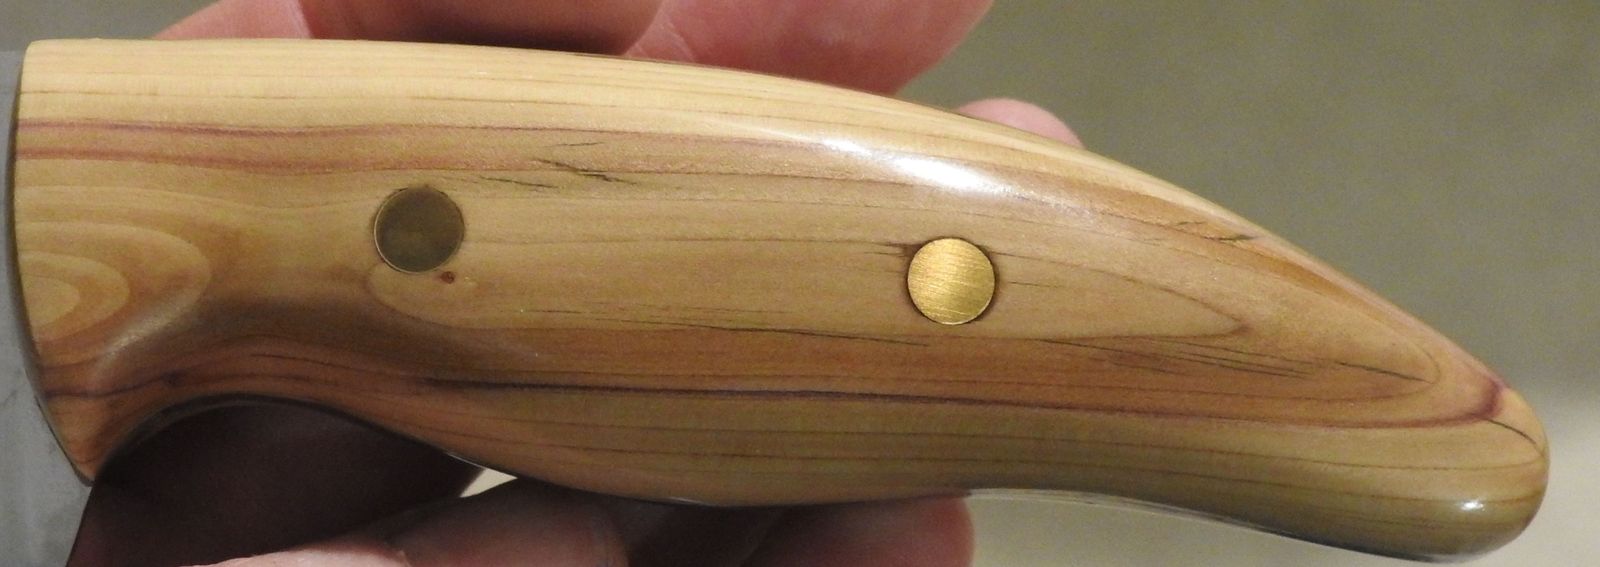
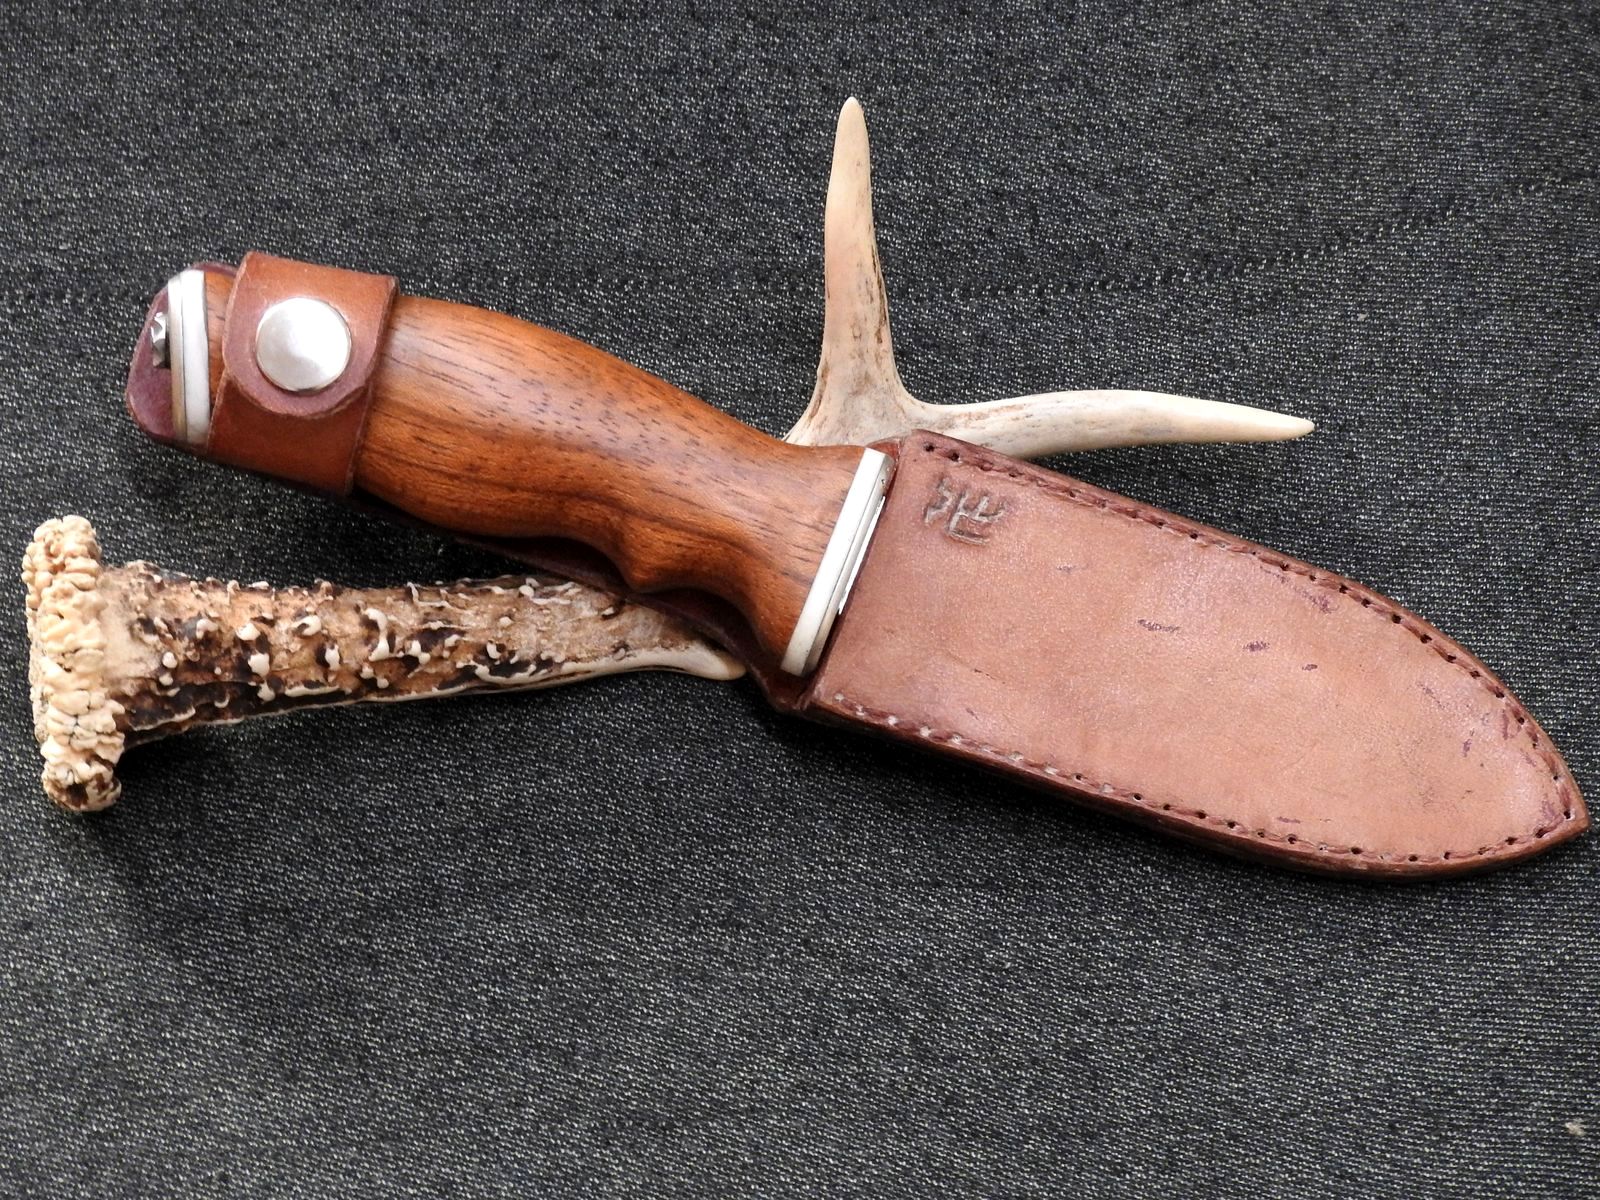
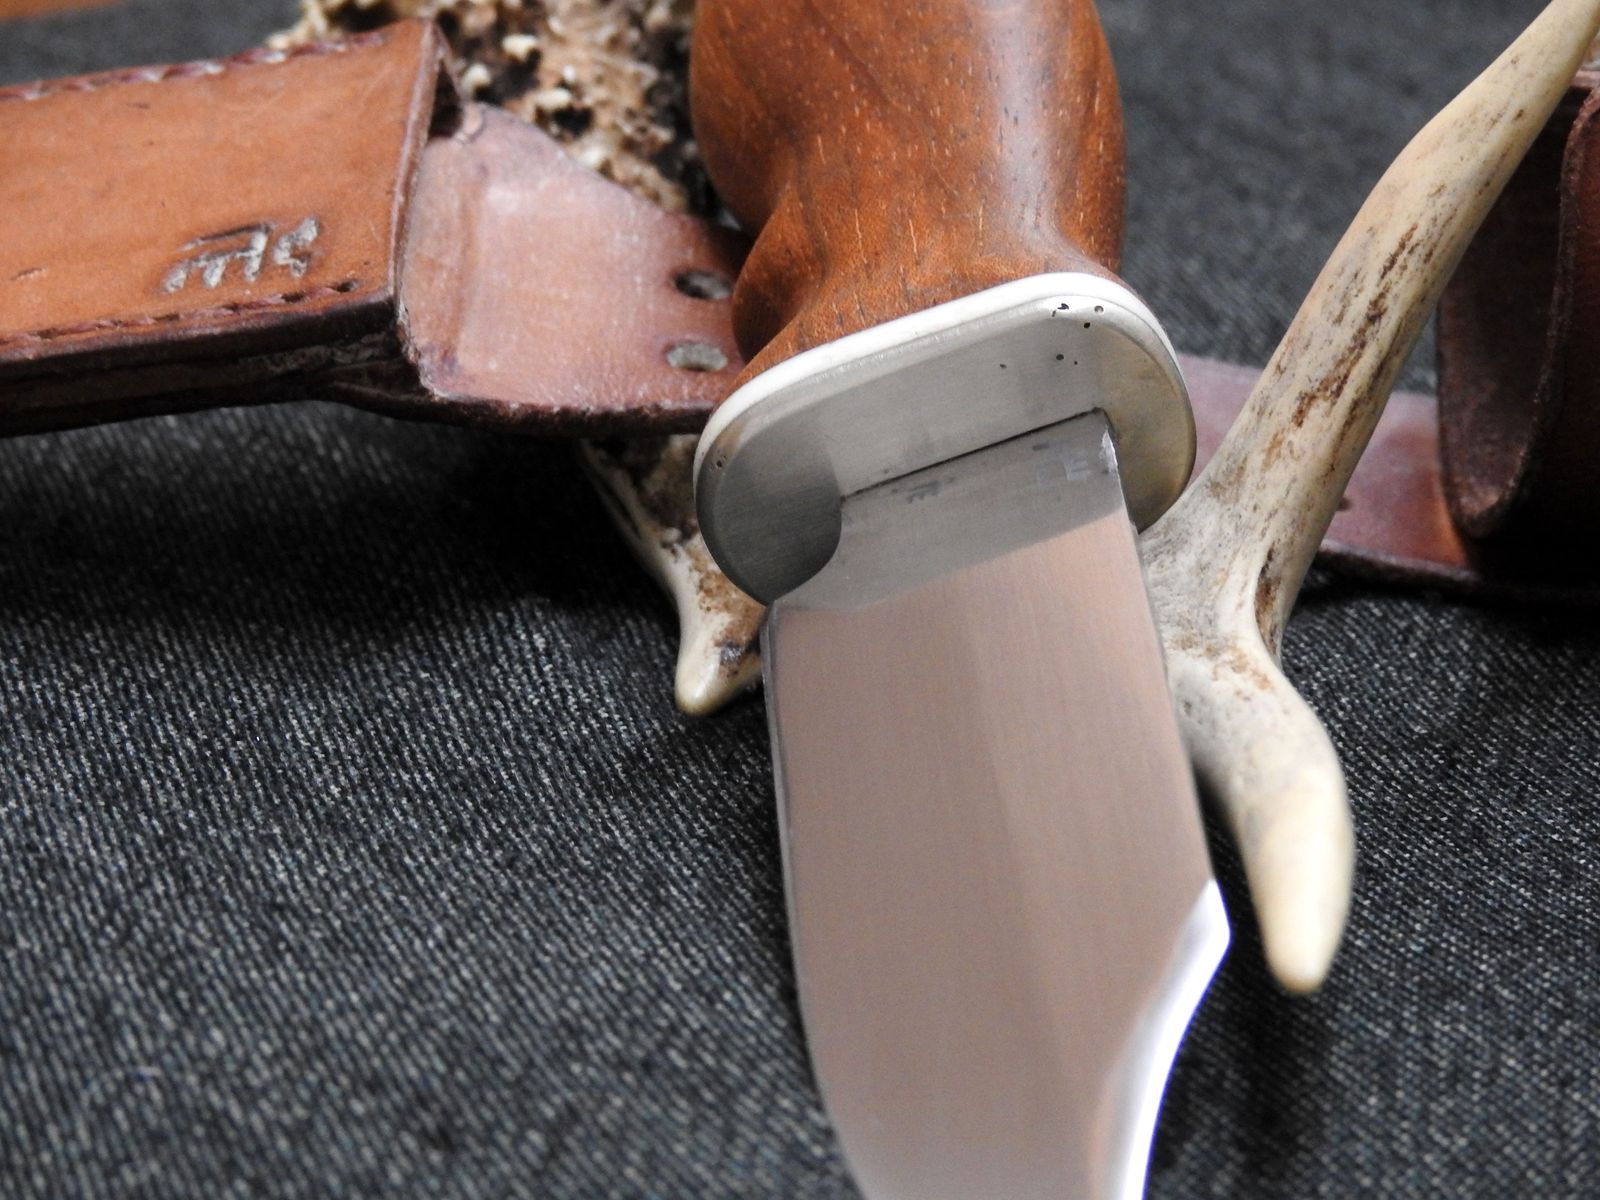
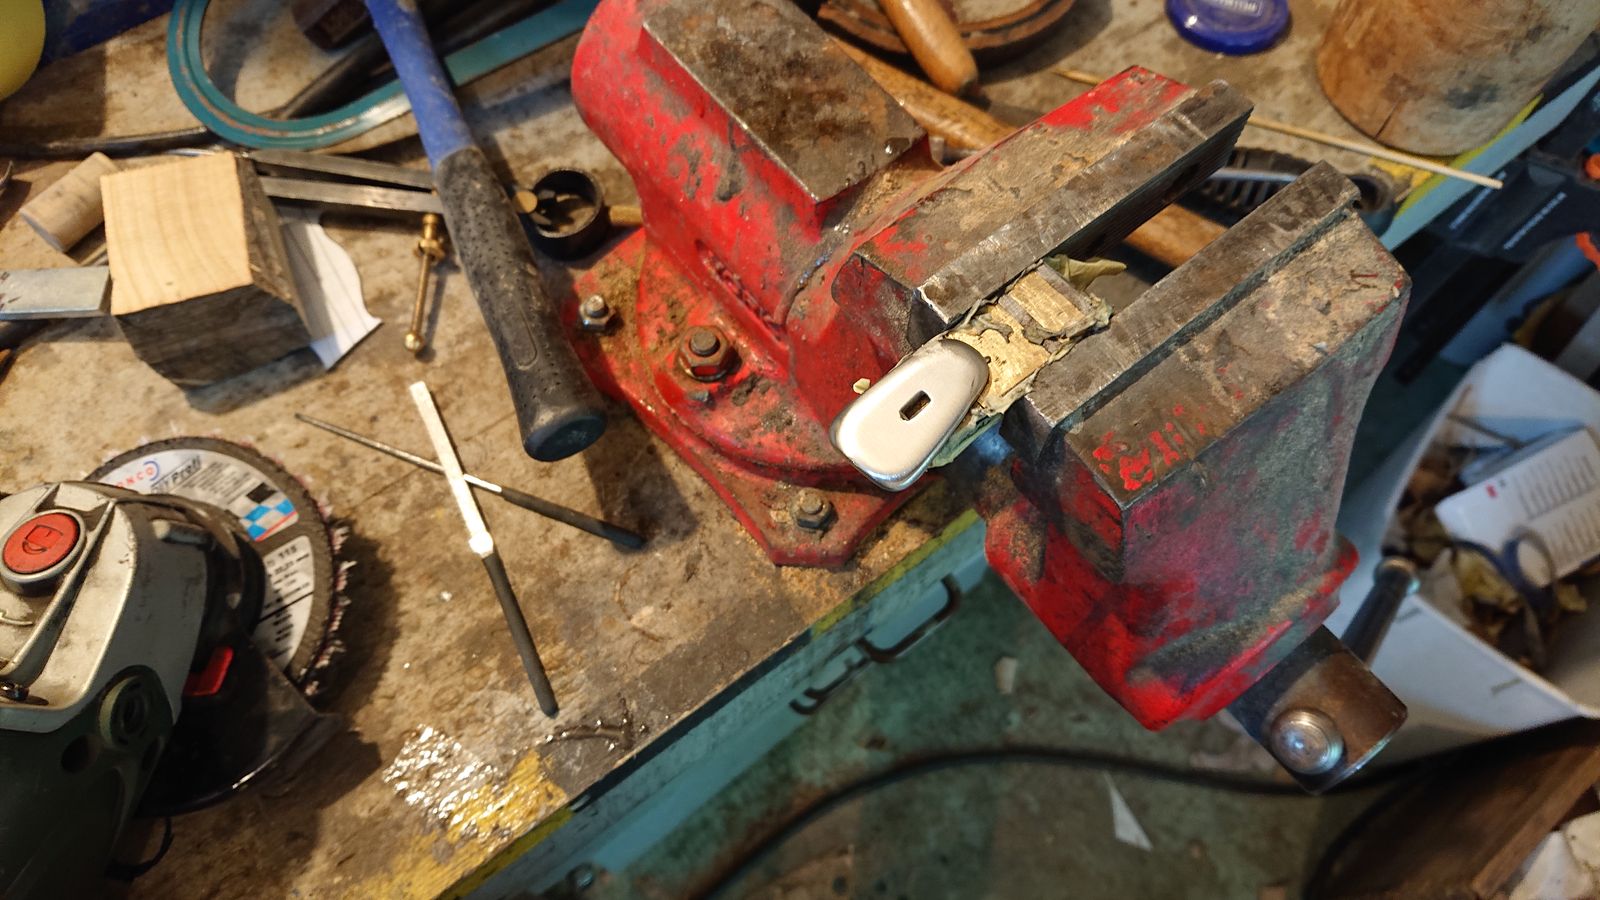
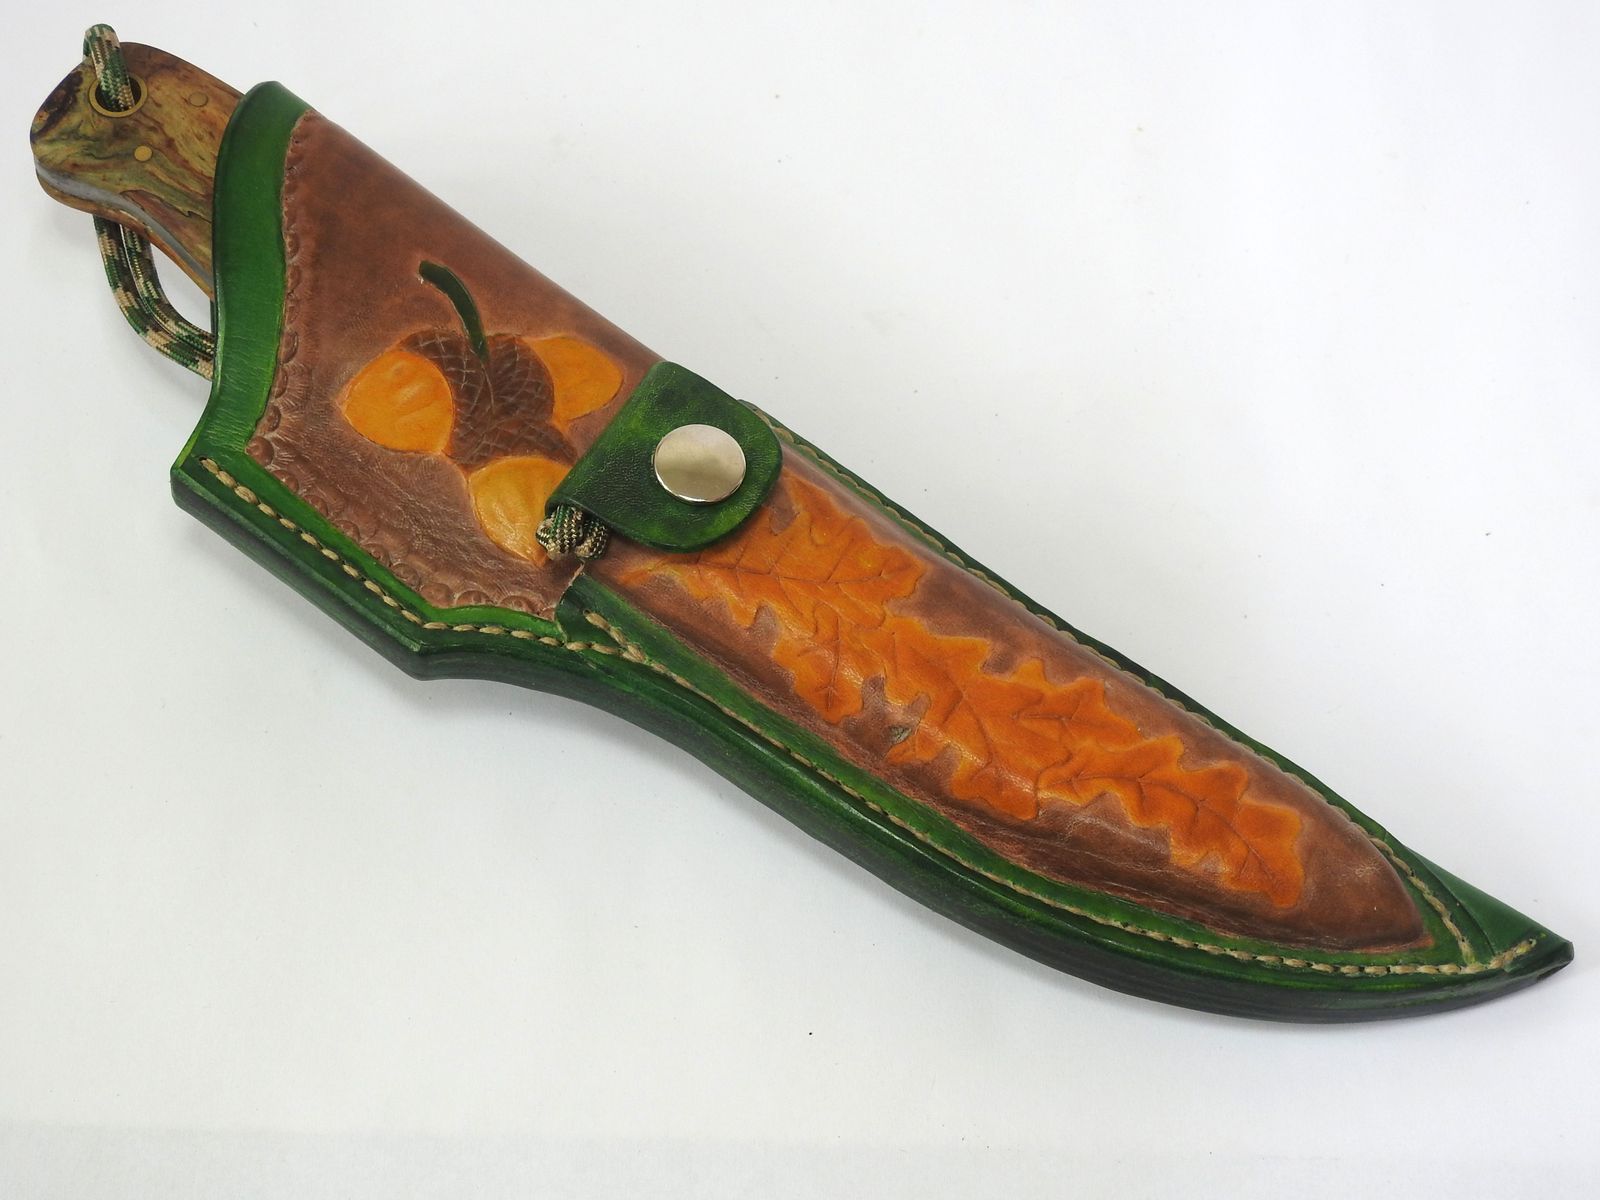
The blade is 160 mm long and 5 mm thick at the handle and tapers toward the tip. N690 steel, sand tumbled satin finish. The handle is made from rotten willow wood stabilized with green-dyed resin. It is a big boi – it weighs 300 g (and that is with the fullered blade and handle is lightened too by holes in the tang). A sharpening angle of 25° should guarantee that with occasional use, the blade will not need sharpening any time soon. Despite being thick, it is reasonably sharp and cuts well, because it has a flat grind all the way to the spine. It is balanced at the bolster, and it packs quite a punch, as a knife of this type should. And because the spine is so thick, it should withstand even some serious abuse should the owner decide to inflict it on the blade. Which I suspect they won’t.

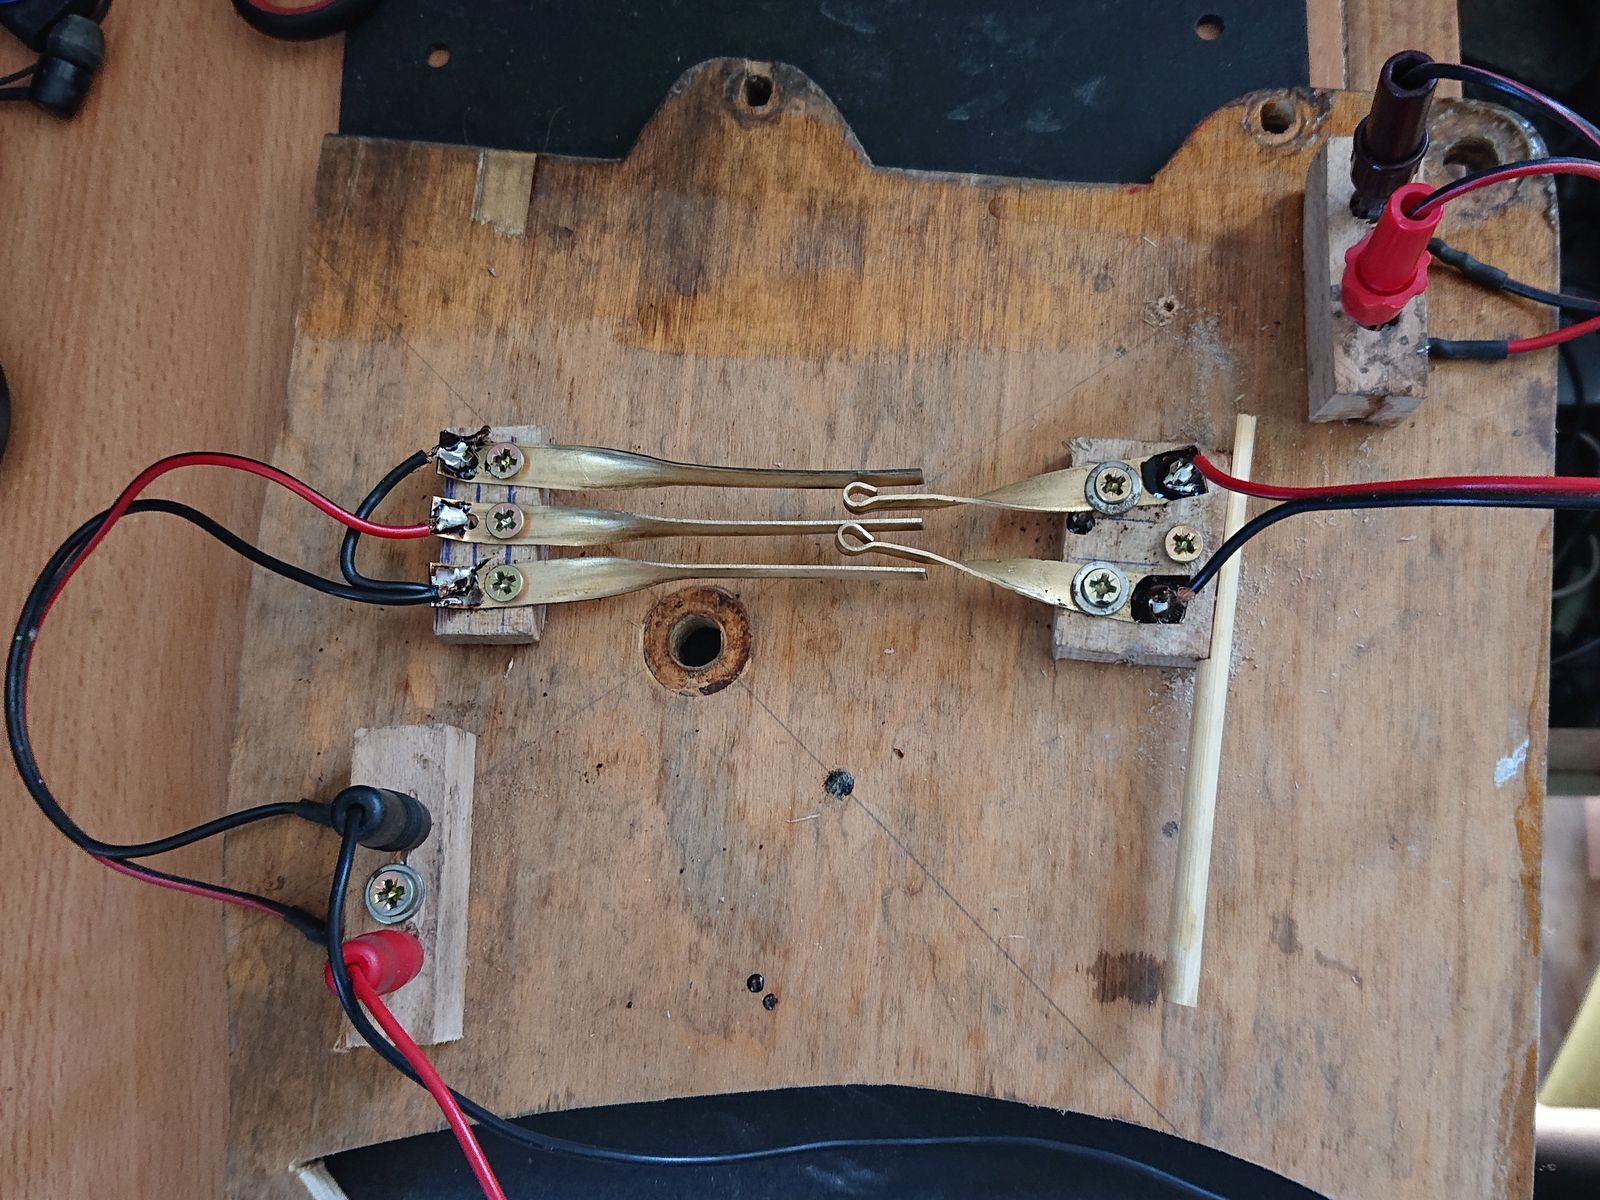
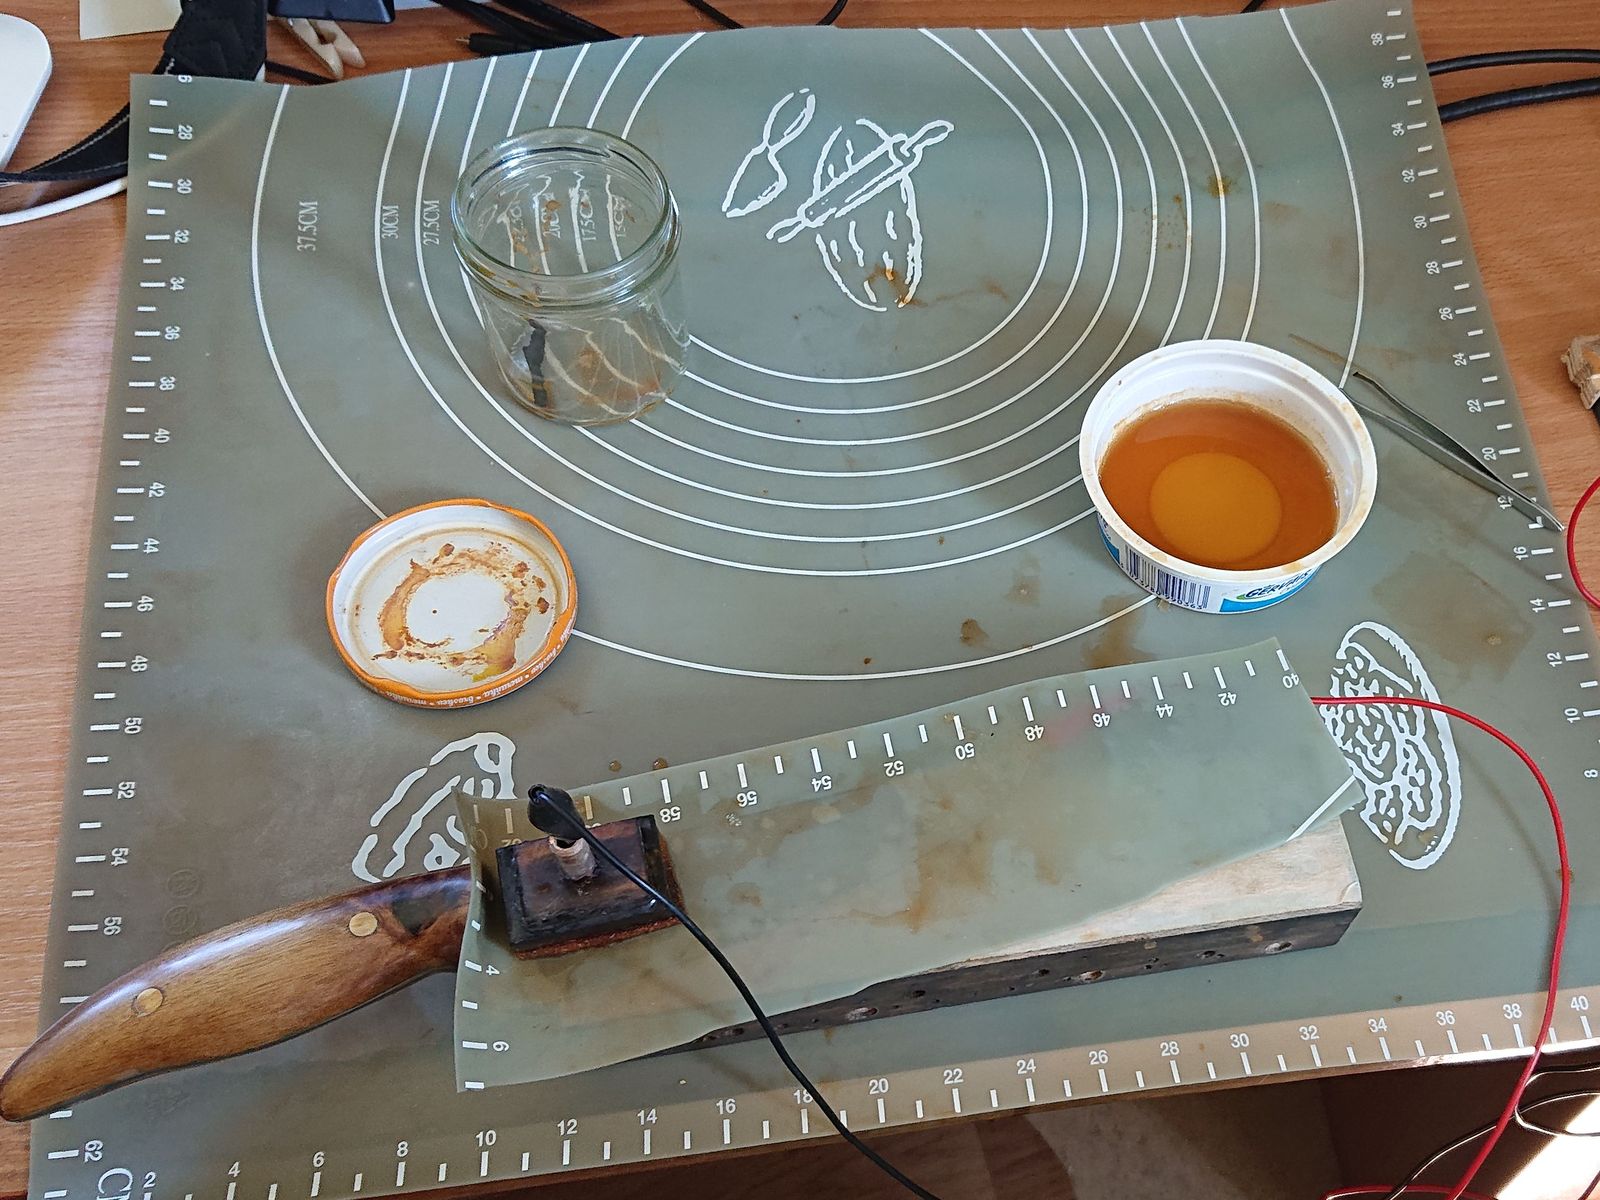
The accessories are a ferrocerium rod and carbon steel striker as a fire starter (more for fun than real purpose, matches are better) and a sheath with a pouch for these. Theoretically the carbon steel striker is not necessary, but when testing it out, I got the subjective impression that carbon steel strikes better sparks from the ferrocerium rod. I might be wrong, I could not think up an objective test for that.

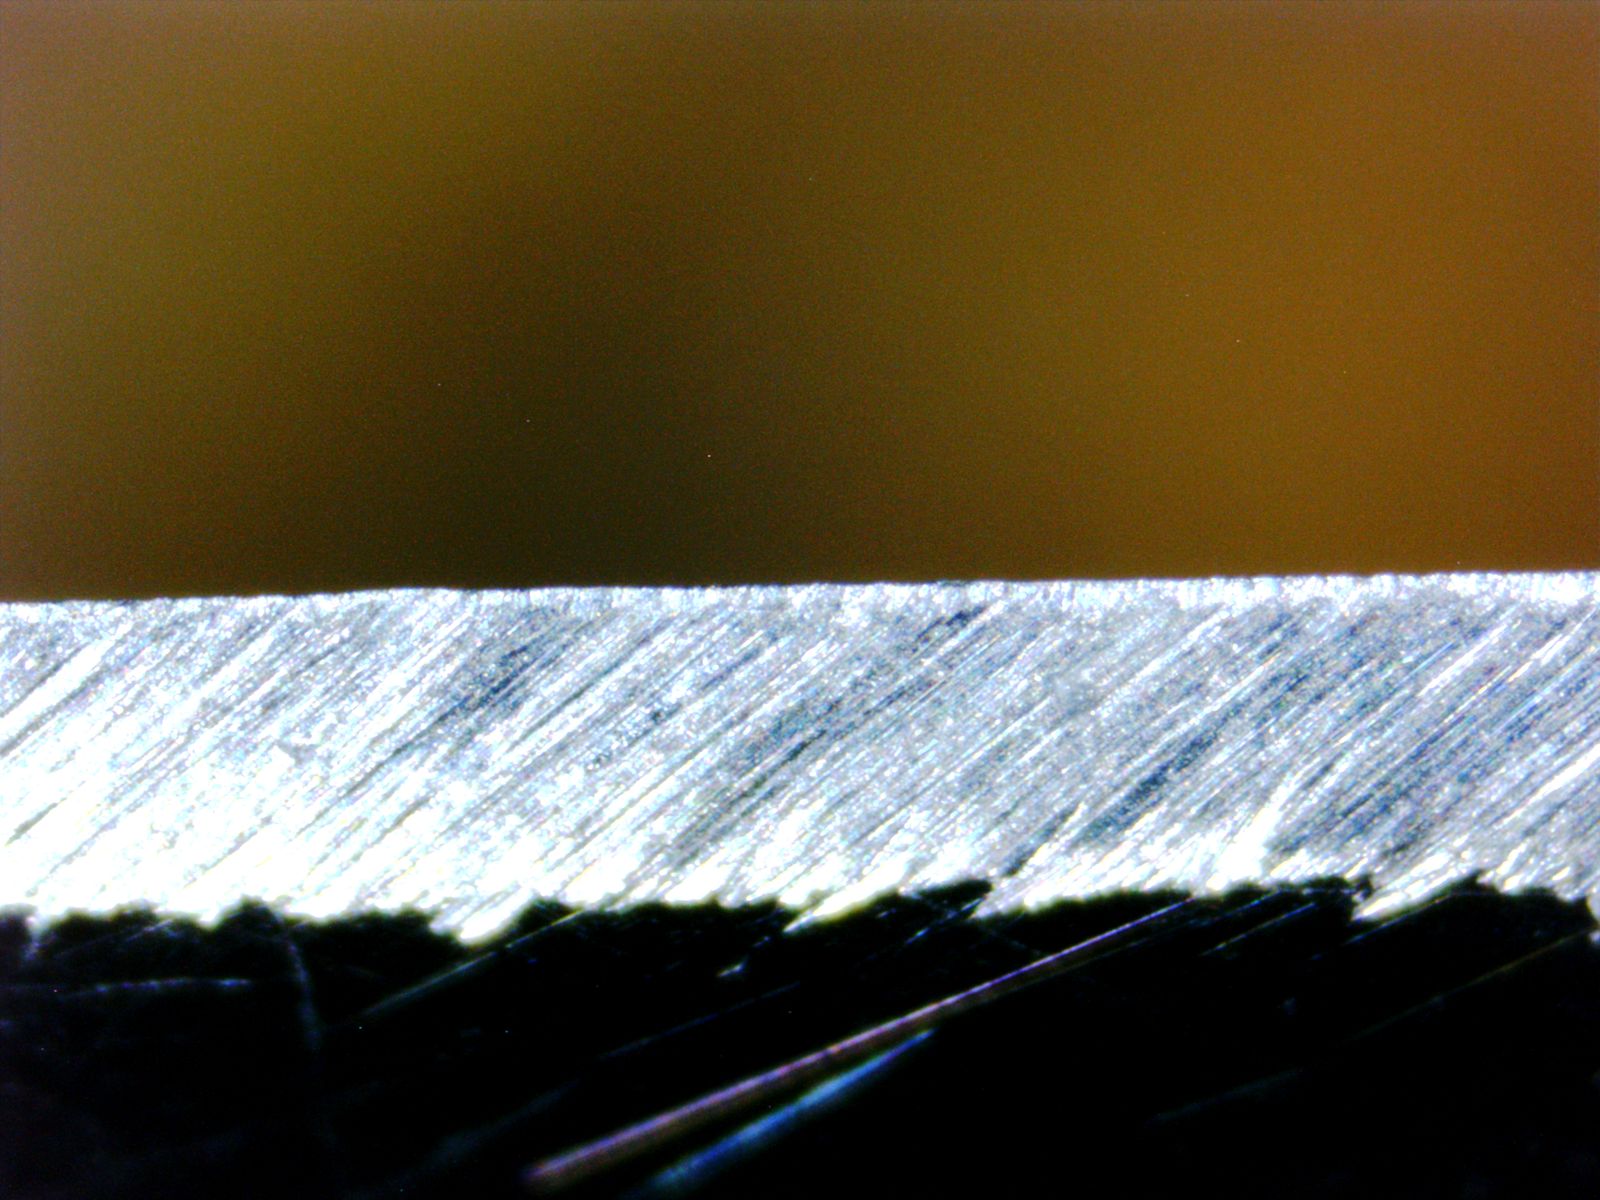
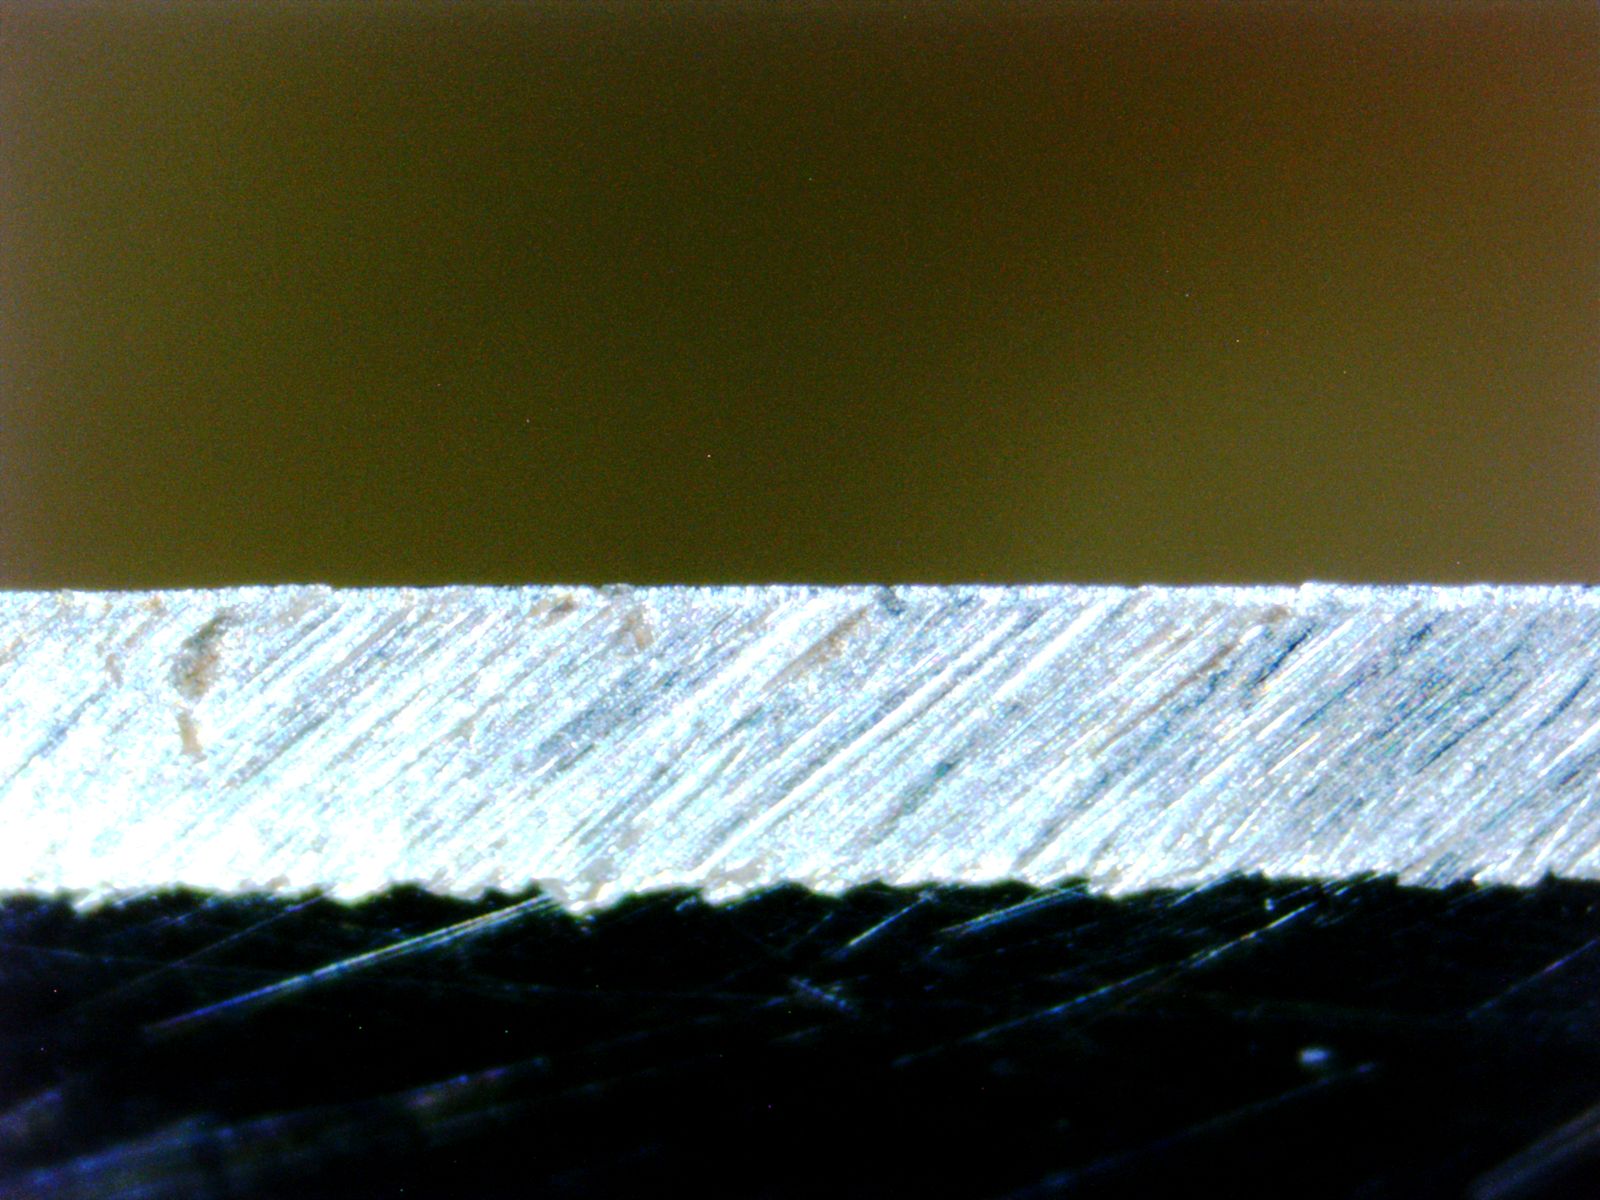
Making fullers by hand is very difficult, it will probably take several more blades before I get it right. I am currently wracking my head about how to make an accessory for my grinder that would make this difficult task just a tad easier. So far no success, just a few semi-functional, semi-failed attempts.

So, Does Homemade Honing Steel Work?

I think it does.

My mom’s knives needed to be sharpened. Normally I would sharpen the knives with the current manufactured batch, but since the honing steels, whilst not finished yet, got to a stage when they can be at least tested, I have decided to test them. So instead of sharpening the knives on my belt grinder and stropping them with the MDF wheel, I have sharpened them the old fashioned way on a whetstone and then honed the edge on steel.

First a picture of a “blunted edge” bevel.

Edge bevel before sharpening. © Charly, all rights reserved. Click for full size.

You can see the perpendicular scratches right near the edge. Those were made by the belt sander. The angled scratches are from half-arsed maintenance with a whetstone that I have done last week when I did not have time to do the job properly. This is not, strictly speaking, a blunt knife. It would still take yer finger off in a jiffy and was perfectly fine for hard veggies like carrots and taters. But it did struggle with tomatoes a bit. Notice how the light reflects differently from the mirror-polished primary bevel, which thus appears nearly black.

As far as size goes. this bevel is very small – about 0,3 mm wide.

100 grit bevel re-established at ca 15 °
© Charly, all rights reserved. Click for full size.

First I have re-established nice regular bevels at 15° with the rough side of the whetstone, which has circa 100 grit. 15-20 passes were needed, even though the bevels are very small – the steel is very hard. It does not look very different from the first picture, except for the scratches being all angled all the way to the edge now. On carbon steel, this would establish a so-called “needle” which is a thin foil of steel on the edge that bends and cannot be ground away, but I have not seen this happen with N690. The needle here breaks usually off very easily, leaving behind a bit of jagged edge.

320 grit bevel smoothened
© Charly, all rights reserved. Click for full

Fine 320 grit side of the whetstone is used to slightly smooth the edges and eventually break off the needle on harder and brittle steels (like most stainless steels). However here it does not look that much different from the second picture, which I did not expect. The knife at this stage is perfectly capable of cutting tomatoes, but it does not shave hair yet. And this is where the test of the honing steels comes into play.

Bevel burnished by honing steel.
© Charly, all rights reserved. Click for full

Now the bevel looks significantly different from before. Note that the edge is now mirror-polished between some of the deeper scratches – the light reflects very differently from the bevel than it did before. The knife is now also shaving-sharp not only tomato-cutting-with-its-own-weight sharp.

So TLDR is –  Although this is not a scientific proof, I am convinced and I think the honing steel works as intended.

Kitchen Knives Set – Part 2: Making the Blades

There are multiple pictures, so I am putting the post below the fold. I have filmed most of these works, but if a video ever comes out, it won’t be this year. I am already getting a bit sidetracked by making this project more elaborate than I originally intended and by my desire to re-build and improve some of my tools. Whilst being hampered in my endeavors by cold weather and other, previously mentioned, things.

[Read more…]

Kitchen Knives Set – Part 1: Thoughts and Design

So, this is my next big-ish project, I have decided to make a basic set of kitchen knives – three knives and honing steel. I am not entirely sure about how useful honing steel is with knives from N690, but I have used it on my mother’s knives and it seems to work. It does not appear to hurt. If this small set works out OK, I will make more in the future and perhaps add some specialized knives along the way, but this basic set is meant for casual cooks like myself (and indeed most of my friends), who do not need a special blade for every task and will be probably very content with one knife for 90% of work.

And because this time I am preparing perhaps for more future projects, I have made templates in photoshop, printed them out, and laminated them in transparent foil for future use.

© Charly, all rights reserved. Click for full size.

© Charly, all rights reserved. Click for full size.

The grid is metric, with the smallest scale being 1 mm.

The “meat” knife is a de-facto universal knife, one that I expect to take care of that 90% of work. Medium-sized blade with a round tip, ergonomic handle for firm grip, suitable for slicing protein as well as fine-dicing herbs and vegetables. And for remaining tasks, there is a small peeling knife with a sharp tip for piercing and a relatively straight blade for scratching-peeling, and a big chef knife for tackling difficult cabbage and for those occasions when cutting a lot of big-ish vegetables or huge chunks of whatever is necessary.

The chef knife has holes along the blade edge, which should help with reducing the sticking of whatever is being cut to the blade. It is easier to make than hollow grind or S-grind and it does work too. The handle is ergonomic as well but it is formed with a focus on two main uses of such a big blade. The thicker butt with a hook end prevents the knife from flying out of the hand when chopping, and the thin front with a lot of space for fingers allows for a choked-up grip with the index finger and thumb on the blade for fine slicing and dicing with a rocking motion.

All these designs should work as expected since they are based on knives that I have already made in the past. Of these, the least tested is the chef knife, but I still do not expect any trouble. I won’t follow the designs exactly, they are just approximations and I expect to tune them up a bit during the work. Any thoughts and remarks on the designs are welcome, as well as any suggestions for further additions to the set ( I am thinking about fish-knife and cheese-knife).

However, I will definitively introduce one new and relatively original feature right now. One that I have not seen used by another knifemaker (which does not mean nobody does it, I just did not see it done). As you can see, there are four-five holes for pins in each tang, which might seem a bit excessive and dorky-looking. That is because I need more pins – two will be wooden and two will be metallic. And they will not be visible. That is, the knives are designed as full-width tang, but the pins won’t appear on the outside of the handles. I have tested this idea on one broken blade and it seems to work perfectly OK for a kitchen knife that won’t get hit with a mallet or hammer too much. Or at all, as things should be.

So stay tuned for the following articles with a full write-up of my manufacturing process for this project. I am decently far already given that I only could work three days this week. And because a video was requested, I am filming (almost) all work as well. But I make no promises there – a future video is, at this time, uncertain and might or might not happen.

Making Kitchen Knives – Part 18 – Etching

I did not include this step in the time measurement last time, and neither will I do so this time. It is about 10-15 minutes per blade and the only way to reduce that time would be to forgo it completely. If I only signed the blades with my logo, I would have made a significant improvement actually, but since I have decided to number them too, I am back to square one time-vise.

I wrote about my logo design in the Rondel Dagger series. At that time it was meant to be maybe only a one-time action, but the design has grown on me and I have decided to adopt it as my new maker’s mark for all my wood and metal projects. When working on my first commission, I have built myself a specialized etching electrode that allows me to etch the logo without having to mask the whole blade, prepare big solution baths or construct complicated barriers holding the etching solution in place.

This time around I have further improved on this and for the logo etching itself I have built myself a new stencil, since cutting the logo in adhesive tape each and every time leads to inconsistent results and is time-consuming. I tried to get my hands on photosensitive foil to make a stencil, but I was unable to find any seller in CZ offering one that is not for copper. And then I realized that my mother has an old silicone kitchen pad that she never uses, so I asked if I can destroy it in the name of science. She said yes, so I took it and I cut my logo in a strip cut out of it with a scalpel. It is water repellent, so the etching solution did not want to get in there, but a drop of dish detergent in the etching solution has solved (ahem) that problem.

© Charly, all rights reserved. Click for full size.

However, another problem persisted. Etching stainless steel works differently than etching carbon steel. When etching carbon steel with FeCl3 solution, all you need to do after the etch is to let the solution sit for a few seconds and it turns the inside of the etch black with oxides. For stainless steel this does not happen. You need to change the polarity of the electrodes to deposit a layer of black oxide on stainless steel. In order to do so I had to remove the crocodile clips and switch them between the blade and the electrode several times, which was onerous and annoying.

© Charly, all rights reserved. Click for full size.

I have performed tests on the piece of blade that I nearly ground through, and here you can see the results of various etching parameters. On the left, the two etchings are with five minutes of etching time, which was needlessly long and has led to etching the surrounding area under the stencil too. I found out that one minute is more than enough for this logo and those are the two upper logos in the middle. And as you can see, they are grey, not black, because I did not change the polarity. All the other etches are various iterations of me playing with the polarity and whatnot.

After this experiment I have spent a fruitful afternoon cursing in the workshop building this highly sophistimacated tool from a scrap of plywood, brass sheet metal, copper wire, and some left-overs of speaker cables.

© Charly, all rights reserved. Click for full size.

I can plug my 12 V DC source in the input (on the right) and my crocodile clamps on the output. When the switch is held to the left, the red wire/clamp is the anode and it etches. When the switch is held to the right, the red wire is the cathode and it deposits metal ions (which quickly turn into oxides). And I can flip the polarity fairly quickly, and I can either make the logo entirely black or just the outline, depending on how quickly and how many times I switch the polarity. It was quite fun, although there is still some factor of unpredictability in the outcome that I was not able to figure out.

So I could go etching the blades that were ready and as a bonus I got good use out of the rest of the silicone pad too.

© Charly, all rights reserved. Click for full size.

And it worked really well. The best results I got with 1-minute held at etching current, then 10 seconds depositing current and then 1 minute quickly switching the polarity back and forth. After that I neutralized the remaining acid on the blade with washing soda solution, rinsed it off thoroughly and that was it. I got some teething trouble, etchings on some blades are not perfect, but they are not terrible either, they are all identical in shape and size and after I found the correct way, it took me less than 5 minutes per blade.

Etching the numbers was a different kettle of fish after that, for the numbers are tiny, Glagolitic numbers can be quite funny-looking sometimes and I do not think I can cut stencils for them from 1 mm thick silicone sheet. I might try, but for now I reverted to my old method – scalpel and plastic adhesive tape.

Next time I will show you the actual knives that came out of this. I have to decide whether to make one post presenting them all, or scatter them over several days. I think I will do the latter. Either way, taking pictures will take some time too.

Making Kitchen Knives – Part 15 – Tumble Time!

I was on and off working on this project in February. I have filled my tumbler with very fine sand (one that is used to fill in the spaces between concrete pavement bricks) and walnut shells and I polished the blades with increasing grit belts, then I stuck them into the tumbler for a day or two until I thought I can get the scratches all out after 12 hours evaluation.

It was still more time consuming than I would like to, mostly because many blades were ever so slightly bent, a problem that I really hope to solve with plate quenching in the future. On a bent blade, the concave part gets polished quickly, but the convex is a pain in the ass.

So I progressed slowly and at 150 grit I stopped, thinking that the fine sand can take the scratches out in time. It did, however, it took over a week in the tumbler, so next time I will go probably somewhere around 240 or perhaps even 320 grit before going to the tumbler. The blades did have a nice sand-blasted like look to them, so they were de-facto good to go functionally, but I thought they might be still improved by putting them in the tumbler some more. So I did, into a mixture of jeweler’s rouge (Fe2O3 powder) and crushed walnut shells. And I was right, they have now a very nice satin finish that I think is perfect for kitchen knives.

A mirror polish can be a bit sticky, so for kitchen knives, it is not the best option. I will see how sticky this polish is in a bit, but it looks good. Unfortunately, pictures do not give it justice, I won’t even try.

Time-wise, I have spent about 110 minutes per blade with this polishing process to achieve this result. So an improvement of 58%, but with a different look in the end.

Here is the blade line-up from worst to best:

© Charly, all rights reserved. Click for full size.

The first left blade has a slight crack on the edge. Not from the tumbler – that would be possible, but it did not happen – but from the one time where I forgot that the blades are drying on a rug and I took it to wipe my hands. All twelve fell to the floor and this one cracked near the edge and will have to be re-ground to a different shape – I do not know which yet. It was also one of the curly ones and that might have played a role too.

The second blade from the left would be perfectly OK if I did not mess it up. There is a place about 1/3 from the tip where I run accidentally not over the edge of the platen but over the corner. I nearly ground through the blade there, making an unseemly spot where it is paper-thin. I will probably prototype this to a much smaller blade, like a peeling knife. A lesson for the future.

The third and fourth are the remaining two of the curly-wavy blades. One will be re-shaped into a fish gutting/filleting knife for my uncle, one will remain an all-purpose kitchen knife, only with a slightly narrower blade than intended. It will be more similar to the knife I gave my mom and my brother.

The next five blades have a slight bend to the right side that I was unable to straighten out. They will be functional, but cutting straight will be a bit difficult, so not ideal for bigger things like cabbage, but still OK for carrots, leeks and onions, and sausages.

The last three are what I intended to achieve. 25% success rate – a disaster. But I am still learning, so hopefully next batch comes out better.


A Knife for my Brother

I did not manage to finish a knife for my brother’s 50 birthday last year, for I nearly hacked off my finger with a hatchet. So I am rectifying the issue this year.

This is the blade that was hardened when I was working on the rondel dagger. It is not a perfect blade, aesthetic-vise. I messed up the polish a few times and I had to eventually stop trying to correct it otherwise the knife would turn into a small razor. It is a good universal kitchen knife, very good cutter, I am just not happy with the surface finish. But it is either this or nothing and this year I want to give my brother a knife I know he wants. He is going to appreciate it even with the flaws.

© Charly, all rights reserved. Click for full size.

I tried to make up for the flaws with the handle, so I have used a piece of partially rotten lilac branch that I have harvested last fall. It is just stunningly beautiful wood and this is probably the prettiest knife handle I have made so far. The wood is rock-hard with tiny pores (lilac is one of those woods that can take 1000 grit polish without dirtying) and would probably hold up well even without the boat lacquer coating. But it was partially rotten, so the outlying regions were not only discolored, but also softer, so I soaked it in boat lacquer to stabilize it. With the coating, it should be near indestructible.

The lilac-colored heartwood will probably age into dark brown over the years, but it might take a really long time since the branch was already several years dead when I cut it off.

© Charly, all rights reserved. Click for full size.

© Charly, all rights reserved. Click for full size.

© Charly, all rights reserved. Click for full size.

A Hunting Knife – Auction for FTB Legal Defense Fund

You can still donate, the damage Richard Carrier has done with his petulance is not undone yet. I cannot afford to donate any meaningful cash right now since I have no income. But I can afford to donate a bit of time. So I am giving this knife in exchange for the highest donation. Details see further.

© Charly, all rights reserved. Click for full size.

Technically it is a hunting & fishing knife since my first customer specifically requested it for angling, but you need not be a hunter for having a use for it. I am regularly using a knife like this when collecting mushrooms or just walking in the forest when it might come handy. It would also be useful as an all-purpose knife for camping. The false edge is sharp, but not cutting sharp. The blade is signed and numbered “2” in Glagolitic script.

© Charly, all rights reserved. Click for full size.

I made a simple leather scabbard, this time symmetrical so the knife can be conveniently fastened on either left or right side since the preference of its future owner is unknown.

© Charly, all rights reserved. Click for full size.

The handguard/bolster has a few dark spots. These are inclusions in the used material (see further).

© Charly, all rights reserved. Click for full size.

The endcap is fastened over an ornate stainless steel washer into which is the end of the tang peened.


If you are interested, write your bid in comments or per e-mail to affinity (note, I might not be able to post your e-mailed bids in the comments next two days, there is a huge storm coming our way and I might experience blackout).

If you bid from outside of the European Single Market, please make sure that you are allowed to import such things and be prepared to pay for any import/customs fees, duties or other taxes as may be relevant in your region/country/state. I will pay for the postage.

The knife will be sent to you after submitting proof of the promised donation. If the highest bidder reneges on their promise, it will go to the next one in line. The start is 10$ (the cost of materials), the sky is the limit.

The auction will run for two weeks until February 23. 2019 and this post will be pinned to the top of the page until then.

More info below the fold.


[Read more…]

My first Commission – Part 9 – Fitting, Signing, Assembling

© Charly, all rights reserved. Click for full size.

The HDD magnet proved to be very useful when polishing the bolster/handguard. It proved to be strong enough to hold it when grinding on the belt grinder, but also when polishing with the angle grinder. I did not intend to use the magnet in this way, but now I will because it has proven itself to be extremely useful for holding these tiny things steady. Shame that other metals that I am going to use for these things – aluminium and brass – are not magnetic.

The next thing I have done after the bolster was fitted was to make the handle. That did not go too well as you may remember. The first piece of wood had cracks, on the second piece of wood I messed up the drilling and the third time was the charm. It is a nice piece of wood and looks great when the grip is fully shaped, but I do wish that I have managed to get the grain alignment a bit better. But grain alignment is not something that anyone else fusses about that much, so I should not fuss about it either. Here you can see the grip roughly cut and shaped on the belt sander.

© Charly, all rights reserved. Click for full size.

After the grip was shaped, I have also glued to ti the end cap/pommel thingie and I have decided to sign the blade before assembly.  For that, I have tried a new thing, which unfortunately completely and utterly failed.

I have bought photosensitive lack that is used for etching PCB boards. The idea is, you spray-paint your metal surface, you print your design, you put your design on the surface and use UV light to quickly deteriorate the paint on illuminated areas. Then you wash out the deteriorated paint with a 1% solution of NaOH and voila – you can etch.

The paint did not deteriorate under UV lamp as advertised and the NaOH solution did not wash it out of the illuminated areas. I have followed every step of the instructions, multiple times, and it just did not work. So I tried to increase the NaOH solution concentration – and it washed off all of the paint. So until and unless someone shows this particular product to me to work, I am considering it an unfortunate waste of money.

I do not want to make my signatures too big, and I want to number the blades from now on, and the wax is not very conducive to tiny fine details. So I had to revert back to how I did things in the past, with slight improvements. I have covered the blade with plastic adhesive tape. But this time I have used double-sided tape on the parts where the signature and numbering were due to go, and then I glued to it one print of the now useless stencils for the failed photo etching. Then I cut out the letters with shaving razor and a pointy scalpel blade.

Because I did not want to damage this blade, I have first tested this new technique on the failed machete (that fail has proven quite useful, I have hardened piece of steel for experimenting).

© Charly, all rights reserved. Click for full size.

Etching in a cup with solution works, but it takes a lot of space and a lot of solution to immerse the whole blade. So I have built myself a new thingie that allows me to perform etches with very little solution.

I took a piece of graphite and ground it flat to about 20x30x5 mm. On top, I glued a piece of wood and covered it all with excess epoxy glue to protect it against moisture. The next day I drilled a 6,5 mm hole into the wood down to the graphite. Lastly, I took a piece of 8 mm brass pipe, cut M8 thread in the hole and on the pipe, and I screwed the pipe into the hole so far that it has a solid connection with the graphite.

For the etching itself, I have simply put a piece of felt soaked in diluted FeCl3 solution on top of the design, between the blade and the new graphite electrode. Anode (+) on the tang, cathode (-) on the brass pipe and after five minutes the job was done. The etchings are clean and nice looking.

© Charly, all rights reserved. Click for full size.


© Charly, all rights reserved. Click for full size.

Just like last time, I have no pictures of the assembly. Imagine me slathering epoxy mixed with wood dust all over the tang, hammering the handle onto it and then peening the end of the tang whilst being in a constant state of panic that something goes wrong. Nothing went wrong, although I am not happy with how the peen turned out. But the customer did accept in advance that peened tangs can be a bit unseemly. Even unhardened stainless steel does not like to be peened and tends to crack around the edges. And I did not dare to try and weld soft steel stud at the end of the tang, this steel allegedly does not weld well. But maybe I will try something different for the second blade. This one is unfortunately stuck with this, although it might get a bit better with some more polishing.


So the knife is now more or less finished and functional. The last thing to do is to clean and polish the wood to about 300 grit and then impregnate it with boat lack.

© Charly, all rights reserved. Click for full size.

YouTube Video: Original Vs Reproduction – Which is better?

What I find the most interesting about his video is the realization that our modern perceptions of what is and is not beautiful are heavily skewed towards unreasonable and sometimes unachievable perfection. Sometimes perfection that you can only evaluate up so close, that you need a magnifying glass and calipers.

I blame the industrial revolution and mass-produced machined goods.

My first Commission – Part 4 – Welcome to Knifemaker’s Hell

I really wish my first customer has chosen a knife with simpler geometry. For future projects of this kind, I will have to make some more attachments for my belt grinder, because it is woefully inadequate for the concave false edge. I messed that up several times already and quite a few times I got frightened that I will have to start all over again. Whether I manage to correct the slight flaws that are in there remains to be seen, my guess would be no. It will cut alright, but it won’t be perfect no matter what I do. Grrr.

This weekend I have spent with grinding as much time as I could – approx 4 hours each day. More is not possible, at least not for me. Grinding on belt grinder is for me very mentally tiring, because I have to concentrate a lot more than I had to when grinding manually. Because whilst grinding on the belt grinder is quicker, it is also possible to make mistakes quicker.

At this point, I should be finished with polishing, but I am unfortunately not even halfway through. Mainly I have myself to blame for this. If you remember, when writing about the kitchen knives I mentioned that after the first grind with the magnetic jig I went back to freehand in order to be able to alternate the angle of attack to get a flatter and more even grind. Well, I forgot to do that with these two knives and I ground them both up to 120 grit ceramic belt on the jig. The result was ever so slightly wavy grind that I had to correct now that the blades are hardened. So I had to start all over at 40 grit and work my way up, sweating profusely whenever my hand slipped slightly. But at least one thing is clear now – whatever misgivings I had about the blades being perhaps not hardened properly, I do not have them anymore. They are extremely hard and tough to grind, which is why it took me so long to get to 150 grit today, which is the point at which I had to call it quits.

Still a long way to go. © Charly, all rights reserved. Click for full size.

I estimate I will need about ten more hours overall, on and off the belt grinder, before I can call these two blades finished. That means at least one more weekend. At least. It also means more than double the time that I think it should have taken me. When I am done with this and with the kitchen knives, I will probably make a batch of these blades as an exercise, I must get the muscle memory and experience and know-how to do a proper job in a reasonable time, I cannot dick around with one blade for months on end anymore.

Making Kitchen Knives – Part 13 – Headscratching Curls

These are the three blades that were quenched by using protective stainless steel foil. The function of the foil is to prevent decarburization during the extremely high temperature at which this steel needs to be held at for prolonged time in order to get all carbides into solution.

My initial thoughts were that the blades warped because they are ground too thin. Well, that is not true. Today I have measured the thickness and they are indeed way thinner than I should have made them – all are just 0,35-0,45 mm thick at the cutting edge – but three of the remaining blades are even thinner, three are in the same range and only four are thicker. And of those thinner or just as thin as these, one has very, very slight bend towards the tip that should be possible to correct, and the rest is straight.

So the blade thickness is not the cause. I cannot imagine what else could it be, I do not believe that the foil could have such impact, not to mention that these blades were pulled out of the foil prior to quenching.

My second guess would be decarburization, maybe the experimental protective coating did not work as well as it should and the steel has lost some of its carbon, making it less prone to warping in the quench. But it should also leave it much softer post quench, and I just do not see that.

I have tried my hardness assessing gauges on bought kitchen knife – that big fat stainless steel overpriced junk to be precise – and I got the same result as for the softest one of these – that is, approx 52 HRC.

This means that the blades where my 62 gauge does not scratch are definitively the hardest blades and harder than the store-bought one. And the 62 gauge scratches all these three, but it does not scratch 3 of those where I used the experimental protective coating. And to add to the confusion, one of those three hardest ones is also one of the thinnest. This to me rules out decarburization as the deciding factor for the warping, although it might have caused the high variation in hardness.

I do not believe it is due to my grinding skill, because that should distribute the warping randomly and not only on the three blades that were quenched with foil.

Currently, I am just scratching my head. Any opinion is welcome.


My next step can be either to make these blades circa 5 mm narrower by grinding away the curly parts or trying to re-harden them with the protective coating and maeybe even trying plate-quenching instead of oil. I have never done plate quenching, maybe this could be a good opportunity to try it out…