The hamon-making class is over, and I’m home and digging out from under the things that piled up while I was away.
I don’t have a lot of detailed stuff to post about it, because there wasn’t much detailed stuff to do – it was mostly grinding and then polishing. Lots and lots of polishing.
Some of the things I’m going to say here may sound like complaining but they’re not. They’re realizations I had while exploring how a linear process maps onto a class, from the viewpoint of a person who used to teach computer security topics in the form of 8-hr lecture/hands-on at SANS, IANS, and Arthur Andersen University. It’s a very different form of teaching from teaching an art-form or a trade. Art-forms are kind of squishy, “well, you do whatever…” and trades are very detail-oriented, “you have to get every single scratch out of it or it’s not custom quality work.”
I showed up at the parking lot around 8:31 (“we start at 8:30” was what I was told) thanks to a slow-moving farm vehicle ahead of me. Upper New York State is beautiful and there is a mix of places that reek of money, and old falling-down farms. I stayed in a lovely AirBnB the night before, so I was up early, had a delicious breakfast at nearby diner, then headed in. There were 4 of us students, and we hung out and introduced ourselves for a while before Greg arrived.
The first thing Greg said was “I hope you all brought the blanks I told you to bring.” Instant problem: he never told me anything about a blank. In retrospect, I suppose it was obvious – I could have cut a nice thing out of the piece of 1/8″ W-2 I have leaning against my shop bench, but I guess I’m getting rusty at thinking about this kind of thing. In retrospect, I could have asked him, “what do I need to bring?” But I didn’t. I’m just not as “on the ball” as I used to be, because my subconscious knows that I don’t need to be. My giveafuck has been worn away by all the years of corporate teaching and conferences. Two of us had blanks, two of us didn’t, and the two of us who didn’t queued up behind the angle grinder and made sparks. I cheated, as is my wont to do: I decided to blank out a nakiri – a thing I later came to regret.
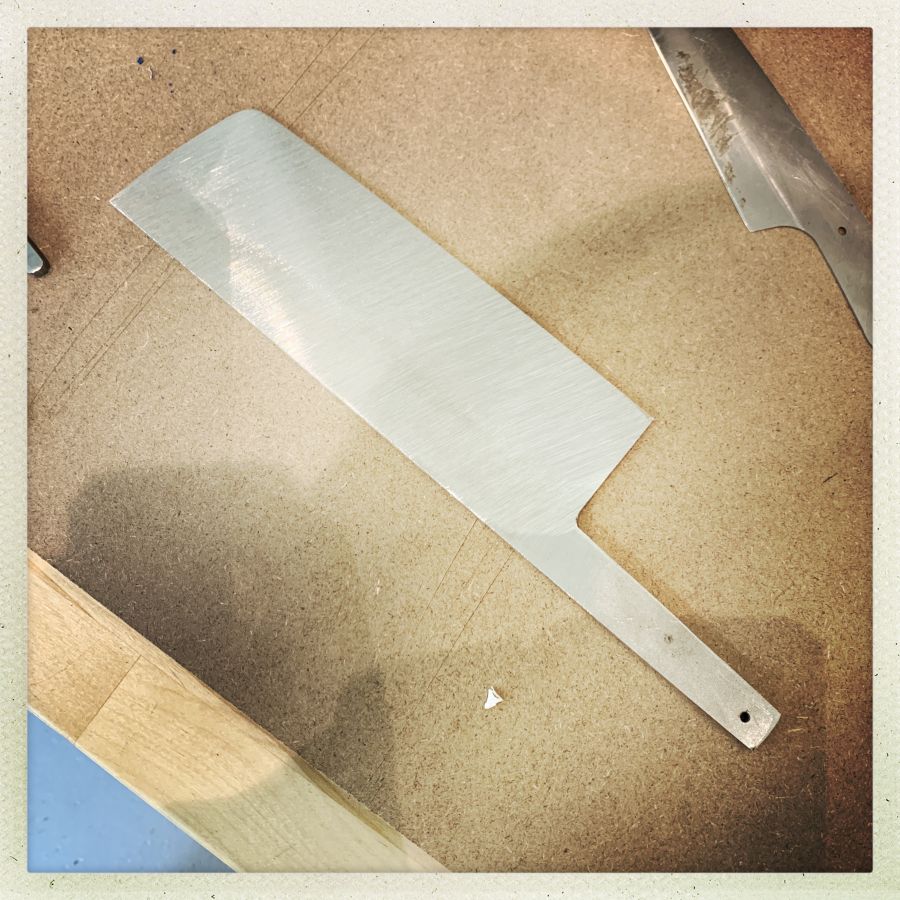
See what I mean? You make 2 cuts and curve the front with an angle grinder and you have a nakiri blank. Total time: 3 minutes.
You also have great big flat surfaces, which are a train-a-comin’ when the requirement is mirror polishes and perfect flatness.
Then, we got into the other stuff. Since the class was already split into the fast group and the slow group it worked out OK at first because the guys who had brought blanks could get right into making their patterns, while the guys who didn’t bring blanks got into grinding the edge-shapes of the blanks. In my case, that meant I had a whole lot of material to remove. I started thinking I should have made a paring knife. But there isn’t much room for a splashy temper-line on a paring knife. I was already deep in the land of trade-offs and not loving that aspect of it.
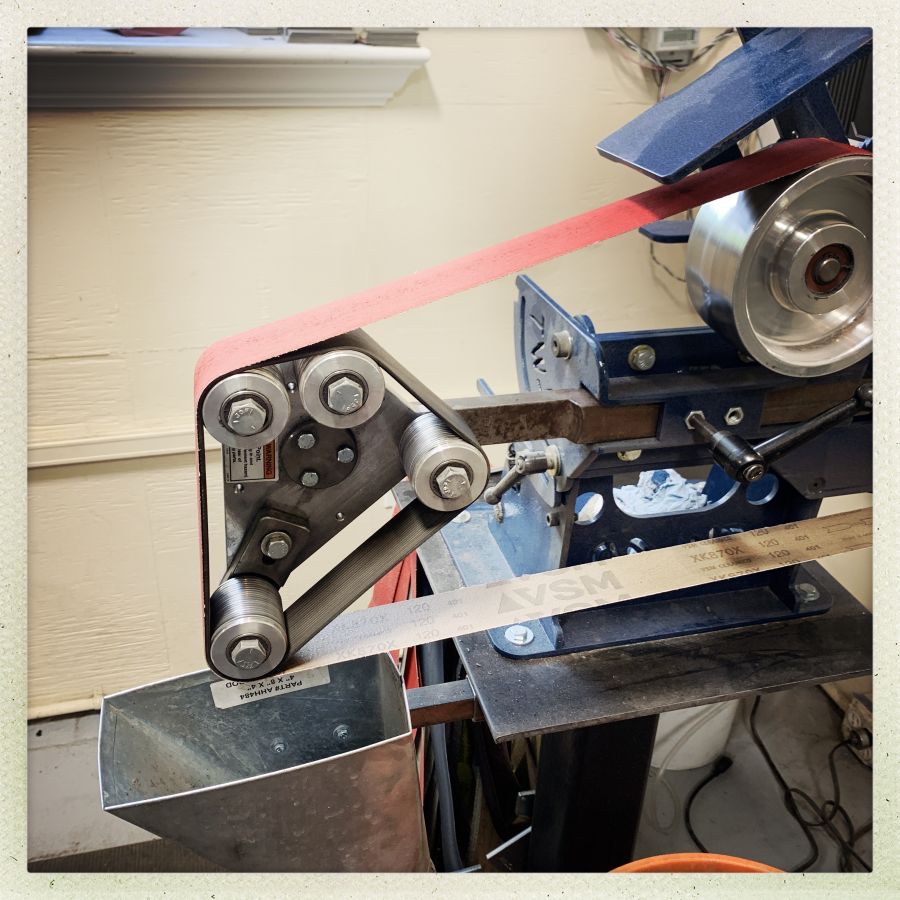
One of Greg’s grinders
There was a lot to learn from observing. Greg has 3 grinders in a row, each of which can be set up differently, so he can move between them without having to adjust platens or change belts. And I have to say, he’s the fastest grinder I’ve ever seen. To demonstrate some of his grinding technique he took a blank and went from mill-finish surface to mirror polish, hamon, and etched logo in about an hour. That was amazing. How was he so fast? He’s super focused on what he’s doing and he knows exactly where his hands and the grinder belt are. So he’s just on the right spot all the time and mistakes aren’t part of the scenario.
The grinder attachment above is for polishing – the belt behind the sanding belt is slightly curved and provides both backing and a “hot spot” (more like a “warm spot”) that inherently feathers into the rest of the blade grind. Very nice but … I never got to use it because someone else was always using it and I figured let the budding professionals go at it because it’s worth more to them. There was another grinder with a water-cooled glass platen that allegedly kept the blade heat down. I am skeptical: neither of the feed lines was discernably warm, which makes me think it’s not dissipating a lot of heat.
Watching Greg go at a blade was instructive. He does the “angle switch” technique very effectively and it helps him get all the scratches out on the grinder before getting to hand sanding. The “angle switch” technique is: each grit belt you use, you grind at a different 45-degree off-angle from the belt, so all the scratches from the previous grit are clearly visible in the steel. He uses the same technique for hand sanding and he goes at his hand sanding like he’s trying to kill something. Fast, and furious.
Surprisingly, Greg’s technique for producing a hamon is not substantially different from what I learned at Michael Bell’s. There are a few details, such as the refractory cement that he uses, and the heating tub that he uses, but the main difference was that he’s usually doing what’s called an “interrupted quench” – you quench the blade for 8 seconds then remove it from the oil. At that point it’s still around 600F. It’s hardened where it’s going to harden but that’s it. Greg then … grabs the thing in his hand (wearing welding gloves) and runs outside with it, manually bending any warps out as it cools. He says that’s OK as long as it’s hotter than 400F, at which point things start to crack if you bend them. I found it unsettling as hell, to see him running around with his gloves emitting plumes of smoke from where he was holding the steel. That’s kind of “Rambo” in my opinion. But, it works: he corrected some bends and the corrections stuck. Partly what’s going on is that the un-hardened parts of the bar are holding the rest of it in the bent position, with some tension. My suspicion that’s what’s going on was justified when some of our blades got hot during the grind and needed more bending. But, since a hamon is near the surface of a blade, you can’t grind deeply into it or you’ll grind it away, so the blade needs to be thinner than usual going in. It’s hard to argue with successes like Greg pulls off again and again and again.
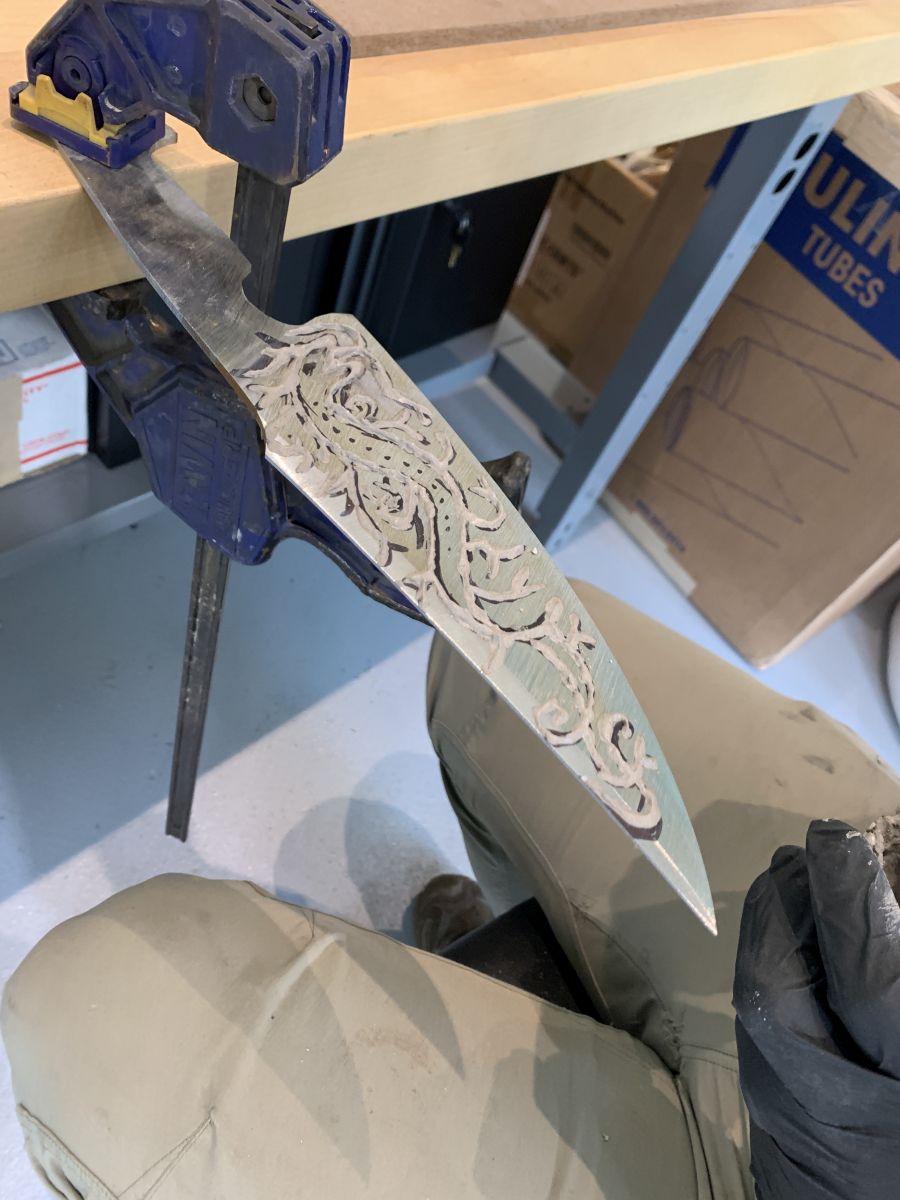
One of the other students’ knives in the process of clay-up
A lot of the puzzle is figuring out what thickness of clay produces what effect in the hamon. The fellow whose knife is above had a very concrete idea what he wanted to attempt and really worked at it. It came out great, too. Lots of detail remained in the blade, which was interesting. The trick is to use a very specific quenching temperature that is ideal for pulling a hamon out of W-2. And very specific thicknesses of clay and composition of clay. Greg ad hoc scienced his way, over years, to figure that out and once he had the right settings, he could bash out great-looking blades ad infinitum.
Around lunchtime the first day, the AirBnB where I was staying called me, desperate. It seemed I had mis-used the website and had booked only one night when I meant to stay for two. So of course my kit bag and such was there, and they had another guest arriving shortly. I then had to go get my stuff, and find another place to stay, which turned out to be hard because apparently all the deferred weddings due to COVID-19 had deferred to last Sunday and every hotel, motel, or Bed and Breakfast was full. I managed to find one place that was 1/2 hr from the class, but I wound up getting there late and leaving early, which translated to tired Marcus.
I learned something, too: I suck at art. I didn’t have a detailed vision of what I wanted to do – or, rather, I did, but Greg said “that won’t work.” And then I had no idea what to do. I’m not good at arting, and I made a few feeble attempts before Greg got frustrated and demonstrated how to do clay blobs and whatnot. So, the result is not something I consider “his” or “mine” it’s a thing we both had our hands on but it’s not a collaboration either. I’m fine with that; it’s an experiment and I needed a cleaver anyhow.
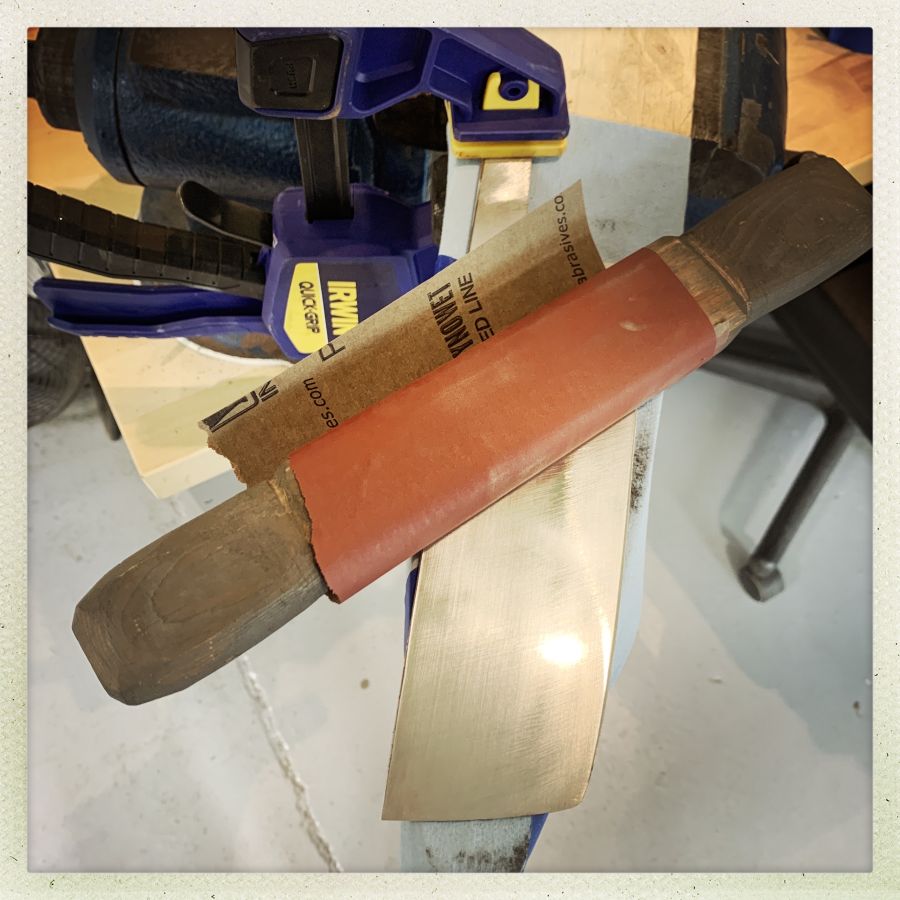
The rest of the class, or most of Day 2, was hand sanding. Just sanding and sanding and sanding. Then more sanding. Some of the guys had a head start and were able to get their blades to mirror polish and do some etching to bring out the hamon, but I did not. Basically, I have a blade that’s about 600-grit finish and I need to bring it to 2200-grit, which is another 4 or so hours or work. There really isn’t any way around it. So I watched closely as the other guys did their etching.
Then, I drove down to Baltimore to see my parents, who I haven’t seen since COVID-19 hit. And then home. I did a lot of driving on this trip but I had audiobooks and lots of bottled water and nuts and time passed. It was a good (not great) trip, and I learned a bunch of things, some of which weren’t the things I was interested in, but that’s fine. For example, I don’t find hand sanding for 5 hours while trying to catch up to other guys to be particularly edifying. But then, hand sanding utterly sucks no matter how you slice it. If you’re making a cleaver, remember that every little scratch or depression in the blade is going to haunt you up close and personal for days.
That’s a full day. But worth it, being around knife making in general.
I also suck at art but I persevere; perhaps magic will happen and I will succeed.
What a great opportunity to try something different! Yikes on the mirror polish. I only have to worry about sterling silver or gold, can’t imagine trying it on steel, but I bet it’s a lot more durable.
I think you “art” pretty well, but I do agree it’s difficult to have a strong clear vision of where you want to go sometimes. Usually that’s just due to not doing that thing enough. How many times have you tried this technique? I think the vision will come to you. Give yourself 500 times. Or so. You may be surprised at how differently you feel about it once you’ve done it 500 times.
Sounds a bit like a class you have to do a couple of times. Also frustrating if the steel is that significant a factor
How deep is the hamon in the steel?
You do art, you are wonderful at letting out what is hiding in wood* and metal, which is what sculpture is about. From what you have shown us of your process you do sometimes do rough sketches as a way of thinking through what you want to do or want others to do, being asked what you want on the spot is rather different to being able to ponder it at your own pace.
*glancing up at the medicine bowl you sent me, I don’t think I told you that I turn it regularly so I see each ‘side’ in turn bcause I don’t know which view I like most.
Jazzlet@#4:
You do art, you are wonderful at letting out what is hiding in wood* and metal, which is what sculpture is about.
I never thought of myself as a sculptor. But that might fit. I’m very much a “grind away everything that’s not what I wanted” sort, rather than a “take a blank canvas and make something on it that’s better than a stick figure” sort.
So glad you like the bowl. I have a few pieces of bog oak stuff I stare at and meditate. The grain is like a drug to me.
Two thoughts on the Hamon-making process.
I do not consider myself to be an artist – I aspire to be an artisan. I can draw a reasonable plan or blueprint for a project, but cannot seem to get any artistic visions out onto a piece of paper. Were I attempting what you’re doing with these knives, I’d likely either hire an artist to paint on the fireclay/whatever refractory in a mutually agreed upon design …. or, I’d find a line art design I liked, modify it in Inkscape to meet my needs, an cut a stencil with my stencil cutter and use that to lay out the refractory.
You do art fabulously. It’s difficult to find inspiration when you’re stressed and things have not gone as planned.
*gives bowl another quarter turn*
You have a good eye for what should be left, as well as for form in general, I obviously can’t say how much of what you make is what you intend to make, but intended or not the results are gorgeous.
I am looking forward to seeing the final results after you’ve gone through the tedious process of sanding and polishing.
I think your wooden bowls qualify as art. Drawing skills aren’t a requirement. Creativity and mastery of technique are the only requirements to craft artfully.