Harakka Island- Chapter 4

We’re on to chapter 4 of Ice Swimmer’s series, Harakka, an Island and today we’re heading toward the water. I’m always drawn to big, open water and these photos show off the sea beautifully. I’ll let Ice Swimmer fill you in on the details.


Chapter 4 – West

The western shore of Harakka is visible from Uunisaari and one conversation with Nightjar in the comments of a posting with a picture of Harakka from Uunisaari sparked the idea to go and explore the island.


1. Open Sea in the Southwest, ©Ice Swimmer all rights reserved

There is a path from near the northwestern corner of the Artists’ Building to the other side of the earthworks behind the building. The path leads to cliffs on the western shore of Harakka. When looking southwest from the path one can see some islands, but also open sea.

[Read more…]

Making a Rondel Dagger – Interlude 3 – Dubbin

With the work done, I have to protect both the leather covering of the scabbard and the iron fittings against the elements and medieval appropriate medium for that is so-called dubbin or leather food. Google does yield some recipes, but I did not bother searching for or following an exact recipe much – once I have known the rough composition, I plunged right into it as is my wont.

Ingredients in the mug.

So I took a stainless steel mug, put in it a piece of lard, about the same amount of unrefined beeswax (twenty years old, btw.) and I poured an “adequate” amount of olive oil on top of it. Then I lit the fire and stirred until it all melted together. It was quite interesting to watch – the pig fat dissolved of course first and the big beeswax piece last, but it did not take too long. In fact, it was over in mere minutes. I have measured the temperature and when it all was blended together the liquid had about 80°C. High enough to be dangerous, but not so high as to melt plastic or hiss in contact with water. It remained liquid long enough to touch with bare hand.

Finished dubbin in a plastic container.

Even so when pouring it into a plastic container for keeping, I have put said container in an even bigger one and poured cold water around it just to be sure. As you can see, the liquid has had a honey-like colour that I have found rather pleasing to the eye. It does not smell too bad either and when the product cooled enough to be touched by bare hands, I have simply dipped my fingers in it and applied it to the scabbard in no small amount. In fact I sloshed liberally all over it, making an uneven layer that was in parts over 1 mm thick.

Dubbin applied to the scabbard.

That of course does not look very pretty, so I took a heat gun and melted it all until it sunk into the surface. I was careful however to not heat it too much – just about to melt it and no more. Leather does not respond too well to heat and I did not want to damage it.

When that was done I rubbed the scabbard first with a paper towel which took off some of the excess dubbin, then simply by hand. The dubbin is actually relatively pleasant to touch – not unlike a hand lotion in fact, although it is more solid.

The leather strap tied around the scabbard unfortunately did not survive this – it was made from recycled leather of poor quality and tore off. I have cut a new one and this time I plied it with dubbin before tying it around – and that seemed to have worked rather well. The dubbin made the old leather soft and pliable and also sleek, so it was much easier to pull it through the holes and tie the knots than in my previous attempts.

I intend to buy a soft bristle brush at nearest opportunity that will be used for this substance exclusively. It has hardened into a yellow mass that looks like refined beeswax but is much softer to the touch – but not creamy as a hand lotion. I have labeled the lid of the plastic box and I have stored it in my workshop for future use. I think I got carried away a little here and made possibly a life’s worth supply.

If it goes rancid I will let you know. I hope not. And next time you see the “Rondel Dagger” title, there will be pictures, I promise.

Dubbin.

Harakka Island – Chapter 3

It’s time for the next chapter of Ice Swimmer’s series, Harraka – An island. Thanks again, Ice Swimmer. I’ll let you take it from here


Chapter 3 – Former FDF Building


1. Main Door, Former FDF Building, ©Ice Swimmer, all rights reserved

The building is from 1928 and it used to belong to Finnish Defence Forces and nowadays it is used by artists who can hire studio space for five years at a time there. This is the main entrance.


2. The building and the Birch, © all rights reserved

There is a big birch next to the building.


3. Rusty Ring, ©Ice Swimmer, all rights reserved

A ring fixed into bedrock next to the building. As for the picture, Caine was definitely an influence for me in this kind of photography.


4. Corner, ©Ice Swimmer, all rights reserved

We’re going around the building. This is the northwestern back corner.


5. Backyard and Fireweed, ©Ice Swimmer all rights reserved

There was a lot of fireweed in bloom on the island. Now we’re in the backyard of the Artists’ Building, looking at earthworks built when Harakka was partially fortified.


6. Tractor, ©Ice Swimmer, all rights reserved

The little tractor is probably used for hauling various things.

7. Chemistry Equipment, ©Ice Swimmer, all rights re

The building was used by the FDF as a chemical laboratory. For that reason, while there were plenty of wild raspberries, strawberries and other berries growing on the island, tasting them didn’t feel too attractive. The building is actually the third site for the FDF Chemical Laboratory. At first, the laboratory was in downtown Helsinki, in the same building that housed the University of Helsinki Chemistry Department and after that in one of the garrisons in Helsinki before it was moved to the island.


8. Whose Island part II, ©Ice Swimmer, all rights reserved

The ratio of shoes / webbed feet is fairly small.


9. Birch stump, ©Ice Swimmer, all rights reserved

At the southwestern corner of the building, there used to be a birch.

Now we have seen the building used by military chemists and subsequently artists and some of its surroundings. Next, we’ll go a back, a bit south in the backyard of the building.

(link to previous post, Harakka an Island: Chapter 2)


Youtube Video: Nurgle Plague Sword Build

Michael Cthulu is not a smith, he is a welder. And he does not make historically accurate replicas, he makes ridiculous, humongous swords from computer games that have no chance whatsoever to being actually functional in the real world.

But he is entertaining to watch and he has shown some tricks in his videos that are valuable to me in my workshop – like his unique working goggles with replaceable glasses.

He also seems to be a genuinely nice person, at least judging by the ammount of his products he auctions for charity ever since he makes enough money for comfortable living.

Mild content warning – the video takes almost an hour and contains half-naked and very hairy dude in his fifties doing dangerous things with fire, electricity and fast spinning machinery.

Fancy Bats

Joseph Zowghi has sent us another of his fancy bat portraits. This time it’s a group of Ectophylla albas, otherwise known as Honduran white bats, gathering under a leaf. I was happy to find this submission because I’m fond of Joseph’s drawings. The rounded, repetitive lines draw me in and the artist has a talent for making bats look appealing. Thanks so much for sharing, Joseph.

Harraka Island – Chapter 2

Today we’re back with Ice Swimmer for the next chapter in his series Harakka, an Island. Thanks, Ice Swimmer. I’ll let you take it from here…


Chapter 2 – Uphill


1. Crossroads, ©Ice Swimmer, all rights reserved

In picture 1 we’re looking south. The low wooden building is the brackish water aquarium building. We’re going to go uphill, to our right.


2. Geese Uphill, ©Ice Swimmer, all rights reserved

A barnacle goose family is blocking our way. They’ve got little ones so the parents may get aggressive.


3. Geese Uphill in More Detail, ©Ice Swimmer, all rights reserved

A closer look at the geese.


4. Uphill, © all rights reserved

After a bit of an undocumented detour, the goose family is elsewhere so we can try going up the hill. It seems there’s a dead tree at the end of the road.


5. Dead Tree and a Windmill, ©Ice Swimmer, all rights reserved

Indeed, a dead tree, a lamp post and a windmill/wind turbine. And there are a few gulls.


6. Footprints, ©Ice Swimmer, all rights reserved

Going up the hill and looking at the gravel, one begins to wonder: “To whom does this island belong?”


7. Building, ©Ice Swimmer, all rights reserved

The gulls are observing their surroundings and we can see a vaguely neoclassical building.

(link to previous post, Harakka an Island: Introduction)

Itsy Bitsy, Lean and Mean

This is the last in this Itsy Bitsy Spider week, that has gone on for almost two weeks. That does not mean however that spider contributions are not welcome anymore. Should you come across some pretty specimen, definitively take a picture to share.

Today’s picture is from rq: Just a lean, mean, bug-eating machine hanging out.

Picture is bellow the fold.

[Read more…]

Tree Tuesday

This week Tree Tuesday comes to us courtesy of Opus who took these photos on Mt. Batchelor near Bend, Oregon. The first shot shows just how windswept the location is with a tree that could only manage to grow in a single direction. The next two photos further demonstrate the harshness of the landscape in images of rock, scrub and the carcasses of long dead trees.  I find the set quite poignant, especially the last shot showing how the remains of a once proud giant breaks down to feed a whole new generation of trees. Thanks for sharing, Opus.

Mt. Batchelor, near Bend, Orgeon, ©Opus, all rights reserved

©Opus, all rights reserved

©Opus, all rights reserved


Pollination Party – Ants and Flies

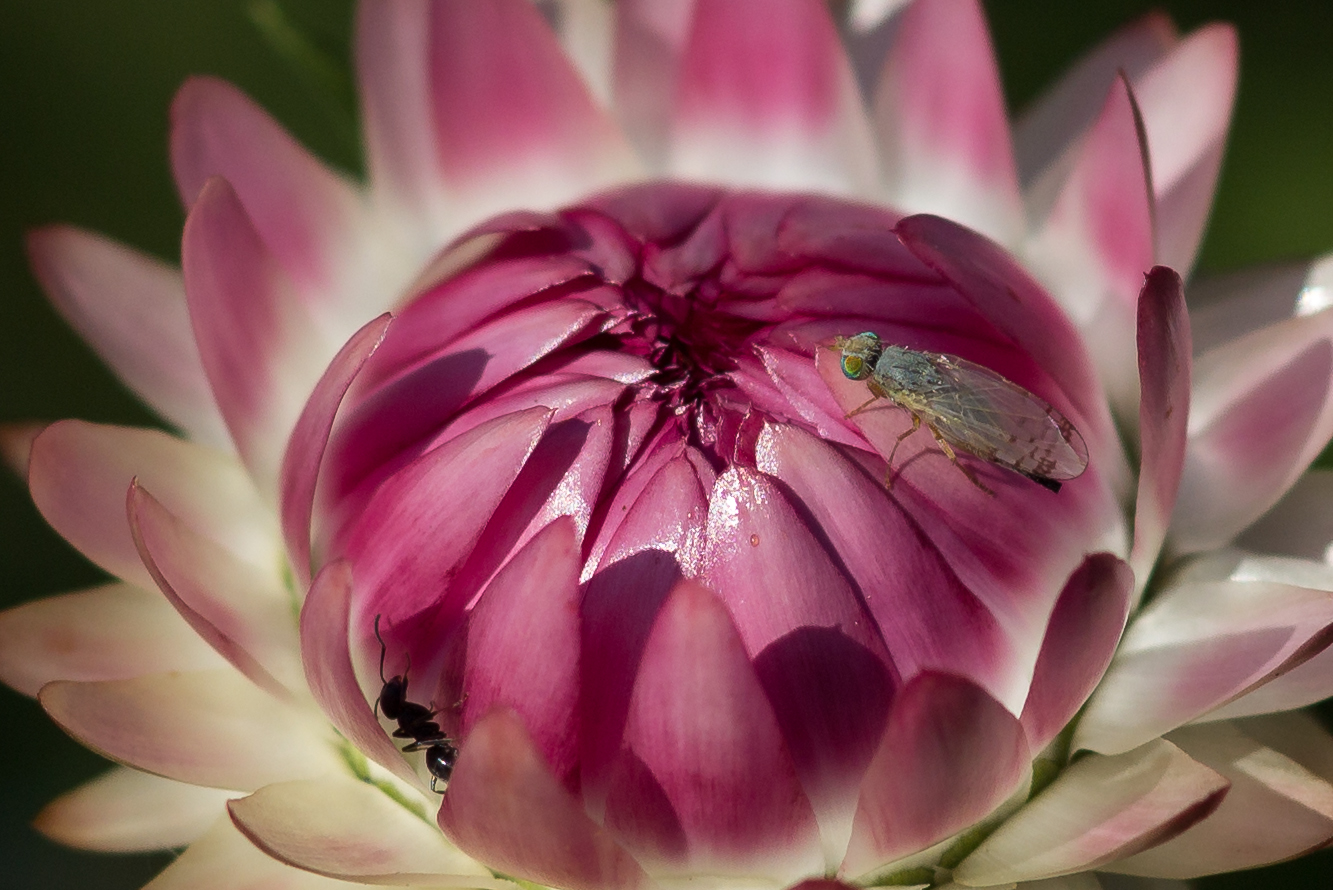
I truly am envious of Nightjar’s flowerbed.

Nightjar notes: Ants are not very good pollinators, but they definitely show up for the nectar buffet, as do flies. One curiosity I was told about the Stomorhina lunata is that the larvae feed on, very specifically, locust eggs!

©Nightjar, all rights reserved. Click for full size.

Acanthiophilus helianthi and an ant.

An ant. On a flower. In a picture.

Eristalis tenax a bee mimicking hover fly.

Stomorhina lunata


Anatomy Atlas Part 21 – Heart

Heart. An organ whose importance was known throughout the history, but whose real function was not.

©Charly, all rights reserved. Click for full size.

The one interesting fact about heart that springs to my mind is that one of the most important discoveries into how it actualy functions was done by a Czech anatomist Jan Evangelista Purkyně who discovered the specialized impluse-conveying neurons in 1837 (but I had to look that date up, since I have terrible memory for numbers). They bear his name “Purkynje fibers”.

I wonder whether kids in other nations around the world get to hear his name when learning about heart.

Making a Rondel Dagger – Part 16 – Chape

I had a very busy Sunday. My vacation is nearing its end and I have been hell-bent on finishing this project already, but things got in the way all the time.

The biggest problem with the chape was that I could not find any information about how to do it properly. There are some pictures of finished products  and some info about casting them from bronze, silver etc. but not about how to form one out of steel. So I had to start from scratch.

My first two attempts were completely unsuccessful. I do not even have anything to show you  – you are free to imagine some vaguely rectangular and bent piece of metal. What I am going to show you is my third – and final – attempt. I do not call it a success either, but it is at least big enough part of a success to yield a usable product. But I am not satisfied with it and I had to repress the urge to hurl it out of the window with great force.

In retrospect I think my biggest mistake overall was using too thick steel. The shovel that I was recycling was ca 1,5 mm thick and for this purpose probably half that thickness would be appropriate. Unfortunately I did not find any suitable piece of steel in my scrap pile.

Should anyone wish to avoid some of the mistakes I have made, here is the most important thing I learned: do not try to do it without dies and templates. It is a complete waste of time. Chape is a very complex piece of metal, bent and formed in multiple directions at once.

I wanted only the front face to be pretty, but even that has proved to be beyond being doable without a template, definitively without  a skill that I lack. And since I  also lack screw press, I had to do with my vice. So I have built a set of jaws – one formed approximately as the tip of the scabbard, and one with a matching hole about 2 mm bigger on all sides. After this I have heated a piece of steel, put it between the jaws and pressed it as quick as possible. After a few repeating and some repairs/adjustment of the jaws I have finally got a  shape that at leat partly fitted the tip of the scabbard. I might be on the right track here.

However, after a few presses the metal had nowhere to move – so I have cut it into stripes that I have intended to bend around the scabbard. I have again made the mistake of trying it first without a template. Again, complete waste of time.  I have only managed to bend them so they point straight to the back of the chape. I could not achieve the second bend to close the flaps around the backside.

So I had to fish around in my scrap pile some more. Two cuts that were left over from making the jaws have proved to be useful here – when put back to back, they were the same thickness as the wooden scabbard, therefore I reasoned I could make a template out of them.

So I took an angle grinder to them and made two nearly identical halves that mimicked the wooden scabbard. A few touches with a file were also needed in order to round the edges etc. I am not going to toss these, I am going to keep them as well as the jaws in case I need to do similarly shaped chape again.

I have deliberately made this template so most hammer blows will be perpendicular to the vice jaws. No matter how strongly you close the vice jaws on anything, hammering or filing/sawing it will eventually loosen it or break it. That is actually a reason why specially formed jaws with a groove have to be used for holding round stock.

With this I was finally able to bend and hammer the steel flaps all around so the fit more or less snugly around the tip of the scabbard. I did not want to close it all the way around and I intended to leave the stitching visible, because it was more or less clear that I will have to hammer and ever so slightly bend the finished chape onto the tip so it holds and does not fall of. However, I wanted to at least braze the gaps on the sides. I failed to do that, because I run out of silver solder and I will be damned if I spend another 10 € on this. At this point, I was starting to hate the thing. So I brazed as much as I could and sod the rest. Here you can see it all black, covered in solder and slag and scale. I have again carefully ground the excess solder with fine file and collected the silver dust, but I still did not feel like experimenting with making solder out of that dust.

This is when It I have got the only idea during this whole process that I consider valuable – I have found out that old, nearly worn angle grinder wheels are excellent for scraping of the scale and the slag – both of those are harder than files and they tend to smear abrasive papers. So a bit of water now and then to wash of the dust and a bit of scrubbing with an old wheel and I could proceed to polishing without covering my belts with grime. Polishing I have performed the same way I did with the throat. During this I have found out that the chape is much more asymmetrical than I was hoping for and that there are two poorly brazed spots on the sides. leaving unseemly spots, but as I said, sod it, I am not going to do this thing again.

When the chape was finished, I have put it and the throat on the scabbard and gave both parts a few wallops with a wooden mallet on a wooden board so they hold in place (for the throat I had to put a piece of leather on one side between the backside of the scabbard and the throat for better fit). And then I walloped it all some more so it holds.

So now the project is almost finished. All that is left to do is to sharpen and sign the blade, tie a leather strap around the scabbard and treat it with dubbin and make pictures. Neither of those things should pose any big problems and except the signing they cannot destroy anything. I hope.

Despite being a non-believer, I do understand the desire to be able to pray – a desire to have some control.