This is the part where work on more blades in parallel is no more possible, but I have tested an improvement that I have hoped for to both save time and increase precision. Grinding symmetrically free hand a blade mere 1,8 mm thick would not be easy. My previous knife of this type was made from 2,5 mm steel and I messed up the grind. I have spent more time correcting my messed up grind than I liked to and in the end I had to opt for a blade without a clear transition between the blade and a ricasso.

©Charly, all rights reserved. Click for full size.
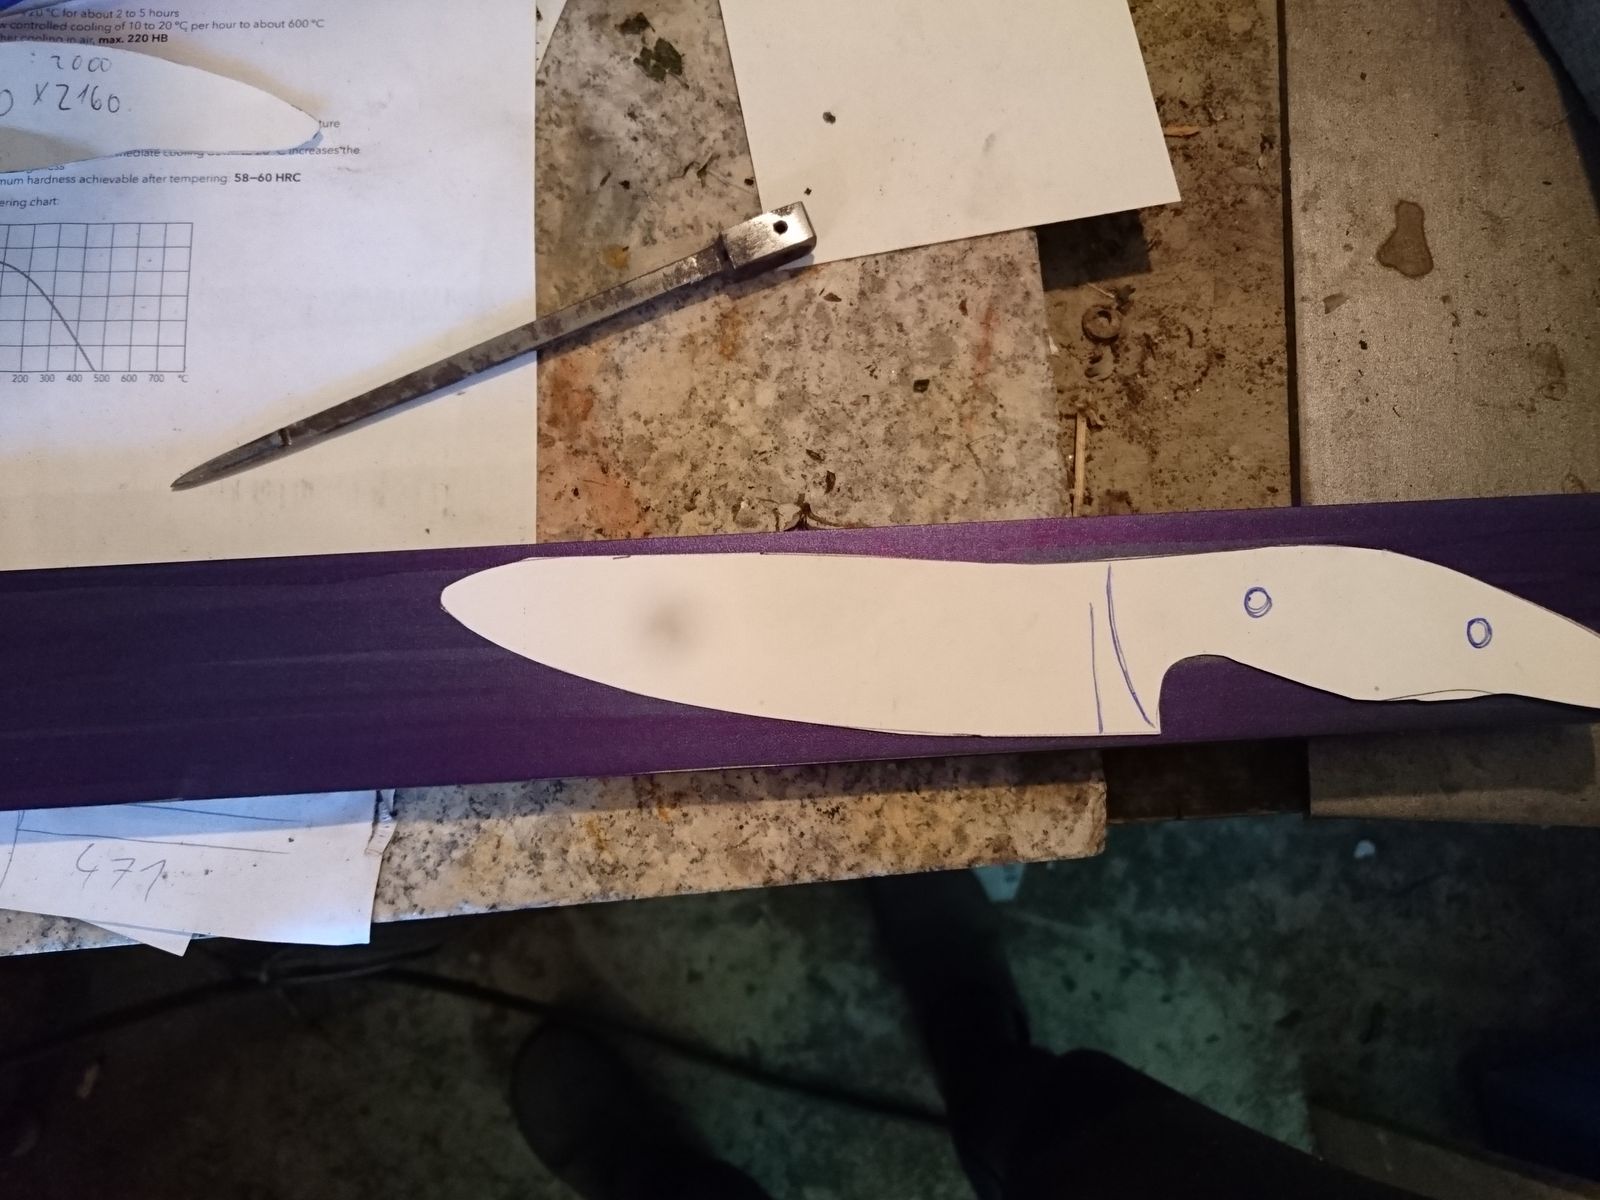
I wanted to do better this time, so I have built an experimental jig. As you can see on the picture, it is a simple 30×50 mm block of hardwood (a leftover from building the belt grinder). Two screws hold the knife on the smaller side, and three screws are right on the edge opposite the knife. Those three screws pop out a bit out of the wood and by how much they pop out is how big an angle I have between the blade and the platen on the belt grinder.

©Charly, all rights reserved. Click for full size.
I did not make a picture on the belt grinder, but you can see on the right the jig with a blade put against a machinist’s square. The advantage of this setup is that if I want, for example, ~0,3 mm thick edge before hardening and with the blade being ground all the way to the back, I know that I have to set the jig so that there is ~0,70 mm between the square and the back of the blade. Which is exactly what I have done, only without measuring, only eyeballing the gap and deciding “yup, that is what I want”.
The jig is set up so that I can screw the blade in two mirroring positions, but I did not bother too much with precision, because I did not know yet whether it will work or not.
It worked, but the imprecision was abit of a problem, as well as the way the blade is fixed. Two main problems occurred:
- The tip of the blade lay on the supporting table. That proved to be a problem, because it got snatched by the belt and dragged into the gap between the belt and the table. It messed up the grind in split of a second and I have spent no trivial ammount of time correcting it.
- Changing the blade on the jig took way too much time, even with accu-screwdriver. Part of the problem was the imprecision, because I had to monkey with it each and every time to get it right.
So a more precise jig that allows fro quicker change is required, and it also should hold the blade at least a few mm above the supporting table for better control. As a proof of concept it worked, it did indeed improve precision, but there is potential
During the grind I have made one time-wasting mistake, but I did not know at the time it is such. After I have established the grind with ceramic belts which go up to 120 grit, I continued to 240 grit on Zircon-carbide belts. As it turned out, I could have spared myself those zircon belts alltogether, but more about that next time.
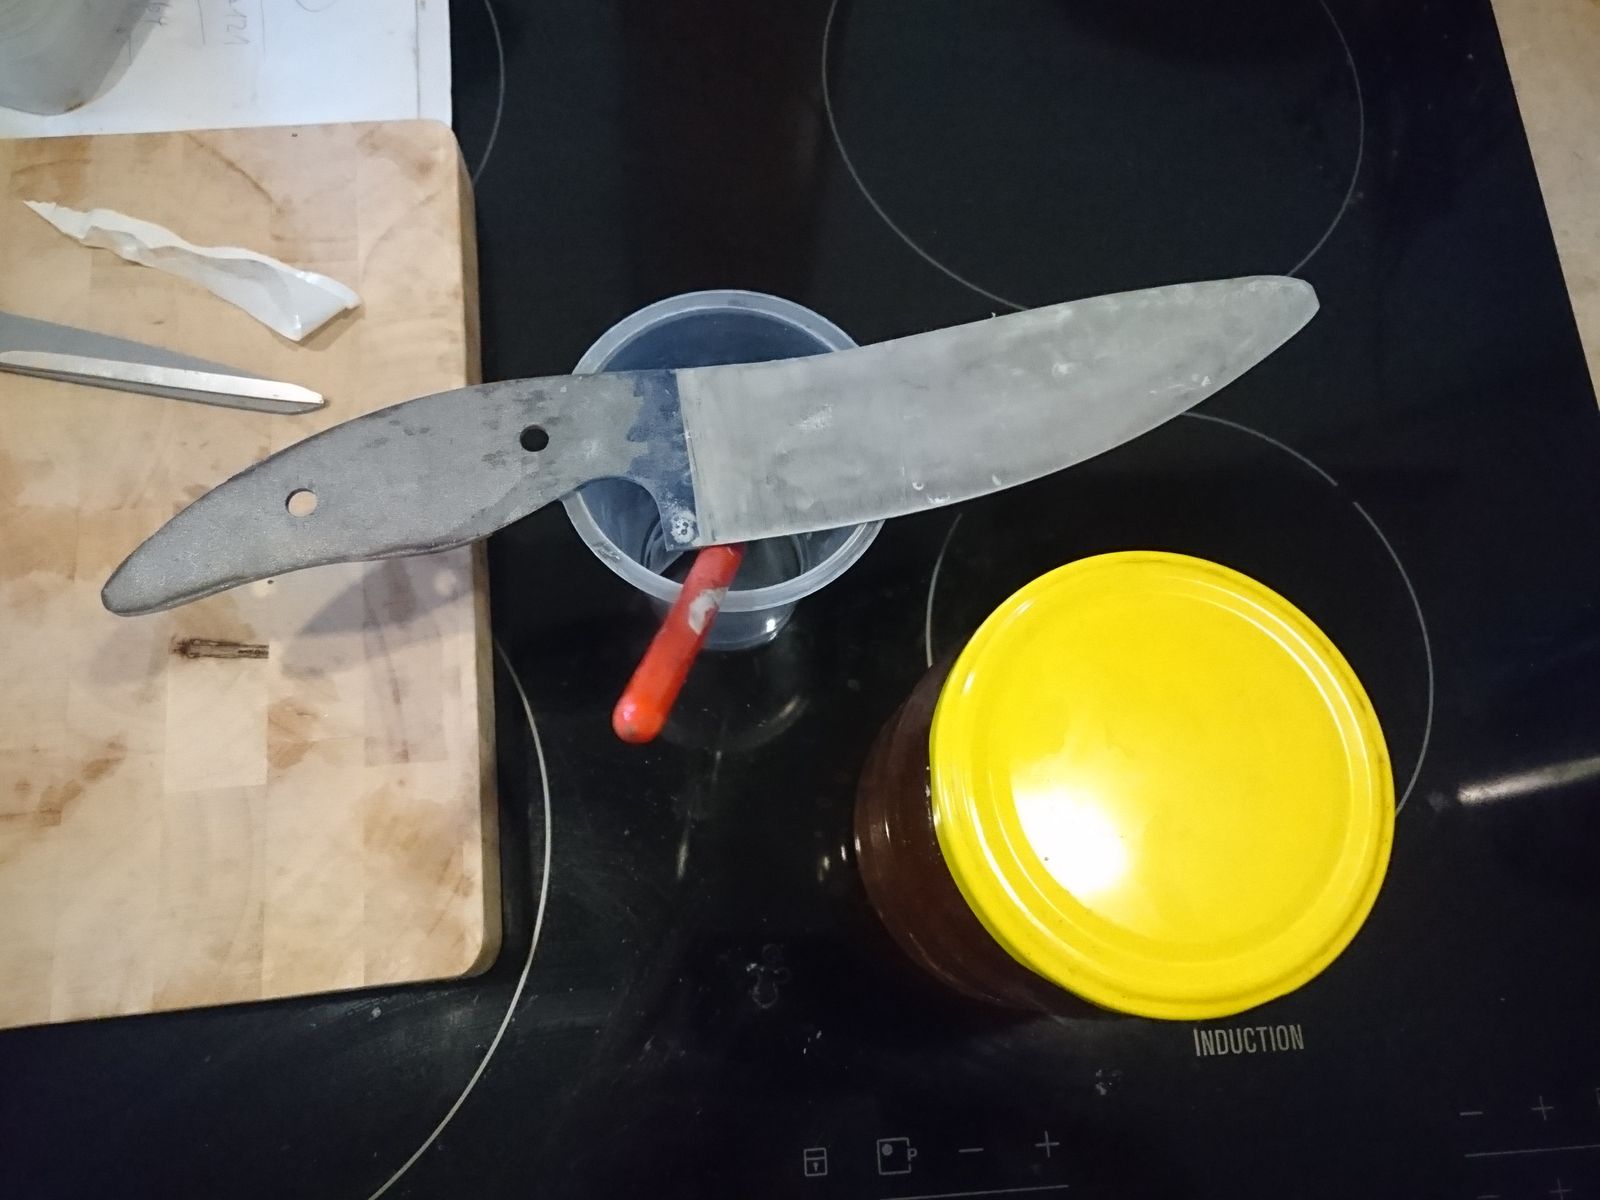
©Charly, all rights reserved. Click for full size.
I forgot to make a picture of the ground blade, but here you can see it as it went into the next step in the process. You can see that I have managed nice clean line all the way to the back of the blade, which I was previously not able to do free hand.
The time spent with this was about 1:15, or 75 minutes. From that time I have spent approximately 10-15 minutes monkeying around with fixing the blade on the jig, and another 5-15 minutes changing belts on the grinder. I also wasted some time correcting messed up grinds. I think that a better jig and above all not going above the ceramic belts should cut this time in maybe a half, but probably not more – it is fidly work and probably the biggest factor is experience. I remember Walter Sorrels saying in one of his videos that he manages this in 10 minutes, but only because he has been doing it for years.
Right now I am putting it into the “low hanging” fruit basket, because I think I can easily get a significant 15-20 min improvement through better jig and not going too fine with the belts. The rest is, unfortunately, entirely dependent on how fast I will scale the learning curve.