Whinge, Knives, Whinge

It took me four months to finish the batch of knives that I started in July. I have documented every hour that I have worked on knives, and the results are not good. I have only managed to work about 20 hours a week. Plus some hours that I have not counted, like when I was making new tools, repairing or improving them, etc.

Please allow me to whine a bit about the causes of that.

I either have chronic fatigue or I am a chronic hypochondriac. I am reluctant to go to a physician right now, partly because of the ongoing pandemic and partly because of last year when after several months of pain, I never got a conclusive diagnosis – and the pain only subsided after a course of steroids that I got for a really bad but unrelated virus (possibly flu) that snuck up on me right before Covid hit Europe. So I am not all too optimistic about our GP being able to help me with this.

I have been more or less tired ever since that possible flu. You remember that short walk in the forest in August when I brought home two full shopping bags of ‘shrooms? It took me three days to get over that, and one of those days my legs hurt so much I was barely able to go to the loo. After just several hours of hand-sanding knife handles my back and hands hurt for two days. Etc. etc. ad nauseam. Add to that the necessity to spend time carting my parents to/from doctors, stacking firewood to the cellar, caring for my trees, and the result is that I do a lot less work than I want to.

I have never seen the point of exercise because my body never reacted to it the way other people’s bodies seem to. I did get stronger, but only in relation to my starting point. In high school, when I could exercise under professional supervision free of charge, after months of work I was barely getting just below the level where my schoolmates have started. This year is that – only worse. I am not going exactly downhill, but just barely. Plus my hands started to hurt again two weeks ago. With the sun gone, I have at least looked at what safe dose of Vitamin D I can take in supplements and I am taking that because it seems to help a bit.

Whining over. I hope it gets better. At least it is not getting worse.

The last knives I have finished are four universal kitchen knives from a batch of five blades. One of those blades was not suitably hardened after all- near the tang was about 2 cm soft part. I do not need to toss it, but I do need to try and quench it again with the next project.

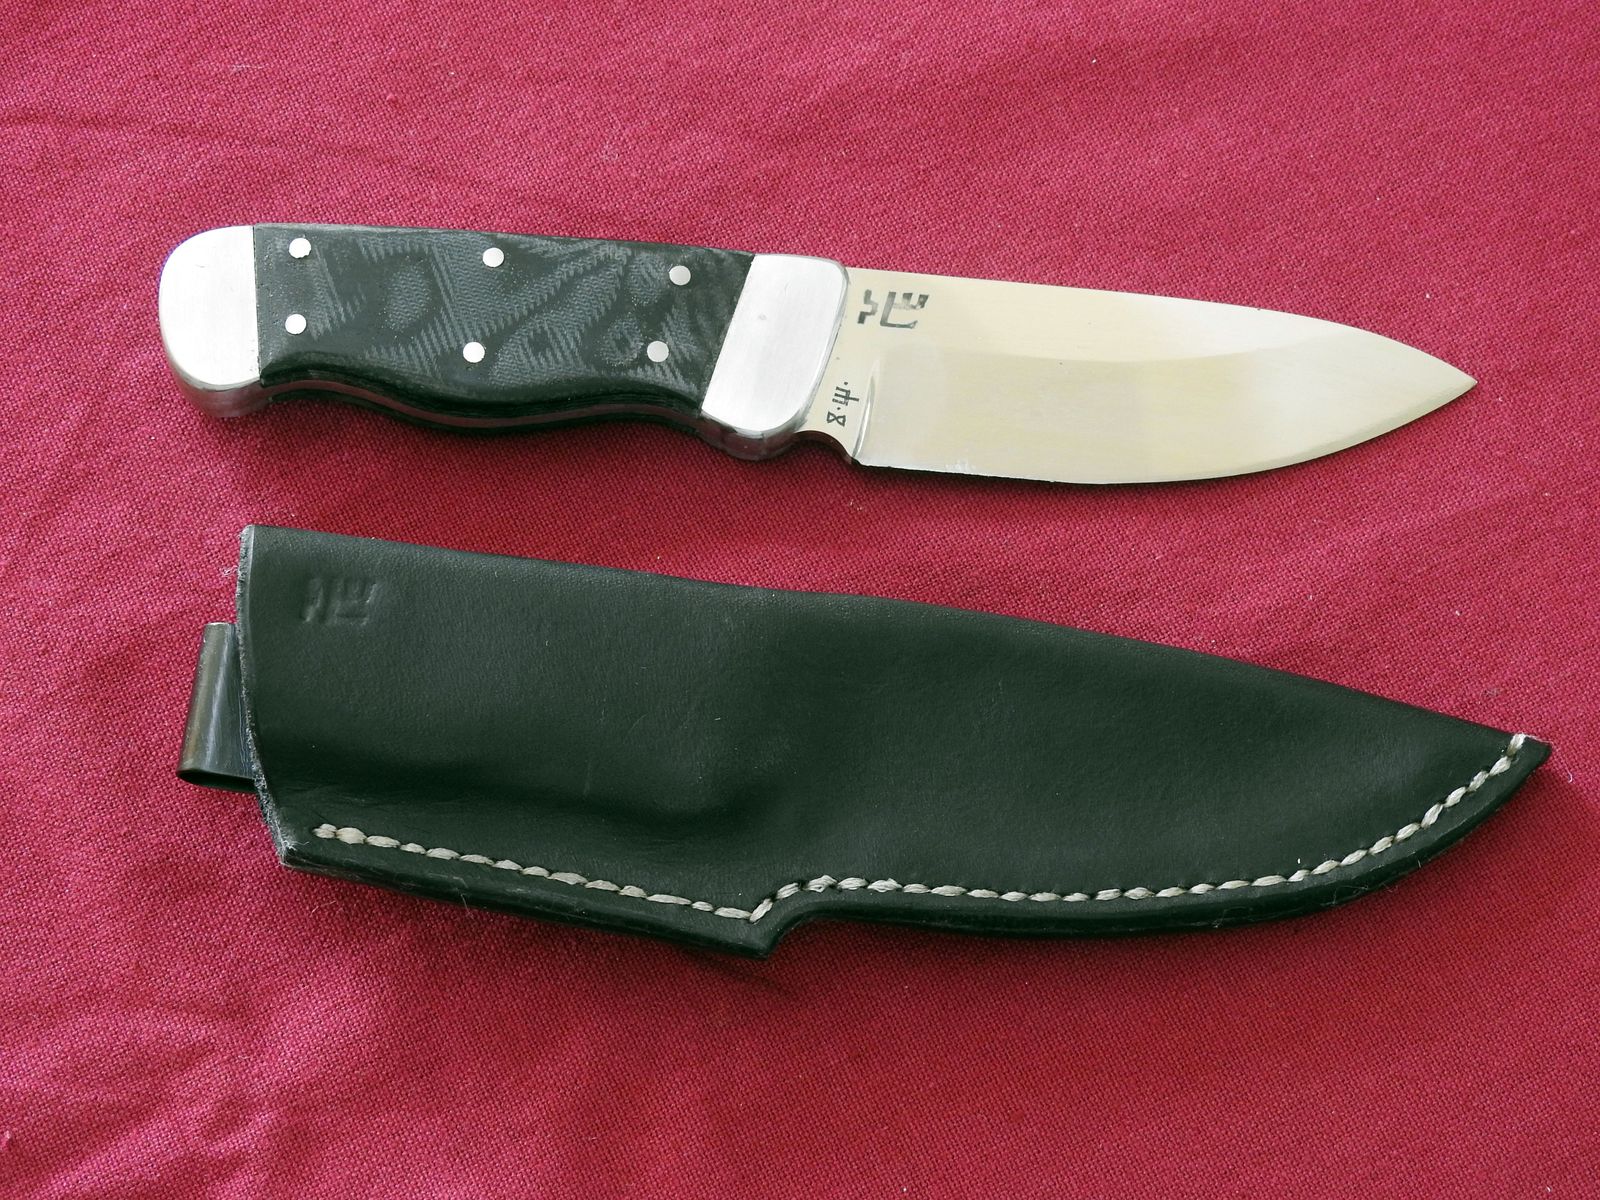
These are a bit heavier and thicker (3mm) than my previous knives of this type because they are made from what was left over from the slabs for chef knives. I have also changed the geometry of the handle a bit – instead of a rounded rectangular profile it has a rounded trapezoid profile. They are also about 2-4 mm thinner overall and 5 mm thinner and shorter at the front to better allow a choked-up grip with thumb and index finger on the blade. And they are pointy this time.

One knife has the handle from apricot wood and I have tried tubular pins filled with the same wood. I think it looks good and I will use that idea in the future again.

© Charly, all rights reserved. Click for full size.

© Charly, all rights reserved. Click for full size.

Two knives have the handles from pickled black locust. It is perfidious wood, in the future, I have to be more careful – the scales were probably not fully dried when I ground them to final size and they shrunk on me a tiny bit when I was finishing the surface with resin. So the tang does exceed the handles a tiny bit. That can happen due to a bad shaping job too, but that was not this case – they were perfectly flush originally, I swear. Lesson learned I have to put this wood in the oven for an hour or so before glue-up and grinding the outline. Now I can forget the lesson before finishing the next batch.

© Charly, all rights reserved. Click for full size.

© Charly, all rights reserved. Click for full size.

© Charly, all rights reserved. Click for full size.

© Charly, all rights reserved. Click for full size.

And last was fitted with padauk wood that I have again got for free with steel shipment. A prime example that there really is no need to use tropical woods, it does not look that much better than the black locust.

© Charly, all rights reserved. Click for full size.

© Charly, all rights reserved. Click for full size.

Knives are a bugger to shoot, I will have to build myself some better lighting system. Either the blade is over-exposed, or the handle is under-exposed, or the colors are off, or all three.

If you are interested in knife making, on Sunday I will start a detailed series about my next knife-making project. Not because I am qualified, but because I want to.

Brass Chisel

I made a new tool. I do not know whether someone else is already using it in a knife-making context, I would not be surprised if it were so. But I never heard anyone talk about it – a small chisel made from brass. I think it is a very good addition to my toolbox, well worth the ten minutes or so that I have spent making it. The inspiration were tools that I was using in my previous job to clean burnt plastic off of various testing devices.

© Charly, all rights reserved. Click for full size.

This may sound like a joke tool, akin to the inflatable dartboard, chocolate kettle, or ceramic rivets, but it is not. But why would anyone make a chisel out of a soft material like brass, that will not hold an edge?

I am glad you asked.

When making knives with the use of epoxy glues and resin, an inevitable problem arises – epoxy stuck to places it should not be stuck to. I am always doing my best to clean any rogue epoxy from the bolster/blade boundary etc before it hardens with a towel soaked in denatured alcohol, but the epoxy tends to flow and bleed over during curing too, plus there is often some contamination on the blade where I fail to spot it in time. That needs to be scraped off, very carefully, without damaging the blade surface.

With my last batch of knives, I have used with great success a square piece of brass, so for the last few pieces, I ground it roughly into a chisel shape and fixed it to a handle. And it works great, exactly as it is supposed to work.

There are several reasons for using brass and not other materials like alluminium or mild steel:

  1. Brass is harder than epoxy, resin or wood, but softer than even unhardened steel. So it can be used to scrape the glue off steel not only on the blade but also on the tang, without damaging the polished surfaces.
  2. Unlike alluminium, Brass does not come with a hard-oxide layer from the shop, neither does it form one over time. It forms a patina, but that patina is not hard enough to scratch steel. Alluminium does scratch steel, partly due to the oxide layer, partly due to galling. Ditto mild steel.
  3. Brass is one of several so-called non-galling alloys, but alluminium is a strongly galling metal. That means that brass does not lead to wear and tear when it slides on a steel surface, whereas alluminium will tend to contaminate, even if not necessarily scratch (if you remove the oxide layer beforehand thoroughly), steel on contact.

And thats all, folks. If you need to scrape glue off of polished surfaces, a brass chisel might be just the tool for you.


Prototyping Chef Knives

This was an interesting project. Interesting in the sense that nearly nothing went as planned.

First I started to make five blades and I broke one after hardening, so I have made it into a smaller knife for my neighbor. But what happened after that was a real bummer – the four remaining blades stubbornly resisted my attempts at tumbling. After over a month in the tumbler, none of them had the pretty, regular finish that I have gotten on my full-width tang blades. Maybe the point of balance of these blades, or their width, or both, have played a role. I simply do not know. I only know that after over a month I took it as “lesson learned, you cannot tumble these, finish them or toss them as they are”. And because they are prototypes whose main purpose was learning, I have decided to use them as they were.


The first piece went on a bed of flowers into a land far, far away. What happens there is in the stars and out of my hands.


The second piece I have finished with an experimental piece of wood – one of the very rotten willow pieces that I have stabilized with resin during my first tests. Only the piece was just a tad thinner than I needed, so the resulting handle is slimmer and straighter than I intended it to be. I am keeping this knife for myself. I just cut onions for dinner with it and it works reasonably well. Whether it works better or worse than other chef knives I cannot evaluate, since I do not use chef knives regularly.

© Charly, all rights reserved. Click for full size.

© Charly, all rights reserved. Click for full size.

© Charly, all rights reserved. Click for full size.

The handle looks…. interesting, but not very kitchen-knifey. I have used dark brown dye for the resin on the assumption that it will give the wood the most natural look. And it did that. Only it gave the wood also a decidedly camo-tacticool look. I think it would be great for a bushcraft/camping knife, but on a kitchen knife, it looks a bit odd. But maybe infusing the wood with bright colored resin – yellow, red, green, or even blue – might lead to interesting results. I am definitively going to try that next time. The rotten log will not burn – yet.

I have made my first bolster from buffalo horn here and fitting that and the handle together with the curved spacer from bone went reasonably well right until the last step in the process. That last step was buffing up of the horn. I have used my DIY red hematite buffing compound because it worked well on the horn – it is less aggressive than industrial steel buffing compounds. But some of it got stuck in the pores in the bone and it is impossible to clean afterward. That is unfortunately a common problem with bone – it has nearly invisible pores that tend to pop-up at the very end of the work when the piece cannot be replaced. So working with bone is always a bit gamble and you often get some dark spots here and there. It is not plastic but a natural product after all. But these red spots look like someone bled all over it. Grrr.


The third piece got fitted with bubinga handle and bone bolster. It goes to my former colleague, who has been patiently waiting for it for nearly a year by now.

© Charly, all rights reserved. Click for full size.

© Charly, all rights reserved. Click for full size.

Nothing went wrong with the knife itself. I have fitted the bone bolster with the handle really well, there are no gaps between the white bolster and the blade. Nothing to complain about except the large cut in my right thumb during assembly because the blade cut during all that wiggling through several layers of cloth and masking tape.

Bubinga is beautiful and very hard, but it is not a wood that I would normally use. It is not grown sustainably and the species, while not endangered yet, are on a way to becoming endangered. But since I got this piece for free with a shipment of steel, I have used it. I think I got it for free because it had a worm-hole, but luckily enough it got completely ground away during work. And the piece was big enough for me to make the handle in a shape and size that I have initially intended. It has a trapezoid-profile with rounded edges, for better grip and edge-alignment.


The fourth blade was fitted with a horn bolster and cherry crotch wood with a bone spacer. And this is the closest to my intended design of all three. It is now in the possession of my main tester – my mom.

© Charly, all rights reserved. Click for full size.

© Charly, all rights reserved. Click for full size.

The cherry wood is very beautiful, all the more pitty for the unseemly cracks. I will have to devise and use some kind of end-cap for cases like this when it would be a waste to toss the wood but there are some blemishes on the end grain. My mother does not mid it as it is and I hope it will serve well. Apart from these cracks, the only thing that went wrong was a cut in my left thumb – yup, I got symmetrical cuts with different knives.

Stats for all these knives: blade ~210 mm length, 3 mm thick, 50 mm wide, grip ~130 mm long. They are more forward-weighted than my full-width tang kitchen knives, so they would be probably very effective choppers too – the point of balance is right at the heel of the blade.

Hallowe’en Photo Festival of Fun and Fundraising

Today’s photo is of a ‘spider mat’ sent in by mrandmrsoccupant. This fabulous work of art was made in Eugene, Oregon during the mid-1960, when the artist was still in grade school. It’s been kept safe all these years by the artist’s mother, who recognized a masterpiece when she saw it.

Spider mat, mid 1960s, ©mrandmrsoccupant, all rights reserved

Marcus Gave Me Wood, Here Is What I Did With It

Marcus sent me a piece of stabilized maple burl last year. It wasn’t very big, not enough for my usual chunky knife handles, but it was big enough for two badger knives, so I used it for the last two blades in the current batch.

I did not do the brass bolsters and pommels very well, I am afraid. The pins refused to blend in – they do so so seamlessly in aluminum and stainless steel, but so far I did not have any luck with brass. And since this blade is stainless steel, some artificial extreme patina would not look proper. I tried to make the heads rounded this time, but I did not like the look of it at all, especially because I did not position them correctly for that kind of look. Nevertheless, the extremely beautiful wood from Marcus, when polished with beeswax, does redeem the knives a little. And when I saw how pretty the wood is, I have decided to make better and nicer sheaths for these knives too.

© Charly, all rights reserved. Click for full size.

© Charly, all rights reserved. Click for full size.

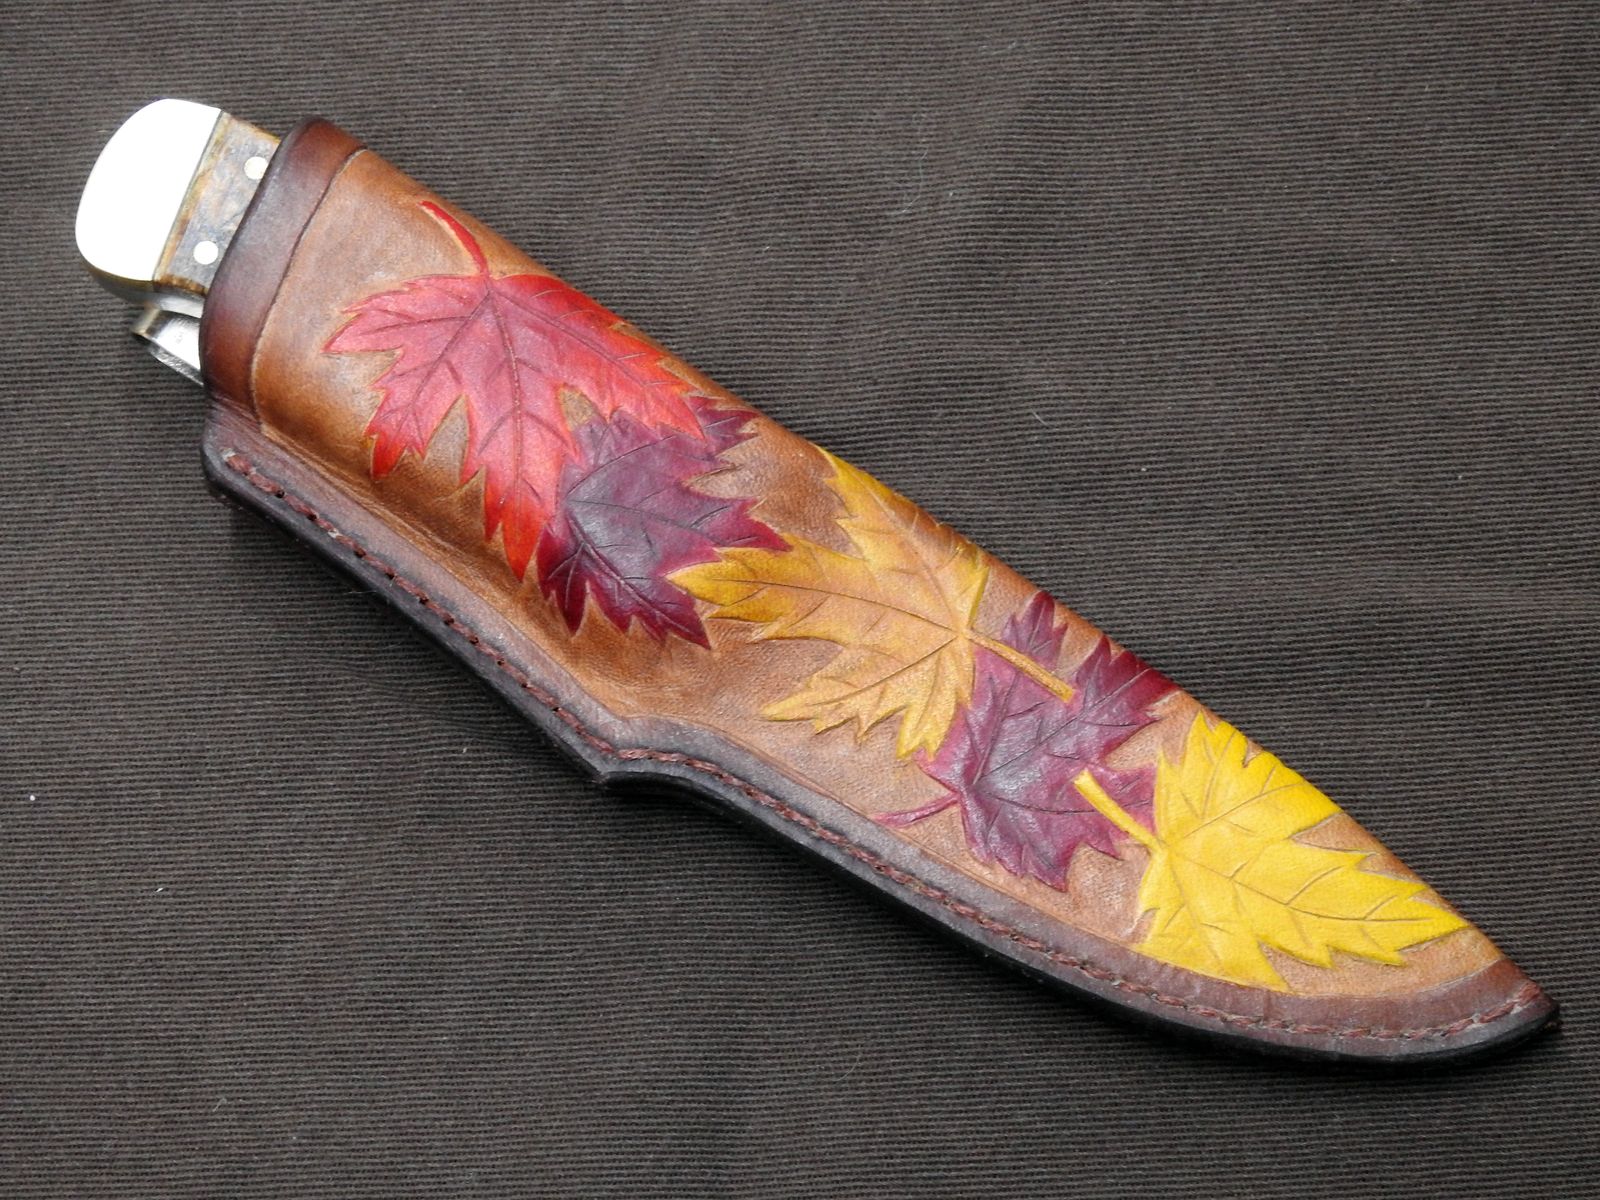
This is the better of the pair. Making the silver maple leaves was real fun, and I have managed to get the colors very close to what I have originaly designed in Photoshop.

It looks pretty, but silver maple is not native here so for the second one I have used a different design and color palette – yellow small-leaved linden leafs.

© Charly, all rights reserved. Click for full size.

© Charly, all rights reserved. Click for full size.

The small-leaved linden tree is pretty common here and it is also Czech national tree, so I have been intentionally a bit patriotic with this one. Unfortunately, I run out of the medium thickness leather so I had to use the thicker one and it was just a tad too thick for this small knife design. It is not a functional problem, only the leather could not be formed so snugly around the knife, because the knife would not get out.

I think my leatherwork is improving and I like these leafs-designs. I shall definitively use them more, even though they are a bit labor-intensive, especially since I do not intend to use the same design twice. I might use the outline, but I will always at least mix up the colors differently.

Upcycling Old Jeans

During my first experiments with resin stabilized wood, I had a lot of dark brown leftover resin at the end of it. So I have decided to do a little experiment.

I took some old black jeans, cut them into squares of approximately the sizee of a hand palm, soaked the pieces in the resin, stacked them in a receptacle and I poured all the remaining resin all over them. I have tried my best to chase and push manually all the bubles out and let it harden.

The resulting material has an official name – micarta – and the results look quite well, I think.

© Charly, all rights reserved. Click for full size.

© Charly, all rights reserved. Click for full size.

The pieces were not too big, but big enough for four small scales for two of the badger knives that I had in production, so I have used them straightaway. The material works well, it is sufficiently hard to take decent polish, but not so hard as to be difficult to work with. It does heat up a bit and clogs up sanding belts, but reducing the belt speed and using only fresh belts did away with that problem.

© Charly, all rights reserved. Click for full size.

© Charly, all rights reserved. Click for full size.

That the layers are not perfectly perpendicular and flat adds a bit more character to the material, which I like. I think it is a good way to use excess resin and these knives should now be extremely resistant to elements – the blades and fittings are all stainless steel, the handle scales are micarta and the sheaths are leather infused with beeswax. They would probably survive for a non-trivial duration in fog and rain outdoors. Not that I would do that to them.

I am also pleased that now that these knives are significantly less work than the bowie-type small hunting knivest that I was presenting previously. The goal is to have a mix of cheap(ish) and expensive items on offer in the future, I do not wish to only make luxury items that take weeks to months finish each, neither do I wish to destroy my enjoyment of the craft by bogging myself down in repetitive tasks o making the same thing over and over again.

Hallowe’en Photo Festival of Fun and Fundraising

It’s October, which means that means that Hallowe’en is just around the corner.  The bloggers here at Freethought Blogs will be hosting a Hallowe’en Fun and Fundraising event to show off our talents, including fall photography, and you’re invited to play along. There will be other events happening on Hallowe’en Day so stay tuned to hear about those, but the Photo Festival starts now, so you’ll want to tune in often to see what our fellow bloggers are doing with their cameras.  I’m pretty sure there will be spiders, but who knows what else could turn up. But wait, we want to see your photos, too. All of the photos will be posted under the title above, so they’ll be easy to find.

PHOTO submissions should be sent to affintysubmissions@gmail. com (the address is always in the left sidebar under the percolating head, and the link there will open up an email form for you). If you’re able and so inclined, you can donate to the cause at our PayPal at FtB Defense Fund.

As soon as we have the schedule for the Hallowe’en Day event, I’ll point you to it, but for now, why not pick up your camera and go outside and see what you can find. They don’t have to be current photos. You can search through your stash, too, but fall is a gorgeous time of year, so why not get outside while you can. It won’t be long until Winter arrives, dragging Covid with it, which means a lot of isolated indooring. Ugh. Don’t waste this opportunity to get out for a walk before that happens.

Today, the Photo Festival of Fun starts with a submission from our regular reader, Avalus, who has sent in a deadly dragonfly to start things off. It looks to me as if this guy is camouflaging while waiting for an unsuspecting fruit-eating bug to happen by, so he can gobble them up. Wham! Avalus then tortured the berries by making them into jam, so this harmless-looking photo is anything but.

Dragonfly with Blackberries  © Avalus, all rights reserved.


Finally I got Something Done

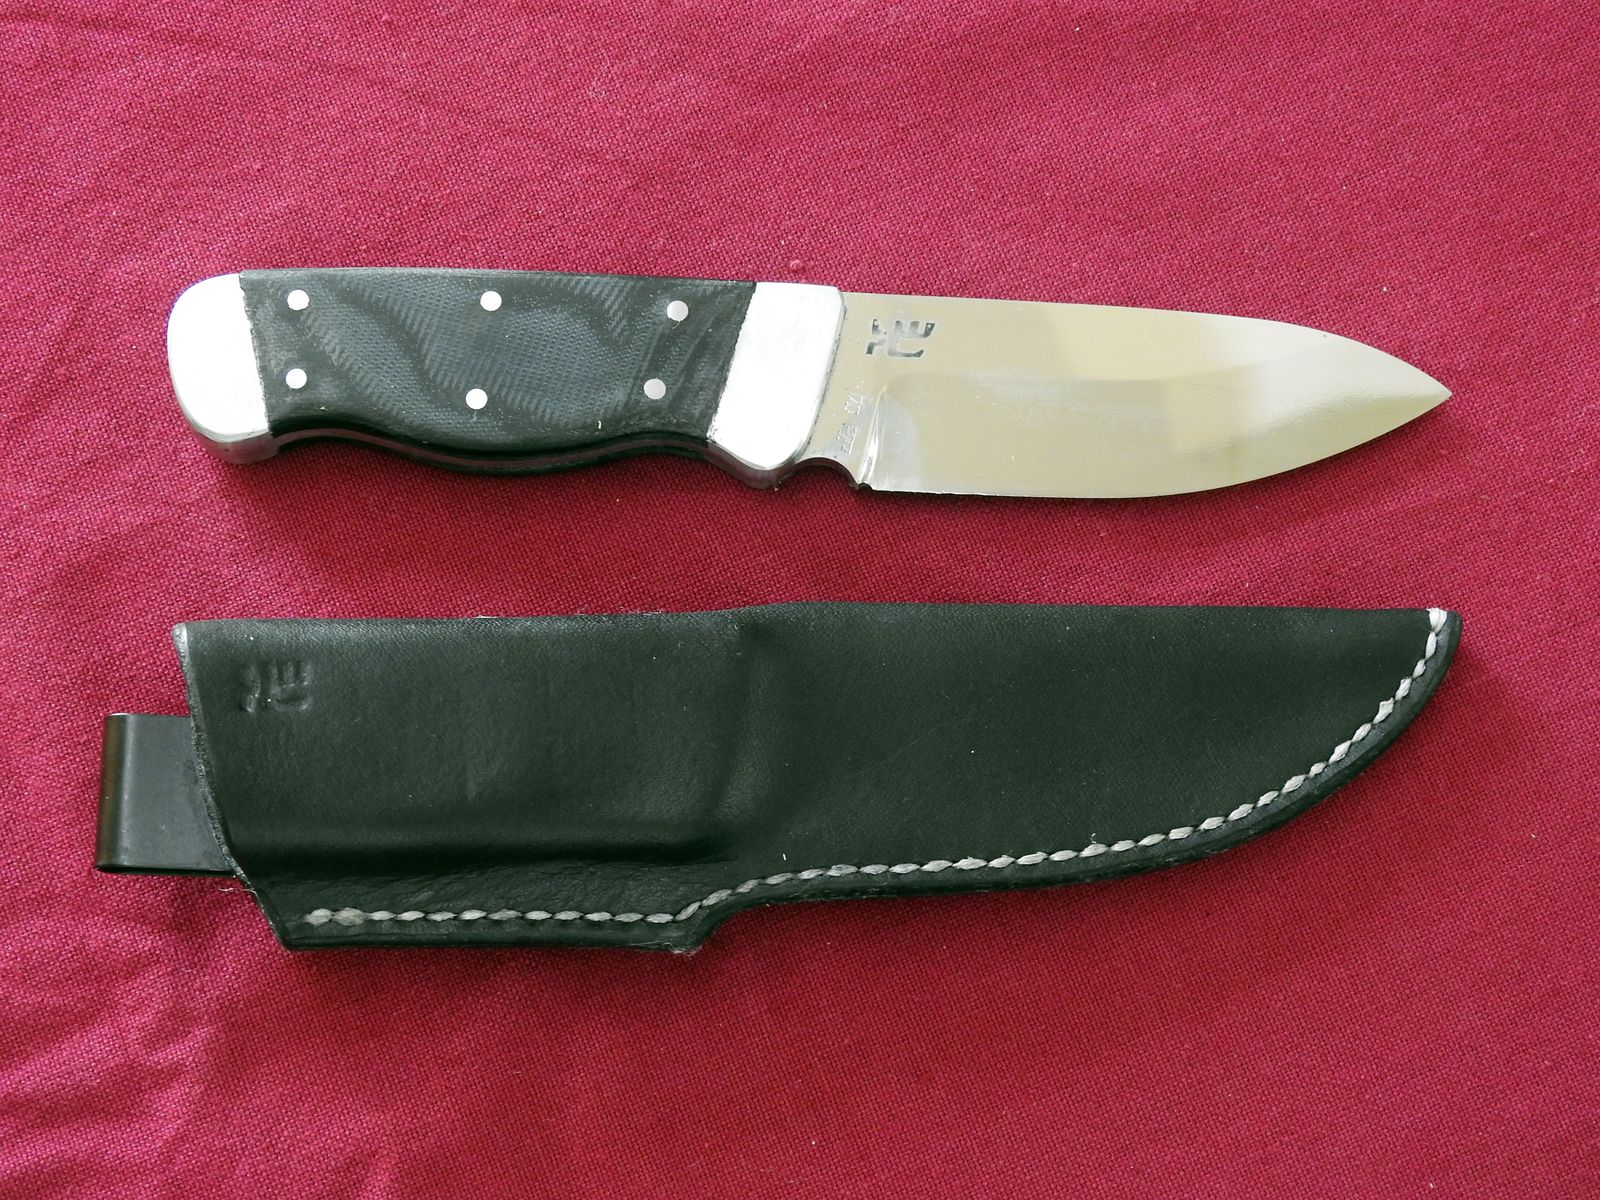
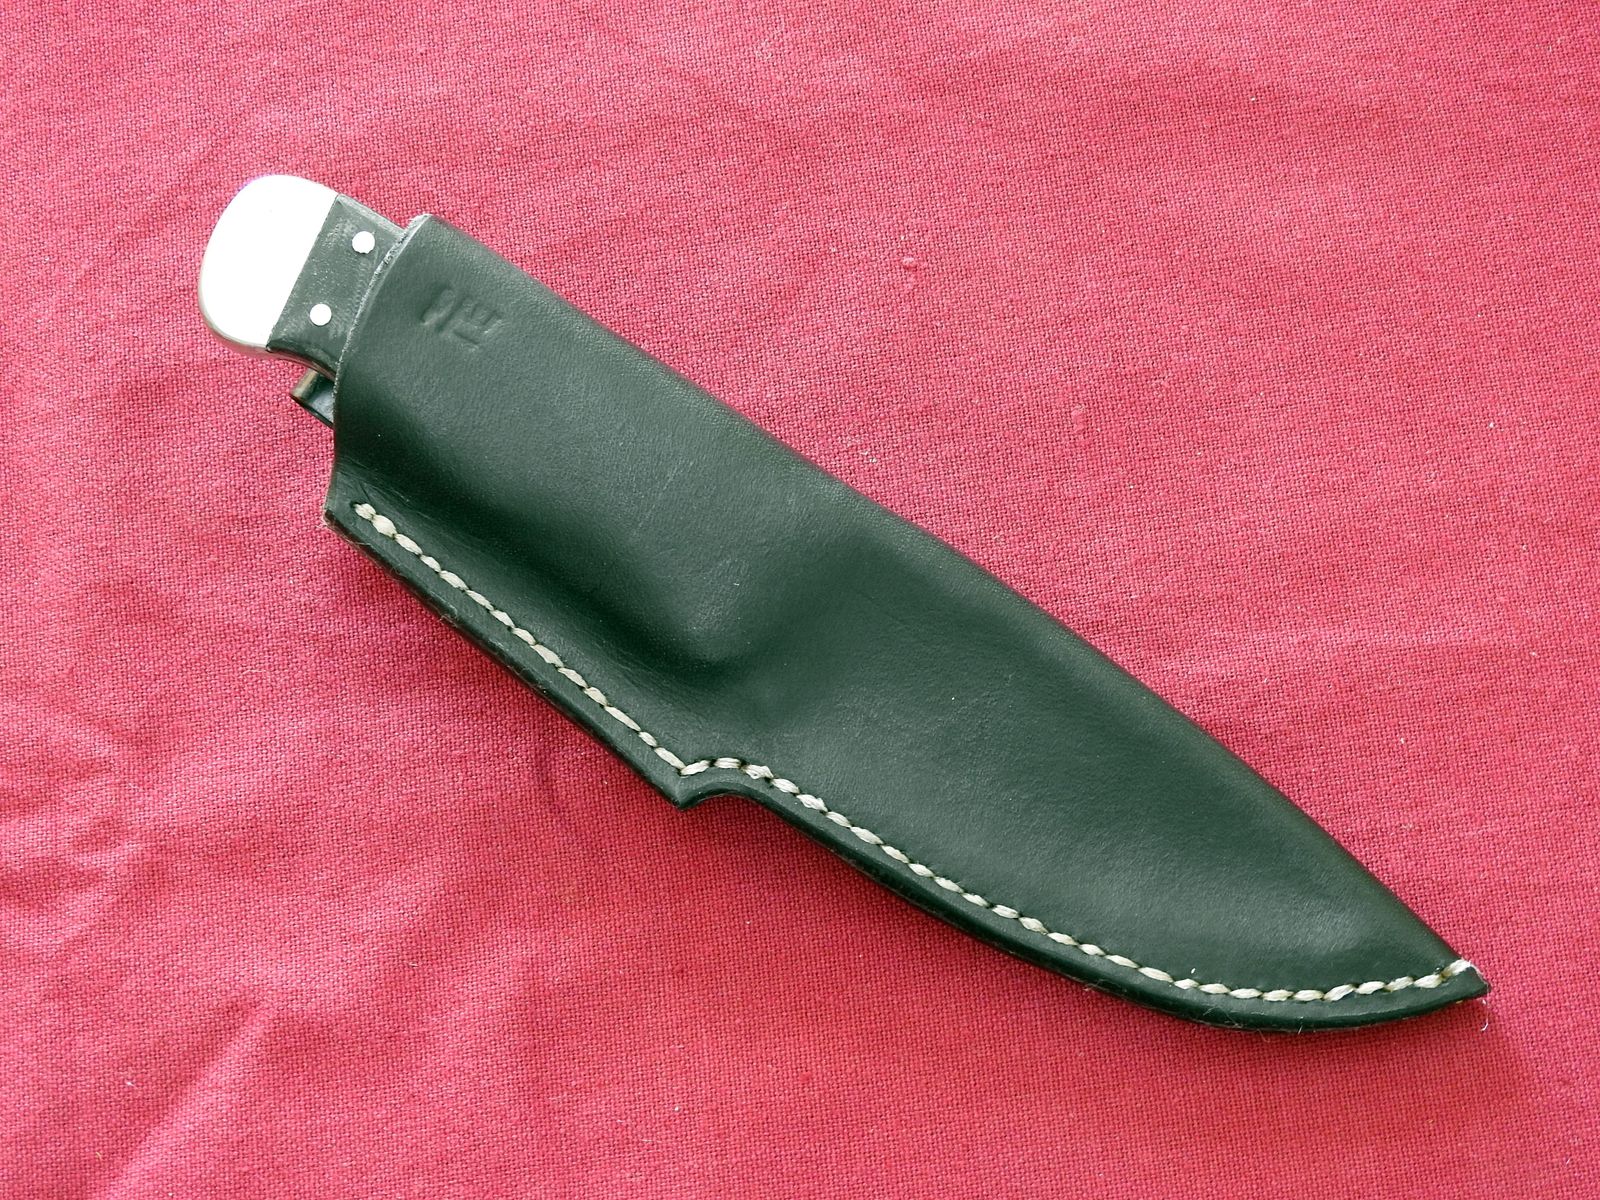
The original plan was to make ordinary knives, no fancy stuff, no distractions, just to build up some stock for sale when the bureaucracy here finally gets its act together. But I did not stick to that plan too well. First I got distracted several times making new tools, then two knives came out so nice that I thought it a shame to not make sheaths for them that are just a little fancy. But after two months, I have finally finished four pieces.

Today I was trying to take pictures, with very varying success. For reasons that I do not understand, I get usually the best results with reddish/magenta cloth background.

Here are the four knives, details, and some talk about each piece are below the fold.

© Charly, all rights reserved. Click for full size.

[Read more…]

My Little (Stitching) Pony

Since sewing leather sheaths whilst holding them between one’s knees is a huge pain in all kinds of regions, I have decided to bite the bullet and build myself a small stitching pony. It is very simple, but, as usual, it took me way more time to make than it should have. Here it is for you to admire.

© Charly, all rights reserved. Click for full size.

It is made from reclaimed firewood, so I have spent a lot of time sanding of splinters.  The “H” formed base is for stability, but the two planks are only fixed with one screw each and tightened only with a winged nut. That way I can loosen them, and fold them so the pony can be put out of the way and leaned against a wall when not in use, together with other useless junk I posess, like painter’s easel.

You can also see that I have bought a suitcase for my leatherworking tools. It is already full to the brim and I have barely begun :(.

© Charly, all rights reserved. Click for full size.

Jaws are covered with leather, here it is not fully trimmed yet. You can admire the high precisisn’t with which I am usually assembling these tools.

The right jaw is fixed, the left jaw swivels on a hinge. They are tightened via one long screw with a winged nut. The screw is deliberately very loose, so it cannot be overtightened.

© Charly, all rights reserved. Click for full size.

A piece of wedge-shaped hardwood with slits slides on two screws and under the winged nut, allowing for a sort of easy quick-tighten and -release tool.

It works as it should. Like all tools, it gets some getting used to, but it does make the leather stitching several orders of magnitude easier. I have tested it today and I was definitively a lot quicker. And my back hurt less.

Expect some leatherwork in future too. Hopefully.

I Was Like a Fox in the Henhouse…

Today I took a day off of any duties and works and I went for a walk in the forest, with my camera. And right at the edge of the forest, I got distracted.

© Charly, all rights reserved. Click for full size.

I had planned a long picture-taking walk, about five-six kilometers. I had drink and snacks packed, an audiobook prepared, and just in case I find some mushrooms, I had two cloth shopping bags in my backpack. I thought maybe I find enough for a dinner.

© Charly, all rights reserved. Click for full size.

Boletes are growing in huge numbers. I did not even get to the best places and I filled both shopping bags before venturing so much as twenty-thirty meters into the forest. They weighed about five kilos each, here you can see them after I took a hefty portion off the top to give to my neighbor, who likes them, but, like my parents, is too old to go collecting herself.

© Charly, all rights reserved. Click for full size.

My tiny kitchen counter was covered in mushrooms. It took me about six hours to clean all these and cut them. Most were cut to slices to dry, but some were too soft and spongy (and there were some blushers in there too) and had to be cooked right away.  And even though there was a lot of waste, I still filled the whole vegetable dryer and a table with drying, and my biggest pot with cooking. There are good ten-twenty meals in the pot, so after it all cools down, they will be divided and packed into small portions and frozen.

I must apologize, I did not make any pretty pictures for you today. But I am really tired, despite my walk being only about one-fifth of the length I planned.

Card Weaving

kestrel is graciously sharing her woven artwork with us, and she’s taken the time to teach us about how this type of weaving is done. I’m sure you’ll agree that it’s fascinating.


Card weaving (or tablet weaving as it’s also called) is a very ancient craft going back quite a ways. A very wonderful find was the Oseberg ship with two women buried in it. Among the many textiles found, there was also a loom with the warp still attached to the weaving cards. However historians believe card weaving is much older than this 9th century find. Card weaving was a technique people used to create very strong and sturdy as well as ornamental bands. Some of the very ornamental bands seen in religious textiles were created this way. 


Although I used to weave quite a lot, for whatever reason, I had never tried card weaving. I’d had to give up weaving (there was no room for my very large loom and I had to sell it) but recently I decided I wanted to weave again. My big loom was gone, but you don’t need much to do card weaving. 

©kestrel, all rights reserved

[Read more…]

Punch and Die (and Fun)

I do not have the genius of Leonard da Quirm, but I do share one trait with him – I get easily distracted and sometimes spend several days trying to shave off a few minutes of some task or save a few bucks. Sometimes the effort definitively pays off – as in the case of my belt grinder or my forge burner, sometimes it is a success but with a question mark whether it was worth it – like the unbender (now I know it was worth it, btw, I have used it several times already and it is time-saver), and sometimes it is a bit of a flop, as when building a vacuum pump. If I had a definitive fail, I do not remember it, and so I allowed myself to get distracted again these last two days.

I have a problem with making metal bolsters, handguards, end-caps, and pommels. As in, it is difficult to get material thick enough to make them pretty, and even if it were not difficult, the result would be overtly heavy and thus would put the knife balance totally out of whack. The proper way to make bolsters and end caps is to make them hollow, and there are techniques for that. One of them is forging – as I did in the rondel dagger project. But that is labor-intensive, has poor reproducibility, and requires special tools anyway. Or I could buy prefabricates and adjust my design(s) to fit what is already on the market. Screw that!

So I have decided to make some new tools, and test them. The inspiration was a technique of minting coins before the invention of fly screw-press, which I have seen as a child in some black and white movie which has shown the making of Prague groschen at Kutná Hora. I remember nothing else about the movie except the part where they strike a punch on a silver blank with a hammer and thus make a coin. I think there was some drama and history in there too…

First I have made a die out of 5 mm high-carbon tooling steel. It consists simply of two holes – one for the bolster and one for the end-cap  (I have chosen my small hunting knife as a pilot project because I think the design will be improved a lot by it and because I do plan to make more of these knives in the future). Second I have ground two punches out of square stock of high carbon tooling steel that I have scrounged at my previous job. Grinding the forms with angle grinder was not easy, but it was not insurmountably difficult either. I had actually a lot more trouble with welding onto it the 15 mm round stock for holding the punch in place and for striking – my welding sucks, bigly. And because at least the first strike needs to be real mighty, I have built a small wooden stand to hold the punch in place for that.

© Charly, all rights reserved. Click for full size.

With the assembly on the concrete floor, as you see it in the photo, I have given it a mighty whack with my puny Mjolnir. And I rejoiced because it was a success. To protect the floor from damage I have put it on a steel plate for subsequent tries and I went and punched four sets for the four blades that I have currently in making, three out of brass and one out of pakfong.

© Charly, all rights reserved. Click for full size.

The pakfong was a bit thicker than the brass so it gave me some grief, thus the surface is not so smooth on the end-cap – I had to whack it several times and it wandered off the die and I struck it without noticing it. But that should not be a problem, there is enough material in there to polish these dents out.

It took me mere minutes to punch all these, and after a long time, I was really, really happy for a bit. There are a few details to iron out – like making a better stand for the punch, making it so I can put it safely on my anvil, figuring out the ideal amount of overhang and so forth – but it functions as it is and it is a massive saving in time already. Whether the knives will really look better remains to be seen, but I am confident they will. Further, this opens a lot of new possibilities for knife designs for me.