My mother was ordering some things from an online drugstore and I jokingly said if she could order me a nylon thread too. And surprisingly, the shop did carry a 0.25 mm nylon thread. It arrived today. I have immediately run an experiment to evaluate if it delivers better results than my old, PVA glue-impregnated thread. And sadly, it does not.
I made 25 measurements with both threads with a razor and then with the testing knife sharpened at 10°. And the results are interesting, but not good.
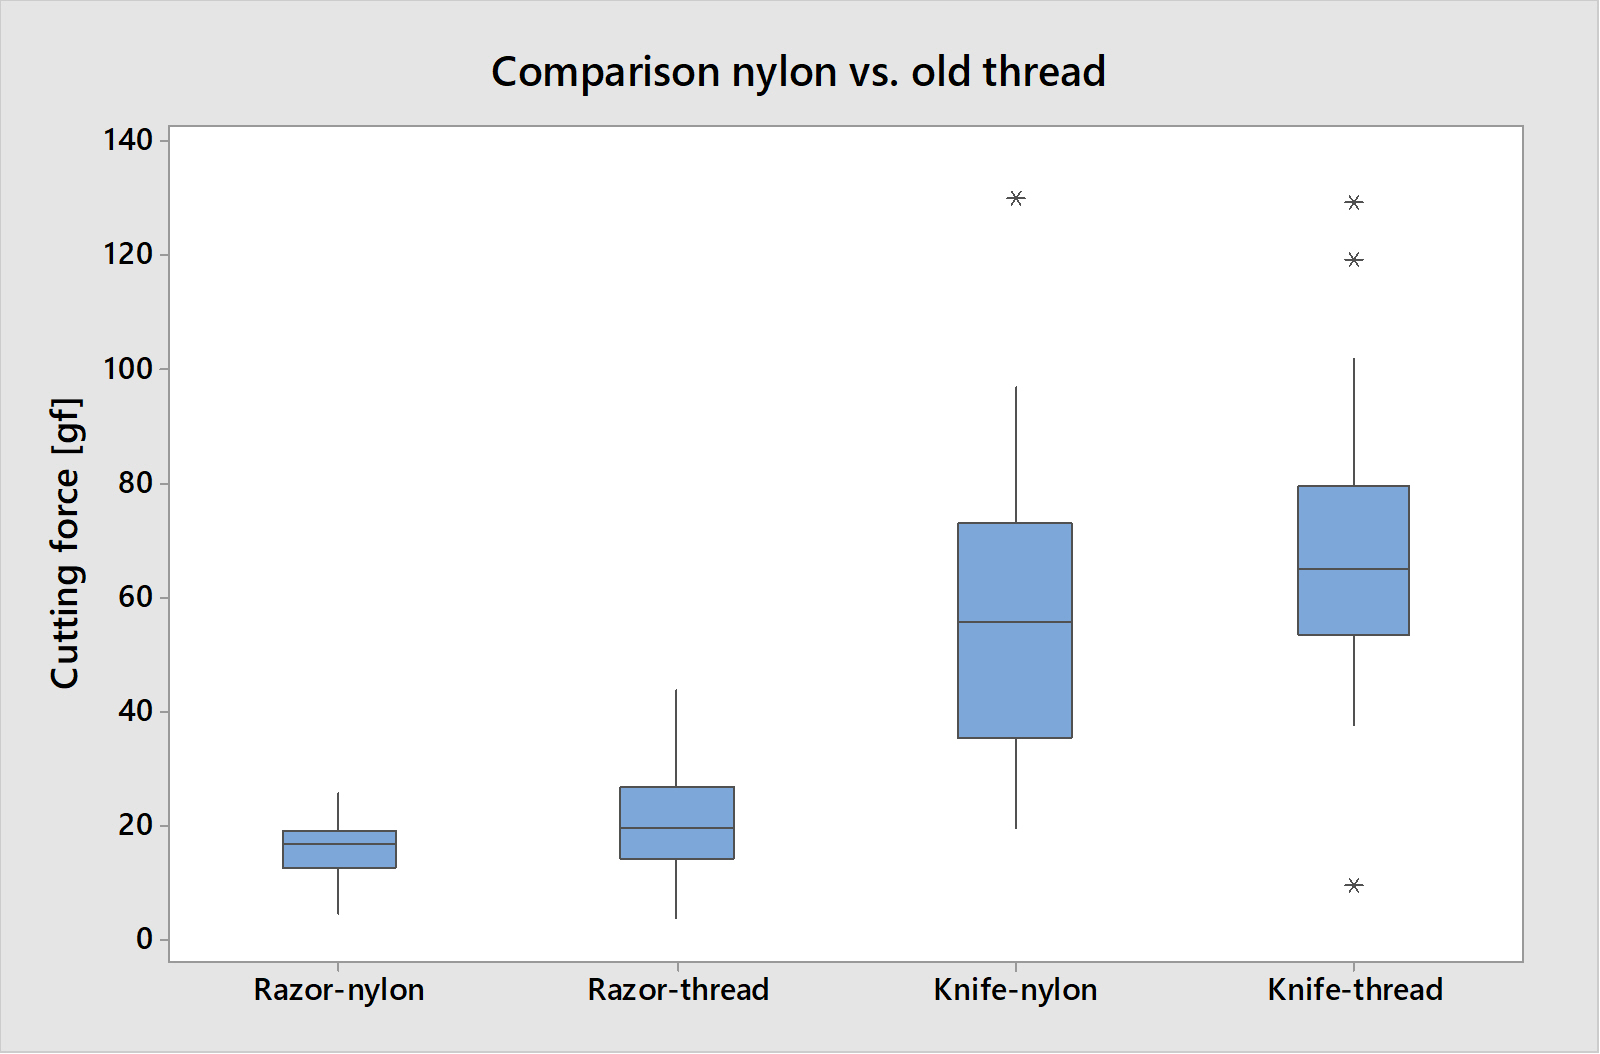
© Charly, all rights reserved. Click for full size
The nylon thread performed statistically significantly better for the razor – the values were less spread out. But when it came to the knife they were both about the same, with no statistical significance whatsoever. And there were outliers in both sets. A disappointment, really. A lower spread would allow me in the future to get useful results with fewer measurements per each test, this way I am somewhat stuck with making at least ten measurements.
At least all four sets had normal distribution which means that averaging multiple measurements should give precise-ish results.
I think that the biggest problem is the scale’s lack of a Hold function and the frequency at which it renews the display. Well, it is still useful and the thread did not cost too much. And it is easier to span.