Grinding and grinding and more grinding… As my buddy Mike says “blacksmiths turn the universe to dust, one piece at a time.” That’s neglecting hand sanding.
I was rummaging through my photo reel, trying to find a picture of what the blade looked like when I pulled it out of the annealing bin. Usually, it looks very non-promising: a blob covered with carbide and scale and white pearlite melted to the surface. Usually, I clamp it in the bench vise in the grinding area (which is not a very good vise) and knock the scale off with an angle grinder and a hard wheel.
Example of what a blade looks like out of the annealing bin: (obviously a different knife)

Those things used to depress me, until I realized that the layer of scale and gunk is very very thin and I won’t really have much grinding to do to get it down to bare metal. After a few years of doing this, I have gotten so smooth and fast with an angle grinder that I can skim the blade so accurately that once I take it over to the belt sander, it’s just a little work on the platen to get the flats flat. Once you’ve done that, it looks like a blade again, and you can assess the thickness, look for cracks, and make sure that the tang drew out right and has no obvious weak spots or places that will become stress points. As you start grinding it, the blade will work harden and you can crack it by dropping it on a hard floor, which is why it’s so tempting to interpose a foot.
I went through a bit of a pointless exercise thinking whether to do some kind of fancy file-work on the back to make it more visually interesting. There was opposed angle piercings:
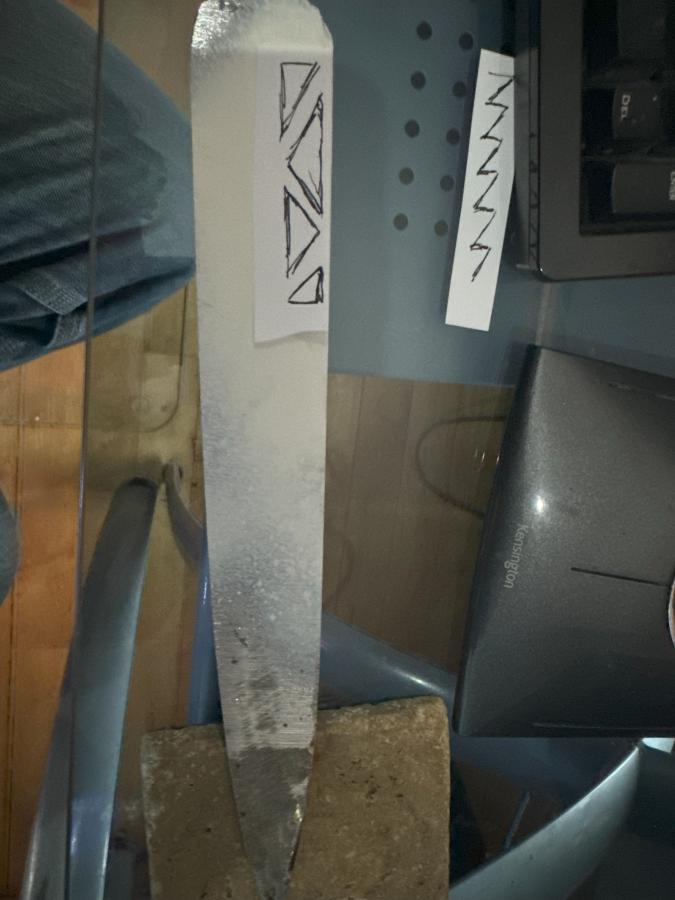
And saw teeth: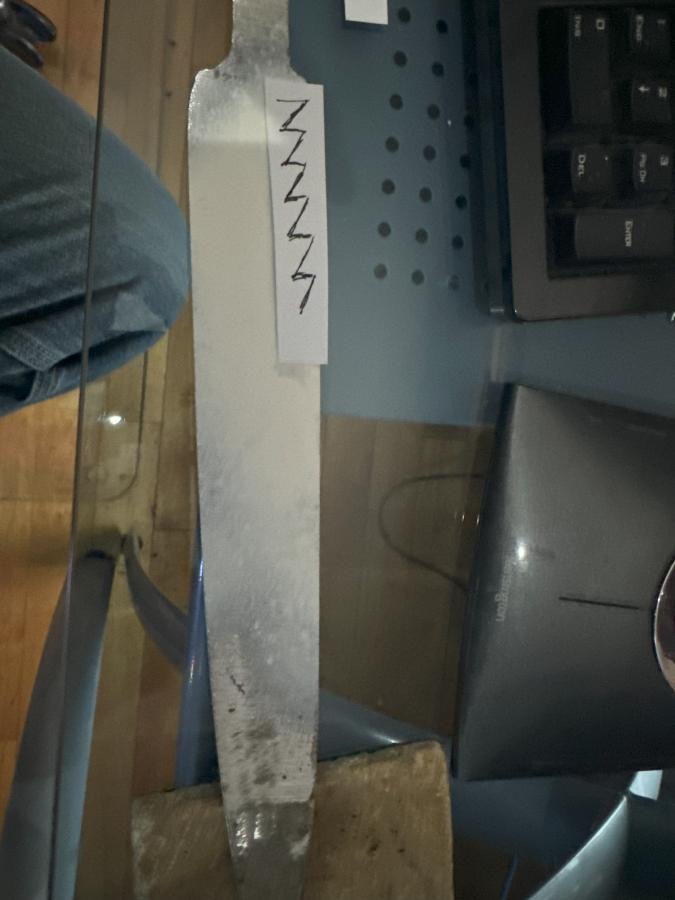
And, hey, Rambo-style round sawteeth:

Well, yeah. Those had to go in before the steel is quenched, because filing the shapes would be a nightmare with a diamond rasp, but while it’s still soft, a chainsaw rat-tail file makes short work of it.
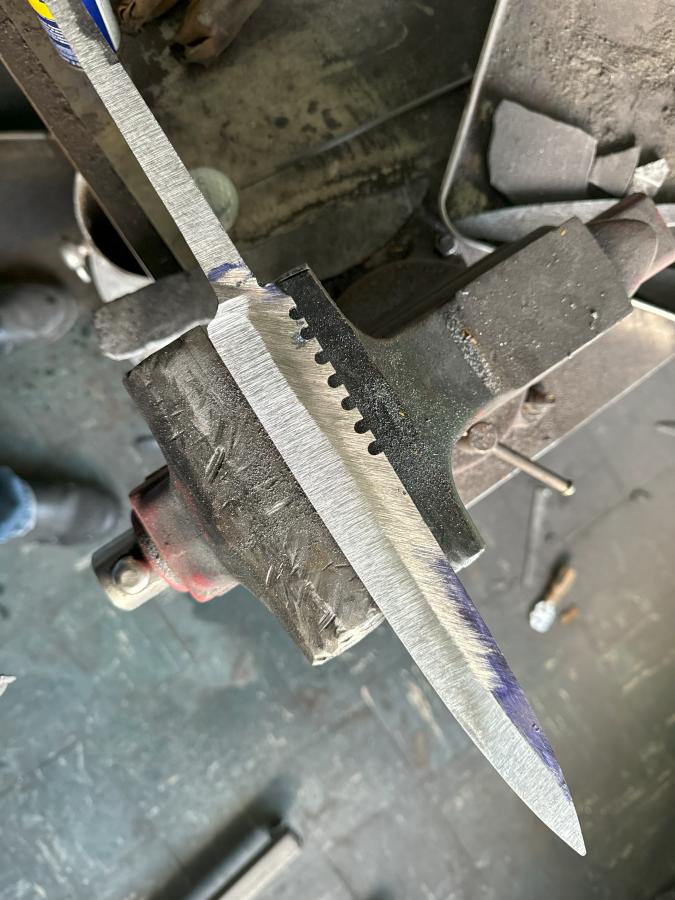
The astute among you, and Reginald Selkirk, Digit Manifest Agent of Destiny, will probably notice that the teeth are not perfectly laid out. That’s correct – when I started cutting down with the file it hit some sort of hard zone and kicked slightly off course. I’m going to say that was to make it more “rough and tough” looking, but I am too proud to lie to cover up my mistakes. I also painted the flats with blue dychem (layout fluid) so I could see where my grind-lines were going to go, and ground a whole lot of the blade to powder to get it looking roughly about right.
You probably can see there’s a bit of a dip in the ridge-line where I probably dwelt on the belt for a half a second too long. That’s not a problem, though obviously I should avoid making it worse – it will be corrected in fine grinding and then flattening and polishing. It just means that I have an extra half hour or so of working on that flat with diamond plates. It is how these things go. I went with a bit of a thickening at the tip, so it’d hold up to delivering a slash or a stab that reaches bone. At this stage, there’s plenty of metal on the thing to still grind off, and the proto-edge (not visible from this angle) is about 1/8″ or 2-3mm thick. That’s a 6″ vise so you can estimate the blade at around 11″ or so. The tang is relatively massive – 1/4″ thick (5-6mm) and wide and long. I left a lot of metal on the transition-zone between the tang and the blade because there’s no point refining that area until you’ve gotten it all quenched nicely.
By the way, that’s an 80-grit finish. 80 grit belts just rip steel to dust and throw little pieces of grit everywhere. Bladesmiths who are working with monosteels and don’t have to worry about warpage will usually grind the blade thinner and to a finer finish, because it’s a lot easier than grinding hardened steel. If you’re working with layers and twists and stuff like that, you’re courting disaster if you thin things out. My attitude is “it’s another 20 minutes of grinding and that’s what I signed up for.”
I usually don’t do much photography of quenches, either. Because I am going to shove that into a cannister of Parks #50 which will burst into flame and I’ll be flapping my gloves to keep them from catching alight. So, what I did was I put some clay on the blade, to keep the center of it softer than the back and edge. But I wasn’t trying to get a temper-line or anything like that, I just wanted a bit of transition between hard and less hard. So, this is a picture of one of the times I pulled it out to have a look at it:
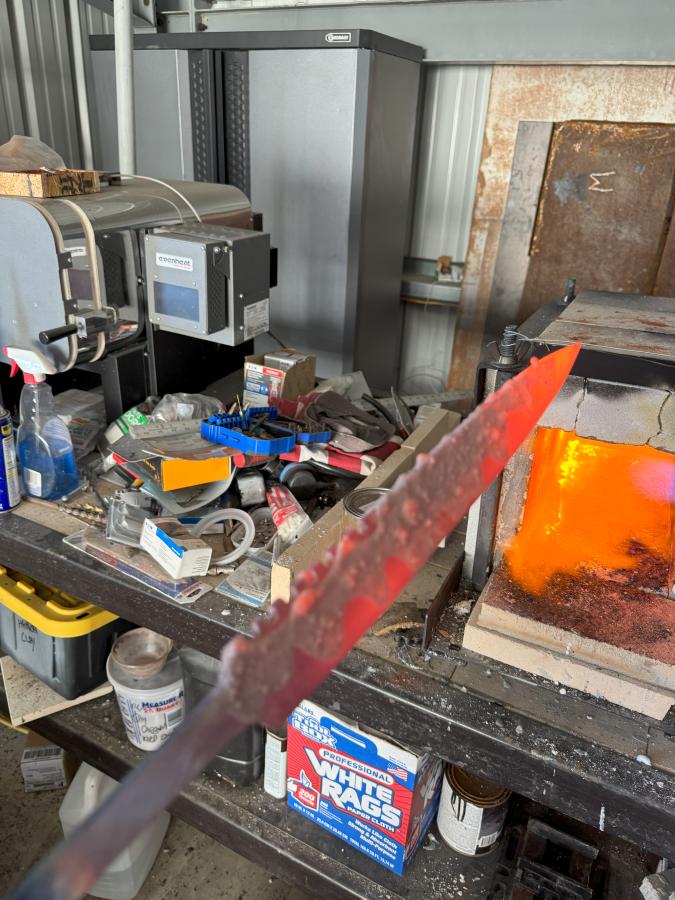
All that sizzling and burning and drama and it’s time to let it cool, wipe it down, take it back to the house and put it in the oven at 400F for a couple hours to temper and slow cool, then it’s a couple days of grinding and shaping and shaping and plating and polishing. I guess that’s next. Oh, yeah, and around now I start thinking about a handle and fittings because it looks like there are going to be some since we got this far.
Naturally, “fittings” on a knife like this means some big hunks of silver and some 4,500 year-old bog oak. There is no other realistic option. But we’ll get to that.
But Master Turner made the tang the full width of the blade!
I bet one thing Reginald Selkirk, Digit Manifest Agent of Destiny, does know about is 4,500 year-old bog oak, like any journeyman would these days. Nobody has ever questioned that, as far as I know.
I don’t know why, but my first thought when reading “chainsaw rat-tail file” was not a rat-tail file used to sharpen a chainsaw blade, but some sort of power tool I’ve never heard of (and I wanted one!). The mind is a mysterious place.
Looks pretty cool so far, and someone is bound to make an action figure (it’s not a doll!) from that image of Sean O’Rambo in the first post.
@2:
If you check the back files, you will find I am on record as suggesting Marcus start his own bog to avoid supply chain issues.
I am looking forward to the murder ballad which will be the grand finale of this sequence.
Reginald Selkirk@#4:
I am on record as suggesting Marcus start his own bog to avoid supply chain issues
I never said anything but your remark inspired me to experiment by putting pieces of oak in water with iron filings, PEG, sodium silicate, iodophor, and selenium/vinegar solution. It’s been sitting on a stack in the window for 3 or 4 years, now. I ought to have a look. My suspicion is/was that there are people “making bog oak” today and I wanted to be able to tell it apart.
I am looking forward to the murder ballad which will be the grand finale of this sequence.
I have since lost track of the fate of the knife; I admit I wonder sometimes.
flex@#3:
but some sort of power tool I’ve never heard of (and I wanted one!)
There do exist small air-powered filers: clamp a file in and it reciprocates. There are also mini belt-sanders for getting into tiny wee corners.
My assessment is that a Foredom or Dremel tool is probably better and more reliable.
Naming of Parts
Thanks to Marcus I now know the proper term of the “thin file hold it at 30 degree thing” for sharpening my hand held chainsaw*. Names: for too long my sickle (to de-head daffs and such) was blunt due to a lack of a curvy tapering sort of carborundum stone to sharpen the inner curve. Joy when I found it’s called a “scythe stone” so I could finally find a supplier. ‘Cos scythes are so popular in UK right…
* “arn’t ALL chainsaw hand held?” …
I just got myself one of those 1/2″-wide pneumatic belt sanders for a special task (getting into a tight corner).
It worked too well. I ended up moving from 40 grit to 150 grit in order to avoid taking too much material off.
I won’t use it often, but after using it, there will be times I will reach for it rather than a Dremel.
No.
flex@#8:
I just got myself one of those 1/2″-wide pneumatic belt sanders for a special task (getting into a tight corner).
It worked too well. I ended up moving from 40 grit to 150 grit in order to avoid taking too much material off.
I have only ever used mine once, and that was to remove the inner seam from some square steel tubing. It worked great. My alternative was to make an extension handle for a dremel or some other weird contraption. When it was all over, I realized that I could have just ground a groove in the mating piece with an angle grinder or even put it on the milling machine. (/forehead slap)