I haven’t said much about the doors because the project has been lingering on the edge of done for days.
Hanging the doors is, literally, a matter of drilling 4 holes, putting bolts in them, and tightening them down. I was on the verge of doing that last night (in a chilly drizzle and fog) when I realized that each of the J-rails has 4 bolt holes, and I had gotten 9 bolt-sets, thinking it was 3. That’s the sort of attention to detail that starts to fall apart on me when I get tired.
The sad fact was that I had already made 2 runs to the hardware store to get bolts, and had already made variants of the same error. First time around, I estimated the necessary length by totaling up the amount of plywood (4 inches) and apparent air-space (about 3/4 inch) and concluded that 5 inch bolts would do the trick. But it turned out I was off and the 5 inch bolts were 1/4 inch too short, and it was back to the hardware store. Then, I proceeded to buy the wrong number of 5 inch bolts, so it was back to the hardware store again. Meanwhile it’s rainy and muddy and I hate mucking about with power tools in the rain.
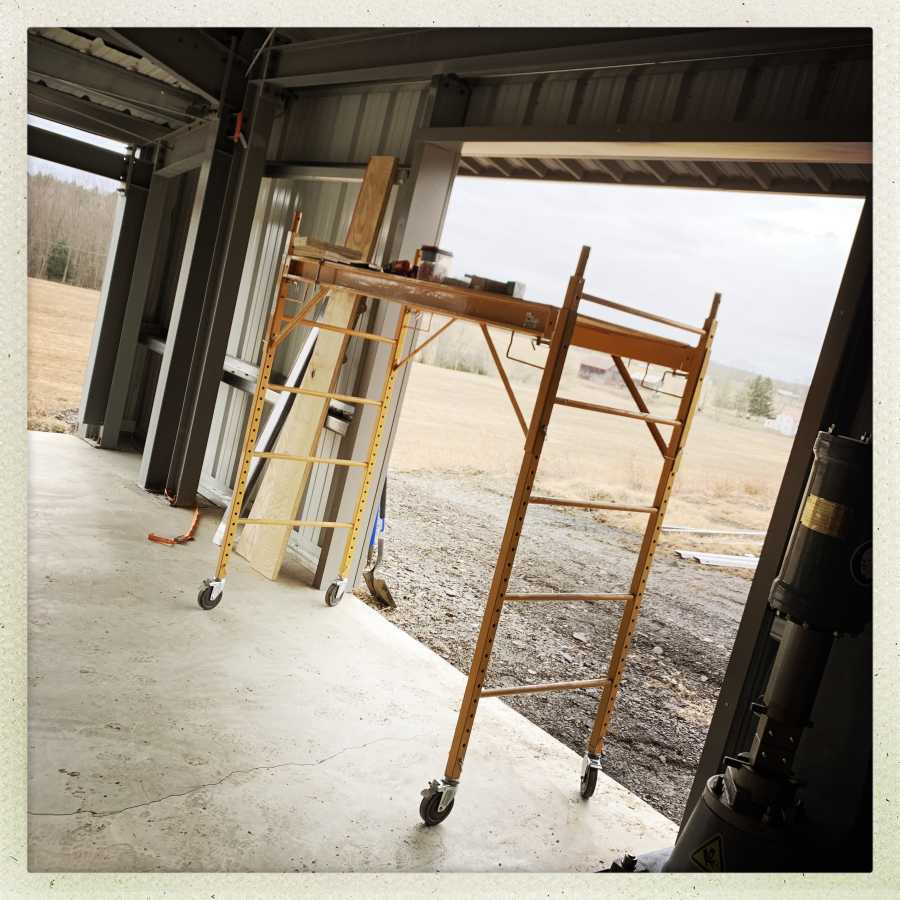
That’s the interior before I got busy. The mounting arrangement I came up with was to construct glued-up plywood beams on the inside and out. The inner beams have hanger bolts that suspend them from the steel cross-beam above the door. That steel is 10ga, pre-stressed, it’s not going anywhere. I drilled the steel and hung the beam with the hanger bolts, then measured and created plywood wedges that fill the dimples in the steel. The inner beam is 3 pieces: 6 feet, 8 feet, and 6 feet, and the outer beam is one piece, 17 feet long, 10 wide, which weighed “a bunch.” I covered it with fascia metal on both sides, screwed the fascia down, and transported it from the shop to the shed by sticking it in the window and out the back of the Tahoe and driving it over at around midnight when the police are patrolling the watering-hole for drunk drivers.
Getting the inner beams up was a snap – put a wedge under it to lift it, and spin the bolts down on the hangers, then level it. By “snap” I mean: drilling a piece of heavy steel at an angle because my drill would not fit properly under it, and getting the holes to still line up. Thank god for whoever invented Sharpies. The outer beam was easier because it was simply a matter of drilling through the face and the wall and the inner beam, then putting in a bolt. But, getting it up there was hard. It was raining, the fascia was slippery, and I resorted to wrapping copper wire around both ends then lifting one into near-place and tying it to a screw sticking out of the wall, then going to the other end and lifting it more or less into place, then going back to the first end and lifting it close to level, then going back and forth farting with the copper wire and a bubble level until it was on the money and I could start to drill. The whole time I was worried it would slip, fall, hit my ladder, and we’d all end up on the concrete in various degrees of broken.
After that, I did something unusual that this project has required: I called for help. My neighbor Mike has a pickup truck and I explained that I couldn’t get the doors in the back of my tahoe (doors are 4 foot 8 wide and 8 foot 6 inches tall, tahoe is 4 foot wide and 6 feet long interior) So Mike and I hopped over, loaded them up – an easy lift for two guys – and that was that.

The good news is that the proportions and dimensions look about right. I am going to need to add something to the bottom of the doors that is water-resistant – probably a fiberglass-painted board – that will help block air and can fit into a retaining wheel bolted to the concrete, so the doors don’t swing in and out.

The outer beam, partially mounted
It was a lot of frustrating back and forth but it’s creeping up on “done” – best of all the “done” part is now inevitable: everything fits in its place nicely, everything is level, everything is tight, and nothing appears to block anything else. I was terrified that I’d discover the door hit the edge of the frame, or the rider wheels would hit a beam, or something like that.
One thing I definitely decided is that come spring I will put a gutter up along the front. The gutterless roof had remarkable sniper-like accuracy at dumping water down the back of my neck. It’s been warmish – around 40 – during the day but the temperature drops down to freezing around dusk, so I have a nice 4 hour window to get things done before it turns to misery. I could soldier on through the dark and rain but I’m just too old and grumpy for that.

for everything else, there’s math
People who’ve worked on projects with me will tell you “Marcus never measures anything.” That is strictly not true. What I do is I calculate the measurements in my head, note them down (sometimes) and then see if the damn thing fits where it’s supposed to. I calculated (I swear!) that the J-rail was going to want to be 3 inches up from the bottom of the outer beam where it was located but it just seemed foolish to grab a drill and bolts and start putting J-rail up, when I could physically destroy myself getting the door into position with blocks and wedges, then climb the ladder and measure: yup, 3 inches.
The J-rail pieces are 3, so there’s a center one and two on the sides. The center of the center rail goes in the center of the door. I held it up, marked it with sharpie, then checked with a bubble level to see if the marks were level (perfect!) and drilled. [By the way, people who make these things: 3 holes are better for leveling then 4. You put the middle bolt in then level on that, then do the other 2. If it’s 4 holes, you have to work from one end to the other, which is a pain with a 6 foot long 30-lb piece of steel you are holding with one hand at the top of a ladder.] It only took a minute. Putting the bolts in and tightening them only took some back and forth and another minute. Then, discovering I didn’t have enough bolts took another minute and I called it a night.
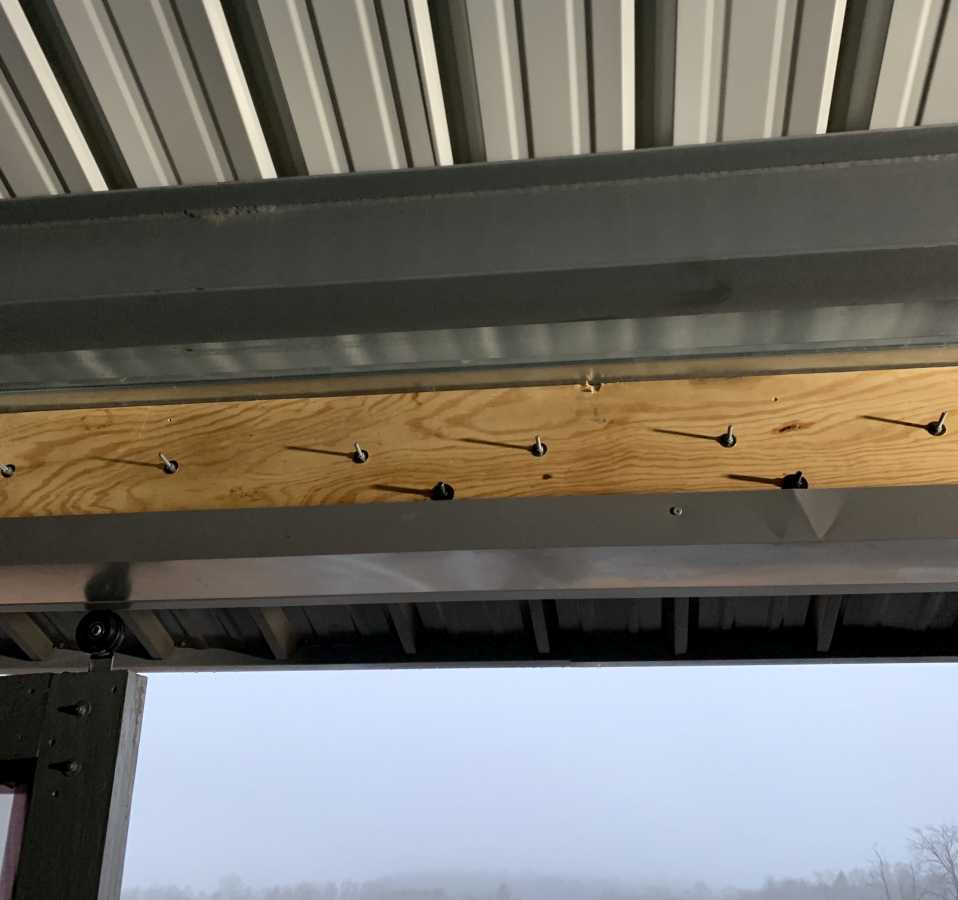
You can’t see the hanger bolts at the top of the plywood but they’re there. That’s 2 pieces of 3/4 inch plywood, glued and now bolted together. I don’t expect it to go anywhere. When I am happy with everything I may go up with the cutoff grinder and shorten those bolts. But it’s not as if I am going to be clambering around up there.
Sitting in my warm bathrobe, writing this, I am painfully aware that there are 3 bolts ready to go, sitting on the passenger seat of my car, and I’m that close to done.

I also realized that I forgot handles and latches and all that crap. Then it occurred to me I could ask other blacksmiths to donate a handle, if they felt like hammering me something. Then it occurred to me that the door might never be finished, if I do that, and I found some rustic-looking stuff on amazon and clicked “buy it now.” I’m getting tired of this project (the truth is I was tired a month ago) and I still have another set of doors to do, benches to make, wires to run, propane to plumb, and an anvil to move.
The wheeled construction gantry: damn those things are great. They are much safer than a ladder, and you can pile stuff on them. I got that one when amazon had a “free shipping day” early when they were starting the prime program. The thing was only $150 but shipping was about $150, too. So with free shipping, I couldn’t pass it up.
They are going to look good, but it is frustrating being soooo close, but not done. Gold stars for stopping when it gets colder, it’s too damn easy to make mistakes or injure yourself.
I thought the shed would have come with gutters. Around here the moment you build something with a roof you connect it to a rainwater tank
The doors look good
dangerousbeans@#2:
Around here the moment you build something with a roof you connect it to a rainwater tank
That’s definitely the plan. A blacksmith’s shed can use a source of occasional bits of water. I’ll rig that in the summer, though. Need to figure out a good way of not having it turn into a mosquito breedery. Up here, there basically are no mosquitoes because of the wind and other critters in the water that eat them. But as the planet warms up that’s going to change fast.
cf. https://rainwatertanksdirect.com.au/blogs/keep-mosquitoes-away-rainwater-tanks/
TLDR: mesh.
(Planning regulations in much of rural Australia mandate rainwater tanks for new dwellings; it’s a known issue)
I agree with Jazzlet that it’s good to know when to quit and come at it fresh. The doors look great and will be up and working before you know it.
Our city provides homeowners with cheap closed system rain barrels. The eave plugs into the top of the barrel and there’s a faucet to get water out. Most people set it up on a platform so it’s easier to access.
voyager@#5:
Most people set it up on a platform so it’s easier to access.
I feel like I may have to make some kind of funky stand and find an old wooden barrel that I can put a plastic barrel in, at head height or something. It’s gotta look funky. What would a 17th century Japanese swordsmith have? (probably a pond) Ideally I would have a terracotta tenuki spitting rainwater…
The reason water tanks are raised relates to gravity and flow pressure, not aesthetics.
Same as a toilet cistern.
If you’re ever in Kyoto, you could pay 400 bucks to make a kogatana at this forge. (There’s a traditional bucket and some not-so-traditional buckets in the pic on the site.) But maybe it would be better to visit Seki City which is famous for sword making. I don’t know if there are any forges that let you make your own stuff, but you can watch demonstrations at the Traditional Swordsmith Museum. (A few good pics of traditional gear on that site. No buckets, though.)
@ John Morales yep, some height in the tank is useful. I lived somewhere where the tank was basement level, so the moment the power cut out you had no water too