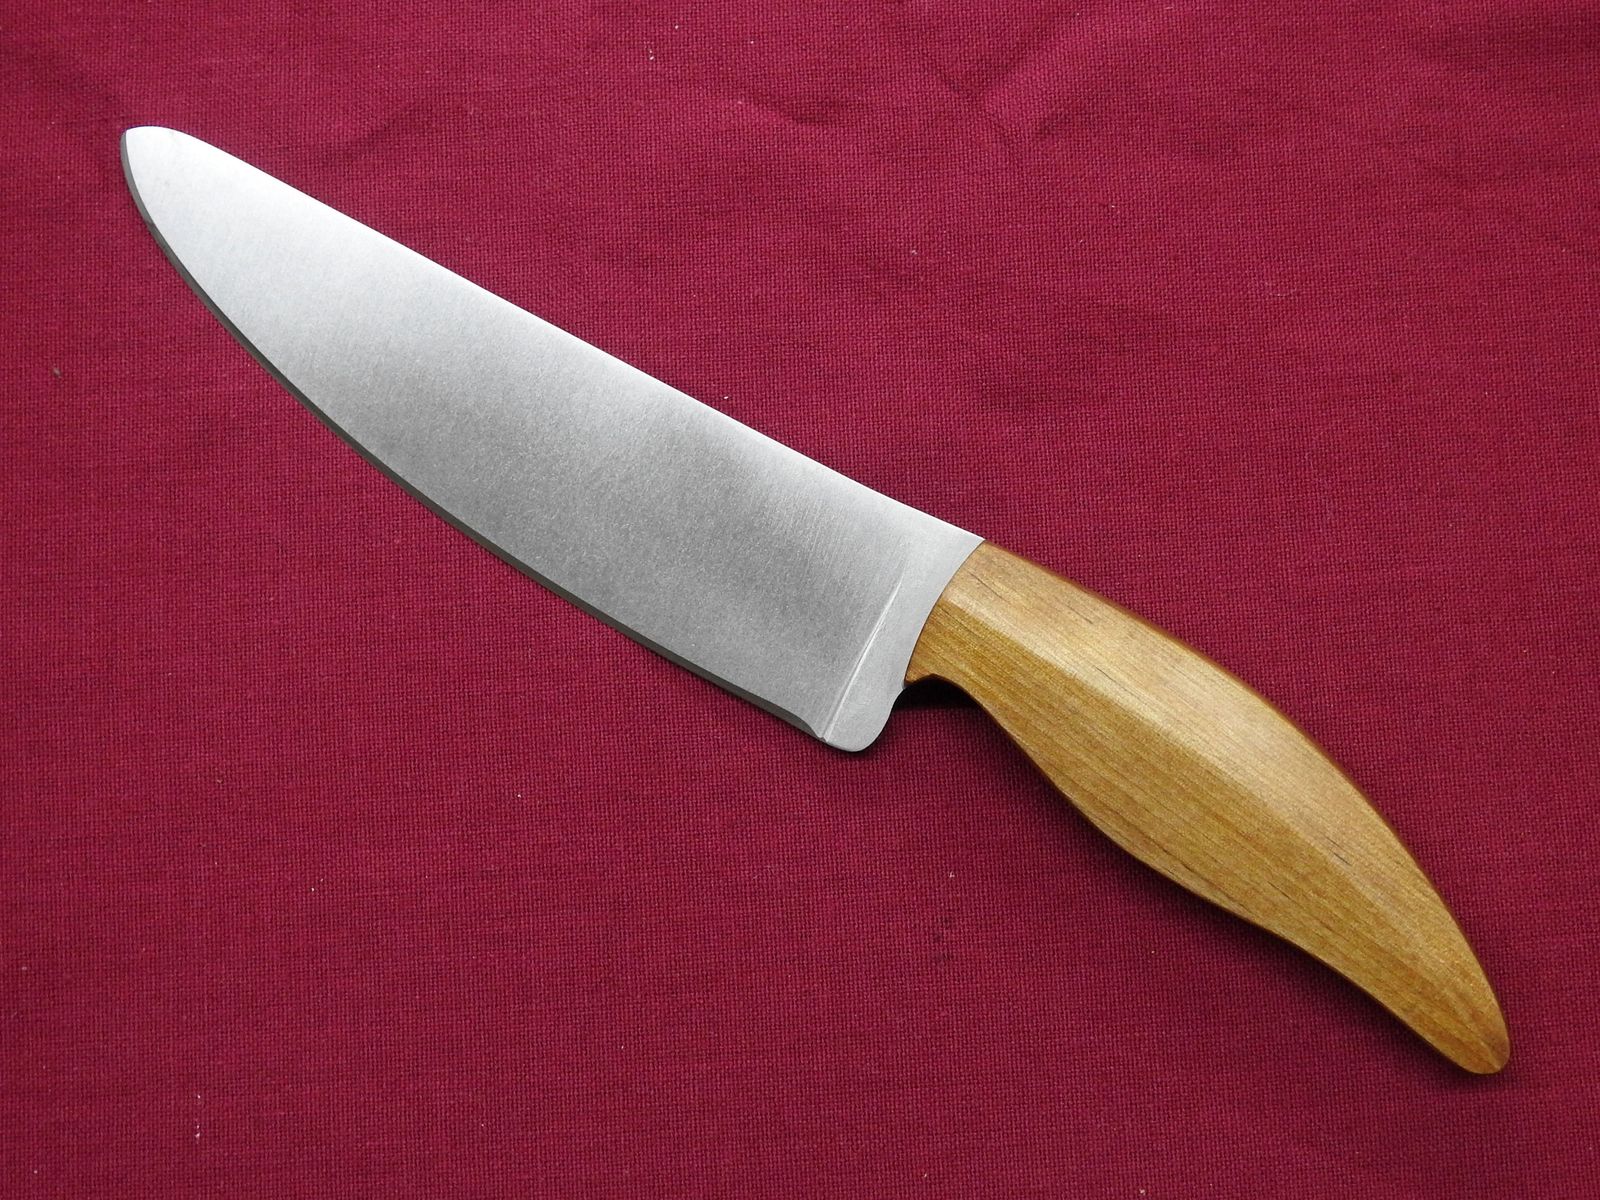
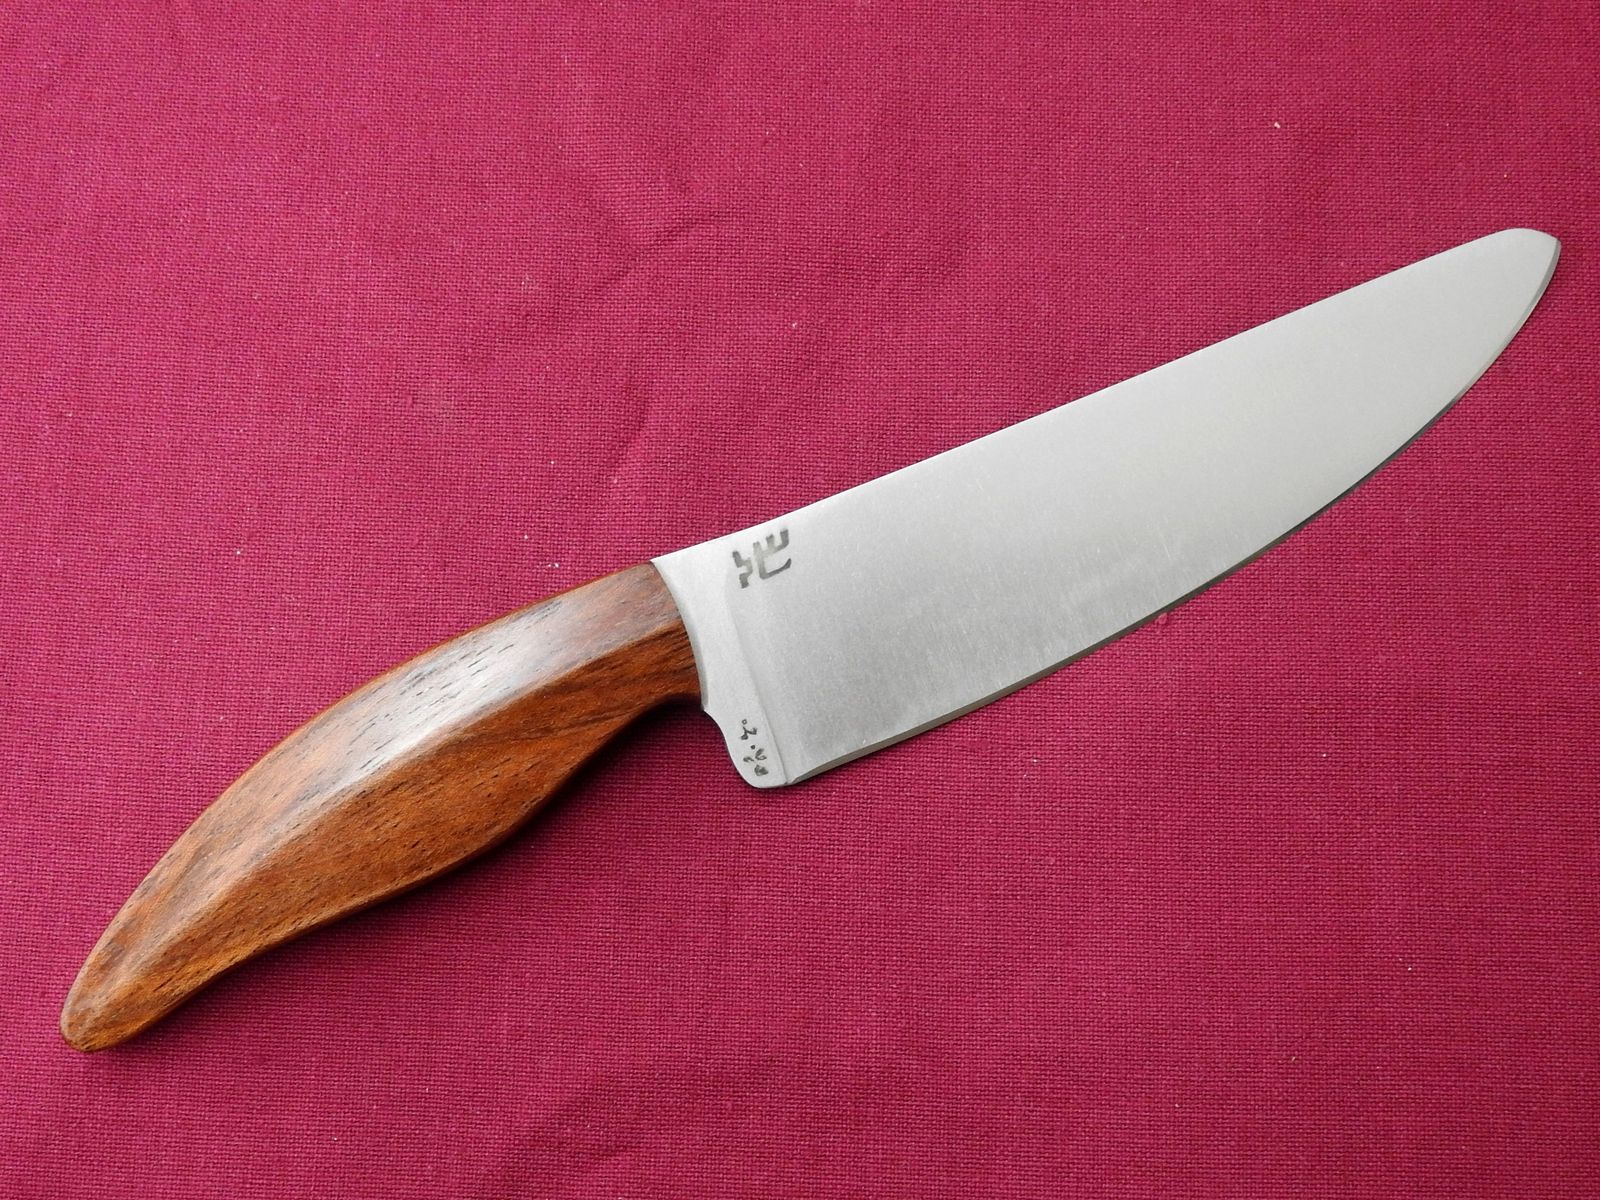
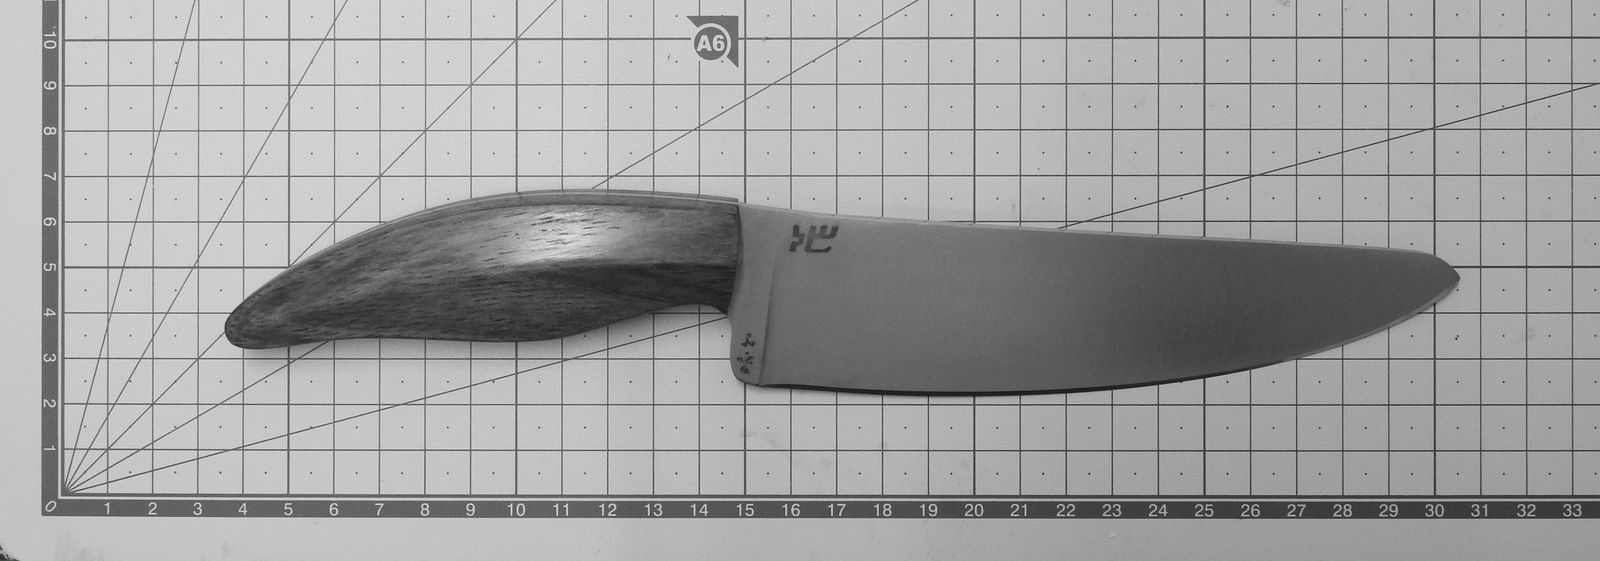
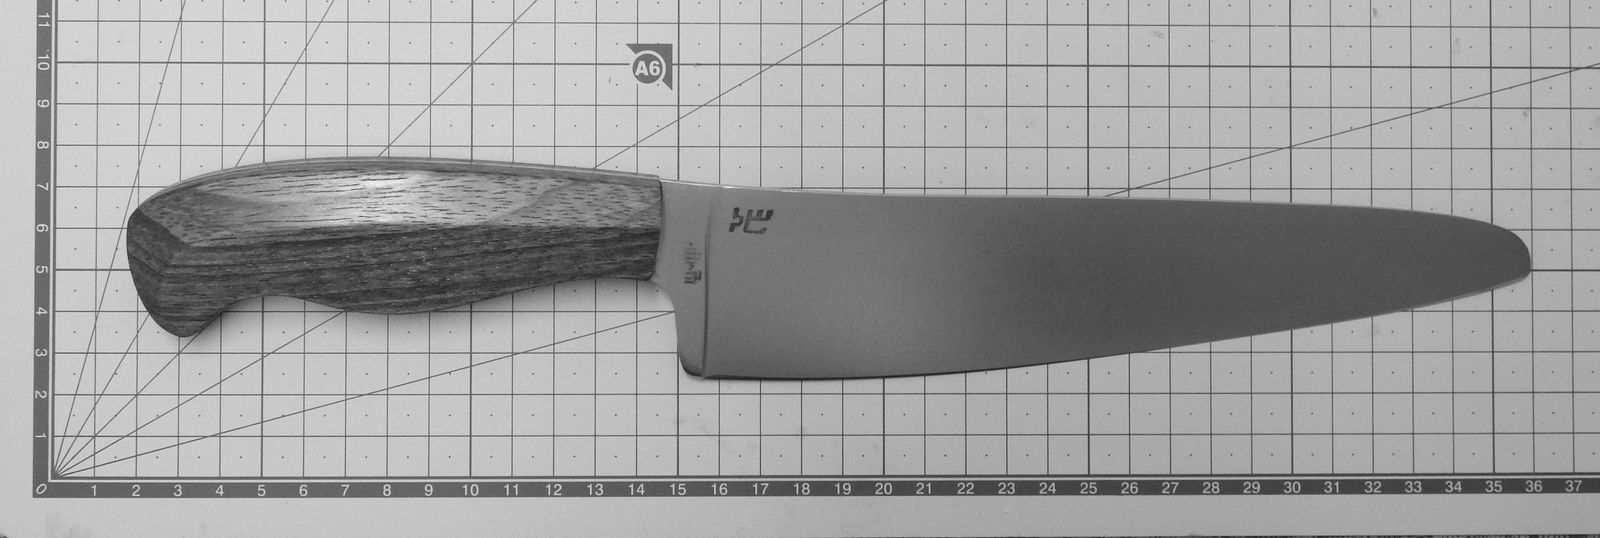
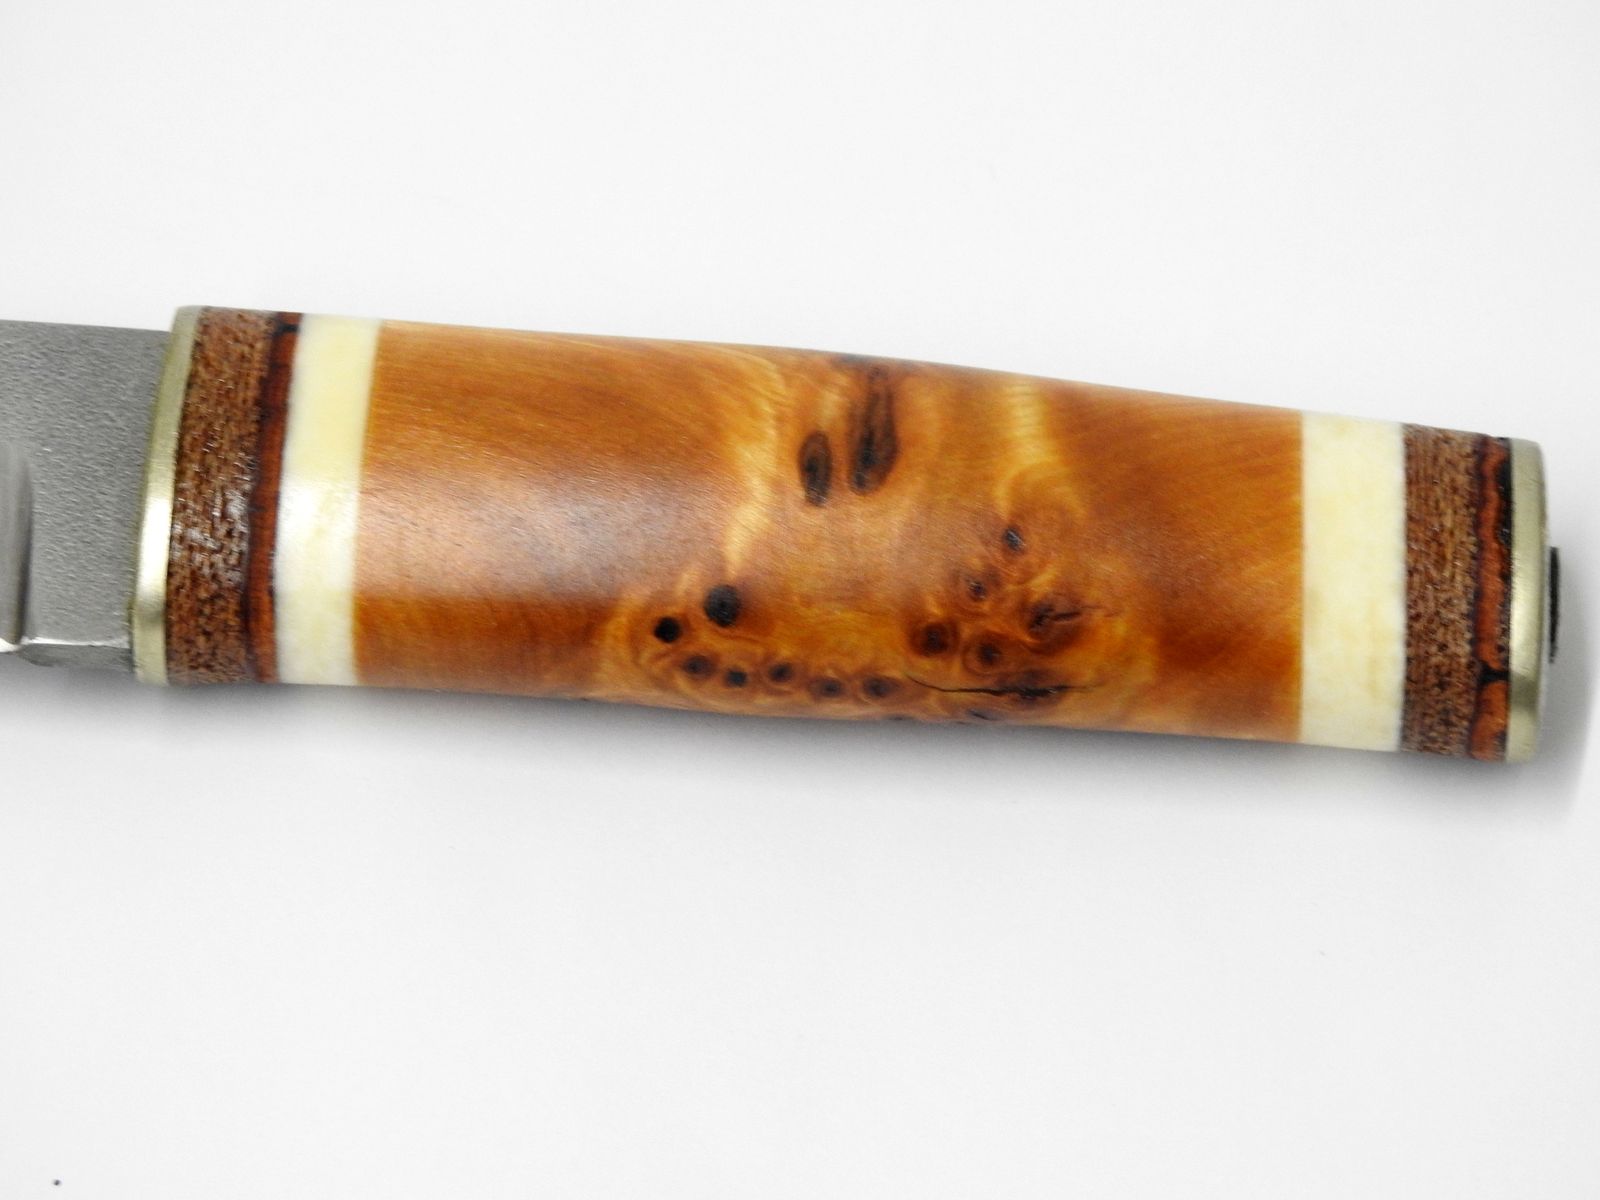
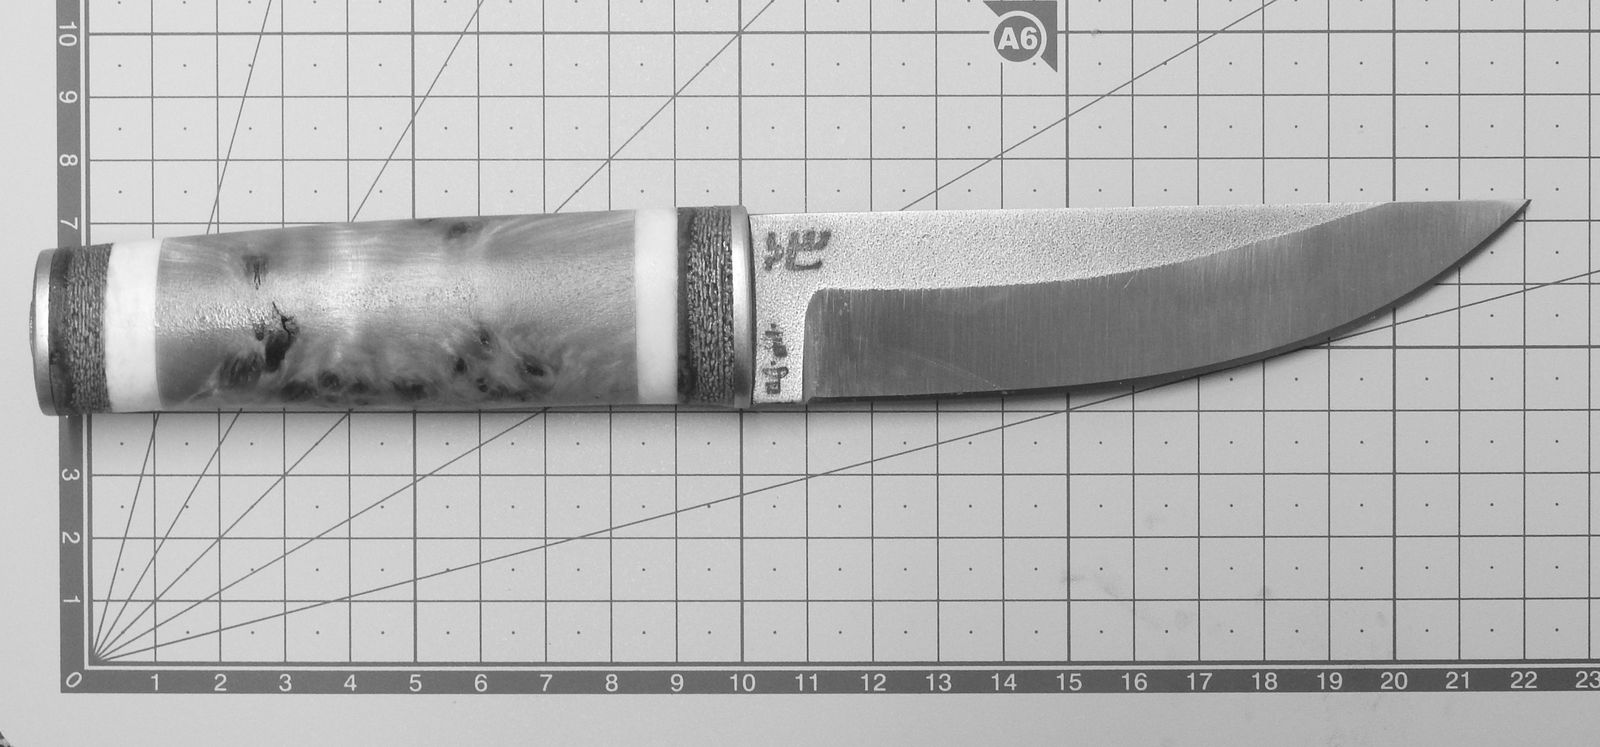
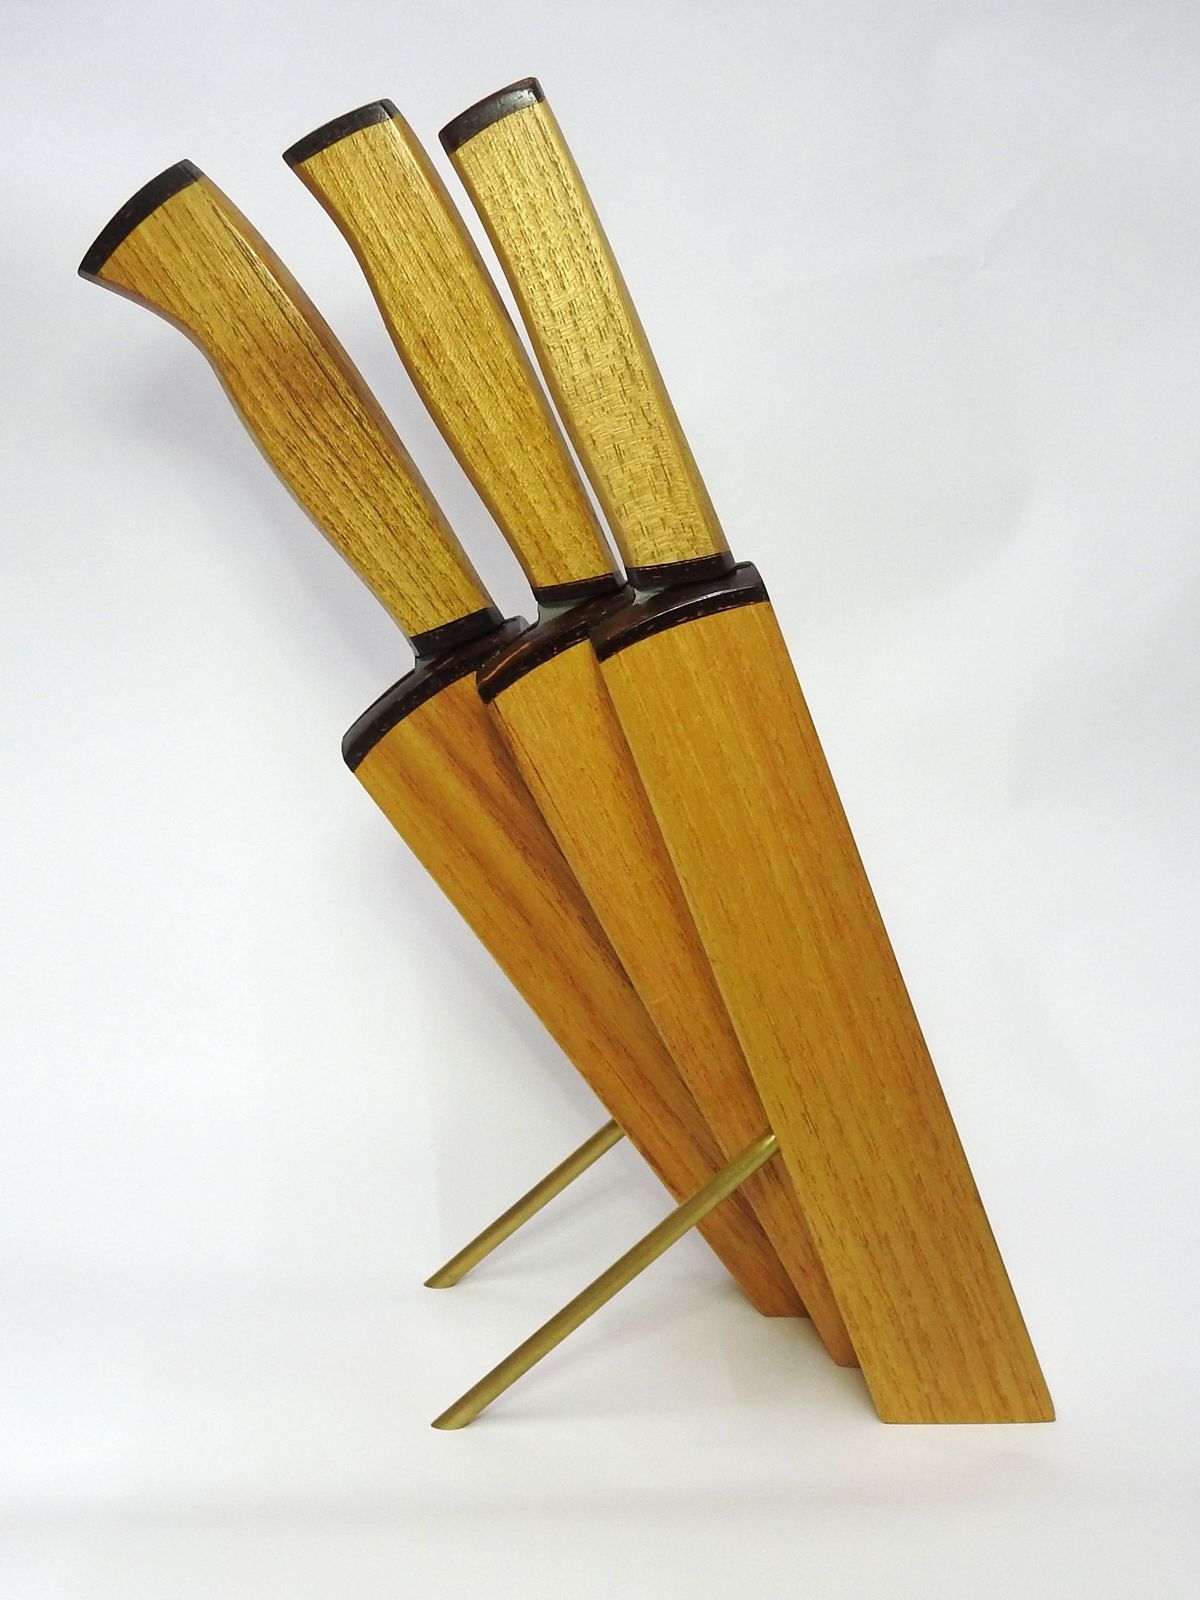
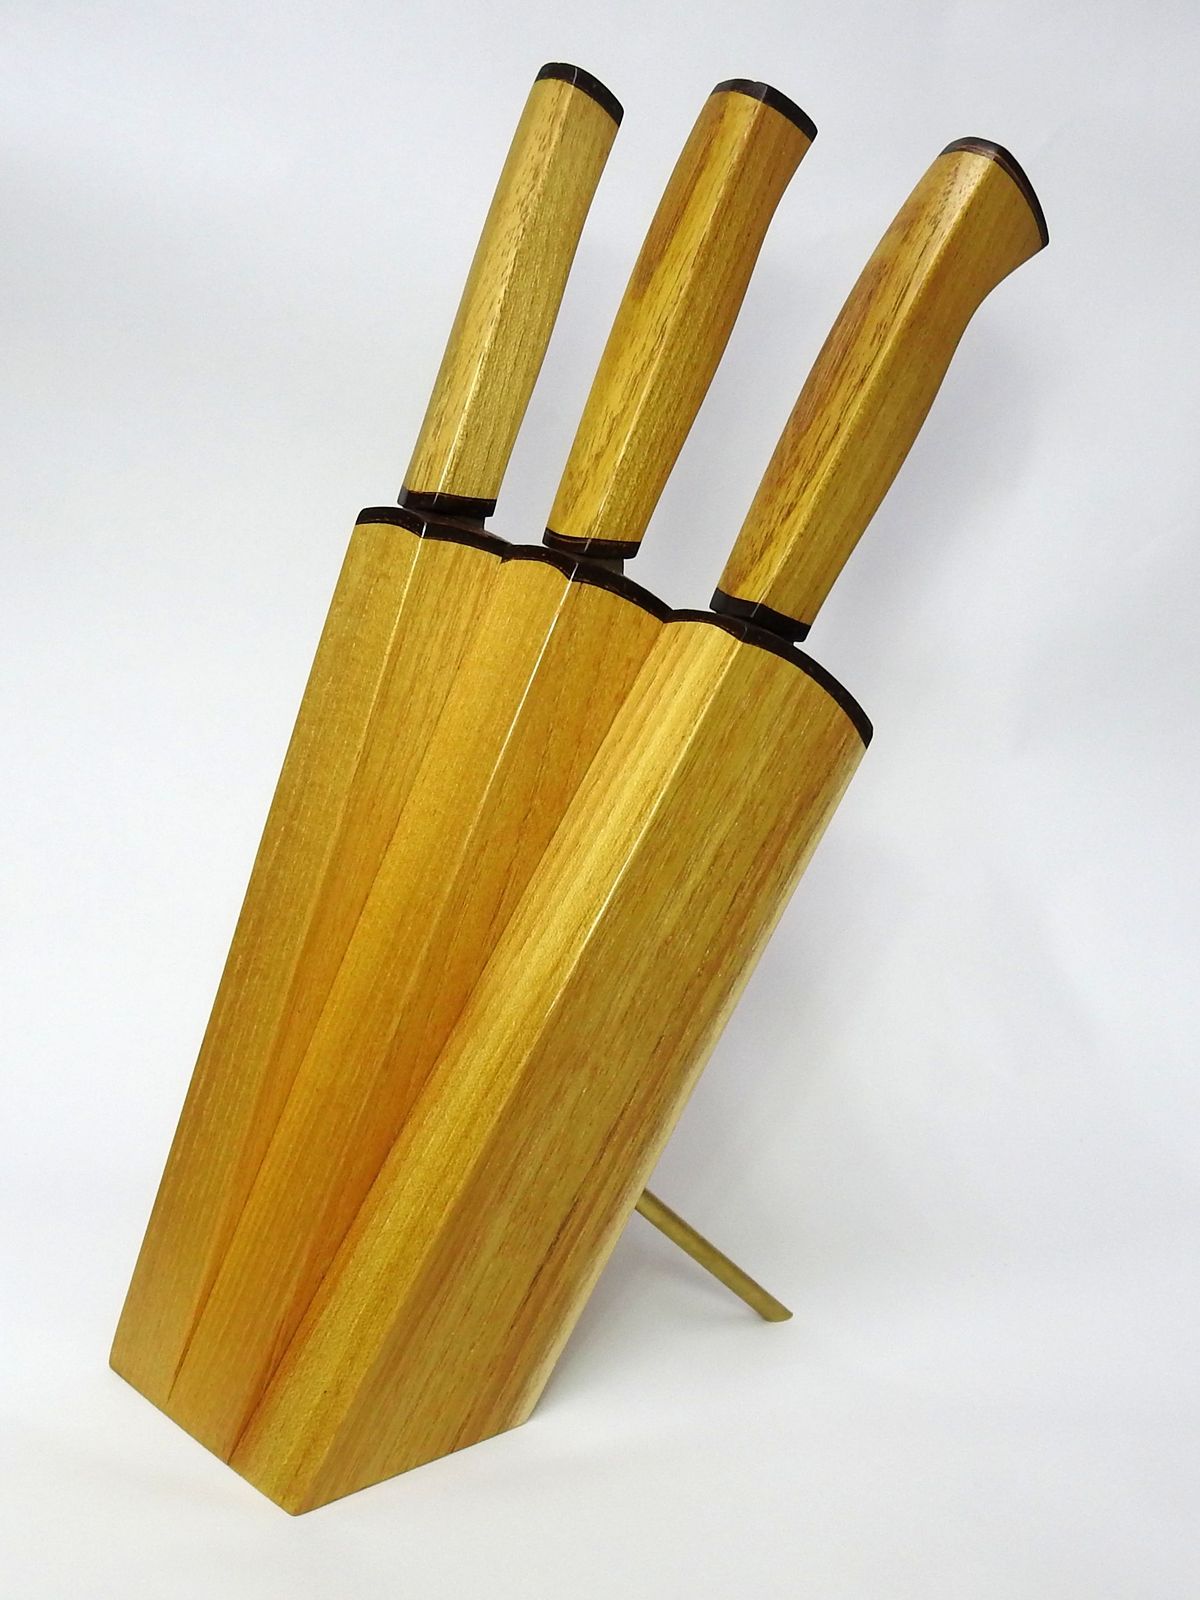
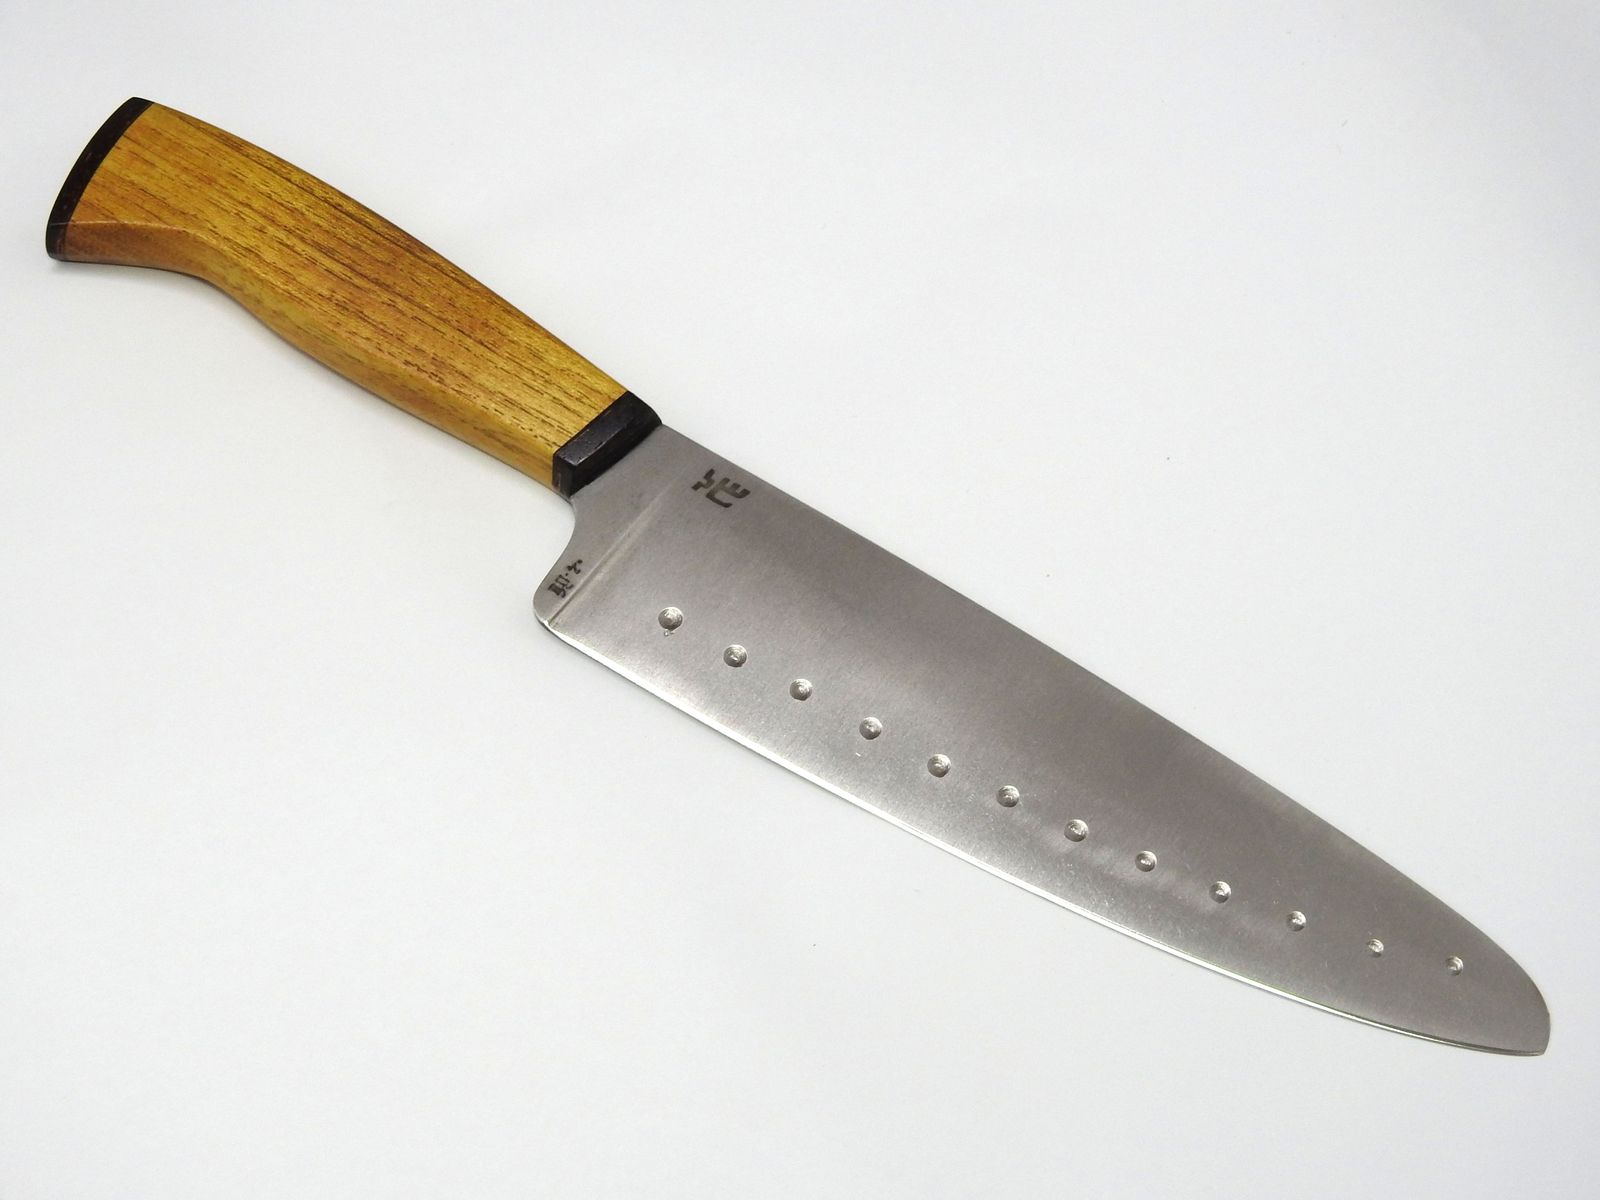
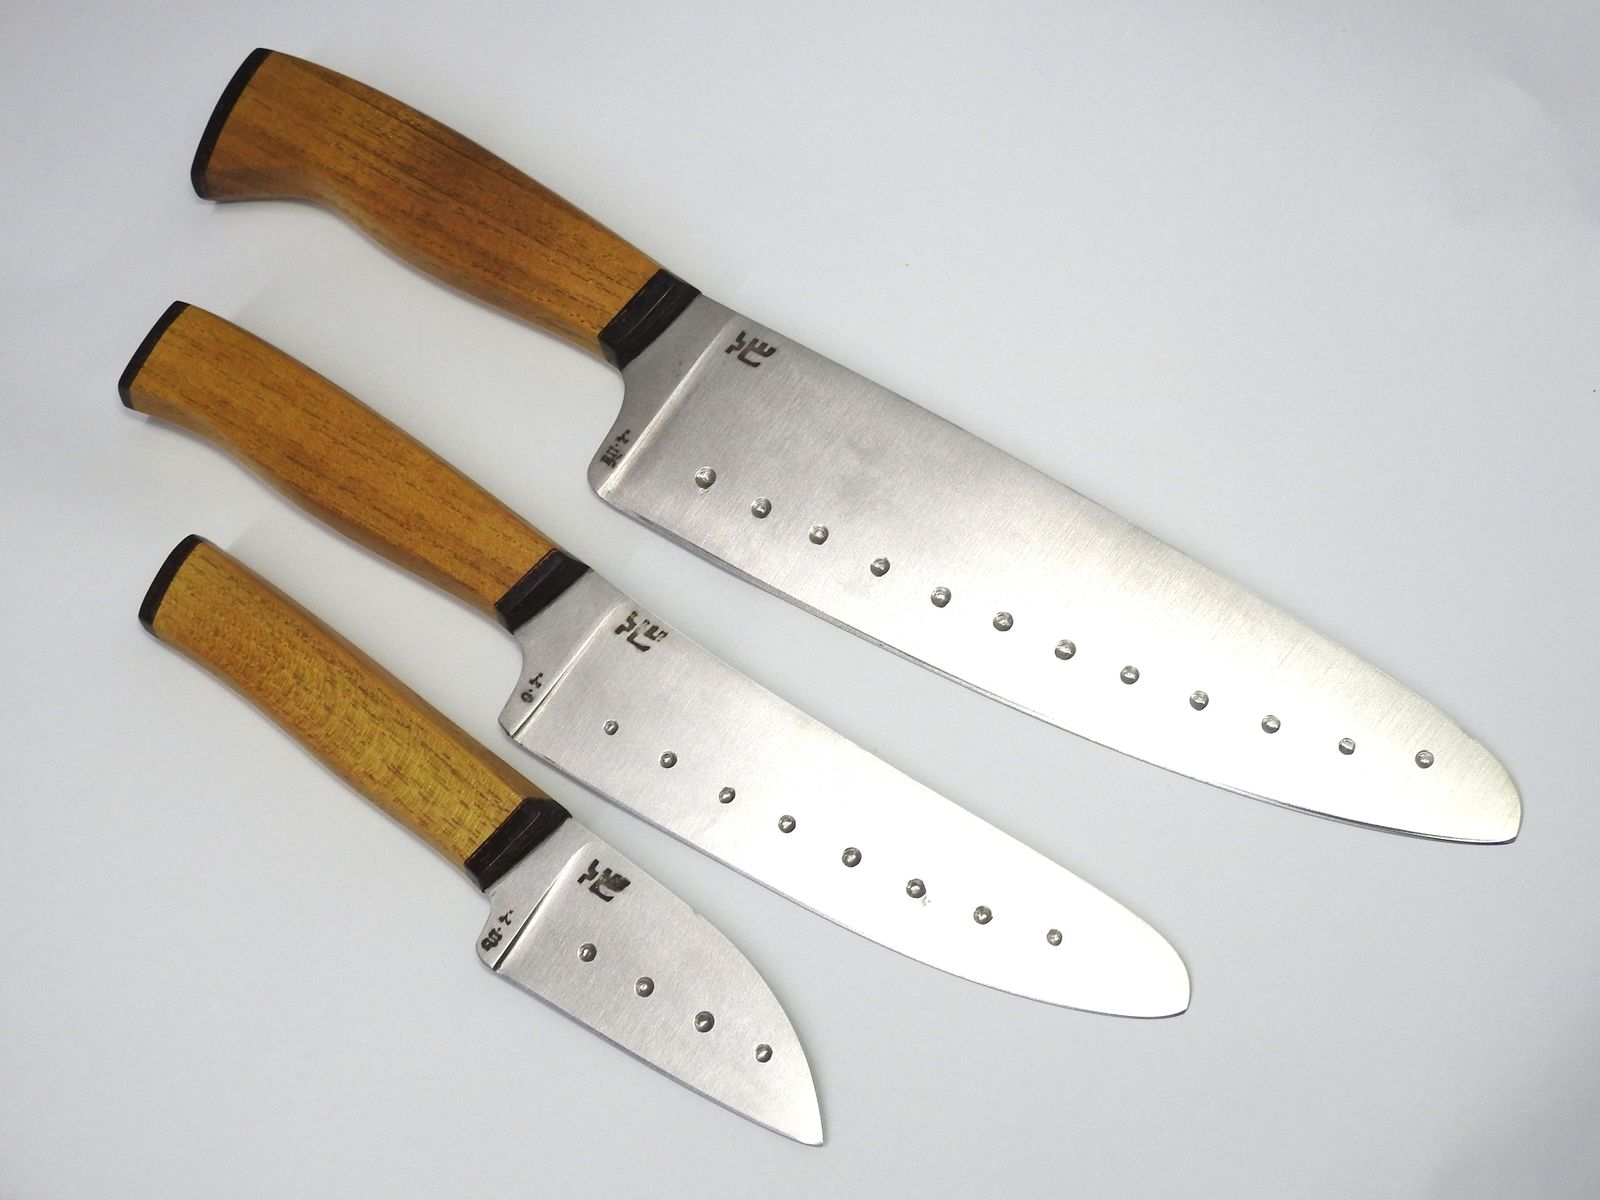
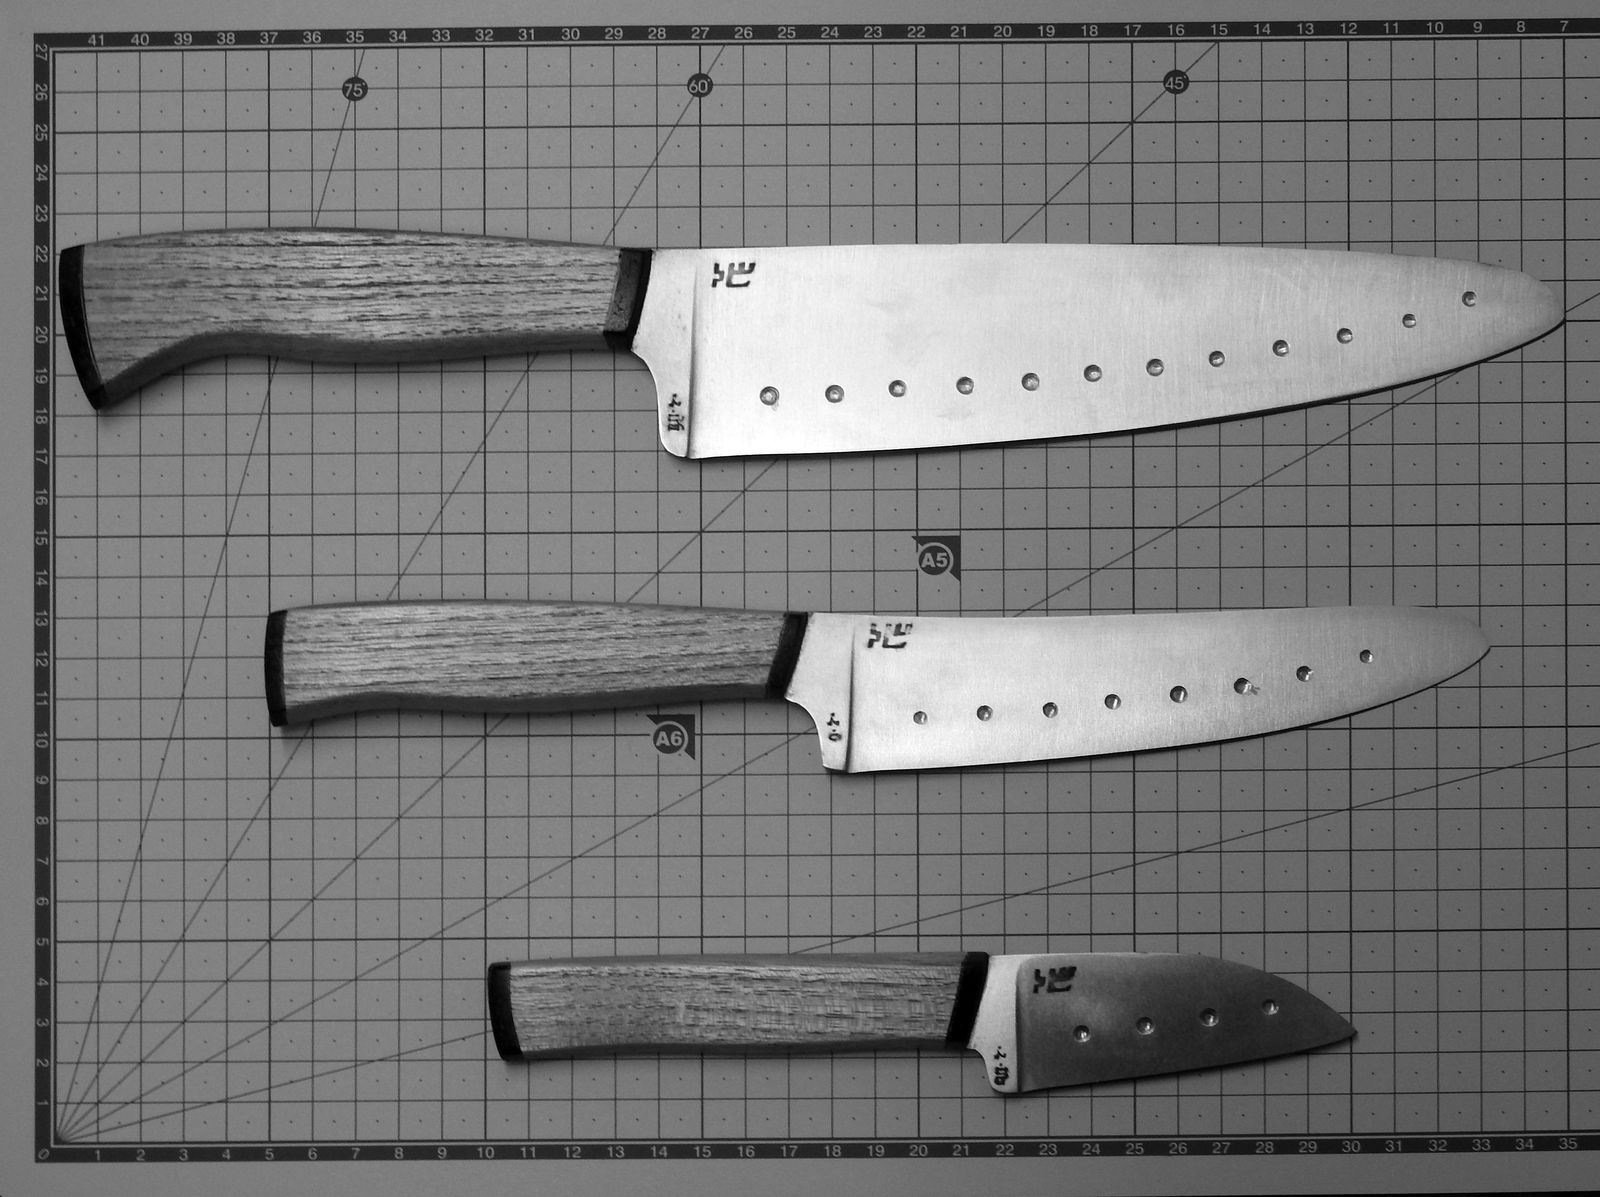
Getting a Different Grip on Handles

I have recovered from the vaccine haze and Christmas laze so today I was able to finish (i.e. sharpen and clean up) five knives. Initially, I have intended to make these with the usual rounded ergonomic handles, but during the work, I have decided to try something a bit different and I have made the handles with a hexagonal profile. With a flat back and belly and ridges somewhere around the middle of each scale. They do feel comfortable enough in the hand and this profile is very safe against the knife twisting in the hand if big force needs to be applied. With a knife, everything is about trade-offs between comfort, safety, costs, and functionality. What a piece of wisdom that surely does not apply anywhere else /s.

The first one is my medium-sized universal knife, with a rounded (or this time “clipped”) tip. The wood is a piece of very uniform birch wood that was pickled in ammonia which gave it a slightly brown color.

© Charly, all rights reserved. Click for full size.

© Charly, all rights reserved. Click for full size.

© Charly, all rights reserved. Click for full size.

The second one has a handle from jatoba, and it is a kinda prototype of the type of knives that I want to make to make use of my jatoba treasure-trove.

© Charly, all rights reserved. Click for full size.

© Charly, all rights reserved. Click for full size.

© Charly, all rights reserved. Click for full size.

Both of these have a bit thicker blades than I ideally want them to have. That makes them very sturdy, but perhaps less ideal for cutting some hard foods. Still should cut about anything with ease.

Of the five finished knives, three are chef knives.

One has again the handle from jatoba. I am very pleased with the handle, not so much with the blade. The curve of the cutting edge did not come out as I wanted it and I was unable to correct it during sharpening without risking destroying the blade.

© Charly, all rights reserved. Click for full size.

© Charly, all rights reserved. Click for full size.

© Charly, all rights reserved. Click for full size.

The same objection applies to a knife with the handle from black locust, with the addition of the blade not having proper taper at all. – I have messed up the grind mightily on this one. Nobody else is probably going to notice it and the knife will be still perfectly functional, but I need to hold myself to a higher standard than that. Anyone can make a perfectly functional knife, it is not that hard.

© Charly, all rights reserved. Click for full size.

© Charly, all rights reserved. Click for full size.

The third one, with the handle from spalted poplar wood stabilized with honey-color dyed resin, is the closest to what I was aiming for of these three. A broad blade comes to an extremely fine cutting edge, slightly curved to allow for slicing as well as draw-cuts. This is a knife that I have no objections about. Well, except for a slight asymmetry in the handle shape. The asymmetry in coloring is of course due to the used wood and is part of the character,

© Charly, all rights reserved. Click for full size.

© Charly, all rights reserved. Click for full size.

© Charly, all rights reserved. Click for full size.

These knives were supposed to be parts of sets, but I have messed up the numbering, so they will have to make their way in the world solo. I could not make a set of the spalted poplar anyway, I only had two pieces of that wood and I messed one of them up.

These angular ergonomic handles are easier to make than fully rounded ergonomic handles so I will make more of them, especially for cheap-ish knives with handles from jatoba and black locust. The pile of naked blades shrinks, but very slowly. There is still a lot, and I mean a lot of work to do.

View of my Knife Testing Lab

Its Christmas and that means cutting up a lot of food in a lot of different ways. So I thought I might share a little peek in our humble knife testing facility.

© Charly, all rights reserved. Click for full size.

My mother is giving the knives thorough testing and so far she has not found any task they are not suited for. I have tested them too, yesterday, when I was gutting, skinning, and fileting the carp for traditional Christmas dinner. The three knives were up all the tasks, including sewering the head from the body and de-boning the fish (which consists of cutting out the ribcage and spine). I am usually very critical of my work, and these knives do have some cosmetic issues but functionally I am very satisfied with the design. The handles do allow for a variety of grips that are commonly used in the kitchen by both noobs and pros. The rounded tips on the medium and the chef knife did allow me to easily scrape off the scales with the former and place one hand safely on the blade for additional pressure for the latter. The tip on the smaller knife was sharp enough to pierce the wall of the abdominal cavity and its shape did help to avoid piercing the guts as well when cutting it open. Which is important, especially regarding the gall bladder – if you pierce that, it can render a lot of the meat useless.

The testing will continue of course – what is not known yet is how the cheap oil finish will stand up to time. For that several months are needed at least, several years would be ideal. But I do know already that when I am finished with my current batch of knives, it is worth making these sets for sale because they are not just ornaments and will be genuinely useful to whoever buys them.

Regarding my third Covid shot, yesterday the slightly elevated temperature was gone and I was feeling mostly OK. But I did notice a symptom that I do not remember from my previous two shots – in addition to a sore shoulder near the injection site, the lymphatic nodes in my left armpit swole a bit and became tender, and the pain extended to my left pectoral muscle. It has receded a bit, but it still hurts somewhat, although not as much as to impede me in any meaningful way anymore.

It seems that I had a different reaction to each of my three shots, although they were all Pfizer. And not only different in duration, but also where, when, and how the symptoms are expressed. Interesting but hopefully not very consequential.

Birch Bark Handles

When I was flatterooning birch bark, I have got some sheets big enuff to make handle scales on smaller knives, so I did.

This one badger knife has one handle scale significantly darker than the other, and the lighter one has a distinct camo-look. I am not sure what to make of that, but the knife looks nice and functional.

© Charly, all rights reserved. Click for full size.

© Charly, all rights reserved. Click for full size.

© Charly, all rights reserved. Click for full size.

On the second knife I had better luck finding more similar pieces of bark, but I was also experimenting with making ornamental pins and those were not entirely perfect. But I will probably continue making them, I think they do have kind of charm.

© Charly, all rights reserved. Click for full size.

© Charly, all rights reserved. Click for full size.

© Charly, all rights reserved. Click for full size.

There is still a lot of blades to outfit before I can seclude to warm cozy indoors and make the leatherworks. In the meantime, I am thinking a bit about what kind of sheath would fit these knives best.

Simple Finish Knives

I have made twoo puukko. To be honest, I was not a fan of this type of knife at all. I have only decided to make them just as a part of my ongoing knifemaking education. But now I am totally a convert.

The first one has a handle made from birch bark, cow bone, and white brass. It looks a bit like a stacked leather handle but it feels different in the hand. Birchbark can be flattened by boiling it in hot water and pressing it between two boards to cool and dry off, making it into flat hard sheets. They are slightly more brittle than wood, but they do not have any preferred failure direction, so they do not split and break easily.

© Charly, all rights reserved. Click for full size.

© Charly, all rights reserved. Click for full size.

© Charly, all rights reserved. Click for full size.

The second one has a handle from birch wood with a small burl in it. It is not proper burlwood, it was just a piece of firewood that I thought will be interesting. I think I was correct in that surmise. The endcap and bolster are from pakfong.

© Charly, all rights reserved. Click for full size.

© Charly, all rights reserved. Click for full size.

© Charly, all rights reserved. Click for full size.

© Charly, all rights reserved. Click for full size.

Both of these knives have just a simple finish to them. The blades’ primary bevels were ground only up to 120 grit and then tumbled after quenching in sand as long as it took to take all the scale off. Bolsters and end caps are not highly polished, as well as the handles. In fact, I took a steel brush to them to roughen the surfaces a bit. And the finish is just several layers of ordinary boiled linseed oil.

I was aiming for a simple, rough-looking sturdy knife as well as a simple, easy-ish manufacturing process. I think I have managed both. I really like these knives and I will make at least somewhat fancy sheaths for them. And I will definitively make more puukko in the future. I also think that this design is ideal for recycling old files into knives, so I will probably do some of that too.

Accidentally Tacticool?

I have designed this knife with a focus on ease of manufacture. It is meant to be a simple design that would allow me to utilize micarta made when impregnating wooden handles with epoxy. The metal bolsters are not exactly easy to make, but micarta would allow me to forgo them completely if I ever decide to do so. I do not like knives without bolsters, thou.

© Charly, all rights reserved. Click for full size.

© Charly, all rights reserved. Click for full size.

© Charly, all rights reserved. Click for full size.

The ornamental pins came out more asymmetrical than I hoped for, I will have to use another method to get them more consistent. And the black micarta, made from old jeans, looks tacticool, which is not entirely intended. The knife is a small outdoor knife, suitable for example for mushroom picking. In fact, my father immediately said it would be a knife ideal for mushroom picking upon seeing it, which made me happy because that was my intent.

Then I have also made a badger knife with a handle from micarta. But this time it was not micarta made from stacked layers of fabric but from smaller cuts of different colors crumpled together in the resin.

© Charly, all rights reserved. Click for full size.

© Charly, all rights reserved. Click for full size.

© Charly, all rights reserved. Click for full size.

It is hard to take a photo of, but the crumpled fabric does give the micarta a black&grey camo look, which is again more tacticool than I intended. I will probably start making micarta with bright colors because those are more suitable for a forest walk IMO – if you lose them, you have better chances of finding them than these. Although the stainless steel would, of course, gleam like a naked bum amongst the undergrowth.

I will probably furnish both of these with simple black sheaths. These knives are meant to be simple.

An Experimental Kitchen Knives Set

This set is numbered, but I won’t be selling it. I have tried several new things whilst making it and it was designed in part with a focus on ease of manufacture, except the experimental dimples in the blades.

© Charly, all rights reserved. Click for full size.

© Charly, all rights reserved. Click for full size.

The stand is made from three slabs of massive black locust wood and the front of the knife stand, the bolsters, and the end caps on knife handles are made from a coconut shell. Fitting the curved coconut shell perfectly to a piece of wood is of course not possible, and I have solved that problem quite successfully by dyeing the epoxy glue dark brown.

© Charly, all rights reserved. Click for full size.

© Charly, all rights reserved. Click for full size.

© Charly, all rights reserved. Click for full size.

The finish is simply drying oil (commercial “Teak oil” which is a mixture of various oils) applied in several layers daily for over a week. It is still a bit tacky to the touch, but that should solve itself in time and with use. The surfaces are not overly polished – I did not go above 330 grit for both the metal and the wooden parts. Black locust wood has big pores in its growth rings, so polishing it very highly makes little sense anyway. I have, in fact, brushed the wood with a steel brush to accentuate the pores.

© Charly, all rights reserved. Click for full size.

I tried to make divots in the blades to make them less sticky to food, but it did not work out, they have too small a diameter to have any noticeable effect (I think). I will either have to build a tool to make these divots wider or to make very shallow fullers reliably and reproducibly. Neither of those two tasks is easy and I do not currently have any ideas.

© Charly, all rights reserved. Click for full size.

© Charly, all rights reserved. Click for full size.

The handles are not of an overly complicated shape, they have simply hexagonal profiles with some curvature to the facets and smoothed edges. They are reasonably easy to make and comfortable in the hand. The tang is held not only with glue but also with a nut on the end, which is covered by the coconut shell endcap.

© Charly, all rights reserved. Click for full size.

© Charly, all rights reserved. Click for full size.

© Charly, all rights reserved. Click for full size.

I think these three knives should cover just about any task that an ordinary home cook needs to do in their kitchen. I hope. I have given the set now to my mother to test and I have forbidden her to use any other knife for the time being under the serious threat of confiscating her other knives. She has got instructions to use and abuse them to test them thoroughly. If they pass the test, I will make multiple sets (without the divots in the blades) for sale.

I have also been thinking of adding this kind of picture in the future to my blades when I offer them for sale on the interwebs, to save myself the trouble of having to write the sizes in words for each piece. What do you think about that idea?

© Charly, all rights reserved. Click for full size.


One Santoku, Two Santoku, Three Santoku…

Today was finishing day – I finished six knives, three of which are Japanese-style santoku kitchen knives.

Three santoku knives. © Charly, all rights reserved. Click for full size

Japanese knives are not my forte. I know a bit about them, but not much. I do not intend to make them in significant numbers. Not only because I am not Japanese, but also because some of them are highly specialized tools optimized for one specific task and most people here in Europe would have no clue whatsoever how to use them or care for them and those who do would probably prefer to buy them from actual Japanese craftsmen. But I had three offcuts that just lent themselves for this type of blade and I am all for making the most with the least amount of waste.

Where I (afaik) differ most significantly from Japanese blades is the round-heeled ricasso. And the knives are glued together with epoxy.

Olive wood handle. © Charly, all rights reserved. Click for full size.

This one has a handle from olive wood, cow bone, and buffalo horn. The handle is asymmetrical – the bone piece is not flat but rounded. Fitting the wood, bone, and horn together was thus a bit of work, but I have managed to fit them together fairly well, albeit not perfectly. The handle has a D profile, with a flat-ish top and rounded belly.

Olive wood is extremely beautiful and I should have probably saved the piece for a worthier blade. But it stinks to the heavens when worked and is somewhat greasy so it tends to clog up abrasives something awful. Due to the greasiness of the wood, I have finished the handle with tung oil, five layers over two weeks. And when I was at it, I used the same finish for the other two as well.

Santos mahogany handle. © Charly, all rights reserved. Click for full size.

This is just a simple two-piece handle, bone bolster, and Santos mahogany wood. This wood works reasonably well and is very dry, the exact opposite of Olive. It does not gum up the tools, but it makes a lot of dust that likes to float around. I think it is a neat knife. The handle has a rounded belly and a faceted back.

Cherry handle. © Charly, all rights reserved. Click for full size.

And last a knife with a handle from my late cherry tree, cow bone, and buffalo horn. The handle is faceted, probably the closest to a true Japanese-style knife.

They are all 160-170 mm long blades, with handles 110-130 mm. I am not planning to make more unless I get suitable offcuts again.,

Eye Yam on Insta Gram

It is not as if somebody complained, but I do not wish to constantly “knife up the joint” at FtB anyway, so I have finally, reluctantly, made an Instagram account to share pictures of knifemaking and knives. If nobody minds, I will still post longer written articles about knives and knife-making here, but only for bigger or more special projects, whereas on Instagram will be snippets and pictures and off-the-cuff thoughts. Probably mostly about knives. There may be some garden pictures in due time too.

There won’t be any sexy photos of my beautiful body in lingerie or insights into my lavish lifestyle with expensive gadgets, that I can promise for sure.

If you are interested, here is a link – click -.

An Overabladeance

I have not made a knife for several months now, but that does not mean I was not working on knives. Below the fold is most of what I have done and also a bit about what I intend to do with it in the future.

BTW, I would appreciate it if you let me know something about your favorite knife if you have one. Almost everyone has, even when they are not “into” knives in particular.

[Read more…]

T’was Tool Making Day

I did not feel like working on knives today, so I have decided to make the measuring pin from brass. It took me rather longer than I expected because I had to work out several things on the fly and there were therefore several failed attempts and repairs. But I managed it in the end and the result looks kinda cool. And it works just as well as the wooden one, in addition to being ever so slightly more precise.

© Charly, all rights reserved. Click for full size.

The bent brass pin on the right is screwed and glued into the lower half of the pin and goes through a hole in the upper half where it has slight (several tenths of a mm) clearance.

© Charly, all rights reserved. Click for full size.

Here you can see the upper jaw, where a ground wood-screw holds the spring tightly in place. In combination with the bent brass pin, this holds both jaws fixed against each other so the tips do not misalign (too much) when used.

© Charly, all rights reserved. Click for full size.

On the underside is no screw. Originally I thought that two bent brass pins in the back portion will do the trick. But it did not work at all, it turns out that make something like that precise enough by hand is impossible (for me at least). When you look closely at the pictures, you will see that there are plugged holes where that second pin was. If I were making another one, I would try to ditch the guiding pin altogether and fix both jaws to the spring with a screw. Whether it would work better or not I do not know, since I stopped tinkering as soon as I got a working product.

And the second tool that I have made today is a center scribe.

© Charly, all rights reserved. Click for full size.

It is a piece of black locust wood onto which are fixed two small ball bearings. The axes are just press-fitted both into the wood and into the ball bearings. Black locust is strong enough to hold and if it splits, I will make the body from aluminium, this was just a proof of concept.

© Charly, all rights reserved. Click for full size.

Here you can see the other side. The wood-screw goes all the way through and just the tip pokes out between the ball bearings. Should it turn out necessary, I will eventually replace the screw with a re-ground drill bit, but for testing, a screw was a readily accessible and easily applicable piece of hardened steel.

© Charly, all rights reserved. Click for full size.

To scribe the center on a flat bar (in the future on an outlined blade) it is simply inserted between the ball bearings so it rests firmly on both of them and on the screw tip. When dragged through (for example downwards on the photo, assuming the tip of the tang is down), the screw tip inscribes a line that is very close to the center. Not perfectly, but I can also scribe a second line by dragging the piece of steel through the assembly in the other direction (putting the tang up in the photo and dragging that way). These two lines very close to each other are sufficient enough for me to grind the blades symmetrically, after all, it is better than what I have used so far.


Caliper Pin – New Knifemaking Tool

When grinding blades, it is important to have the ridges, fullers, and similar as symmetrical as possible, especially before quench. An asymmetrical blade has a much higher probability of warping or bending in the quench.

On an unhardened blade, one can scribe markings with a scribing needle and/or compass, but once the blade is hardened, that is no longer possible. And I still want my blades to be at least mostly, even though not perfectly, symmetrical too.

I used to measure the symmetry with a help of a folded piece of paper that I have cut with shears so that it has two perfectly aligned points. When folded over the blade, I could easily-ish check if the points align on the ridge on both sides and thus check where I shall grind more during the polishing to keep the symmetry.

But the pieces of paper get wet and manky in the process, and I kept of course losing them so I had to make new ones over and over every day and sometimes several times a day. And today I finally got an idea how to replace them with something much better and hopefully permanent. I took one wooden clothespin and I ground it in about 5 minutes to sort of mini-calipers that can be clipped onto a blade

© Charly, all rights reserved. Click for full size.

This pin is made from softwood so I could not make the point too refined, but I do not need to. I want to make my blades mostly symmetrical, not perfectly symmetrical. And anyhoo, I shall, in the future, probably make a better and more precise one out of brass, this is just a proof of concept.

And it works well, here you can see it in use. It shows that the ridges on both sides are within few tenths of a mm apart, and that is good enuff for me, that is a difference that cannot be seen with the naked eye and is not easy to measure even with calipers.

© Charly, all rights reserved. Click for full size.

.

Mirror, Mirror…

I have finished the two fullered blades that I intended to mirror-polish for research purposes. It went reasonably well, I must say. The new jig helped a lot to smooth out and polish the fullers and although I had to resort on occasion to my old method of wrapping the abrasive around a bottle cork or popsicle stick, my fingers were spared or the worst of the worst. They are not perfect, but they are good enough for it to take some time to spot the irregularities and imperfections.

I think that next time I will do even a bit better because I did not have the jigs from the start for these, I have developed and tinkered with them during this project. One such tinkering that I forgot to mention in my previous post was to coat the idler wheels on my belt grinder with PVC flooring offcuts. That has reduced the chatter when grinding and polishing the fullers on the belt grinder, so I could actually use the belt grinder for polishing, and the handmade jig was subsequently only used to remove the perpendicular scratches and replace them with longitudinal ones. And because next time I will have all this equipment and the knowledge already, the results should, at least in theory, be better and with less work.

So here are some pictures containing the main things that I am writing about – blades, flowers, and insects.

© Charly, all rights reserved. Click for full size.

© Charly, all rights reserved. Click for full size.

The pumpkins are flowering nicely and there seem to be enough solitary bees around to pollinate them.

The blade on the left is the one that I have almost tossed. The fullers align well near the hand, but they diverge towards the tip quite noticeably, at least a few mm. Both fullers on both blades are a bit irregular.

I have a love-hate relationship with mirror-polished blades. They are very difficult to make, it is a lot of hard manual work that busts fingers and back so I hate doing it because I am tired and I do not recover as well as I should from physical exertion. But I also like doing it because it is very rewarding and satisfying to see the gradual change with each step as one progresses from 40 to 7000 grit and then to the buffing compound.

But they are never truly finished because the mirror polish exacerbates every minute irregularity to an absurdly high degree. A few microns deep divot will be seen at a certain angle. Also one thinks all scratches are removed and then, a few days later, you look at it at a very specific angle in a very specific light and suddenly you see that some gossamer-thin scratches are still there.

Then there is the practical side of course – although the steel is hardened, at mirror polish you can literally scratch it if you cut cardboard or office paper with it. They are very precious flowers indeed – basically, the wind blows a speck of dirt on the blade, you wipe it off and it leaves behind a scratch that will be visible in some light. That was one of the main reasons why I have decided to make a tumbled finish for my friends’ knife and why I am going to use it for most of my knives because that hides all but the most egregious scratches.

All in all, although these two blades are not perfect to a degree that I would be perfectly content with them, they are good enough that I shall go on and finish them with high-end fittings.

Fulleramajig & Joy and Depression of Knifemaking

My friend got the knife I conspired with his wife to make for his 40th birthday. He wasted no time and tested it on a BBQ that very day. Afterward, he called me and thanked me and sung praises of his new toy. I must admit that it made me happy for a moment because this is the main reason why I am making knives – to make the end recipient happy that they got something unique, beautiful, and useful as well. That is the good news out of the way, lets go to the somewhat miserable part now.

In my previous post about that knife, I commented that making the fuller was a pain in the fundament, to which Marcus helpfully replied by reminding me about an old video by Walter Sorrels in which he made a small handheld jig to polish fullers. That has inspired me to make my own jigs for making fullers.

First I made a semi-functional attachment for my belt grinder.

© Charly, all rights reserved. Click for full size.

The aluminum arm can freely swivel around the rusty screw along the right side of the upper idler wheel. It is held in position by an M8 screw on the back and the brass L- part is an end stop. When grinding, the screw on the back sets the maximum possible depth of the fuller and the brass end stop sets the distance of the fuller from the blade spine/edge depending on how I put the blade on the jig.

It works, somewhat. It does not allow me to make the fuller too deep by accident, which is a definitive plus. But it has the major disadvantage of being asymmetric, whereas blades are (mostly) symmetrical. When grinding one side, the back of the blade lays against the end stop, when doing the other side, it is the edge. That makes it difficult to make the start and finish at the same point on both sides of the blade – I have made two blades with it so far and whilst one is reasonably symmetrical, on the other the fuller is off by about 3 mm towards the tip. I wanted to toss the blade but my mother says I should finish it, so I will. Whether I will attempt to sell it, we shall see.

I intend to polish both of these blades to mirror polish, to see how much work that is and how it will look. And to polish the inside of the fuller I have made a small jig from an old furniture leg.

© Charly, all rights reserved. Click for full size.

© Charly, all rights reserved. Click for full size.

It is along the same general lines as the one by Walter Sorrels, only from cheaper materials and less precise. Putting the paper on is a bit fiddly and I will try and come up with a bit better system, but it does work. It is elbow-grease powered of course, so it is a lot of work, but it does allow me to apply the pressure with wrists/palms instead of fingers, so I can put my whole body weight behind it when needed. I got the fullers to 800 grit reasonably fast so I do think that I will manage to get mirror-polish without extreme suffering and pain.

And last update to my workshop is this.

© Charly, all rights reserved. Click for full size.

I would love to have the grinder in a separate room, but alas I cannot afford that. And the dust was getting on my nerves, as well as everywhere else. So I have bought ash vacuum particle separator for my shop-vac. The inlet is made from a piece of leftover sheet metal held with insane amount of ductape on an extendable tube recycled from another, defunct, vaccum cleaner. It works reasonably well and although it does not catch all of the dust, it does catch most of it. As a result my workshop is a lot cleaner and I need not vacuum every surface as often as before.

And now to the total misery.

I was happy to get my licence to actually sell my knives, but I feel miserable all the same. I need to buy and set up accounting software, set up a separate bank account, contact tax/accounting consultant and buy and set up a webshop. And I am procrastinating all of those things because that is the one actual part that I hate.

I have done almost all of the things above as part of my various previous jobs (exception is setting up webshop, but I do have experience with setting up and maintaining webpages), so the problem is not that I do not know what to do. The problem is that if I do not do anything, I cannot fail, whereas when I do all those things, I can. I know it is totally silly, I know that the only way to actually succeed is to do the things that need to be done, but subconsciously (and partly consciously – the odds are not in my favor) I am just expecting failure and I do not want to go through all the hard work just to toss it after a year or two and get emploeyed at some shitty deskjob again. I want to make knives and I would love to give them away for free. But if I did that, I would not be making them for much longer. Attempting selling them is the only way how I maybe can keep making them . And I hate, hate, hate that.

I am depressed. It is irrational, and I know it, but that does not help.