Ant Log turned out very well indeed. It could have been better, but that’s how these things go.
In retrospect, I wish I had used a thinner section of wood, and made the edges more curved and less vertical; that would have had a better chance of bringing out the ant colony’s holes:
 .
.
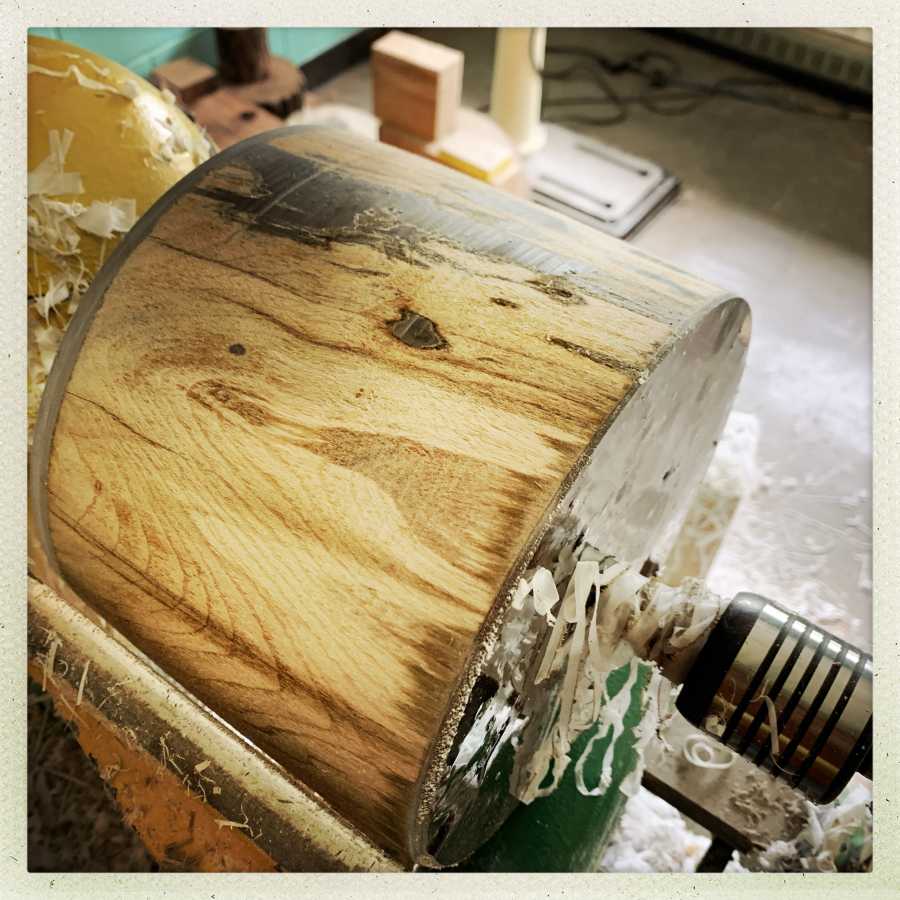
One nice thing about casting in resin using a bucket is that your piece comes out round already, and there’s a little dimple in the resin from where the bucket was injection formed. No trouble centering up the piece – just screw on a face-plate and put the center in the tailstock and go!
I mostly used my mega skew-chisel to shape the outside a bit and give it a bit of taper, then carved a mounting-point for the chuck, turned it around, and put a forstner bit in the tailstock to carve some of the insides out.
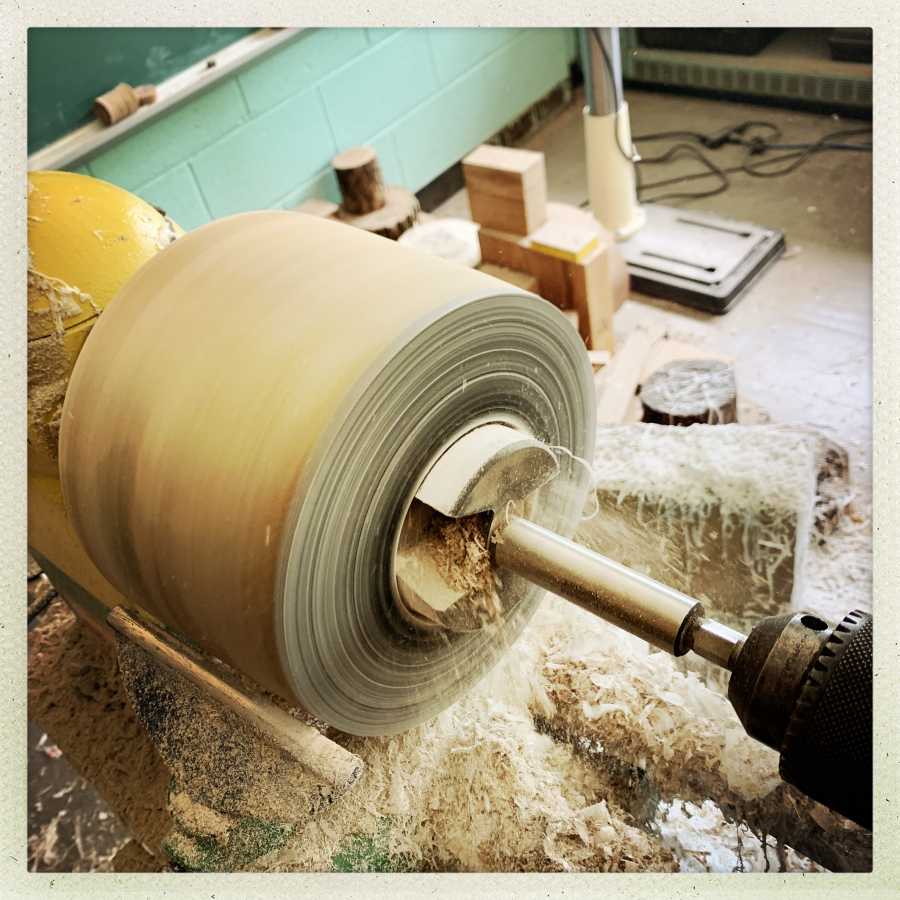
It’s pretty slow going, because you don’t want to burn the wood or the forstner bit, and it made me switch over to the carbide bar. The carbide bar turned out to be a lot faster, but it made a lot of mess.]
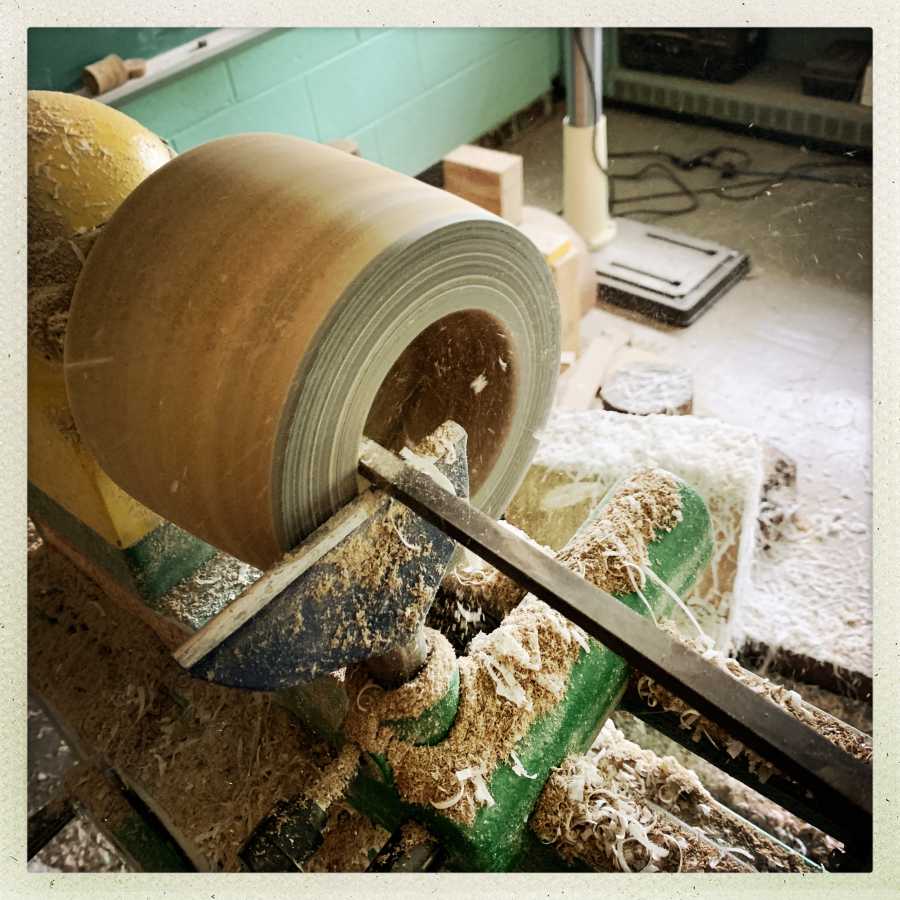
I felt a bit stupid carving out all the resin I had just laboriously injected but, whatever. The carbide bar really rips stuff up.
On youtube the other day I saw someone using a carbide bar with a kind of swan-neck and a base that was wide and thick; I guess that’d be less likely to try to turn in your hand, and the weight would dampen the vibration a bit. I may have to whip up a block of suminigashi and make myself one of those. My mega-chisels, with the huge long handles, work really well; they are very stable.
Then comes: sanding!
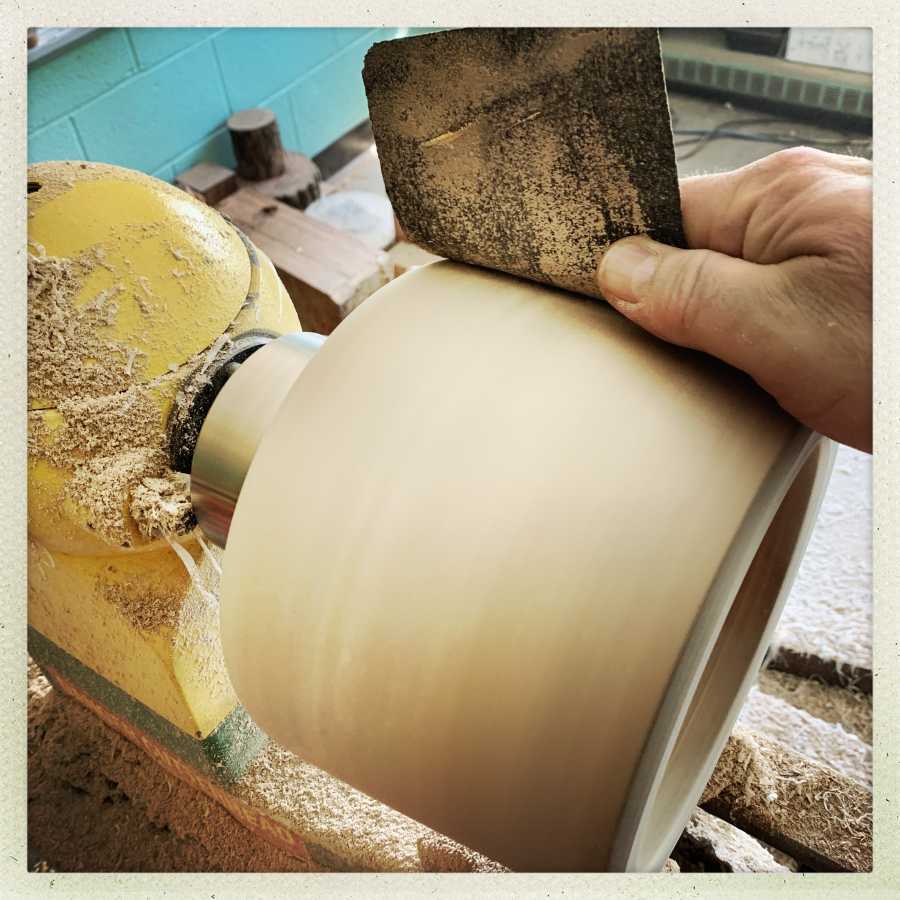
Obviously, you need to be careful not to ever hold the paper so that it can catch on the work-piece or your hand, and drag you around the lathe. That’s more of an issue on the interior: you can reach the inner edges pretty safely but putting your hand in the hole feels like putting it into the mouth of a bear. You do it carefully.
In fact, I was so skeeved by that part, that I decided to do some thinking and strategemizing instead of just going at it. A few minutes later, this is was working quite nicely. Because the drill is not sticky and doesn’t bend, it might tap against the edge but that’s about it. And, honestly, if something goes wrong and the drill gets thrown across the room, well, drills are cheap. Comparatively.
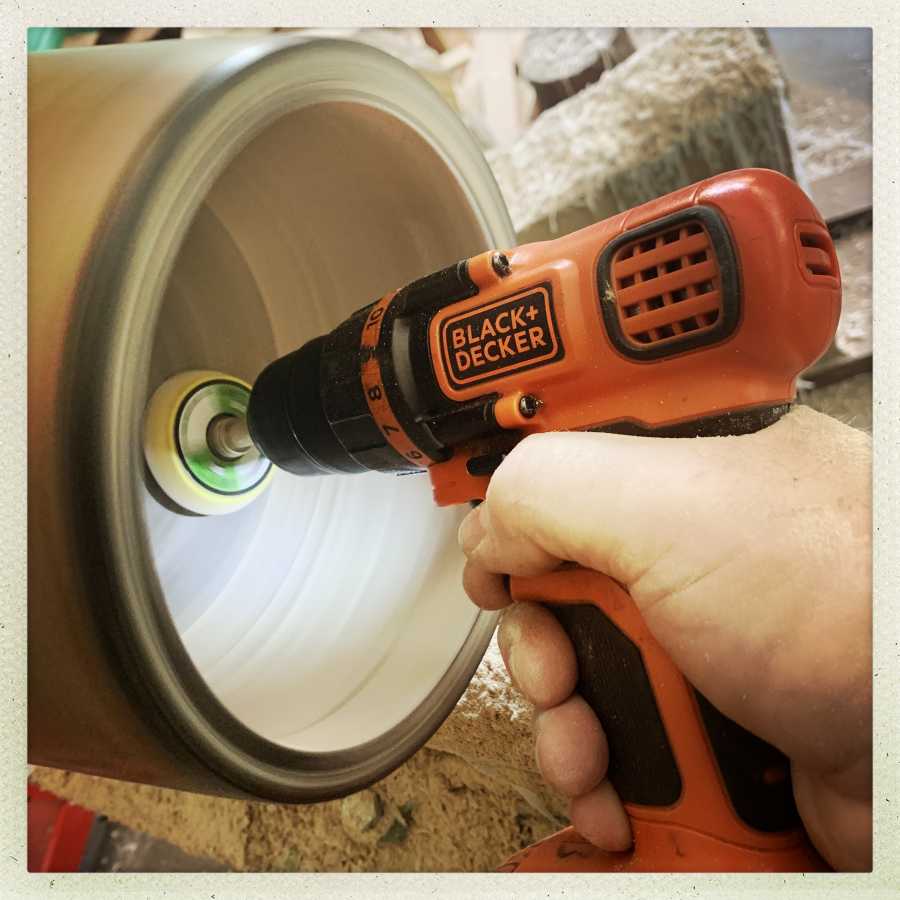
The little sanding pad worked pretty well but because it has a foam backing, it doesn’t shed heat so it melted after a while. Sure makes me wish I had my metal lathe leveled and running but in the meantime I can probably whip something up with some aluminum sheet and a threaded rod and just grind it round on my belt sander. The sanding pad was about 4 times faster and easier on my hand than holding sandpaper, so it was a huge win – if I needed to I would cheerfully treat the pads as consumables and just burn them up.
That reminded me of another thing I have in the shop: scuff-balls!
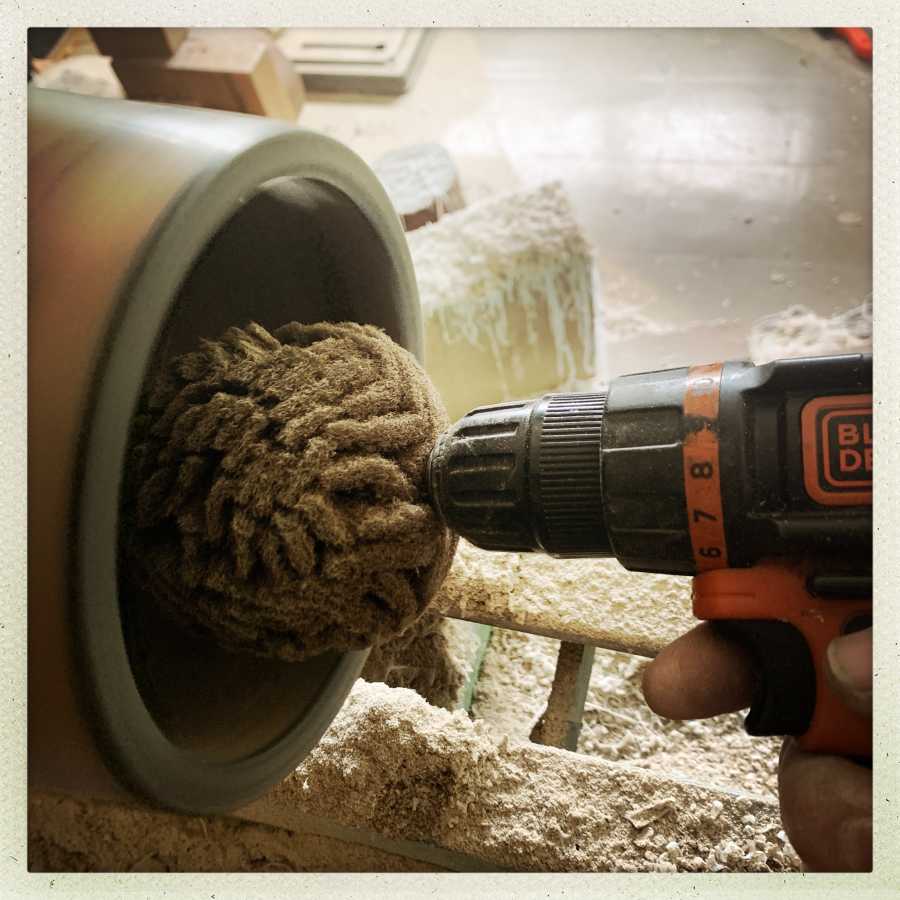
I got the scuff balls a few years ago to help a friend of mine remove some resin (don’t ask how it got there, OK?) from a travertine marble counter-top. The sanding disk thing held up to about 200 grit, and coincidentally the scuff ball is 400 grit. They make them in a wide range of grits so I have a small selection on order. As I said: anything I can do to keep my hand out of the bear’s mouth is good, and it’s good for my arthritis too. Mostly, I’m happy about the improvement in safety – that’s really huge for me.
The last stage was polishing it at length with yorkshire grit. I made my own because I already had all the stuff I needed for it in the closet – it’s beeswax, light oil, and diatomaceous earth. The diatomaceous earth breaks down as you polish with it and you’re left with a nice oil/wax finish. It’s a very fine grit and it takes a while, but the results are spectacular, especially on the resin surfaces.

inside the mouth of the bear
To final finish it, I’ll probably give it a few coats of tru-oil until it’s mirror shiny.
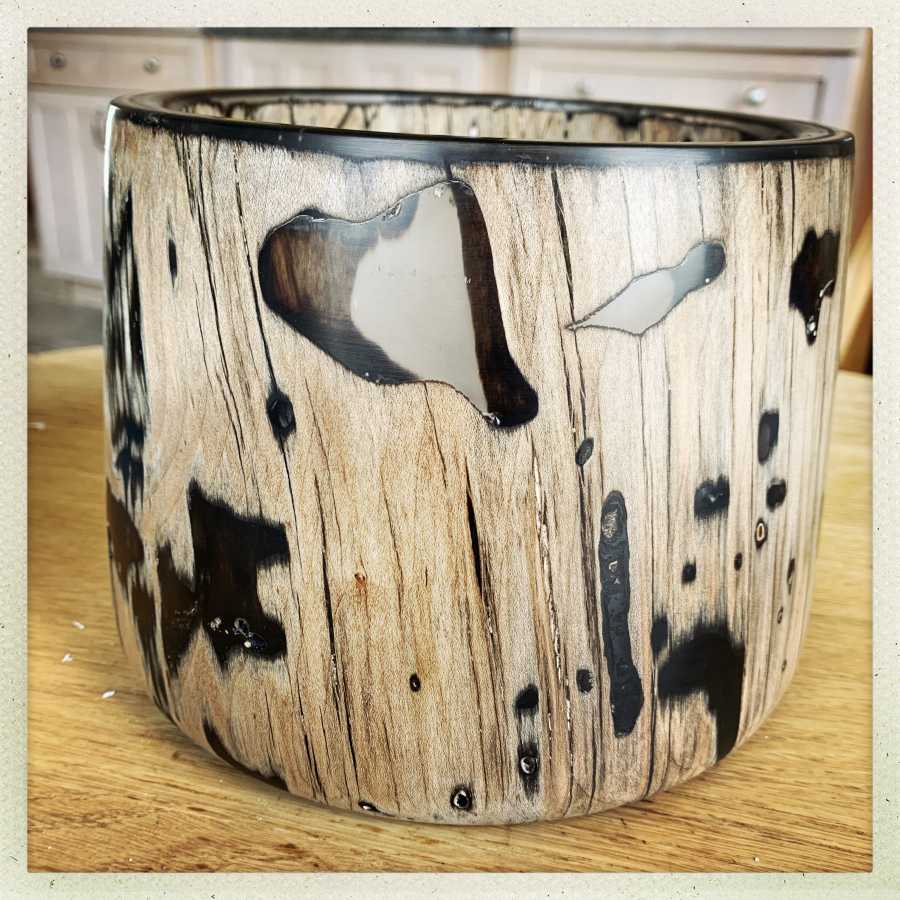
Ant Log!

I wish I had a bigger flatter piece so I could make Ant Platter, but I think I’ll do some shallow bowls next. It takes a fair bit of work getting the piece of wood ready to turn – vacuum infusing, cutting, curing, cooking, resin infusing, pressure tanking, etc, etc. It’s a pain but I think it’s worth it.
Son of broken oak bowl is going to be even more work and a LOT more resin.
Oooh, nice. Specially like the interior shot (`mouth of the bear’) —there’s just something so satisfying about combining worn/damaged/imperfect materials with craft. I usually make my best work with them, actually.
Thanks for showing this.
Lovely, I am so glad it worked out! And safer ways of doing things that are also easier on your hands are good things to have worked out too, so a double win.
That is just so beautiful. That is some really fine work there. I love the idea of using the scuff balls on the drill.
kestrel@#3:
I love the idea of using the scuff balls on the drill.
Yeah, me too – if only because I get to brag that I have coarse grit scuff balls. I’m still basically a 12-year-old inside.
There is a point I forgot to make: the sandpaper heats up REALLY fast; you can blister your fingers if you aren’t careful. Friction is a thing. That’s why the little pad melted; I just needed to give it a break now and then so it could cool down. Also: when you are hand sanding something with resin, there’s a legitimate fear that the resin might soften and the sandpaper might stick and then your hand is rotating with the work-piece.
The little sanding pads’ post is a threaded piece of rod that locks against the pad with a nut – I’m not sure what the diameter and thread count are (looks like 1/4 20tpi) but I ought to be able to thread one of my pieces of aluminum rod and make a longer standoff version that I can use to get into the really tricky spots. The scuff ball is great, though (I need to make a scuff ball extender) and I am pumped to see how a 120grit scuff ball works.
I forgot to say – I find posts like these restful, even when something goes wrong, because barring injury to you Marcus and it’s clear you are careful, the stakes are not high if it does go wrong, but very often I get to see something beautiful that you have made. You and others post about important high stakes things, and that really is great, but it is also exhausting so the making posts, like PZ’s spider posts nd Charly’s making posts and Gilliels photos and making posts and … well you get the idea, are a welcome break.
It looks just lovely!
I have a huge wood-splitting maple block that is near its end for the original purpose. Ants made a nest in it too, a fungus devoured it (despite me shielding it from rain and moisture) so it starts to fall apart. I am going to put it under roof to avoid further damage, nowadays decaying wood is apparently valuable commodity.
That looks cool. The bottom is really interesting
Looks pretty neat. But the clean-up…!
Would it help to cut down on heat if you dipped the sanding pad in cold water every few minutes?
It’s amazing. I especially love how the colouring worked out on this.
jazzlet@#6:
I forgot to say – I find posts like these restful, even when something goes wrong, because barring injury to you Marcus and it’s clear you are careful, the stakes are not high if it does go wrong, but very often I get to see something beautiful that you have made. You and others post about important high stakes things, and that really is great, but it is also exhausting so the making posts, like PZ’s spider posts and Charly’s making posts and Gilliels photos and making posts and … well you get the idea, are a welcome break.
Thanks for the feedback. I sometimes feel like I am being selfish when I post about the fun that I’m having, but – as you say – it’s how I shelter myself from the horror around me, and if I can drag someone else briefly into Marcus-land that’s a good thing.
Gilliel@#11:
It’s amazing. I especially love how the colouring worked out on this.
I didn’t go into much detail about that. The stabilizing resin (cactus juice) was black, which is where some of the contrast came from. Once that was cured, the remaining resin was clear.
publicola@#10:
Would it help to cut down on heat if you dipped the sanding pad in cold water every few minutes?
Some people do that and it also keeps the dust down, at the expense of gunking up the sandpaper grit more quickly.
It’s not a big problem, you just need to remember to sand 20 seconds, pause 5 seconds, sand 20 seconds…
For those of you who like the Ant Log, I am preparing (slowly) Son of Ant Log and Platter of Ant Log. It takes a while to get everything vacuum’d, baked, colored, cooled, mounted, etc. But this is what I have right now:
I am running out of ant log and had a chunk that was about 12″ x 12″ so I cut it horizontally for the next pair of turnings. Maybe it’ll look cool with the holes running from side to side.
Ooooh. *happy anticipation*
How fast do you run the lathe when you’re sanding? I turn mine right down, and don’t find i have problems with it getting hot
dangerousbeans@#17:
I usually leave it at whatever speed I was turning. So: too fast?
Maybe? Might be be worth a try. I don’t know how it works with resin
This is absolutely beautiful work.