Resin and wood make pretty neat effects, so I’ve worked on more than just the red resin/bog oak bowl, which is sitting on my desk next to me as I type this. [stderr]

Drilling for bog oak
Mostly, my experience making the red resin bowl just makes me wish that I had a whole tree worth of bog oak. Damn, that stuff is beautiful. I actually did look into buying a huge chunk of it, having it shipped over by boat, and sectioned at the sawmill across the street, but it came out to about $5,000 which is a lot for wood. Understandably, the prospectors who muck around in marshes in Ukraine [bogoakukraine] would rather sell small pieces at top dollar than release a great big chunk to a possible competitor. But can you imagine what a table-top of that stuff would look like?
One thing I concluded from the experiment is that if you are making resin a compositional element, it needs to be large enough and dramatic enough that it is clearly distinct from the wood. So, I have some (I think it’s oak but it may be ironwood or something else) log that is very split, and I decided to split it further. Then, I cut a plywood disc and glued the broken pieces to the plywood, wrapped it in plastic after making sure there were some pinholes so resin could leak out, and poured about 4 cups of clear resin into it.
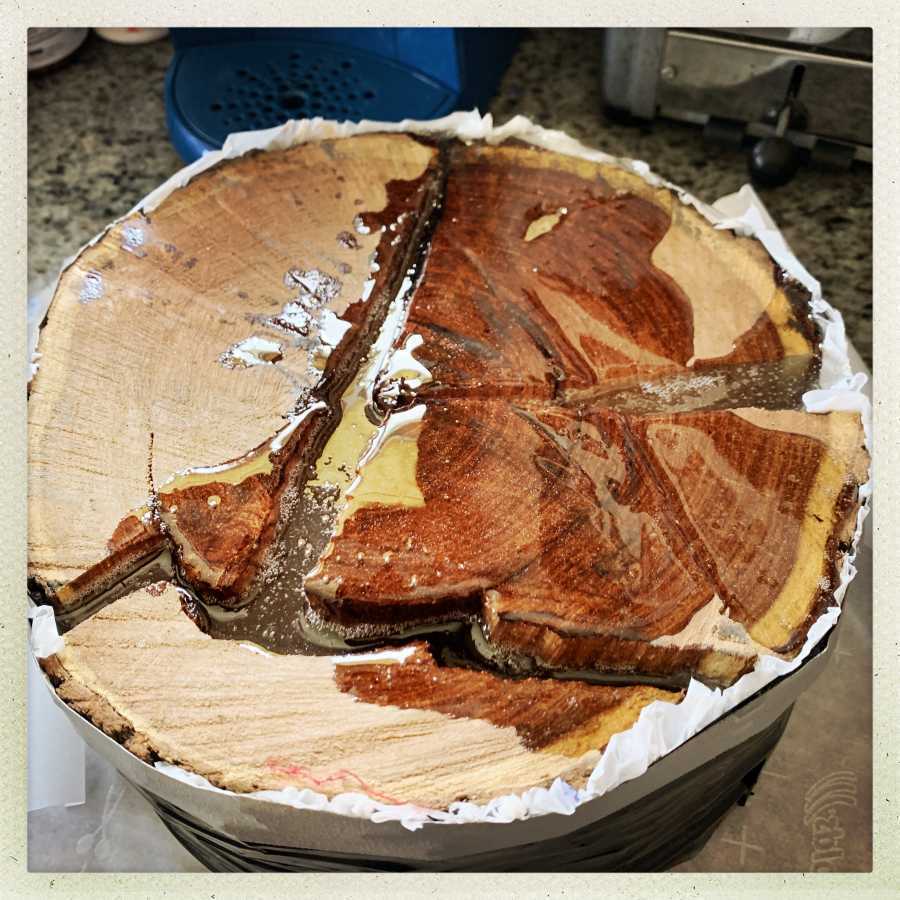
I’m learning quickly; this time I put it on a big piece of parchment paper, so the resin leaked out, flowed over the parchment paper, and onto the floor. Did I mention that kiridashi knives are great for scraping resin off floors? Well, they are.
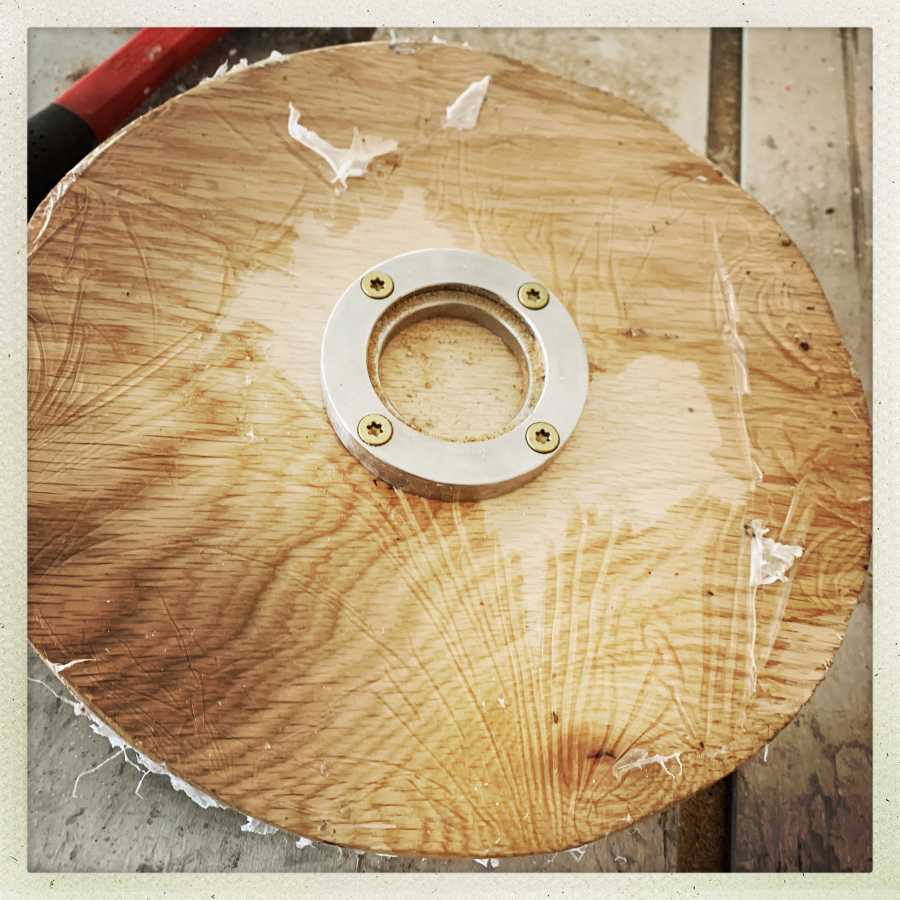
One of the reasons I did the thing with the plywood was because I could compose everything nicely, but also it was really nice to have a flat surface to attach the chuck ring to. Since the ring mounts on what will be the open face of the bowl, there’s no worry about messing things up. The plywood is going to get chiseled off to shreds when I flip the bowl around, if everything goes according to plan.
Plywood is really tough stuff, let me mention that. It’s even been soaked in resin and the wood chunks are really glued on there.
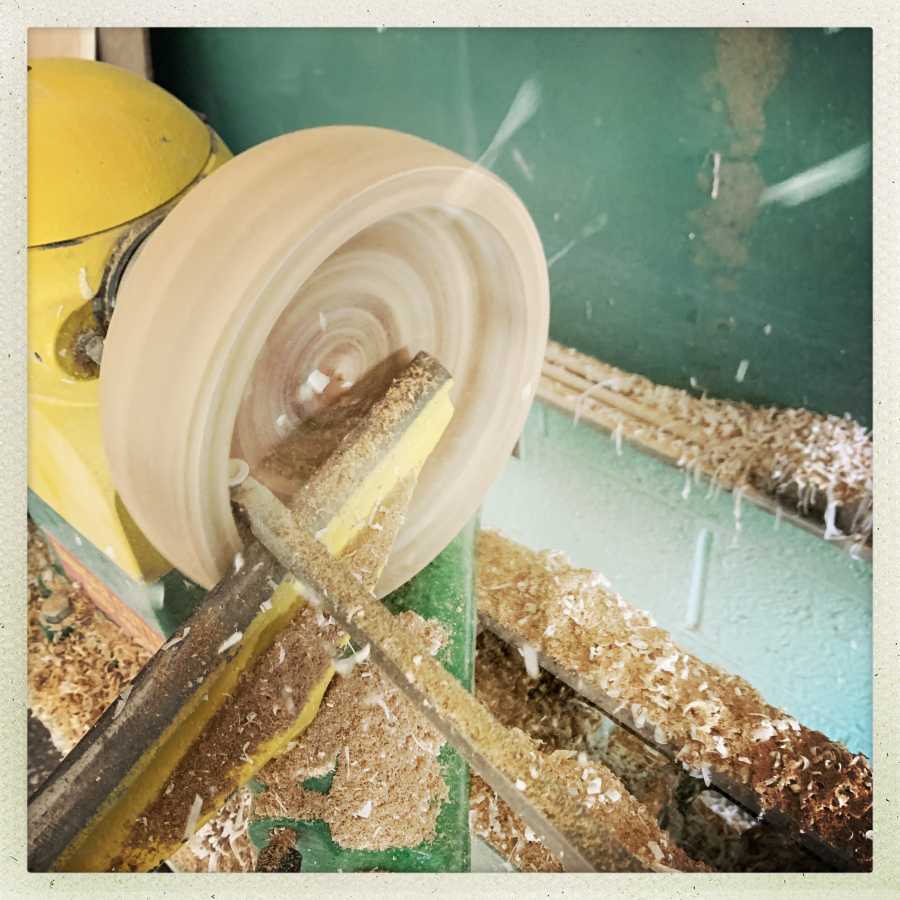
This is what it looks like, mounted on the lathe.
Now, some of you are maybe thinking “he should hang a moving blanket down off the blackboard, to absorb some of the bounce of anything that comes off.” Yeah, that’s a good idea and it’s on my TODO list. If you’re worried about health and safety, I always work in a Tshirt without gloves even if it’s cold, and I wear a face mask that covers partway down my neck and rests on my chin, so there are multiple points of contact/impact distribution with my head. I’m tempted to wear a jousting helm…
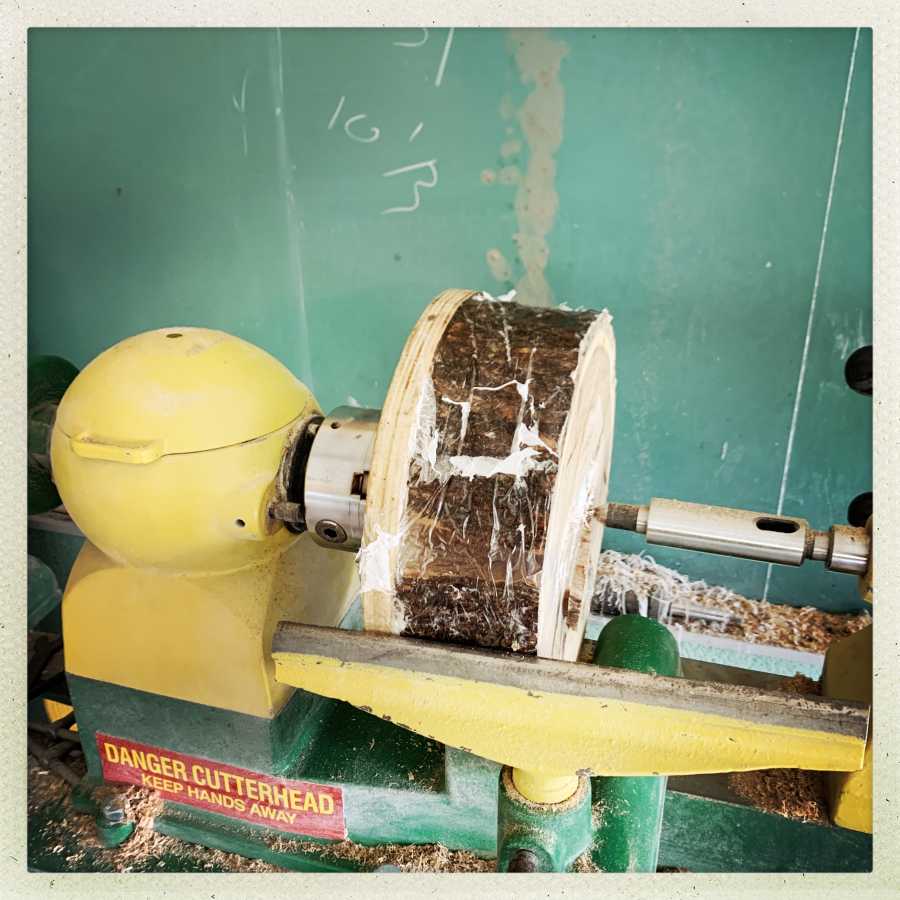
Here you can see the lathe chuck is expanded into the chuck ring that’s screwed into the plywood. It’s a very positive grip. But for insanity’s sake, I also have a spike in the tailstock, on a nice extension taper that lets me still get at the face of the work-piece without trouble.
After some fussing about and jiggling all the things to make sure they don’t jiggle, it’s time to grab the roughing gouge and hit the power and start making that lumpy thing round.
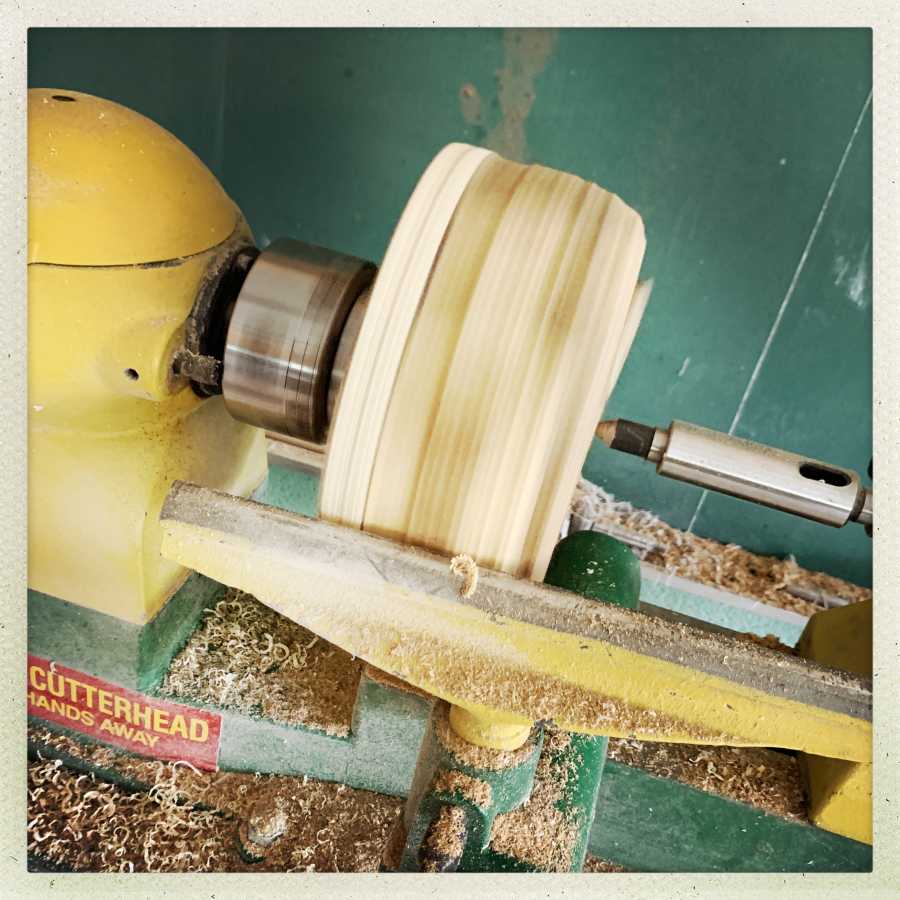
Roughing anything with bark is a great mess and you and your chisel get whacked about some as the wood comes around and catches on the edge. I probably could have/should have cut around it with the bandsaw to make it round(er) so it would turn more easily. You can see ridges in the surface that were ripped out with my carbide scraper. At the point above, it’s pretty much round and I can start thinking about shaping the outer surface of the bowl. I have to take into account the 3/4″ of plywood (and them some) that is going to go away off the bottom.
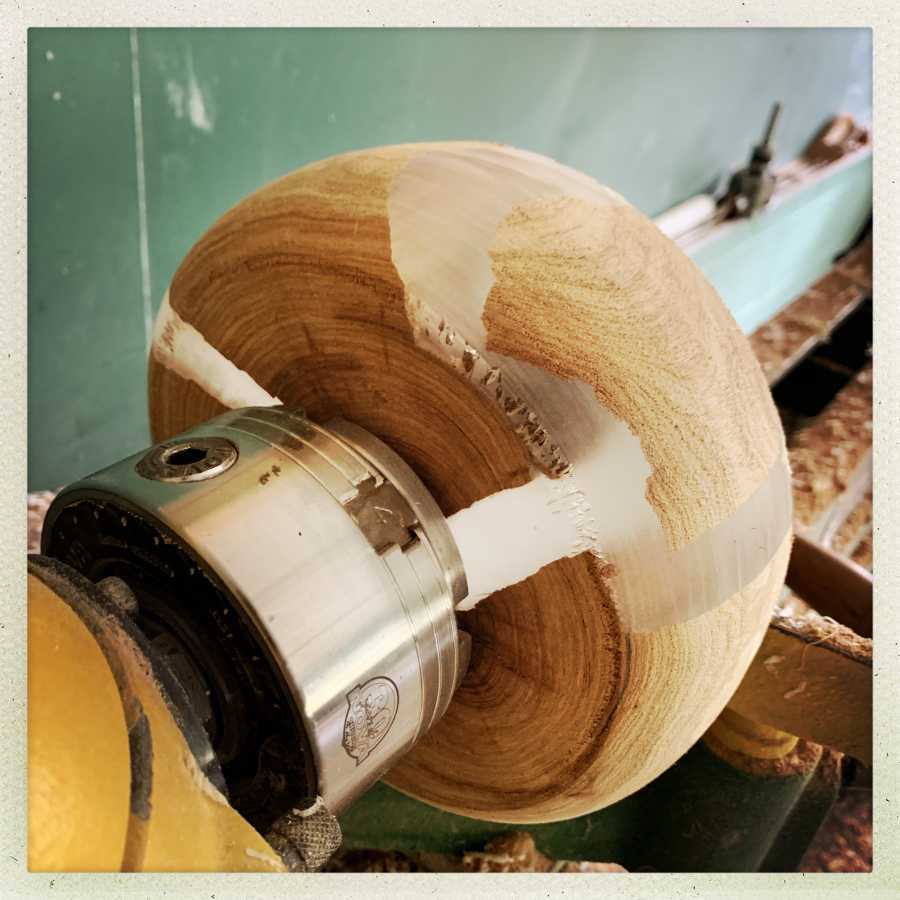
To hold the bowl when it’s turned around, I have to push the tailstock out of the way and carve a recessed area with a dovetail, that the chuck’s teeth will go into. You position the bowl and crank the chuck jaws out and it holds like nobody’s business. There’s a problem with this, that it creates an unsightly, unpolishable area, but it’s otherwise very convenient. I’ll explain how I handle that in the second episode of this.
From there, it’s a matter of flipping it around and working the plywood off with a roughing gouge and carbide scraper. I can do a lot of that with the tailstock still supporting the work, for safety’s sake. Having it held from two ends is really nice and emotionally comforting. Once the shape is about right, I push the tailstock back, make sure everything is tight, and keep working down into the face of the bowl.
You know that evil spike on the tailstock? It’s good to remove the taper from the tailstock and put it away somewhere, because if you absent-mindedly move your elbow back and hit that, it’s needle-sharp carbide and won’t respect your bodily integrity at all. I have not done that, yet, so far, but I’ve seen people catch a chisel, jerk back, and prang right onto it.
I love my carbide scraper. Wow, can it shred wood! It’s also nice because you can work with the front or the sides, so long as you stay close and tight on the rest and the chisel doesn’t catch and spin out of your hand.
After a while, it’s time to wipe the piece down with sanding sealer – apparently a mix of alcohol, water, shellac, and PVA glue – then start sanding. Make sure it’s all tight and from here on out it’s a matter of carefully keeping your hand and the sandpaper from catching on something.
Those great big chip-outs are from the carbide scraper. It just grabs material and rips it out, so you usually have to do some fine shaping and surfacing with the skew chisel. It doesn’t take long to clean those chips up, though.
Now, I don’t want to jerk you around, so I have to tell you that the time for rejoicing is not upon us. In the next episode I’ll explain how I blew this lovely art-work to pieces. (spoiler: and no blood) but I was seriously chuffed right about the time I took it off the chuck and took it home. There were some holes and chips but they’d polish out – the nice thing about using a chuck setup like that is I can put the piece back on the lathe in exactly the same orientation if I want to work on it more. I decided I was going to polish a few chips out, change some of the inner radius of the bottom of the wood, and then fill some holes and fine polish it. But that’s for another day.
I didn’t get good pictures of the bowl in its semi-finished state, because my camera didn’t want to focus on the clear areas. I couldn’t apply any wax, either, since I was going to flow resin into the cracks, so it looked OK but not great.
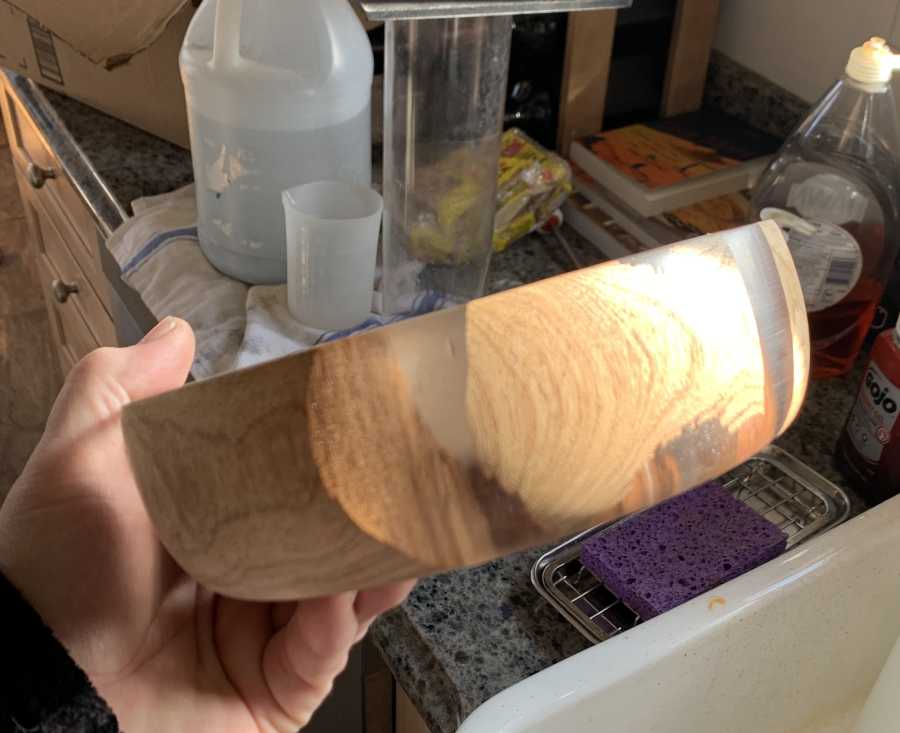
The big chip of wood facing the camera is wafer-thin and supported only by resin. You can clearly see the inner sides of the split surfaces. I was seriously chuffed about how it looked. But the bottom sucked and there were some chips and it just needed a few tweaks and a lot more sanding.

I’m alright with failure, as long as I learn from it, don’t destroy my body or my equipment. There’s lots more wood and resin and next time I do this, I am gonna flippin’ nail it.
That looks great!
If you turn something like that in the future and feel like parting with it I would gladly bid on it in an auction.
That is a great way to use split wood, it looks good at this stage …
I don’t know if this is news you can use, but who knows, maybe?
Opal tends to come in thin, fairly flat, veins. It comes in other forms too, but there are also these paper-thin veins which sometimes are extraordinarily beautiful. There is a marvelous technique here.
First, grind the rock off one side to expose a sheet of opal. Glue on a sheet of black… um, material. There are several choices. Now come in from the other side, grinding off the rock to expose the other side of the opal vein. Now you have a sheet of black material with a fragile film of opal glued to it.
You can cut this sheet up into rounds, or ovals, or whatever, and then you glue clear caps onto those shapes (often quartz, I think) to make “gems” suitable for mounting. The results can be spectacular.
Search terms are “opal triplet” and “opal doublet”
I have to wonder if there’s some method for floating very thin elements of wood inside resin in a similar fashion.
This is such a great idea and has such potential… thanks for the warning it may not be all sunshine and roses in this case.
Making a table top with wood and epoxy is still one of my big dreams. In bog oak? Wow…
Oh no!