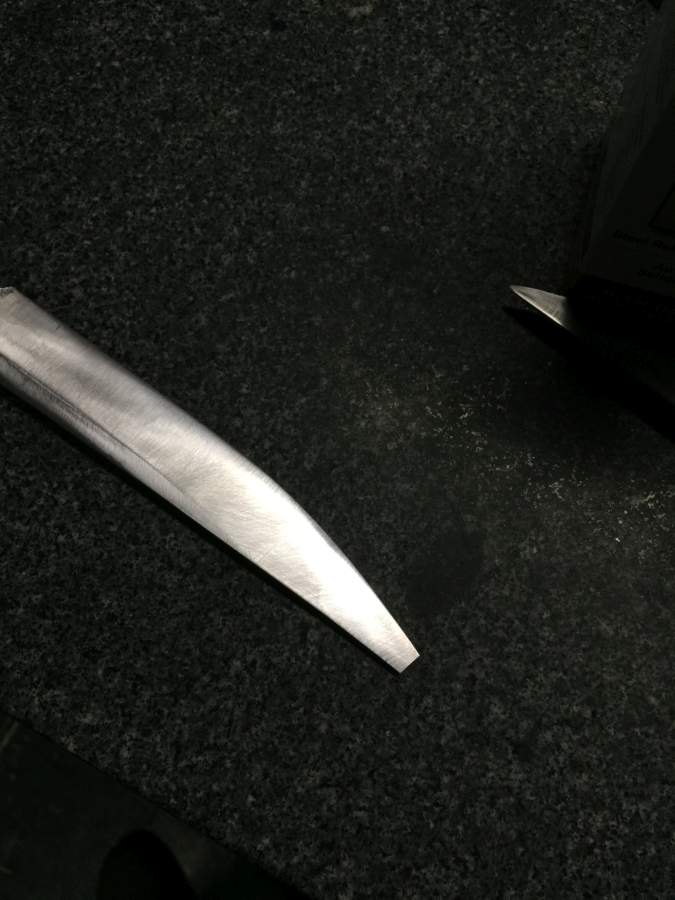
Usually when I harden a blade, I let it get its tempering-cycles while I grind it. That can result in disasters, like a work-piece falling on the floor and shattering.
So by the time a blade is mostly ground down, it’s usually been thermal cycled enough that it ought to be fairly tough.
Still not tough enough to withstand being dropped on the floor, point-first, while polishing it.

As one knife-maker says: “knife-makers don’t make mistakes; they make smaller, shorter blades”
This one had, perhaps, an overly extended tip. Mostly I was experimenting with “how radical can I get?” and the answer was “pretty radical!” until it slipped out of oily fingers.
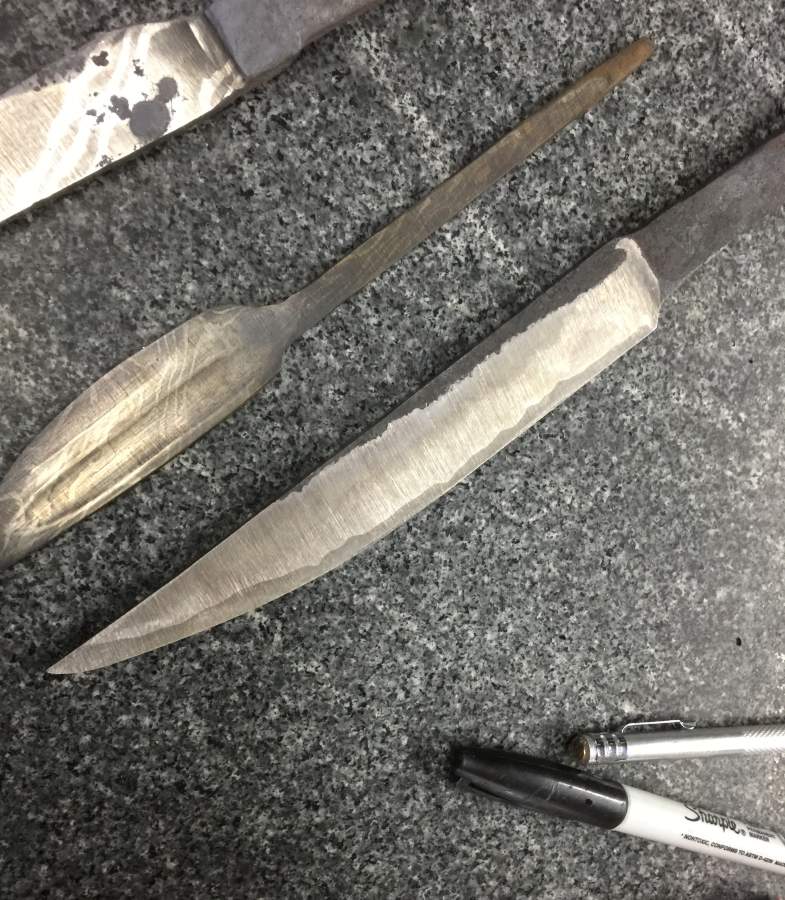
This was a test-blade, anyway. I was discussing weld-line effects with another knife-maker and he assured me that transition-lines between 1095 and 15N20 automatically got this jewel-like cloudy look. I said “they have always been very sharp and clear for me” and “maybe it’s that the weld you were looking at was bad” – my suspicion was that the blade-maker had layered a thin sheet of pure nickel in the transition (which I have sometimes done) so the blade above just kind of happened that way because I was looking for a grind that would expose the transition-line at a sharp angle.
Silver lining to that cloud: it landed point-down on concrete, not point-down on the bridge of my foot.

Related screw-up: I attempted some electro-etching and managed to get too much ferric chloride into the mask, so it ate a big black spot in the side of a blade. That was exceptionally annoying. I now have a couple finished knives that I wanted to logo-etch but I don’t know if I can logo-etch them so I don’t know what to do. Do I release unmarked blades, or wait, or what?

transition lines between the 3 layers comprising the blade. Before I shortened it abruptly.

“…not point-down on the bridge of my foot.”
So. What kind of footwear do you wear while you do this kind of work?
Well done on missing your foot but oh that would make me cry if I saw that happen… I suppose it’s true that the blade can be saved by becoming shorter. Still, a sad thing.
On the etching maybe just practice on scraps and try again? I have to use hallmark stamps by law but of course silver and gold are WAY softer than steel, so stamping probably won’t work. Personally I’d try and get it right and get a mark on there before releasing the blades, but sometimes things just have to move along even without the maker’s mark.
Not to criticize you, but I am tempering my blades in kitchen oven immediately after the quench, only cleaning them somewhat of the oily grime. I had a blade fall point-first on concrete during grinding and polisihing a few times, but so far it always survived OK.
Ad etching – use very diluted sollution. I have used 1/10 for signing the Ciri’s dagger and my prototype kitchen knife.
I see you are experimenting with fullered blades. Good luck with that. My first (and so far only) fullered blade warped something awfull in quench, and then snapped when I tried to straighten it (because I am an idiot and I forgot to use the proper straightening technique).
Finish the almost-complete Mickey Mouse shape etch and call the blade ‘Weld Disney’?
Charly@#3:
Not to criticize you, but I am tempering my blades in kitchen oven immediately after the quench, only cleaning them somewhat of the oily grime. I had a blade fall point-first on concrete during grinding and polisihing a few times, but so far it always survived OK.
Yes, I am coming to realize that “put it right in the oven” is as useful a way to protect a newborn blade, as it is anything else. I don’t have a lot of residual heat after a quench. Sometimes I like to polish the blade a bit so I can heat it until I get the golden color I want for the temper.
In this case, the tip was just too thin for a stabby-poky knife. I laid it out that way, as an experiment, and sure enough – it was a bad idea.
I see you are experimenting with fullered blades. Good luck with that.
I do it one of two ways: grind the fuller into the blade after it’s tempered and quenched, or differentially quench the blade and make sure that where the fuller will go is not fully hardened. I have a fullering die for the press and I’ve noticed that the metal that is moved in fullering does like to warp when it’s hot – I only use the fullering die to move metal down to where I want the blade thinner.
If you’re having problems with warping and cracking, you’re probably taking the blade too thin before you quench it. I keep the edge in the ballpark of 2mm. With modern abrasives and a power grinder, there really is no point in worrying about grinding hard steel – it’s maybe a little slower than annealed steel but “that’s what grinders are for” is my attitude.
I need to experiment with the etching, more. The first attempt was a miserable failure. But that’s what experimenting is for!
Are you using vinegar/salt or ferric chloride or …?
And criticism is always welcome!
chigau@#1:
So. What kind of footwear do you wear while you do this kind of work?
I just realized that “clodhoppers” may be some kind of anti-Irish slur…
I wear great big oiled leather steel-toed engineer’s boots. It turns out that they’re made like that because of exactly this kind of stuff.
kestrel@#2:
On the etching maybe just practice on scraps and try again?
Yes; I was just expecting things to go miraculously well, and was kind of disappointed when they didn’t.
I used to etch with table salt, and the results were good. My last etchings I have made with ferric chloride – commercial solution for etching printed circuits dilluted 1/10 N. Only 5 V. Another thing – the size of your catode submerged in the solution should be proportional to the size of the etched area on the anode. Size matters – too big area of anode submerged in the solution has similar effect to having very concentrated sollution – too agressive etch. Smaller is better in this case.
But you have a power source with twidlable knobs, so you might be able to control the current by other means than by the concentration and the size of the anode.
Marcus #6
good answer
Marcus Ranum # 6: … “clodhoppers” may be some kind of anti-Irish slur…
Nah, that’s “bog-trotters”.
“Clodhoppers” is an anti-rural-people slur. Feel free to use at will, we’re always in open season!
Pierce R. Butler@#10:
Feel free to use at will, we’re always in open season!
Whew! I’m one of those self-hating rural people.
I though that the term was ‘shit kickers’. Everyone calling them that loved their boots and loved their work. No insult, none at all.
I used to work in a machine shop and the guy who worked in the tool room was a old hand at grinding. Had a job for years where that was most of what he did. He used to wear light aluminum spats over his work boots. He explained that yes, they did provide some protection for his instep but mainly they kept the grinding waste and fluids off the tops of his boots.
They were simple one-piece units shaped like a duck bill, split at the heel with a bit of cord at the ankle directly over the heel to keep them on. The shape, and the fact that they were sprung a bit kept them from flapping too much. A least one pair, he had a half dozen of them, had a little tab on the side that hooked under the sole.
lorn@#12:
There’s a popular boot in some punk circles with steel toe-caps on the outside. I admit it’s a good look, especially when you polish them to a mirror finish. I suppose I could spend a week making a press die and turn out damascus toecaps. Hm.