The faster something removes metal, the easier it is to rapidly screw up a blade. If the tools you are using produce perfect surfaces, they’ll be slow but you’ll enjoy the results.
My approach is to accept that time will be spent, and that time is spent deliberately and mostly comfortably, with an audio book and something to keep hydrated with. You start with deep scratches and then grind away at something with a lower grit, until the scratches are replaced entirely with smaller scratches. Then, you use a higher grit and a different angle, until the previous scratches are gone. You have to be careful to not try to jump grits too fast, or to switch before all the scratches are gone. Here is a way of thinking about it: if you have an 80# scratch, and you polish away at it for an hour with 200# sandpaper, lose your temper and switch to 400# hoping it’ll come out – it will take at least twice as long possibly more. There’s a tendency to think “aw, come on” and try a higher grit but it is absolutely wasted time. This was explained to me by someone who took a piece of metal with 80# scratches and handed me a piece of 1000# paper asking, “how long will it take?” I keep thinking it would be interesting to make some carefully calibrated surface and measure the typical removal from ten passes of a particular abrasive. Then you could calculate it in terms of units of elbow grease.

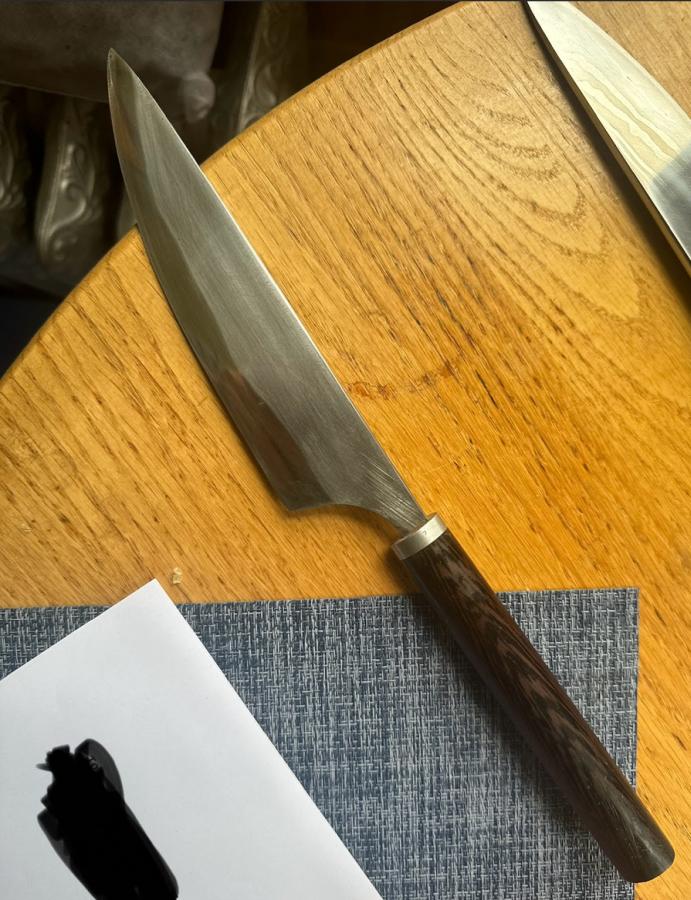
I’m not sure what grit that’s at – maybe 320# or 220#. There is still a long way to go. I usually switch up my tool sets because some are better at removal, others are flatter and more controllable, etc. In the picture above, the flats are starting to form, so I might take it to the 6″ wide belt sander and see what it looks like with all the scratches lined up. That’ll find spots that are not level, etc. Depending on how far in or out of shape it is, I might switch to coarse diamond plates and water, to remove a bunch of material in a very flat way. It’s all about getting things flatter and flatter. The thing can start looking patchy and ugly, with different areas of scratches running in different directions, giving the visual effect of a bent blade.  It’s a bit tricky to talk about grits, anyway, because a sanding belt designed for wood behaves very differently than one designed for metal, and usually a 120# grit belt is about 200# after 15 minutes of use. I have some fairly old belts that I’ve treated with beeswax, which basically have no grit at all; they’re just a strop sort of thing. Bladesmiths constantly change how they polish something, because we always must be thinking “there has to be a better way than this!!” but there really isn’t. It’s just a matter of time.
My method involves getting the planes of the blade right and then thinning them down until they meet in the right places. You can see that the edge-line and ridge-line are starting to look quite a bit cleaner but are going to need some work on the diamond plate near the plunge line at the heel. There is a slight curve on the ridge-line, which is OK because tightening that up along the whole length of the blade will bring it up just about the right amount. Japanese sword polishers have an interesting job: they are handed a blade in an existing geometry and asked to polish it and sharpen it without making it any thinner or changing any angle. My sensei said that they have a different eye for polishing than a blade-maker and we need to take the opportunity to ask their opinion, often.
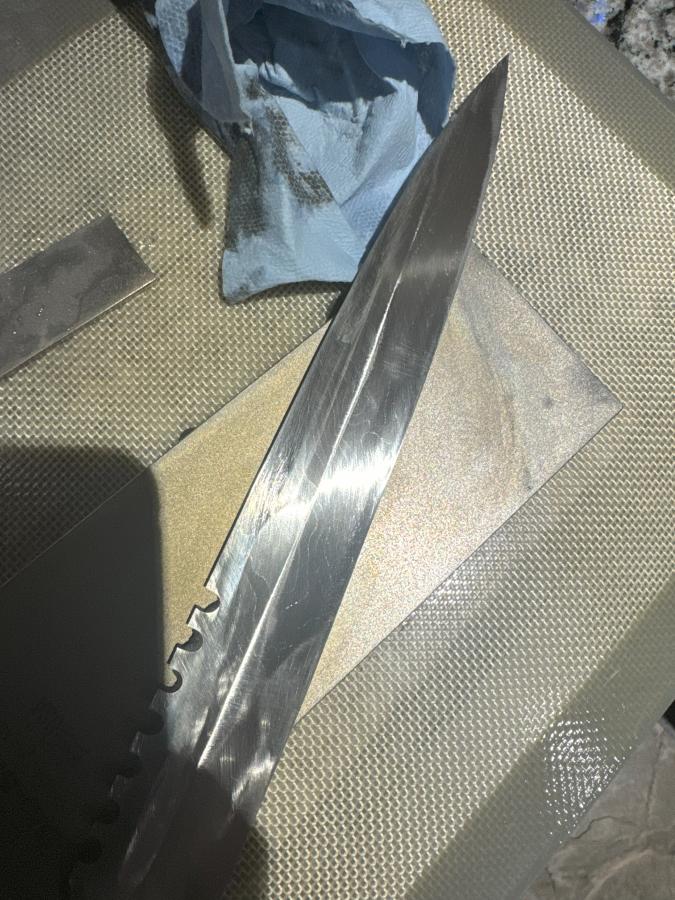
Now, what’s happening is that the plane of the back and the plane of the edge are starting to meet along the ridge-line. I.e.: I got that set up right. The edges on both sides are also starting to meet with eachother to form a cutting edge. There’s always a bunch of different work to be done at the tip, since the geometry of the blade changes there. You want it to, because that gives you more metal at the back near the tip, to support and strengthen the tip.
There are a few things I remember about this project, mostly the amount of time I spent on the flat ahead of the plunge line. If you look in the picture above you’ll see a curve coming up from the edge toward the ridge-line, and another coming down from the ridge-line. That’s a dip that is coming out. It was a big dip but now it’s even across the middle and another 15 minutes with the diamond plate and it’ll be dead flat and the ridge-line will also crisp right up.
Around now, the character of the metal starts to be visible. You can see the weld-lines. If there was also a temper-line that would be showing, too, but in this blade I didn’t try for any because it was going to look complicated enough.
When I’m working with the diamond plates, I put down a silicone baking pad (sil-pat) that makes the plate not skid around on my expensive granite kitchen counter (which is full of dings and blobs of epoxy) 
At this point, it’s just keep refining it and refining it. The diamond plate is called “coarse” but I would say it’s about 200#. The other complicating factor in all this is that the blade is not consistently hard, either. This blade wasn’t too bad, but I just finished building a knife out of wrought iron anchor chain with an edge of Hitachi ‘Aogami’ (blue paper) steel. The aogami is insanely hard and the wrought iron isn’t hard at all. If you polish it wrong, the aogami would begin to stand proud of the back of the rest of the knife.
This is the part where I start to feel a bit of excitement. It’s another day or two and the blade will be done and it’s already starting to look beastly and dramatic. A lot of the details like weird curves at the very tip, I’ll just worry about with a little hand diamond stone and eventually wrap that with sandpaper, then leather.
Next, I have it over at my sharpening bench for polishing. The diamond plates have gotten everything fine finished and flat, next I need to align all the scratches.
Let’s do a quick tour of the polishing bench:
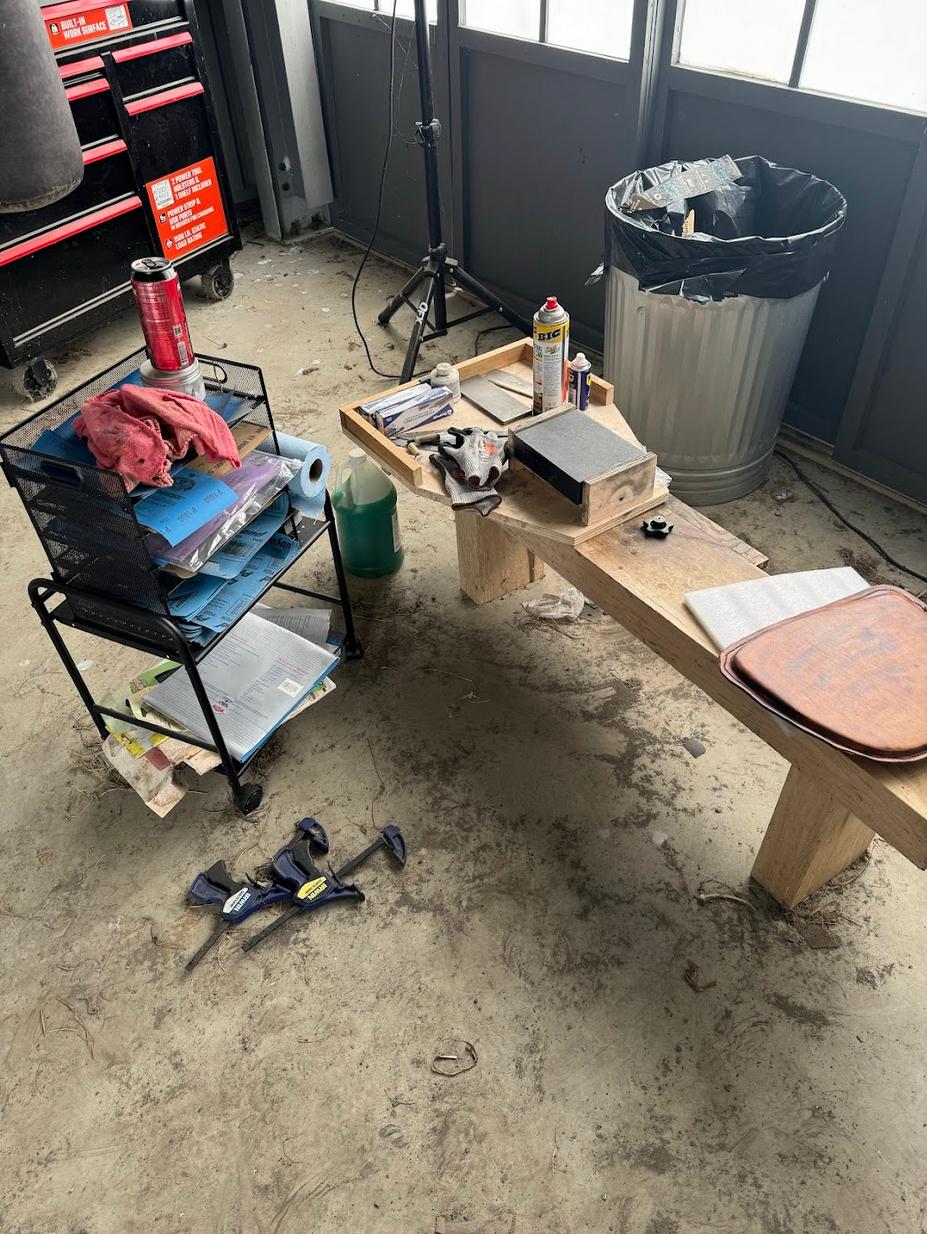
The bench is a maple beam I bought at a sawmill, cut in 3, and pegged together with 1″ oak rounds 6″ long, and some epoxy. On the right hand side of the bench is a homemade woodworker’s clamp I built since I was drilling 1″ holes in the beam, I drilled 2 horizontal ones and then drilled 1/2″ holes through more oak round and glued them in, with some 1/2 threaded rod in them. That makes them very well-founded clamps! I liked that so much I did a shorter version of the same thing at the front and put 1/2″ cast and chromed handwheels as clamp nuts. The apron-y thing at the front sits over two slits that expose the threaded rod and clamp down with the wheels – so, the whole thing can come off and be swapped around if I want to. I actually have another apron-y thing that has a specialized mount for Japanese stones, and another for diamond plates. It’s just plywood and glue so why not? The apron-y thing I have mounted now has an oak “shoe” that holds an 8″x4″x6″ granite machinist’s surface plate. There’s a threaded rod through the shoe that clamps the ends tight, so I can wrap a half sheet of sandpaper around the plate and lock it down very tight and flat. I made the leather butt pad of wet-formed leather, and got the paper stand from amazon. I call it “the sandpaper library” for obvious reasons.
Two other important tools here are the cut-proof gloves, and the garbage can. It’s important to remember that sandpaper is a consumable and using it once it’s lost its bite is mostly wasting time: throw it away. Not on the floor! In the nice can over there.
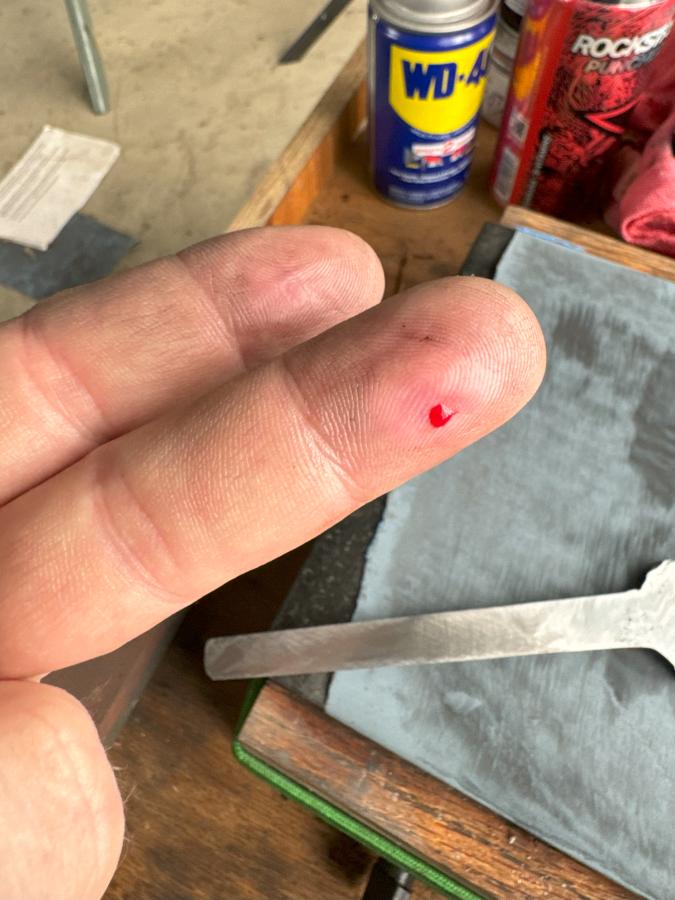
I can tell from the color and the surface that the sandpaper is probably 1000# or 2000#. The way I shape blades, that means it’s still “dull” or about as sharp as a typical knife you might buy at a store. I took the picture above because it was amusing the way the blade lifted just my fingerprints off that region. That was remarkably painful the next day, it felt like a burn.
Usually I use WD-40 but you do not want to get WD-40 into a cut like that. yeeowch. This was mostly just looking at the patterning in the steel.
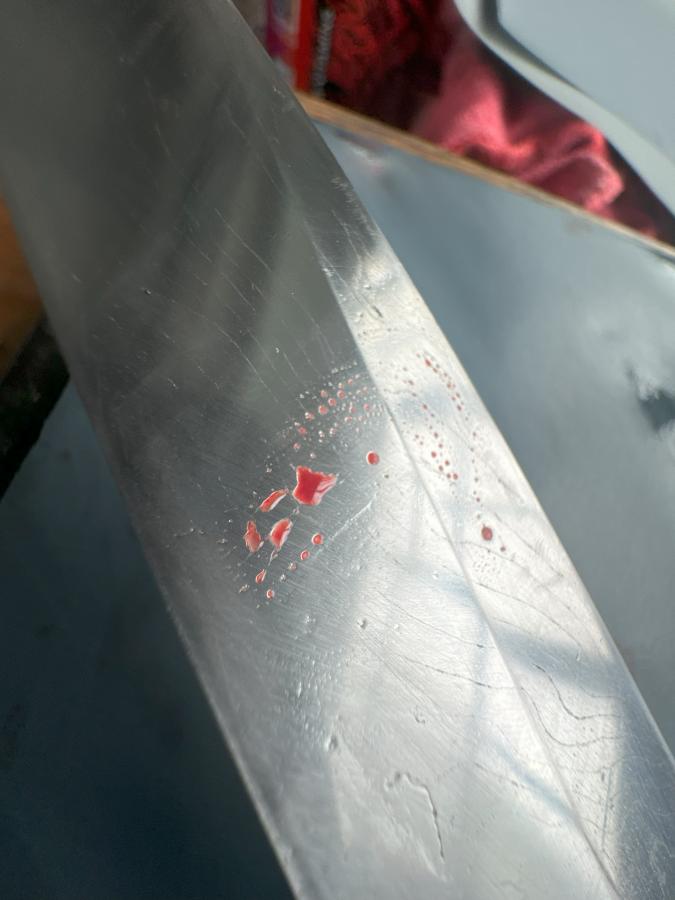
You can see there are still a few scratches here and there; it’s about a day from done. You begin to see the effects of the different surface toughnesses of the steels. The weld-lines have more carbon and silicates in them – those are not “gaps” – that’s where the softer material in the weld eroded a bit faster under the sandpaper. A temper-line (“hamon”) is a mix of two effects – the martensitic edge takes on a slightly different shape because the martensite does not remove as easily as the pearlite on the back of the blade, but it also takes a better shine because it’s harder and you can burnish it better. That’s all, there’s no magic. Just a lot of work. As I wrote that I was trying to decide if I should really illustrate that point with a picture of my wrought iron/aogami knife. It’s an extreme example of differential hardening.
I love showing that to people who get excited about hamons, “yeah, there’s a big difference between the hardness of the edge and the back” – the transition-line is where I just forge-welded a strip of one steel onto a piece of iron and then shaped it out. But I digress.
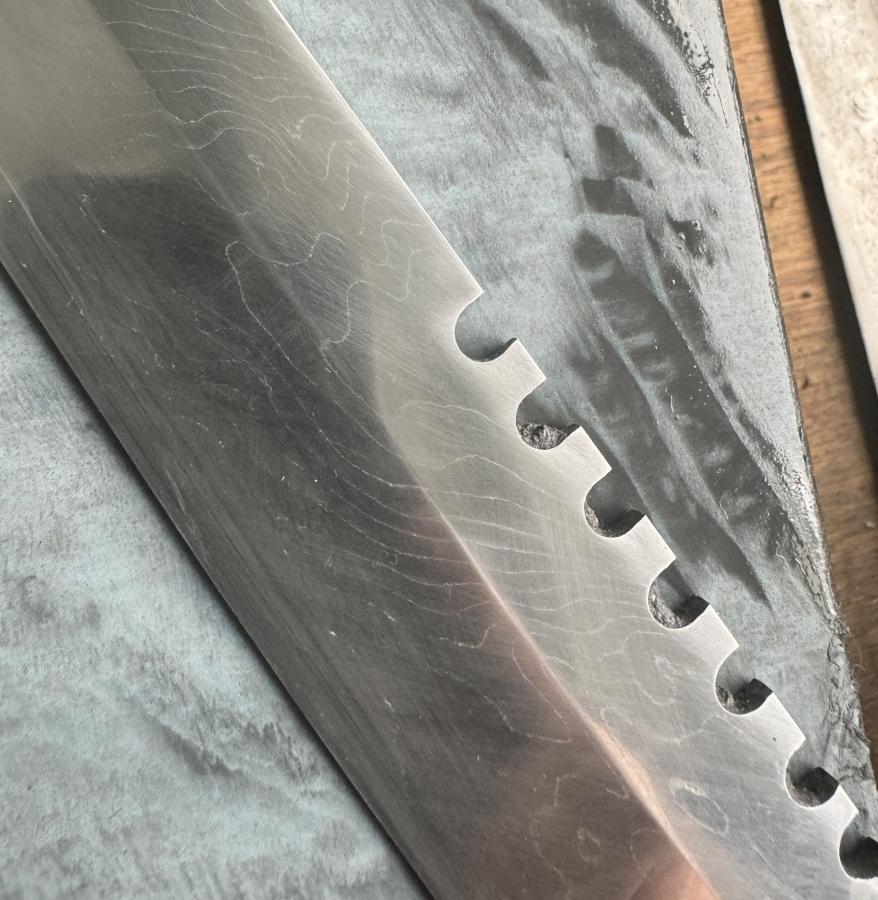
I see two little clusters of scratches! I sure hope I got those! Look at the gunk in the saw-teeth, that’s just a tattoo waiting to happen. Before everything in the polishing stage is considered “done” it gets a good clean up with Flitz and a toothbrush.

Here you can see a bit of fancy around the tip – it’s sort of scalloped to bring the spine down closer so that it can reinforce the slashing edge. The tip-geometry of this thing happens to be the same as a high-end sushi knife. How do I know? I brought my sushi knife out for reference. This is a double-sided instantiation of the same grind, for the same reason – you need thin but supported for cutting. If you’re slashing with the tip of a knife, you’re not trying to chop bone. By the way, that’s why a masterpiece katana’s blade geometry is subtly different at various places along the blade. Most of the fine work is done with the 3″ around the tip and you are expected to place your cut on the target and the blade, to match.
From there it just gets shinier and sharper and I wrap it in vinyl electrical tape to protect myself from it while I’m doing the handle. It gets hard to photograph, because you just wind up with a mirror view of some other part of the shop.
Time to do the handle!
Beautiful — and educational as always. The beeswax on the old sanding belts is a nice idea.
Wow – look at that tip! Gorgeous.
May I ask the brand of diamond plates you use, and how long they last?
The reason I ask is that Chris Schwartz, over at Lost Art Press (tools, classes, and books on woodworking, not steel-working) dislikes diamond plates for sharpening chisels and plane-blades. His observation is that they don’t last when used on a daily basis.
Thanks in advance.
fusilier
James 2:24
The Zen of polishing is a thing. It’s a process that simply takes a long time to complete, and there are no shortcuts.
I did some French polishing on various wood surfaces this spring, and my fingerprints were polished off by the time I got through the 1200 grit, and got the finish applied and buffed out. The silky smooth surface was totally worth the price in fingertips.
fusilier@#3:
May I ask the brand of diamond plates you use, and how long they last?
I’m gonna have to take a whole post to answer that fully. I use DMT/Diafine but I understand them as consumables.
Tethys@#4:
The Zen of polishing is a thing. It’s a process that simply takes a long time to complete, and there are no shortcuts.
I was talking about polishing with a Japanese friend who offered to come calligraph “Satori” on my bench if she’s ever here.
I think that’s a good word for it. Or “flow.” I just do it, and it feels great and then suddenly I start to worry that I may be going blind because everything is getting dark. Oh, somehow I have been sitting here for 6 hours. Then, I stand up and fall down because my legs don’t work anymore.
If you haven’t seen the polishing posture of a Japanese sword polisher, it’s weird. I think one Japanese figured that out one time, and all the rest do it because, tradition. You know how it is.
Ooh, cool
Whenever i get a knife that shiny i can’t resist photos of me pulling faces in the reflection :P