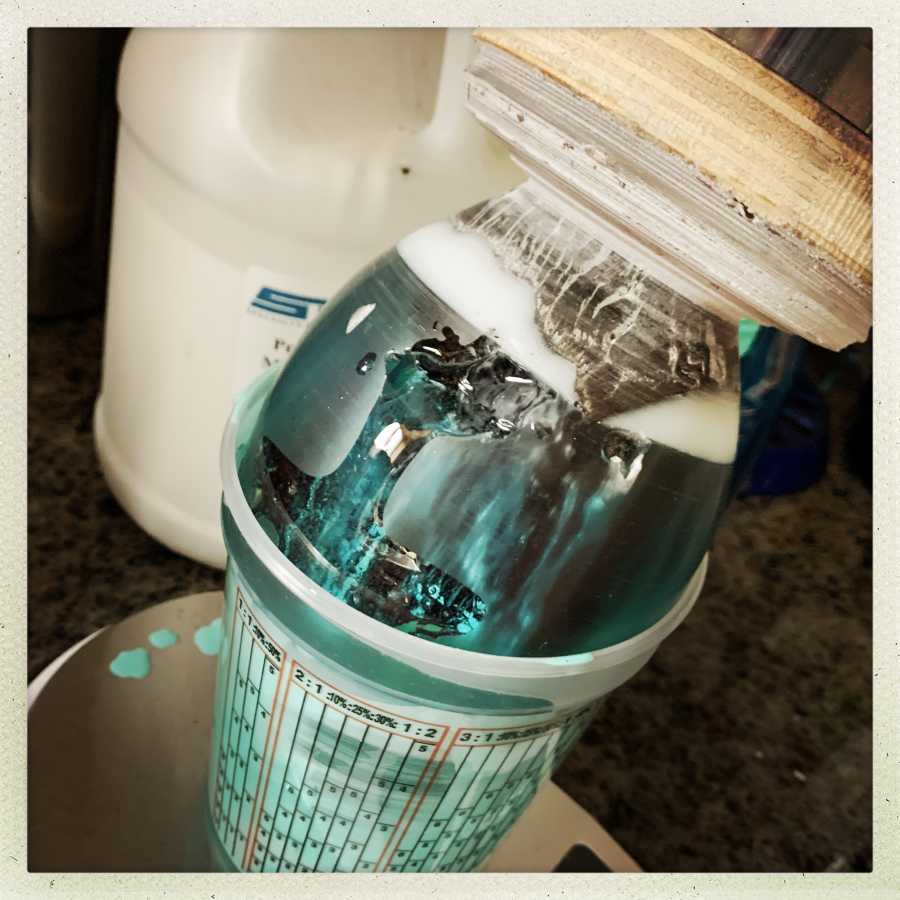
After I got the resin blob out of the pressure chamber, I chucked it up on the lathe.
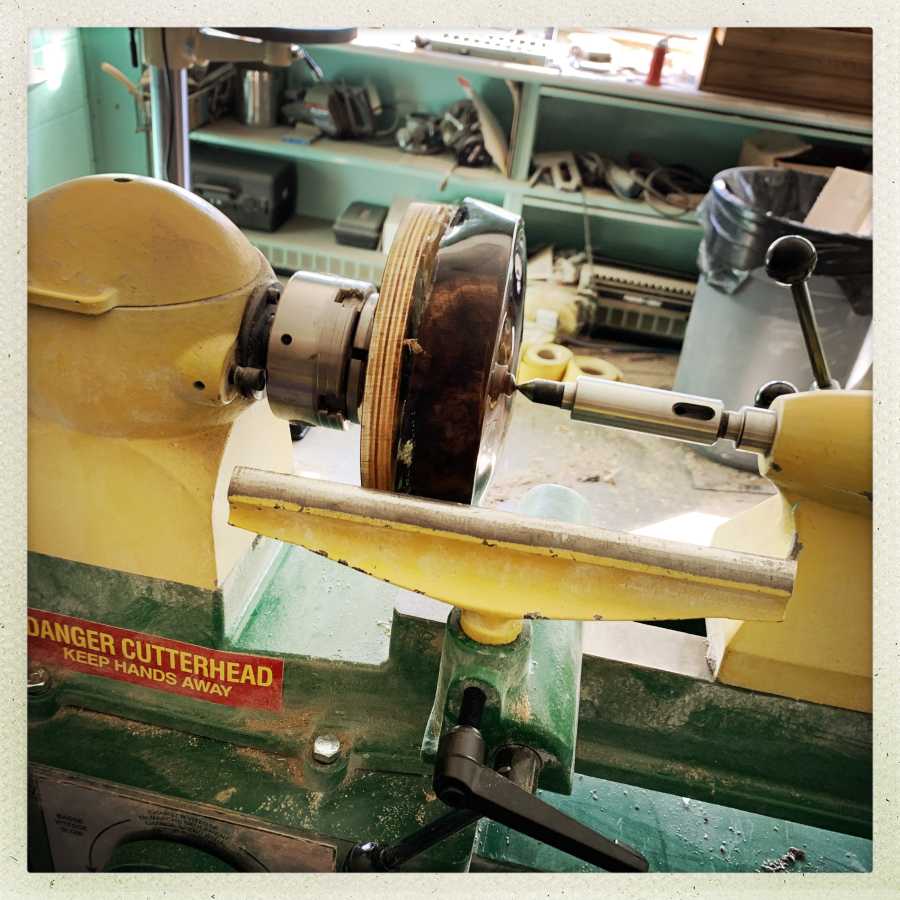
You might think “well, that’s held pretty solidly” between a big chunk of resin-soaked plywood in the chuck, and an active center pushing from the tailstock. I don’t have pictures but it turned out, later, that the plywood in the chuck sheared right off, and the work-piece fell onto the floor. Fortunately, it was very solid and – even better – it didn’t bounce up and hit me in the face or anything like that. I was wearing a face-mask but who needs to test its function in that way?
The object is almost circular to begin with, but hitting spinning resin with a roughing-gouge produces horrific results. Until the impact is smooth, the resin tends to release chunks of razor-sharp shattered plastic. And, since you’re holding the chisel, the stream of chunks goes right up your arm and hand. Looks like glass, doesn’t it?
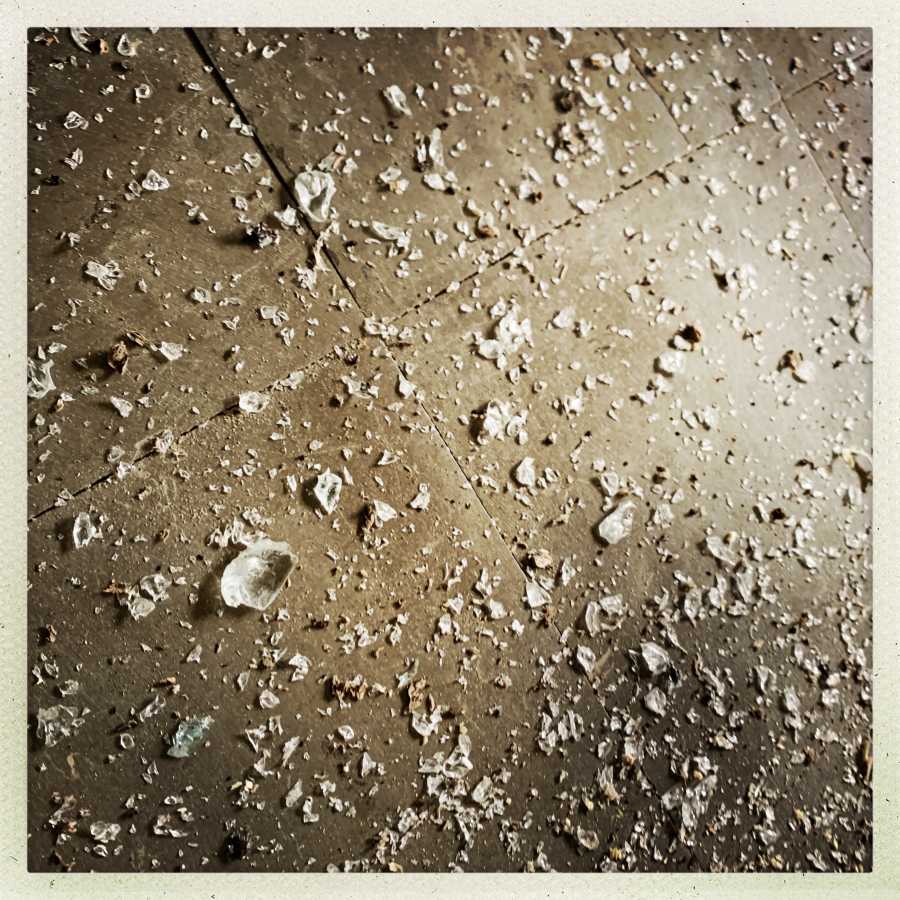
Feels like glass, as a matter of fact.
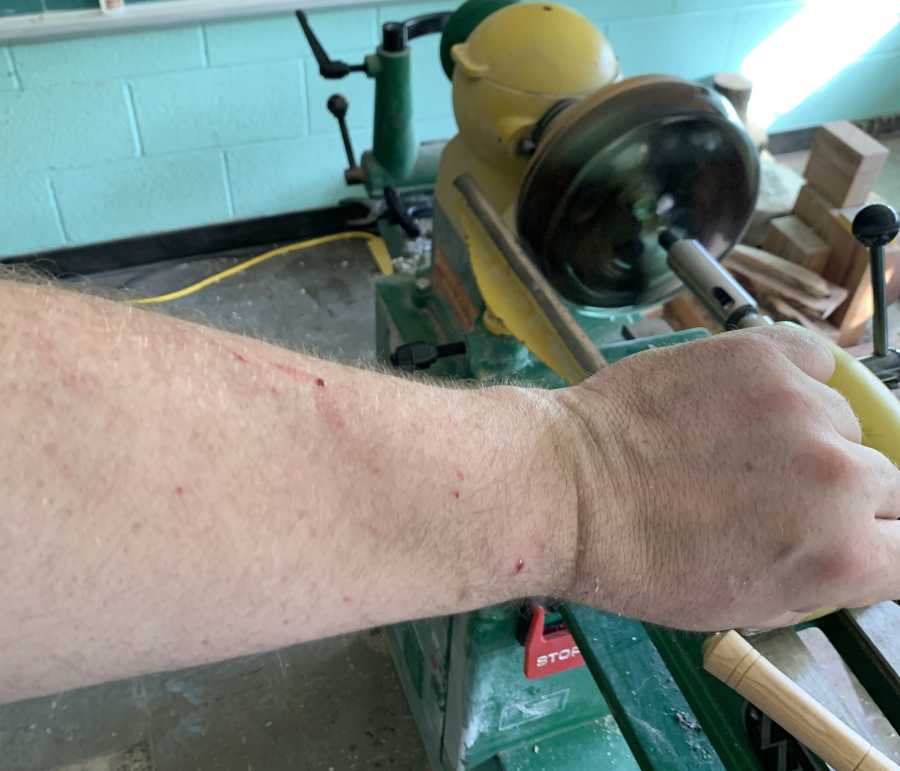
I shot that when the bleeding was just starting. It got a bit more dramatic, later, but mostly I put on an old army jacket and welder’s gloves to finish the roughing-in. Those of you who are experienced with lathes will be screaming “NO! MARCUS! NO!” when I talk about the gloves and jacket (if you catch a sleeve or a glove on a chuck or between the tool-stand and the work-piece, a lathe can take your arm right off and wrap what’s left of it around the work-piece. I made a point of staying way back from the machine. Later that evening it took me a half hour to find and extract all the bloody chunks of resin from my knuckles.
That’s the current state of the composite thing. A few minutes after I shot this, I tried switching it around so I could chisel the plywood off, and the driver-chunk disintegrated. I took a plywood disk and hot glued it to the face here, and tried that, and it disintegrated in a few minutes. Every time something like that happens it’s scary and unpleasant and can hurt you or ruin your work. So, the piece is going to sit on the bench for a while, maybe months, while I source and integrate the components for a vacuum chuck.
A vacuum chuck requires a pump, a pressure relief bleed system, and a mechanical coupler that goes in one side of the lathe’s mandrel and has an O-ring interface that mates with a chuck that looks a lot like a plumber’s helper. You position the object then bring the pressure down 12 bar or so (the pump will fail if it’s pulling on a hard vacuum for long periods of time, so you use the pressure relief to control how much air bleeds into the whole set-up) If your power fails while the lathe is spinning, your work-piece goes – somewhere. I’ve seen woodturners with vacuum chucks powered by a uninterruptable power supply (UPS) and I’ll probably add that to the large stack of components necessary to make a vacuum chuck work. But in the meanwhile, I’m just letting this particular piece sit on the bench. It turns out that lenticular shapes are a problem. Who knew?
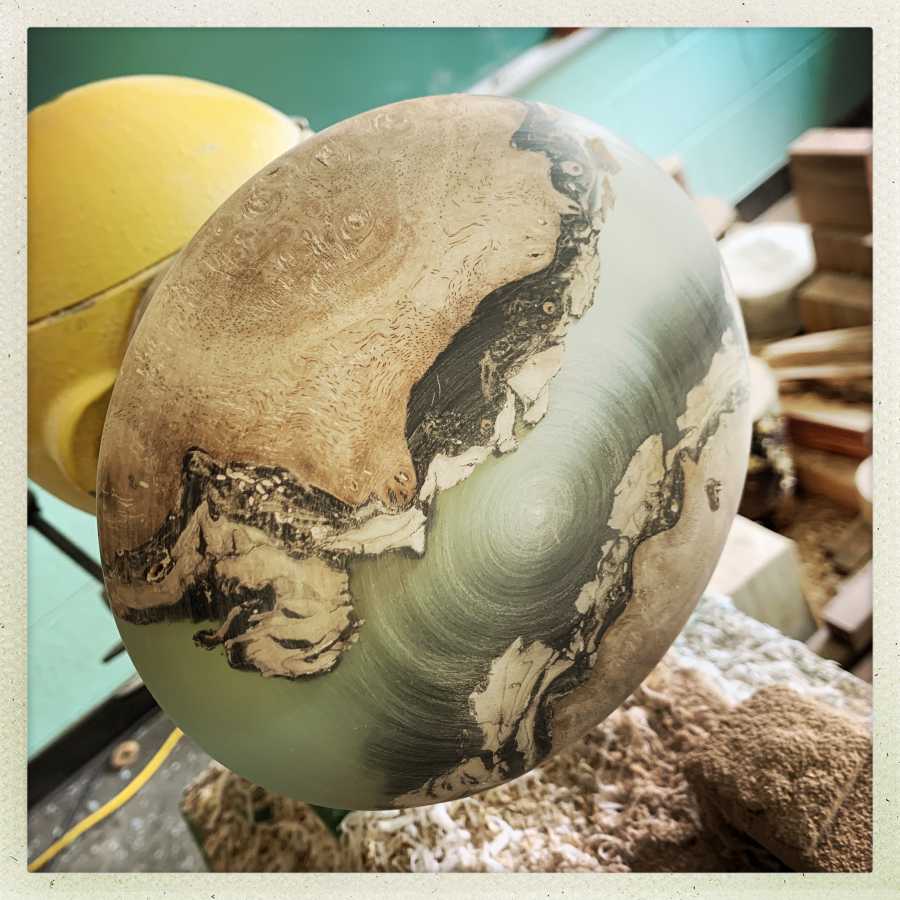
Meanwhile, you all saw hints of the blue winter mountain resin composite I made. I mounted that up and it turned remarkably easily and well. There was a large bubble/void in one side, so I took a forstner bit and drilled a great big hole right down through the void, and poured a small batch of resin in it to fill it. The fill worked out really well, so I was quite happy with that outcome.
That’s also a good illustration of how I did the layering. I poured a batch of clear onto the plywood to bond it and keep my chisels away from the screws coming up from the face-plate. Then I did a pour of white over the pigment I painted on the peaks of the mountain with a brush. The white is/was intended to make a base that is visually distinct but sets off the bog oak, and I think that kind of worked right.
You can see the top of the chuck ring bolted into the plywood; wow, that’s a great idea someone had – the ring locks back into the chuck in perfect registration so you can take a work-piece off, do stuff to it, and put it right back on the lathe without having to re-shape everything. I’m sure a machinist would sniff that it’s a few thousandths off, but it’s high precision for a woodworker.
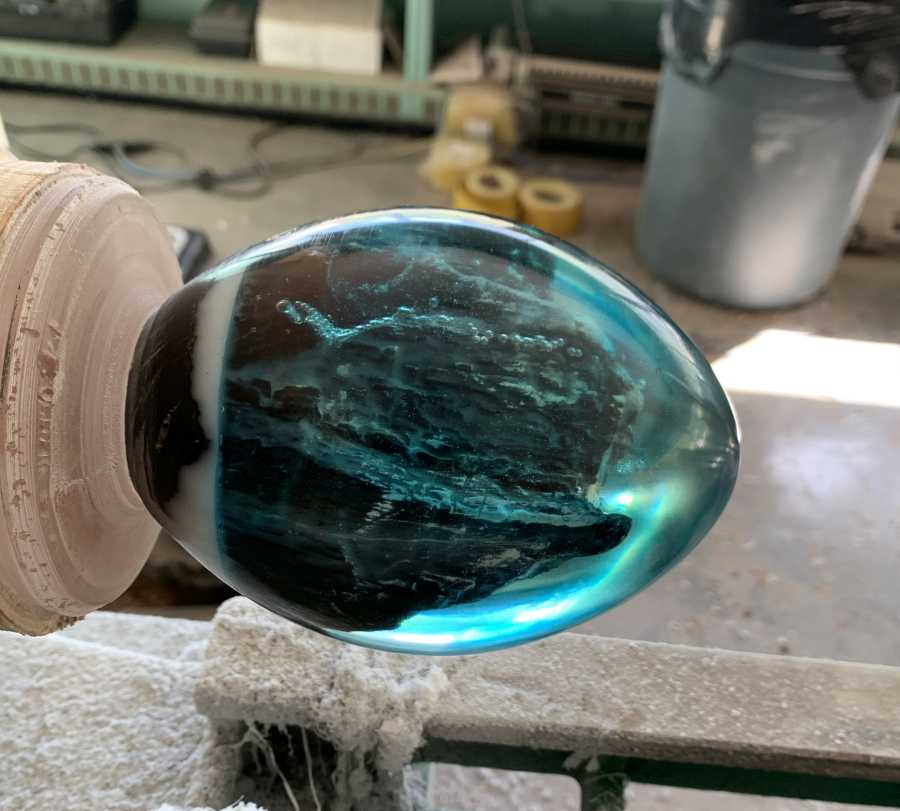
Once it’s shaped, it’s just a matter of polishing it, which is familiar to every automobile restorer, knife-maker, etc: start at 80 grit sandpaper, move to 120, then 240, 400, 600, 800, 1000, 2000, steel wool, and beeswax/diatomaceous earth “yorkshire grit.” That’s what it looked like after 5 minutes of buffing with grit. Then, I sawed it off the base with the bandsaw, sanded the base flat, and polished it with some wax.
It came out pretty much the way I wanted it to! It’s complicated and visually interesting, to me. It reminds me of Ice Crown, the Lich King’s citadel in World of Warcraft.
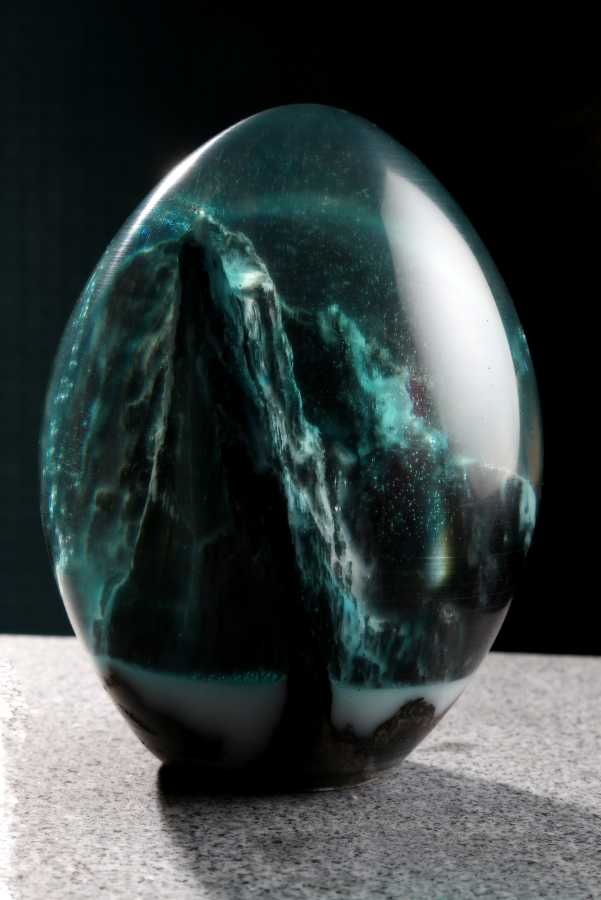
It’s challenging to photograph because the resin has stress/mix-lines in it that diffract light slightly. So it looks swirly at various angles. And I have a bit of pixie dust flake in the white which makes it hard to capture.
I’m going to take a shot at it with a buffer because I can still see a few radial lines from the lathe.

This thing was tremendous fun to make, and it turned out well for an experiment. On the other hand, I have a limited amount of mantlepiece space and I cannot produce an unlimited supply of dust-catchers. I don’t know if these are cool enough to be worth auctioning off, or what.
I may try a few purely abstract swirls. I wish I knew how to make a galaxy… Maybe that’d work well in the silicone baking pan, as a lenticular object. But I’ll need a working vacuum chuck first.
Your mountainscape turned out amazing.
BTW, I’ve seen people seal the wood with resin by brushing it on/or letting it soak a bit and letting it cure before they did the big pouring so there won’t be any air bubbles coming out of the wood.
Bog Oak Mountain turned out really well. The other one shows great promise! I bet it will be gorgeous once you solve the myriad problems it’s giving you.
In my opinion these are *definitely* cool enough to auction off. I’d bid on them!
Giliell@#1:
BTW, I’ve seen people seal the wood with resin by brushing it on/or letting it soak a bit and letting it cure before they did the big pouring so there won’t be any air bubbles coming out of the wood.
Yup, I did that. Partly it depends on how much air is in the wood. If I do another like this I may use a vacuum soak with light resin like cactus juice, then cook it in and do the final casting under pressure. Darned air infiltrates all kind of things.
In this case the large bubble was from where it overheated.
This guy appears to have a third option:
The mountain is beautiful, but also ominous, I love it. And the bowl is going to be gorgeous, bcause the wood is so beautiful, definitely worth taking the time to get the kit so you can do it well and safely.
Also these posts provide a restorative to me, helping me cope with the shit storms that are going on in our countries.
xohjoh2n@#5:
Damn, that’s inspirational.
I have a couple of Starret pin gauges like that I could use but… You made me realize that knife-makers don’t work to a specification. Anything I make is going to fit.
I keep different resins for that. Though the standard one I’m using for small batches nowadays is pretty low on bubble forming. The one I have for big casts has a pot life of 300 minutes.
Re: fixing the resin to the lathe. Why not use your faceplate ring and screws? You’re going to remove the resin that you’d be screwing into, aren’t you? Or will it be another solid piece and not a bowl? Sorry if I’ve misunderstood what you’re producing.
@derferick – I am trying to make a lens-shaped object that is smooth on both sides. I can’t drill screws into the center because it’s clear.
3M VHB adhesive transfer tape? The stuff we use for attaching nameplates and vibration damping rubber is strong yet still removable with effort (thinking we use 468MP; know it is some thickness of transfer tape with 200MP adhesive) (not the 100MP adhesive tapes used as instant bond / spot-weld replacement). Surfaces can be carefully peeled apart if they are stronger than the adhesive, and it can be severely weakened/removed with wd-40 and/or several alcohols. WD-40 makes it turn into not-very-sticky ‘boogers’, while alcohols turn it into a slippery then sticky/slimy super-gummy ooze.
The bond is probably not stiff enough for machining metals stuck together for part holding, but probably enough for wood and plastic.
Bog Oak Mountain is wildly dramatic. It makes me think of Mordor.
I will anxiously await the arrival of the vacuum chuck to see what becomes of that beautiful bowl. The possibility of galaxies is also exciting.