I’m in a bit of a gumption trap over at the studio right now. For a while, things were proceeding nicely, but then I had problems with the electricity. For someone who hates doing painting and wiring as much as I do, I sure seem to like starting projects that involve painting or wiring!
I have a bunch of utility sheets of ABS plastic (very useful stuff!) that I got years ago, for use as shielding and light-blockers, so I laid them out on the floor to approximate where I plan to put everything.
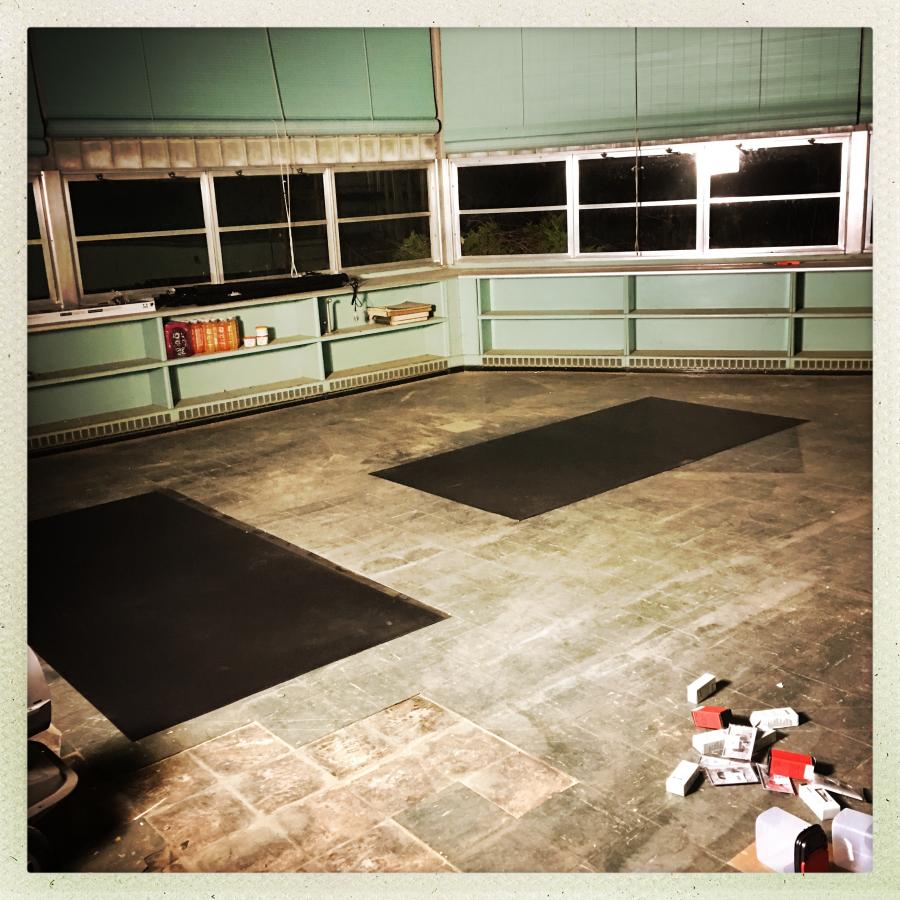
ABS on the floor
I plan to build two massive benches, one of which will be half metal-topped to serve as a welding/plasma cutting surface, the other of which will have the grinder, vise, bandsaw, and whatever else bolted to it. So I laid out the floor with some chalk and the ABS sheets to make sure I had room to walk around and everything was an OK distance apart. I don’t want things too near where the forge will sit (out of frame to the right) or where the anvil will be (near the forge) – flux splashes.
The general idea is to have four circuits running the room:
- Utility (bench mounted devices, forging press, wall outlets)
- Lights (over the bench flourescents)
- Art Lights (small spotlights clamped up in the beams that will highlight work zones in case I want to do photography
- Accessories (speakers, USB, coffee machine)
I did some testing with a small 30-watt LED spotlight to see if I will get suitable exposure if I want to do photos or videos of forge-work.
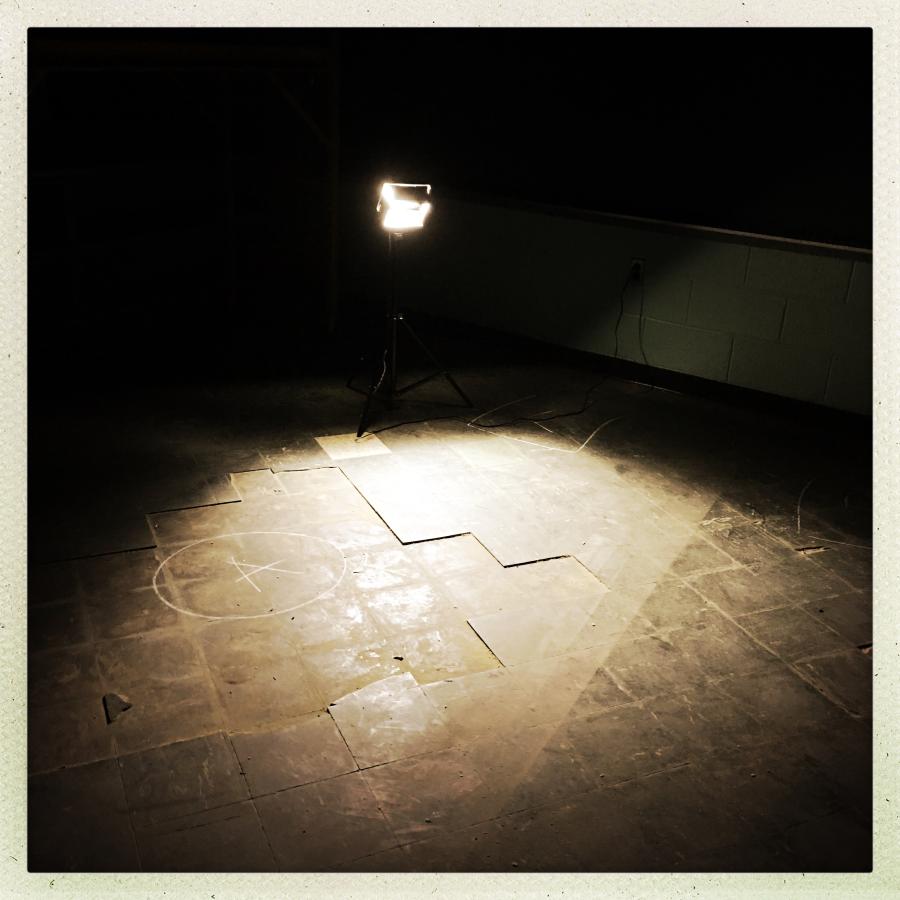
The (A) is where the anvil will go; it’s not an Anarchist symbol. Where the light-stand is is where the forge will go – that’s driven by getting it as close to the driveway, where the propane truck will deliver. One of the things I love about projects like this is that you have to try to think of everything and it has to be in the right order. Everything has to be able to get back and forth and be optimized for convenience and safety, but most of all it all must be possible. I’ve made mistakes in the past, where I plan something so that, say, I have a huge immovable something-or-other and the electricity won’t reach.
Dramatic lighting is something I can’t get away from. Secretly, down inside, I wanted to be a goth – but I’m too blonde and ruddy and happy-looking. But I can still make my spaces gothic. For the forge, I am going to hang flourescent fixtures low over the benches. That should create pools of light and darkness, which give a sense of space and depth.

floor needs vacuuming, damn it.
That’s my photography studio (with my old Cambo 8×10 front and center) I did the lighting for that room by running cable along the ceiling beams and then modifying clamp-on work-lights into hanging LED spotlight chandeliers. The forge room is going to have the same overall idea: low-hanging bank-lights over the benches and the rest of the room dark, unless the art-lights are turned on – in which case there will be hard pools of light around the grinder, anvil, forge, and press.
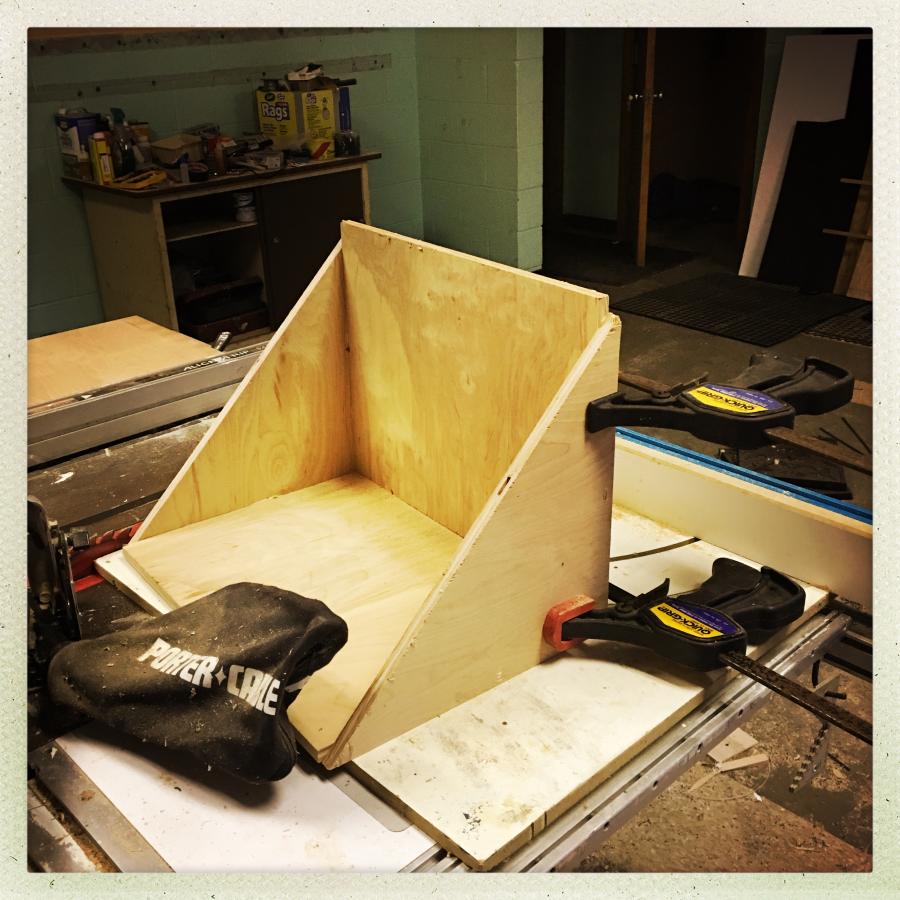
I made some brackets that will mount high up on the walls and will hold speakers and cables for speakers. I can’t work without music to keep my brain from jumping around so much. This was a quick bit of “thrown together and clamped” construction using a biscuit joiner.
Biscuit joiners are hugely underrated for quick and dirty stuff-making. You can get them pretty cheap, used, if you’re willing to stalk ebay long enough. The only problem with biscuit joiners is that they are terrifying and will mangle your hand in an instant if you are not careful. I have a mantra I repeat over and over while using one: “Biscuit joiner wants to grab your hand and never let go.”
Most of the wiring was a matter of pulling various runs along the beams and tie-wrapping them right to the support. It’s a very convenient way of doing things but it means a whole lot of standing with your arms up over your head, pulling and bending heavy copper. I haven’t been typing as fast as I usually do, because most nights my fingers feel like Roy Batty has been playing with them.
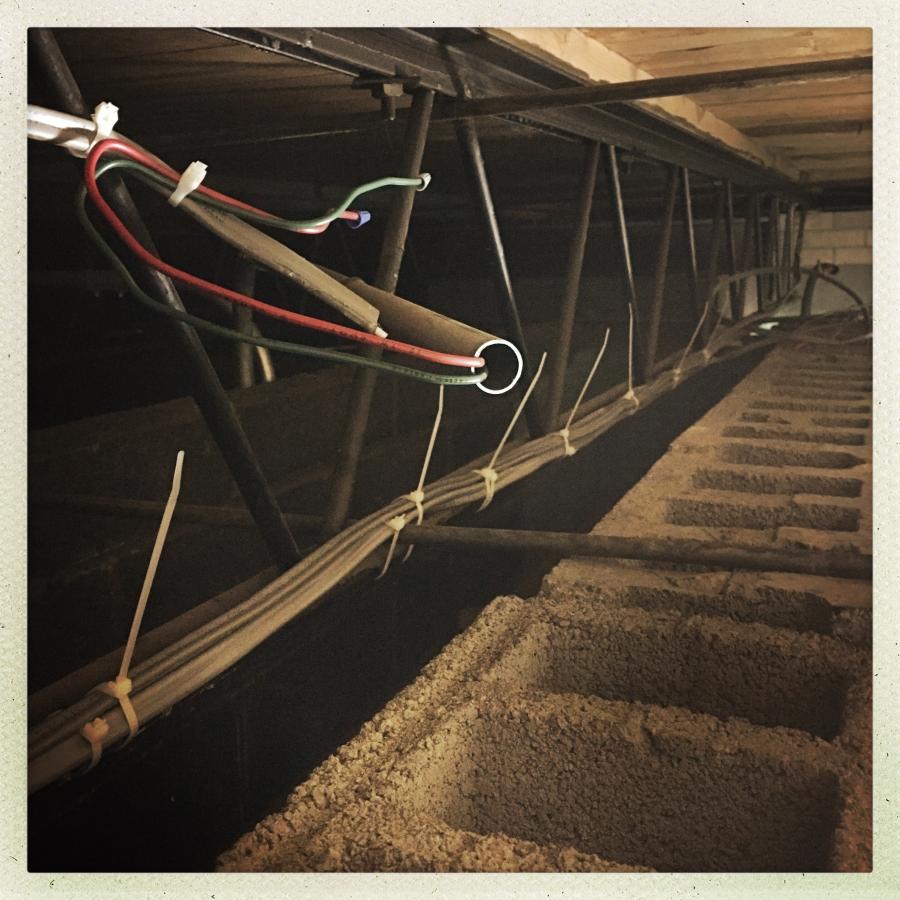
The wire up top hasn’t been connected, yet; it’s going down to one of the boxes on the wall. Lines into the room are kind of random – I’ve got to work with whatever the people who built the building gave me. Mostly, it’s a lot of “measure with a piece of string, then cut wire, feed it, wrap it down, go on to the next.
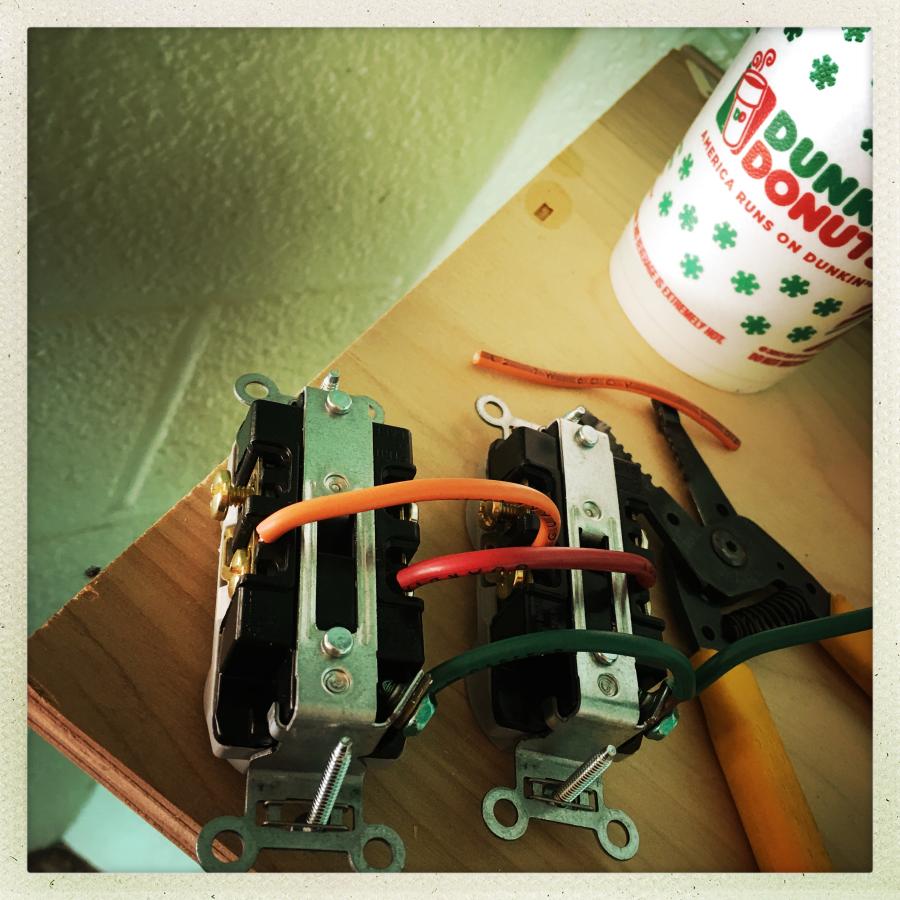
For the circuits that are doing to drive the press and bandsaw I used 12-ga copper, which is a special kind of hell to work with. Hook it up, bend it into shape, put it in the box, and then jiggle, push, curse, and get it all to go in place. Repeat.
Right now there are 12 outlet boxes mounted in the ceiling – mostly bench lights and art lights. It’s a whole lot easier to put more outlets than you need because someday you’ll want to move an outlet and then you’ll be cursing your past-self for lack of forethought.
I was hoping to post an update by now, with the bench lights and art lights all lit, and casting beautiful gothic pools of light on the floor. But that’s not going to happen, yet. When I hooked the wires up through the nice new 20 amp switches I installed in the wall box, I powered everything up, and started flipping switches. The last one (the bench outlet circuit) went blam when I flipped the switch.
Disaster!
First off, I spent a while cursing myself for being so self-confident that I didn’t do a resistance-check on the outlet circuit to make sure it wasn’t shorted because somehow it is. I could have avoided a lot of pain with a 10 second check. But past-self was overconfident and doomed present-self to having to wait for future-self to really curse and swear. Why? Because the circuit breaker box at the school is ancient and filled with discontinued Gould Bulldog breakers. And they’re really worn and they don’t work very well. When the breaker popped on that line, it has staunchly refused to reset itself. Worse, in the course of trying to figure out which breaker it is, one of the others disengaged and has refused to re-engage. Now, I am looking at tearing into the breaker-box and having to debug and figure out what circuits go where and why.
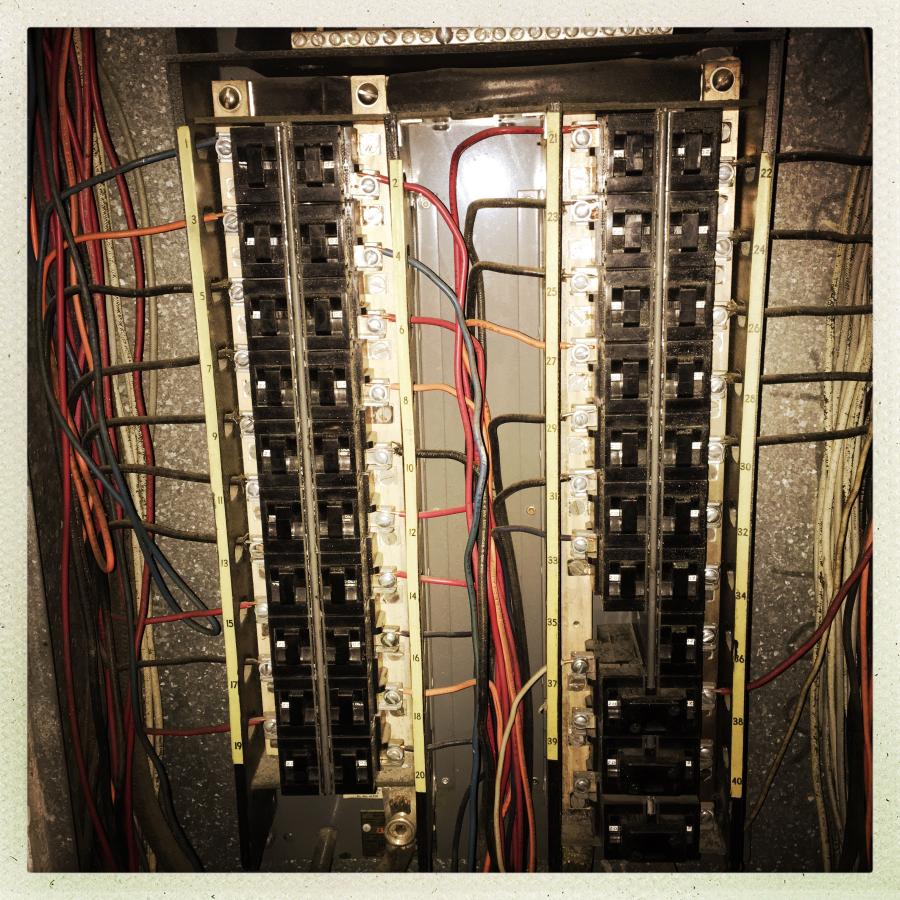
The old pushbutton breakers have a nifty indicator that says “ON” or “OFF” which would be handy if they worked. Unfortunately they are not reliable. Right now I am waiting for a half dozen replacements; I am going to massacre all the breakers that seem even slightly dodgy. There is a supposedly compatible replacement available on amazon, and I’m going to try those. If that doesn’t work I will be having to resort to buying torn-down breakers on Ebay. It’s that or replace the whole panel, and that seems like inviting nightmares into my life.
Next up, I’m going to start cutting pipe for the workbenches and assembling benchtops.
The other day I ordered a 4’x4′ 1/4 steel plate to surface the top of the welding bench. Then, naturally, I thought “I wonder what that weighs?” Well, I’ll get it on top of the bench, somehow. But again I am cursing myself. 1/8″ steel would have been fine. It’s not like I needed 1/4″ steel to keep it from blowing away or something.

The entire building has no wiring with ground circuits. Isn’t that nice?
I laughed my ass off when I saw the Gould logo on the breakers. My 2nd job out of college was working as a system administrator for Gould Naval Combat Systems in Landover, MD. Gould was one of those great companies built on WWII war-profiteering: they made submarine batteries. Sometime in the 60s or 70s the battery business started to dry up and Gould opened Systems Engineering Lab (SEL) in Orlando, Florida, and started making departmental mini-computers. The Gould SEL was a dual processor machine running UTS/32 – a 32-bit version of 4.2BSD. I was responsible to managing our big Gould server and a cluster of Sun 2s and Sun 3s around it. Gould NavCom was mostly a “beltway bandit” and liked to take high risk/high reward bids on big government contracts. As it happened, they teamed with Sun Microsystems on a deal for the US Patent Office: Gould servers, Sun workstations. So there was a lot of investment in software configuration and demos to win the deal. It turned out that Sun also bid the deal on its own, proposing “server configurations” of Sun workstations. So, Gould NavCom found itself losing out to its partner on a big contract having burned through its remaining capital. I made it to the 3rd round of layoffs but I didn’t mind because I’d parlayed my experience there into a sweet gig at Johns Hopkins Hospital, doing system administration (more 4.2 BSD, only this time running on a Pyramid 9020) I believe Gould SEL shut down about 2 years after the Landover office closed.
I do not plan to paint the forge. Painting the photography studio was hell: cinderblock sucks up paint at a phenomenal rate and has to be virtually pushed into every nook and cranny.
Your circuit breaker box reminds me of Medusa.
Good luck on lifting up that steel sheet. I use my Rubbermaid feed cart for stuff like that because I can tip things up on it and roll them where I need them. In fact I used to catch my rams, hog tie them so they stayed put, and would tip them into the cart and take them to the breeding group I wanted them with. I ended up calling it a “rambulance”….
Kestrel@#1:
Your circuit breaker box reminds me of Medusa.
Notice the complete lack of labels? Me too!
Good luck on lifting up that steel sheet.
Those rubbermaid feed carts are amazing. I have one over at P-nut’s barn. You could practically carry a horse in it. And “Rambulance” is perfect!
I have one of those little dolly/creeper things. If I can get the plate on that, I can move it to anywhere. It’s just a matter of time. The main thing I have to remind myself is it’s not like I can break it. If it starts to fall or tilt I gotta remember not to try to catch it. Just let it go and listen to the pretty sounds.
I did not see the phrase “fire suppression” anywhere in that post.
chigau@#3:
I did not see the phrase “fire suppression” anywhere in that post.
I have two wall-mounted fire extinguishers, with a big first aid box near the exit door.
The way the building is constructed, if it starts to burn, it’s gone. I’ve got a nomex flight suit, which is my Fuel Rats cosplay suit. My plan is to wear that and a leather apron.
Plate too heavy to manage alone? I’d weld/bolt/drill a lifting ring/hole or two to it so you can attach a decent chain or handle to shift it. Grind/clean it off later. Two of my work benches ended up with 3/8″ plate tops, because you never knock back a bargain hunk of steel. 1/4″ is good but still needs edge support. I also love my cheap Chinese made hydraulic engine crane, great for handling heavy lumps.
Lofty@#5:
I’d weld/bolt/drill a lifting ring/hole or two to it so you can attach a decent chain or handle to shift it. Grind/clean it off later.
Good idea!
A hydraulic engine crane? Do I dare ask what you do with it?
@ Marcus
Engine cranes are just the dandiest thing on reasonably smooth concrete, although useful elsewhere once you position it. Basically anything that weighs more than 40kg/100lb can be lifted off the floor, transported to any other part of the floor and raised up to around 4-5ft off the floor. The last big job my engine crane helped with was to fit a 2 post vehicle hoist into a friend’s garage. (Friend is cool, has an E-type Jag amongst other things) You lift one of the hoist legs off the ground using a sling near the middle, then slip it along so the post is base heavy. With a short chain to stop the sling sliding off you can now lift and rotate the post to the vertical position. I have no idea how professionals do these things but I’ve done a total of four installs for myself and friends. Oh and it lifts engines in and out too.
And here is an exact match for the one I bought, just to give you the idea:
https://www.ebay.com/itm/Dragway-Tools-2-Ton-Folding-Hydraulic-Engine-Hoist-Cherry-Picker-Shop-Crane/253267675243?epid=1282791891&hash=item3af7ee086b:g:5fEAAOSwUn9aEeX~
Once you’re finished with it just fold up the legs and park it in a corner.
It feels like I am experiencing terrible acid reflux, but really it’s just envy.
abbeycadabra@#8:
It feels like I am experiencing terrible acid reflux, but really it’s just envy.
Aww, foo – I don’t want to make people feel bad. I’m having a ton of fun with this stuff and I hope it doesn’t seem like I’m bragging.
You can take consolation from the fact that I’ll be single-handed shifting a 250# steel plate tomorrow. And today I spent moving around sheets of 4×8 1″ plywood for the bench-tops. When the days end, I can barely move.
Lofty@#7:
Engine cranes are just the dandiest thing on reasonably smooth concrete, although useful elsewhere once you position it.
I may have to get one of those. Probably when I get a bit older. I’m already starting to hate moving big stuff. Today I lifted my metal-cutting bandsaw up onto one of the workbenches (to weight the top down while the glue sets) and I know I am going to feel that tomorrow. And moving anvils has turned out to be a lot less fun than it would have been when I was 20. But, when I was 20, I couldn’t afford anvils. So, I win some I lose some.
Ignorant question: is there a reason not to plaster over the cinderblock and then paint the plaster?
Owlmirror@#11:
Ignorant question: is there a reason not to plaster over the cinderblock and then paint the plaster?
That could be done, but plastering is also pretty hellish. You’d need to do what’s called a “skim coat” and getting it to stick – you’d be right back to forcing goo into cinderblock. I figure if you’re going to wind up packing goo into cinderblock, it may as well be paint.
Plan B was to decide “I really like these colors!”
Or spend $$$ and spray (with due PPE of course).
(Americans excel at overkill, no?)
John Morales@#14:
(Americans excel at overkill, no?)
(hitches up his trousers and puts his hand on the butt of his revolver, tipping his cowboy hat back on his head)
Weeeeeel, ah think we oughta just blow t’place up and spend fahv billyun building a whole new complex.
(calls in airstrike)
That is a very nice work space and the air-raid siren on the roof definitely adds to the appeal, but do you have any 250 lbs combots to patrol the premises like a certain someone?
I spent a couple hours today finally replacing all the old outlets and switches in the kitchen, so I very much concur that solid 12AWG is horrible to handle but it is still not as bad as wrangling the old 4~6AWG aluminum wire in the box that now connects to the new oven via stranded 14AWG in the armored cable whip. Today also marked the first time in the house’s 40+ year history that the two switches on the wall above the stainless steel kitchen sink have ever been at all grounded (small over-sink light fixture, garbage disposal, and wall receptacle on a 20A circuit).
I got to skimp a bit on my basement workshop wiring costs by using custom low voltage LED lighting powered off a 52+/-4V buss with a 16S LiFePO4 battery backup pack. Basically just a small closed network of controller PCBs wired together with cheap 20~24AWG wire for power, ground, and comms. Each controller PCB has four small buck regulators to independently dim LED ‘bulb’ PCBs that are attached to the wood rafters with screws. One of these days, I will finish expanding that to the sections of the basement with drop ceilings that still have fluorescent fixtures containing dangerously old magnetic ballasts. Going to use the steel rail of the drop ceiling and a magnet on each LED ‘bulb’ to make it easily repositioned within reach of its controller.