I went back to see our baby Nile geese (f… you, English) and look how they’ve grown. And also how camouflage works.

©Giliell, all rights reserved

©Giliell, all rights reserved

©Giliell, all rights reserved
I went back to see our baby Nile geese (f… you, English) and look how they’ve grown. And also how camouflage works.
©Giliell, all rights reserved
©Giliell, all rights reserved
©Giliell, all rights reserved
Last time we saw the garden we had a new terrace and stairs, but were still far away from it being finished, which it still is. Since then I gave the old bench a new coat of paint and we got new garden furniture and somebody competent is working on a handrail. What we still need is a lamp. The easiest thing would be to screw one to the side of the house, but when has easy ever been an option? the plan is to put a lamp post in the upper corner of the slope, at the end of the terrace.

©Giliell, all rights reserved
In this pic that’s the upper right hand corner, basically where the wooden fence starts. This way it should give light to the small terrace, but also to the stairs. Also I want a small fountain there so we need electricity anyway. Therefore we spent most of Saturday doing what we’re good at: me telling Mr what he should do and him doing what I told him. Sounds pretty much like some sexist trope about the domineering wife and the poor hapless husband, but it links to the concept of the mental load: The fact that in heterosexual relationships the women are usually the ones who have to do the planning and coordination and sadly, our family is a poster child for this in most parts. Mr has gotten better over the years (often because I simply refused to to do it. If we agreed that it was his task then I would simply unburden myself. No more checking in, no more doing the thinking), but on the whole the mental load is still mine. It doesn’t help that he’s really not good at planning in several steps. He’s more of a Scrabble guy than a chess player and his plan was to start pouring a concrete base at the top where the lamp should go and worry about the slope later. Supposedly after the first heavy rain washed down the earth including the concrete base.
At my suggestion (haha) we started securing the upper part of the slope:

©Giliell, all rights reserved
What looks like just a couple of stones was the backbreaking work of several hours. The slope goes in two directions: into our garden and towards the neighbour’s garden. And we had to start somewhere in the middle, because that stone that looks like I had drunk the gin tonic before and not afterwards is turned over on purpose: It covers the drainage pipe from the terrace, making sure the water can exit freely. To prevent animals from getting in there we put in a tin with holes in the bottom. I’m curious at how this will work out, but it’s raining today so I’ll take a look later. This means that we had to start right there, that was our fixed point, and work our way up and to the sides and down as well. Every other stone has a steel bolt at least 30cm into the ground and a layer of concrete to secure it. And some drainage because I do want to plant something in those stones. The first row is always the hardest because it needs to be very level. Sure, the stones will always have their irregularities, they won’t all be the exact same height, but if you’re off there, you’ll be in a lot of trouble later. That means putting the stone (15kg) into position, checking, lifting it off, altering the ground, putting it back, checking… Yes, my arms are hurting, why do you ask? Especially since our ground is full of stones and pebbles that will just not give a millimetre, no matter how hard you push down. And the worst part: because the whole terrain is helter skelter it looks like they’re all askew because all the other supposedly “straight lines” you’re looking at are, in fact, not straight, which is probably a metaphor or something for my life but that’s off topic.
In the background you can see some boulders to further stabilize the slope. We still had these lying around, but we’ll need to get more of them to create a girdle on the lower edge to prevent the ground from being washed out. It will also create a nice habitat for lizards and insects, because with all the work we’re doing and all the alterations we’re making to suit our desires, that is always an important aspect. That’s the allotted “wildflowers” side of the slope anyway. I hope to get enough of the stones set in time to plant the pumpkins and courgettes. We’re not lazy, we’re environmentally friendly! We’ll spend a lot of time in the garden this year (I seriously cannot understand people who are planning their holidays this year. No, not even within Germany), so we better make it look inhabitable.
Companies want to sell you things. And of course, to run a business that isn’t money laundering, what you get from your customers needs to be more than what you pay for goods and services yourself. But of course they don’t just want to make some profit, they want to make as much profit as they want to and that’s where brands come into play, where they tell you stories to justify a much higher price, where a certain label means the shirt costs 150 bucks while still being made in the same sweat shop by the same people who make the 15 bucks shirts. Another trick is evoking that something is rare and exotic and therefore expensive.
Yesterday we went to the wholesale supermarket and one thing I needed was allspice. I absolutely love allspice, I was running low on allspice and I wanted to make some Jamaican jerk anyway, so I went to the spice section where I was presented with two options: the normal supermarket size packet with 19g of allspice, which would probably have been enough to make a small batch of jerk, and the restaurant wholesale packet, by the same company, with 500g.
The price difference? 2.80 vs 7.50. That’s a difference of 15 vs 150 € per kilogram for the same fucking allspice.
I think we’ll have a lot of Jamaican jerk this summer…

©Giliell, all rights reserved
Schools here were closed about two months ago on a Friday. Thursday night the powers that be proclaimed they would stay open, driving to work on Friday morning I heard that we were closing on the news. Nevermind that the official announcement only came at 12:00 o’clock, we spent the whole morning frantically trying to put together lesson plans, material, information etc., while halve our kids hadn’t even come that morning anyway.
Since then we’ve been trying with more or less success to teach our kids remotely (not easy when some of them don’t even have a smartphone) and keep in contact. Which means a lot of communication. Believe me, I’ve never been as busy and with normal school days disbanded, there seems to be no point at which your work actually stops. All of this requires effort on all sides. These are just a few tales of how not to.
Parents:
Informing schools of your current phone number or even address is overrated. Complain loudly about not having been contacted once you bother to call school.
Call after two months of closure to inform us that your kid didn’t get the worksheets on the last day of classes (I do remember that I sent him home early. He’d threatened to beat me).
Calling back is overrated as well. Feel neglected at the same time.
Kids:
Play dumb. If you’re lucky your parents will believe you. Like when you’re supposed to hand in your work via WhatsApp and your mum texts the teacher on WhatsApp, telling her that the poor lad couldn’t find the teacher on WhatsApp.
The worksheet that is uploaded for your group has a different class label. Claim you had no idea that you were supposed to do that, even though it was uploaded under “Lessons for class XYZ”
Colleagues:
You’ve got quite some health conditions but you’d never say “can I please not have to come in for the risky work. Let your colleagues worry and arrange schedules around you.
Here I need to fill in a bit of background. A colleague, let’s call them L, has been on sick leave for quite a while now and they still will be for a time to come. They were the tutor of a very difficult class, a situation that wasn’t improved by the long absence of their main teacher. Said colleague was the German and English teacher and just before Corona hit we had finally put up a plan which colleagues were supposed to teach them for the rest of the year. I’m not one of them because I’m not a regular teacher, but with the colleagues not having met the class yet, I took over during the last weeks. It was little work for German because they’re doing a reading diary, and more for English. Now that we’re partially up again I have a lot on my plate already, and now the reading diaries have to be handed in and evaluated (there won’t be grades, but there should at east be feedback), so I called the colleague who was supposed to take over the class in German. They are still in home office with no actual class, because they are very vulnerable and have enough preexisting conditions for three more people to stay at home. If I bring them the diaries, could they please evaluate them? “Sure, of course”, they generously said. “Just drop them off”. “Oh, and by the way, who’s actually their German teacher?”
At least when making rulers. It’s a fun mould that works really well. The fairy stickers are a gift from Anne, but #1 has decided to be currently too grown up for hers, so I got to use them.

©Giliell, all rights reserved
First of all, a happy first of May. We may not be out there protesting, but it’s even more important than ever to defend the rights of working people and the working class, as they’re currently, quite literally, sacrificed of the altar of profit.
Having said that, here’s some cute.
The Nile geese had chicks, or whatever you crazy Anglophones call them.

©Giliell, all rights reserved

©Giliell, all rights reserved

©Giliell, all rights reserved
I don’t know how many masks I made by now. It’s a three digit number for sure and we’re making them for all our students. Oh, we did get free masks from the government: 5 of those flimsy single use surgical masks per person…
Better than nothing, I guess.
But I needed to have a little fun as well:

©Giliell, all rights reserved
My interfacing is a bit flimsy, so if I make another one I’ll need to change that. Otherwise I think I can fit some snacks into the nozzle.
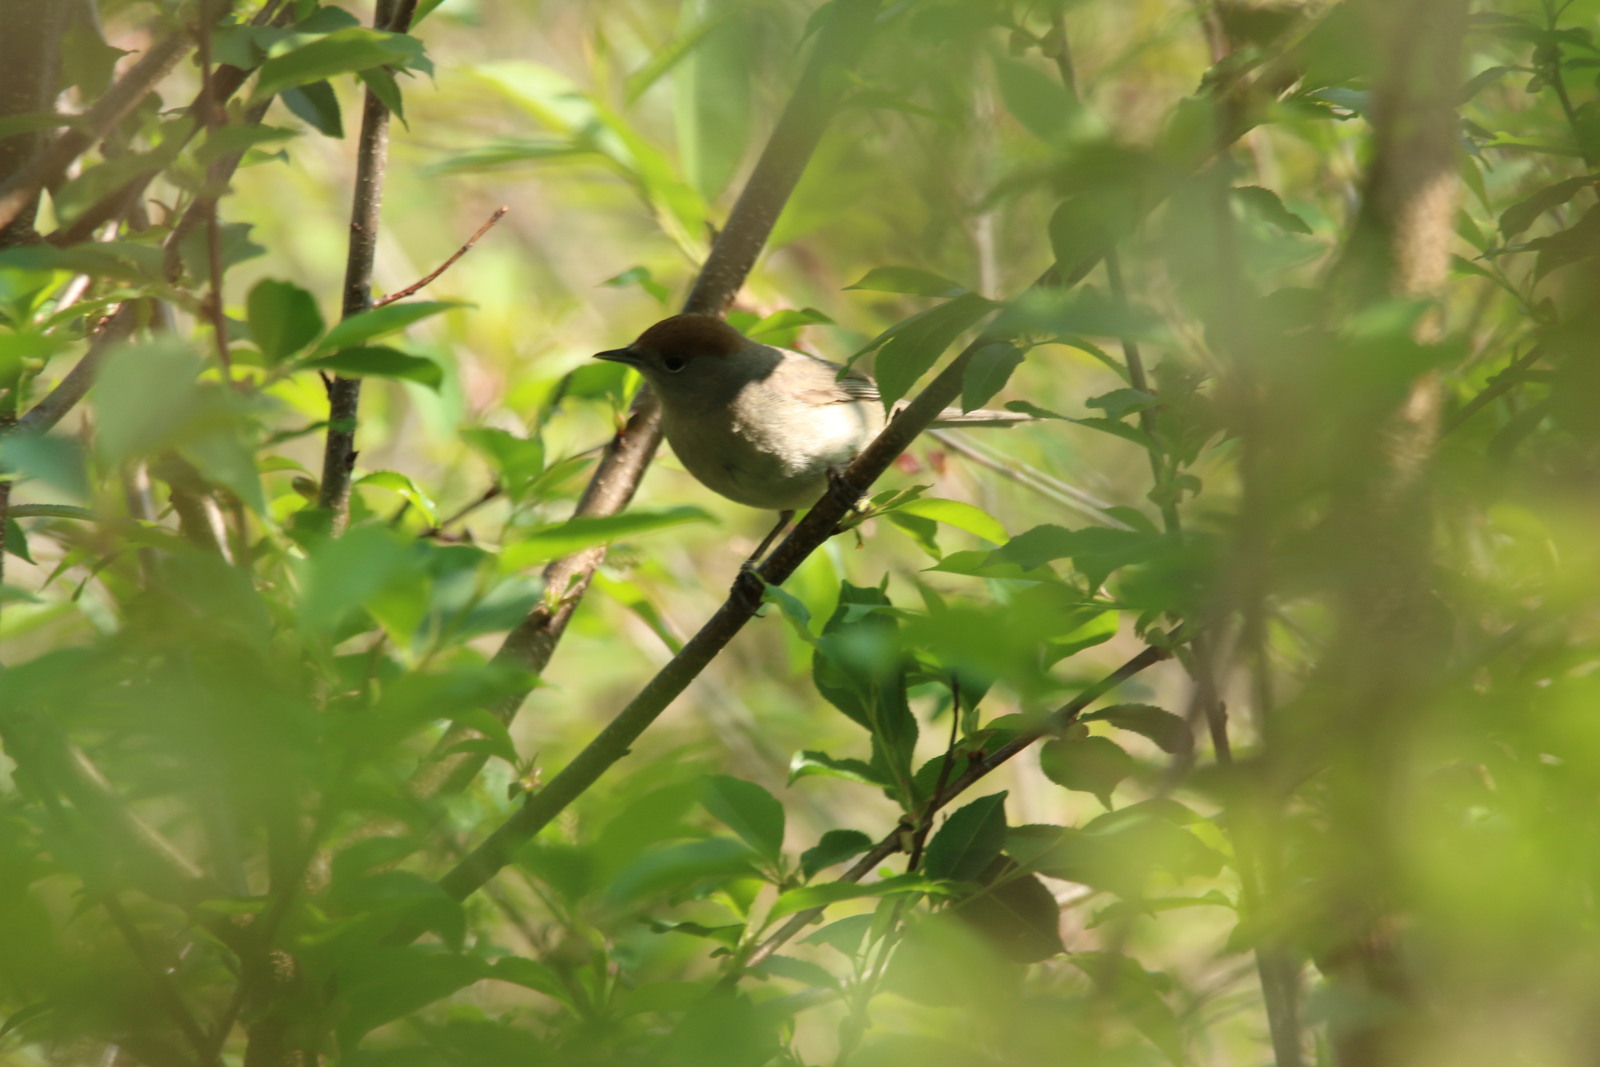
Because obviously half the bird population does not halve a black cap, just like most blackbirds are brown indeed.
But it’s a cute LBB (Little Brown Bird) and I was happy to take her picture.
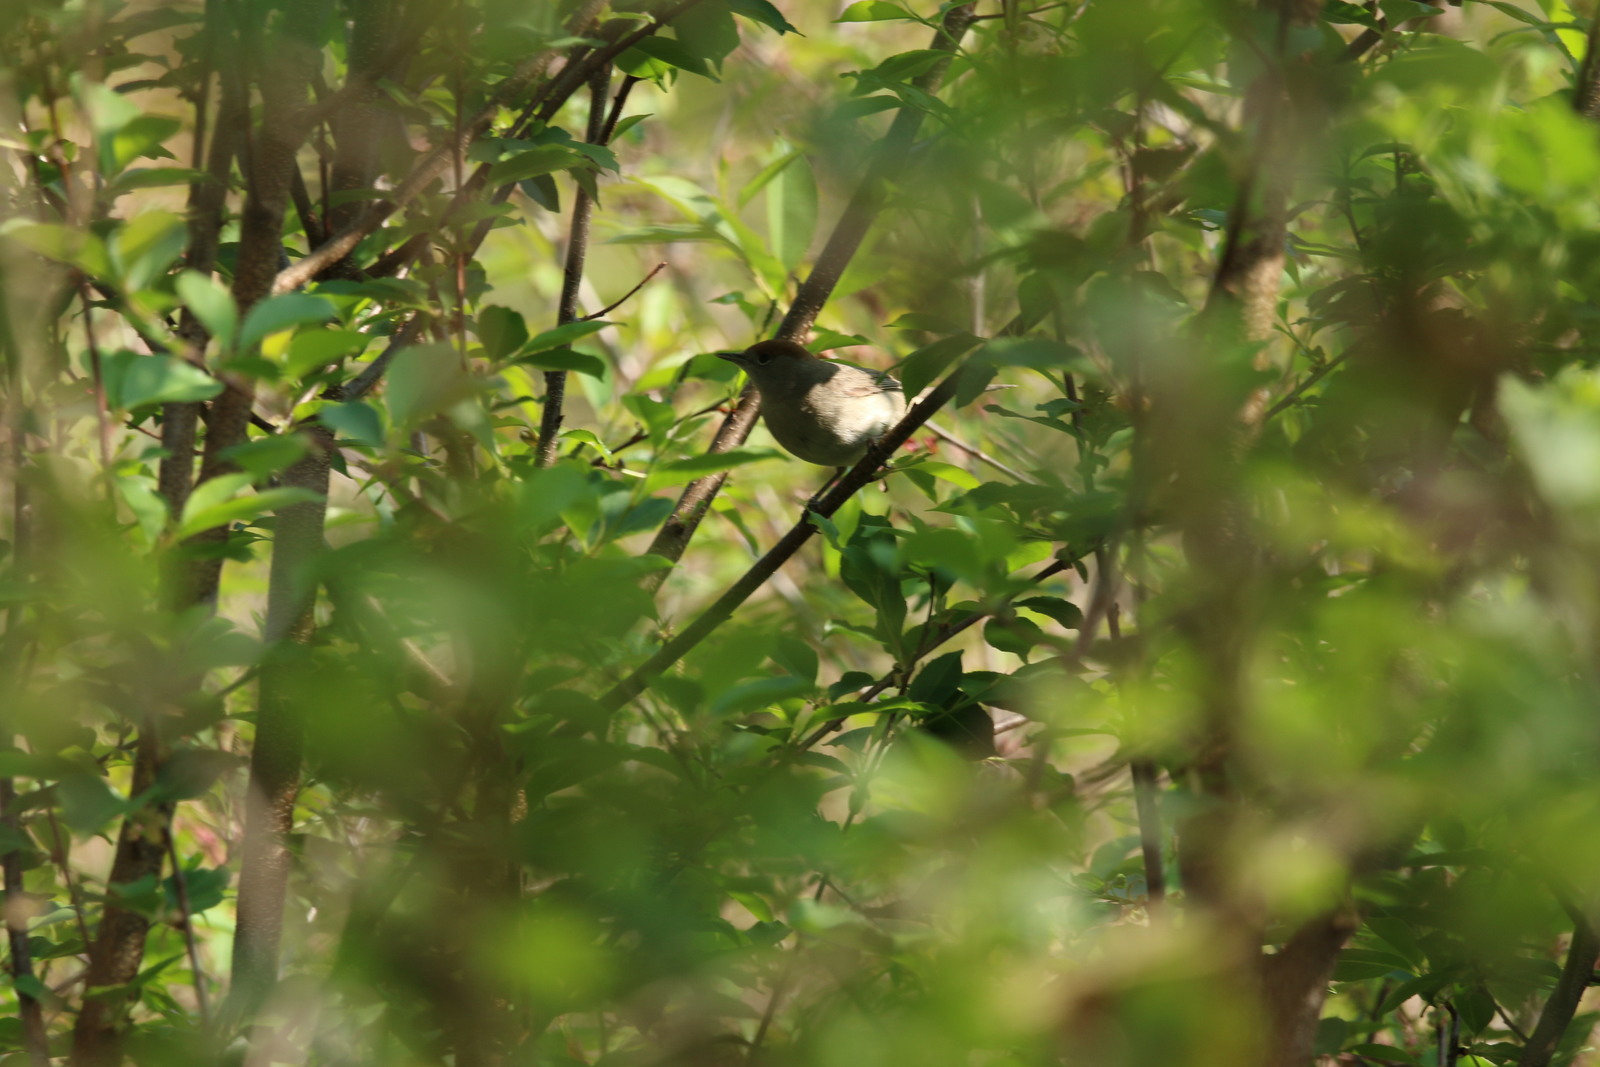
©Giliell, all rights reserved Always get that first shot, because you never know if you will have time to adjust the camera

©Giliell, all rights reserved
©Giliell, all rights reserved

©Giliell, all rights reserved

©Giliell, all rights reserved
A bee fly in midair. I didn’t have much luck with the camera on our walk, mostly because the woods have never been that popular before, but this little fellow didn’t care much for all the crawlers on the ground.
I think the colour speaks for itself, no explanation needed

©Giliell, all rights reserved Dandelion
Yesterday brought us news about the search for Oma, which reminded me that I probably met a distant relative of Jack’s fairy friends.
maybe Jack can ask them if they’re related, the little fairy was a bit shy and didn’t talk to me.

©Giliell, all rights reserved
When we went to the wholesale supermarket I bought a whole crate of zucchini, which means we’ve been using them in a whole lot of dishes, and since they are true neutral, I also decided to make zucchini cake. It turned out really, really nice and it would be a shame not to share.
©Giliell, all rights reserved
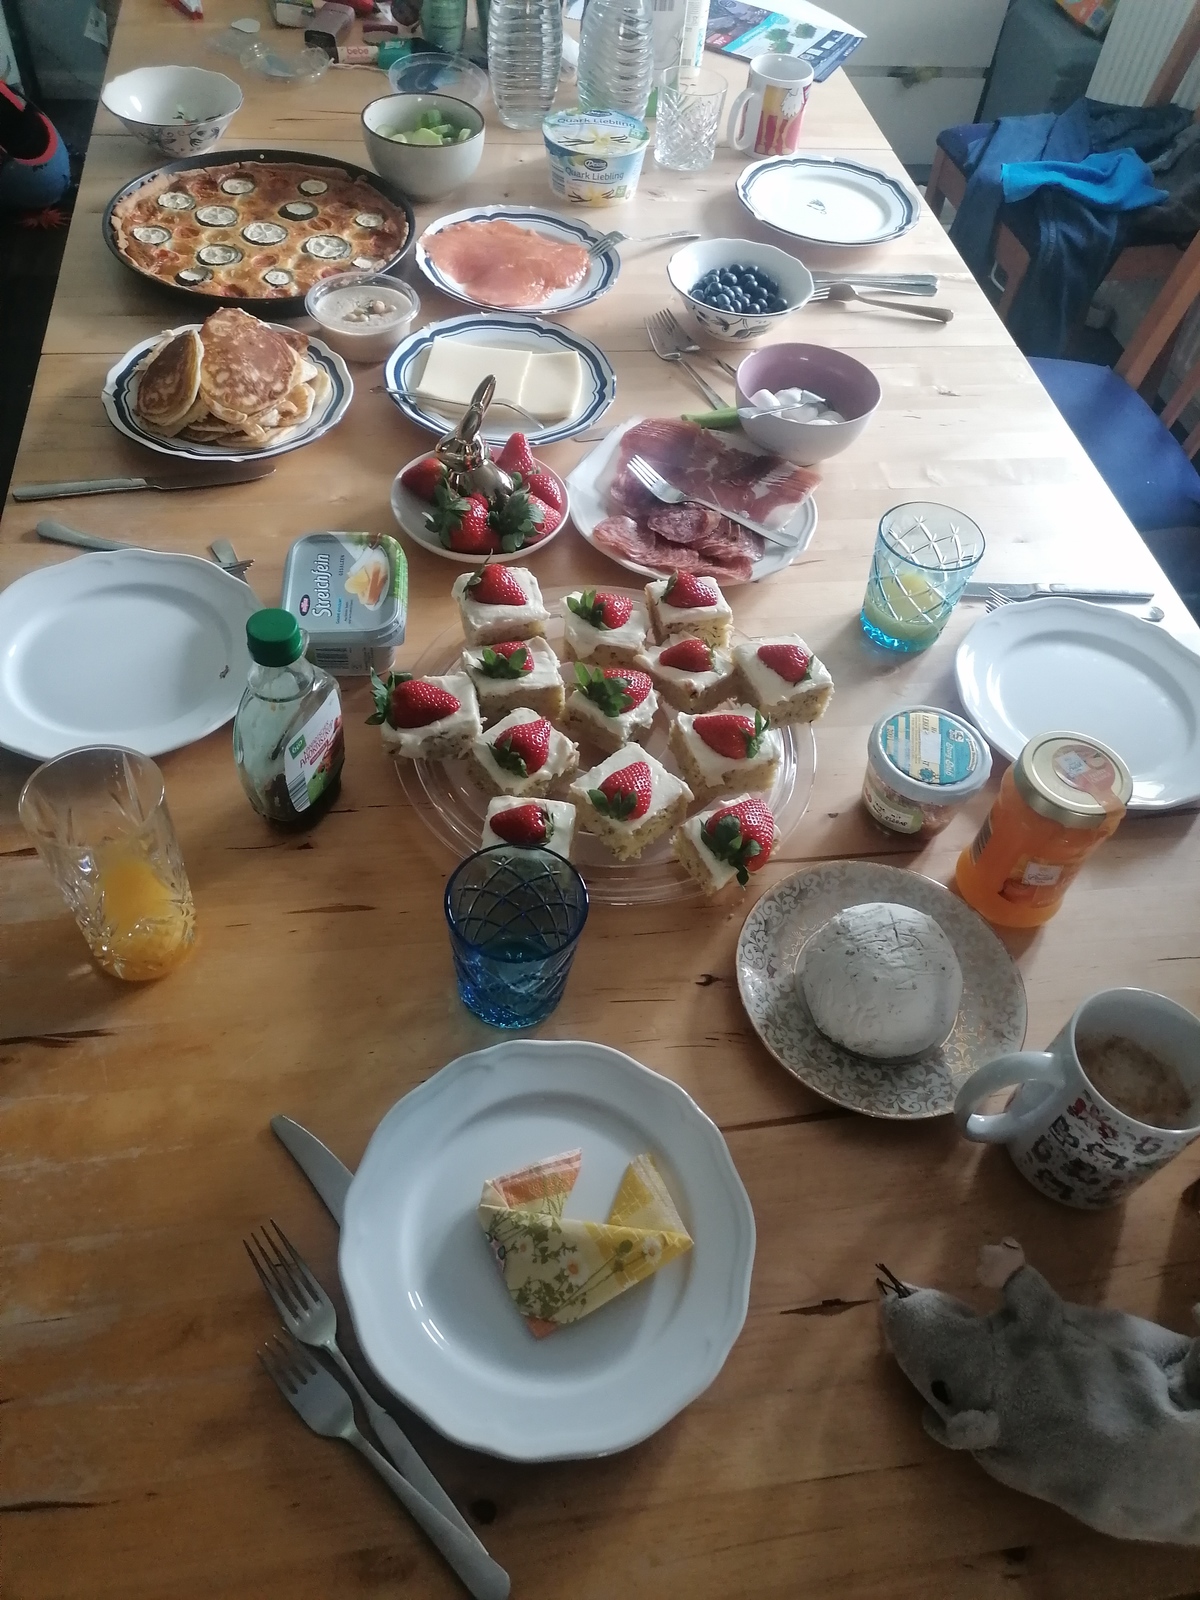
Uhm, yeah. our easter brunch…
For the cake you need:
Grate the zucchini, mix wet ingredients (including the zucchini), mix dry ingredients, combine, bake a 160° with ventilation.
One thing that made me wonder about the recipe was that they told you to bake it in a 26cm (10″) round tin. Every experienced baker can see from the amount of ingredients that this is way too much and I’m sorry for the inexperienced bakers who flooded their ovens with cake batter. I baked it in a tray for about 30 minutes.
Another thing is that there’s really little sugar in the recipe. This means that it’s perfect for a sweet topping. The original recipe had a chocolate ganache, but I went for lime and cream cheese with fresh strawberries on top and it was just perfect. If you don’t want to add a topping I’d recommend adding something like another 100g of brown sugar for extra flavour and sweetness. Or you leave out the sugar completely, add more salt and grated parmesan, which should work as well.
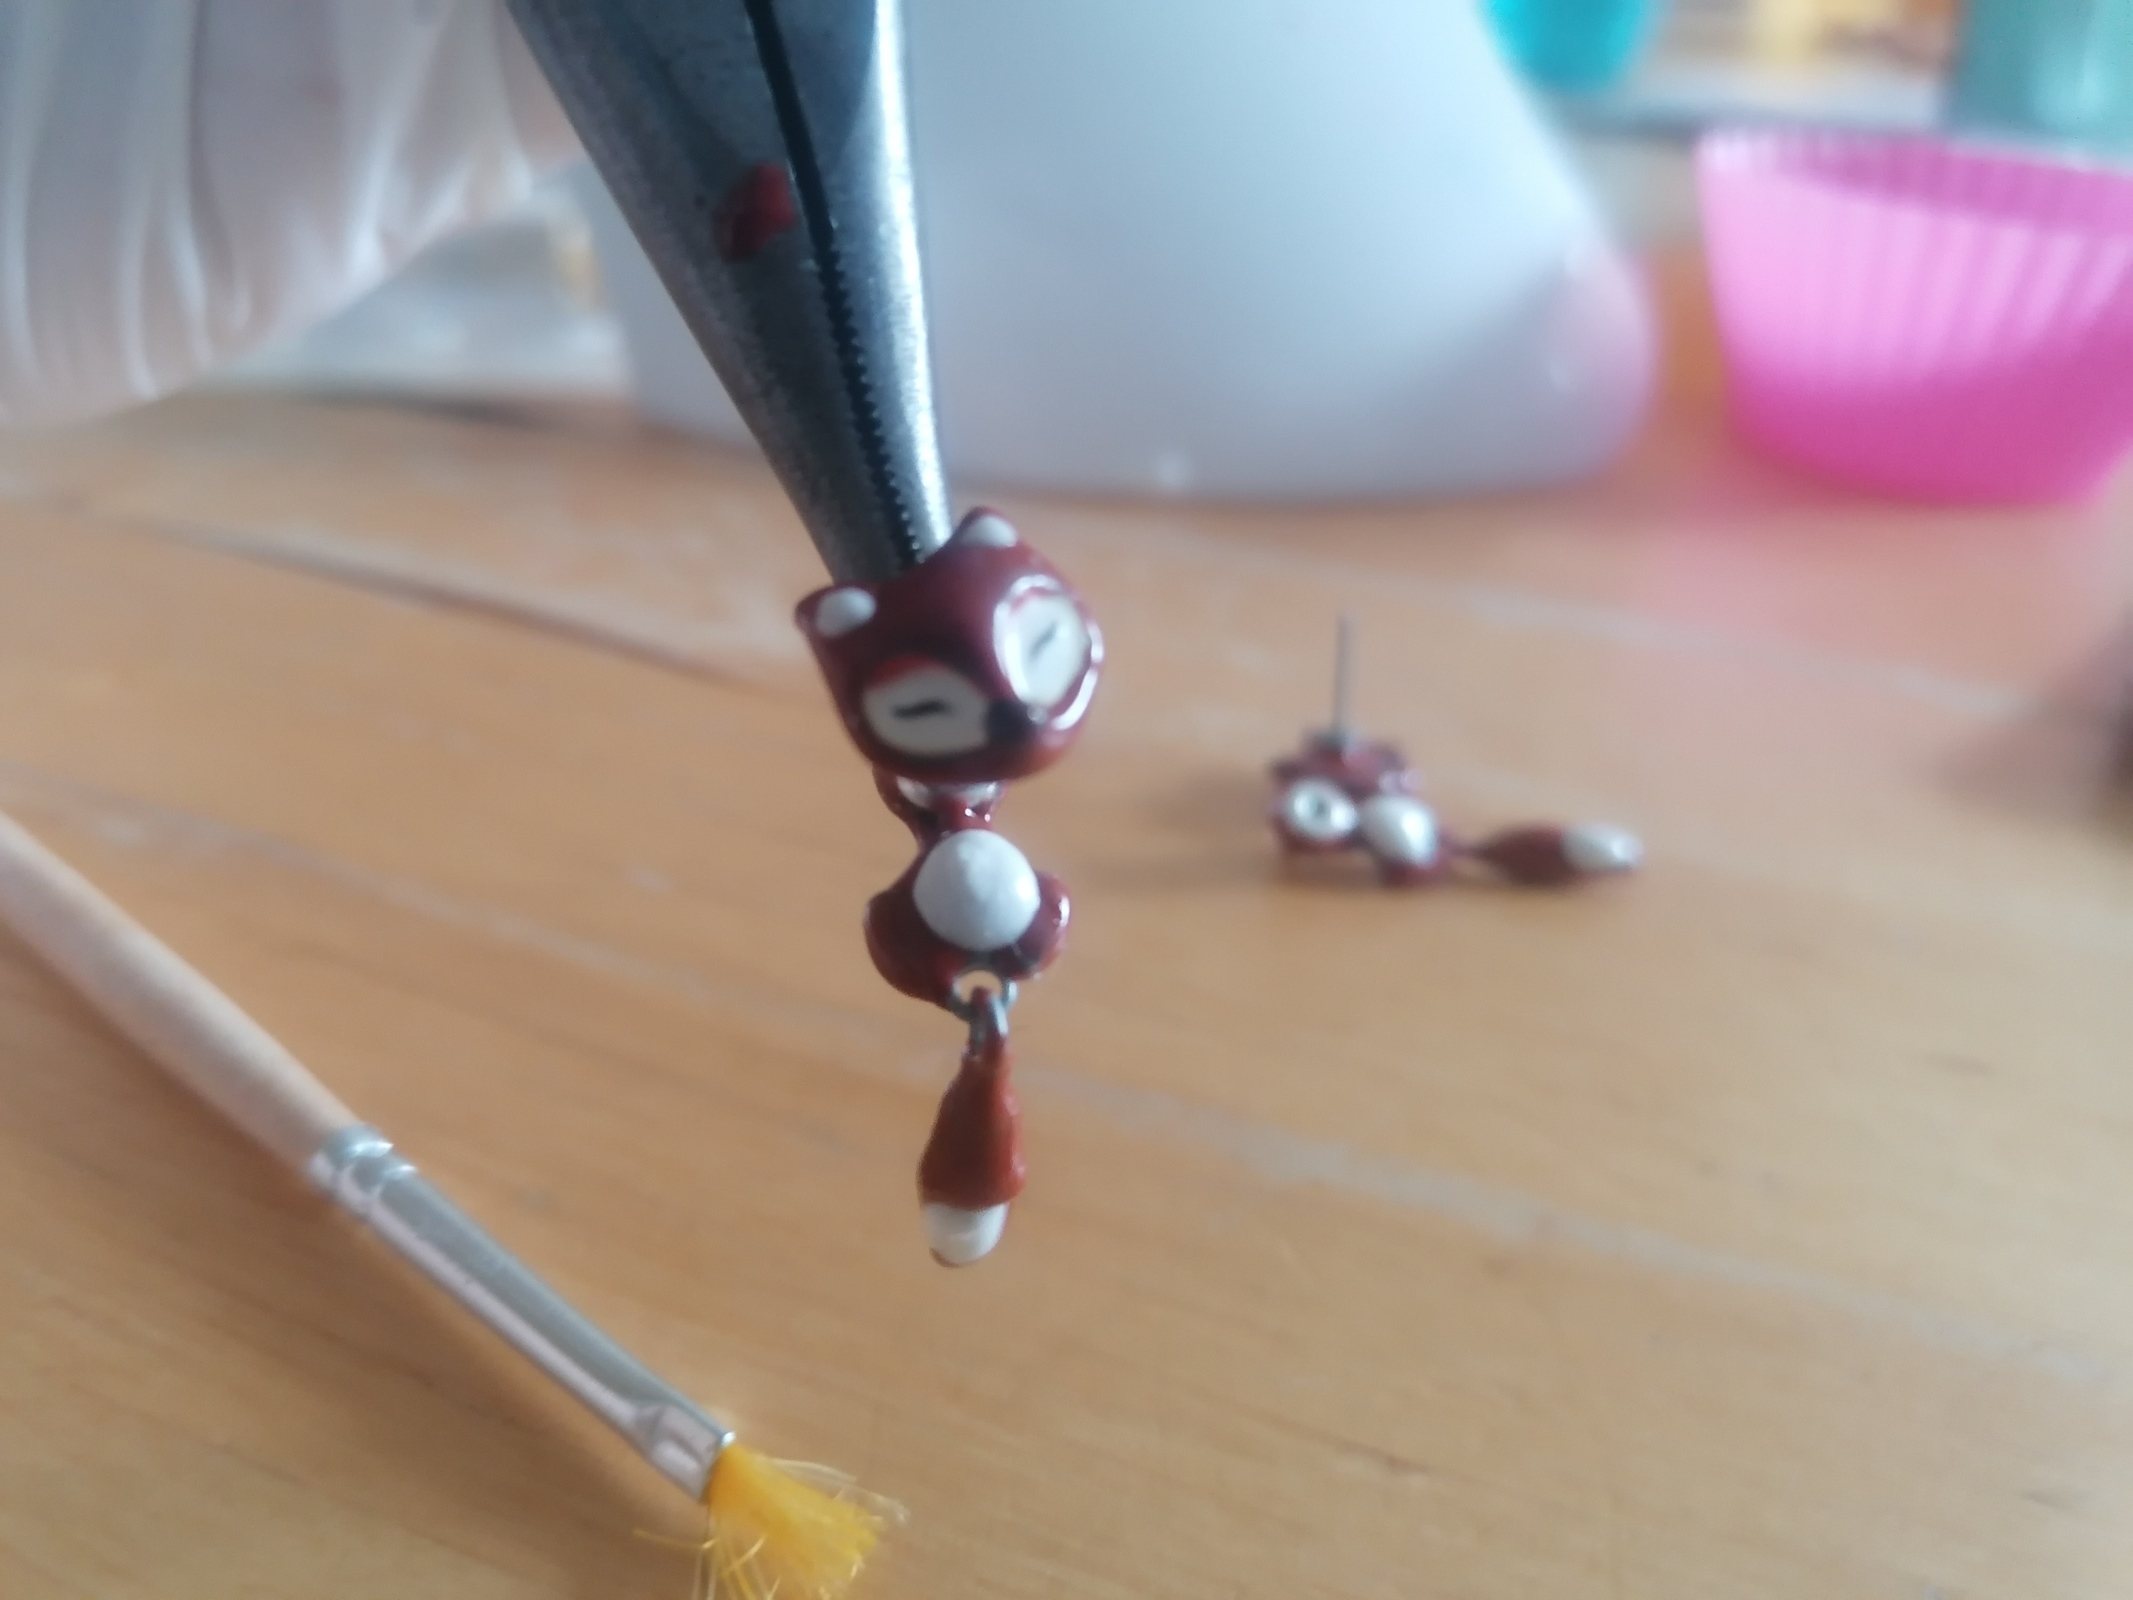
Apparently some people take off their earrings before taking a shower or going to bed. I’m not one of them (unless they have some parts that must not get wet or are huge ones for special occasions), so I tend to periodically ruin my cheaper earrings. The pair I was currently wearing is a cute fox where the stopper is actually the body of the fox so you have the whole animal dangling from your ears. Since I can’t go out and get new ones and also have some time I decided to restore them using UV resin.

©Giliell, all rights reserved
Here you see the sad remains after about three months of constant wearing. From behind it looked like the red was some kind of shrink wrap with little adhesion to the metal. First I cleaned off the remaining paint. The paint around the eyes looks like it’s proper enamel, so I left it at that.

©Giliell, all rights reserved
Next I coated the parts in several layers. One difficulty is the attachments of the tail, since resin would glue it to the body permanently. I worked carefully there with moderate success. Another thing is that resin leaves a lot of volume. The previous “shrink wrap” paint showed off the contours you can see above, but in the restored version they are gone. Foxy probably got a thicker winter coat. Also the colour is more brownish.

©Giliell, all rights reserved
Here’s the finished version. I quite like how they turned out. Kestrel would probably laugh at my clumsy painting skills, but I can live with that.

©Giliell, all rights reserved
©Giliell, all rights reserved
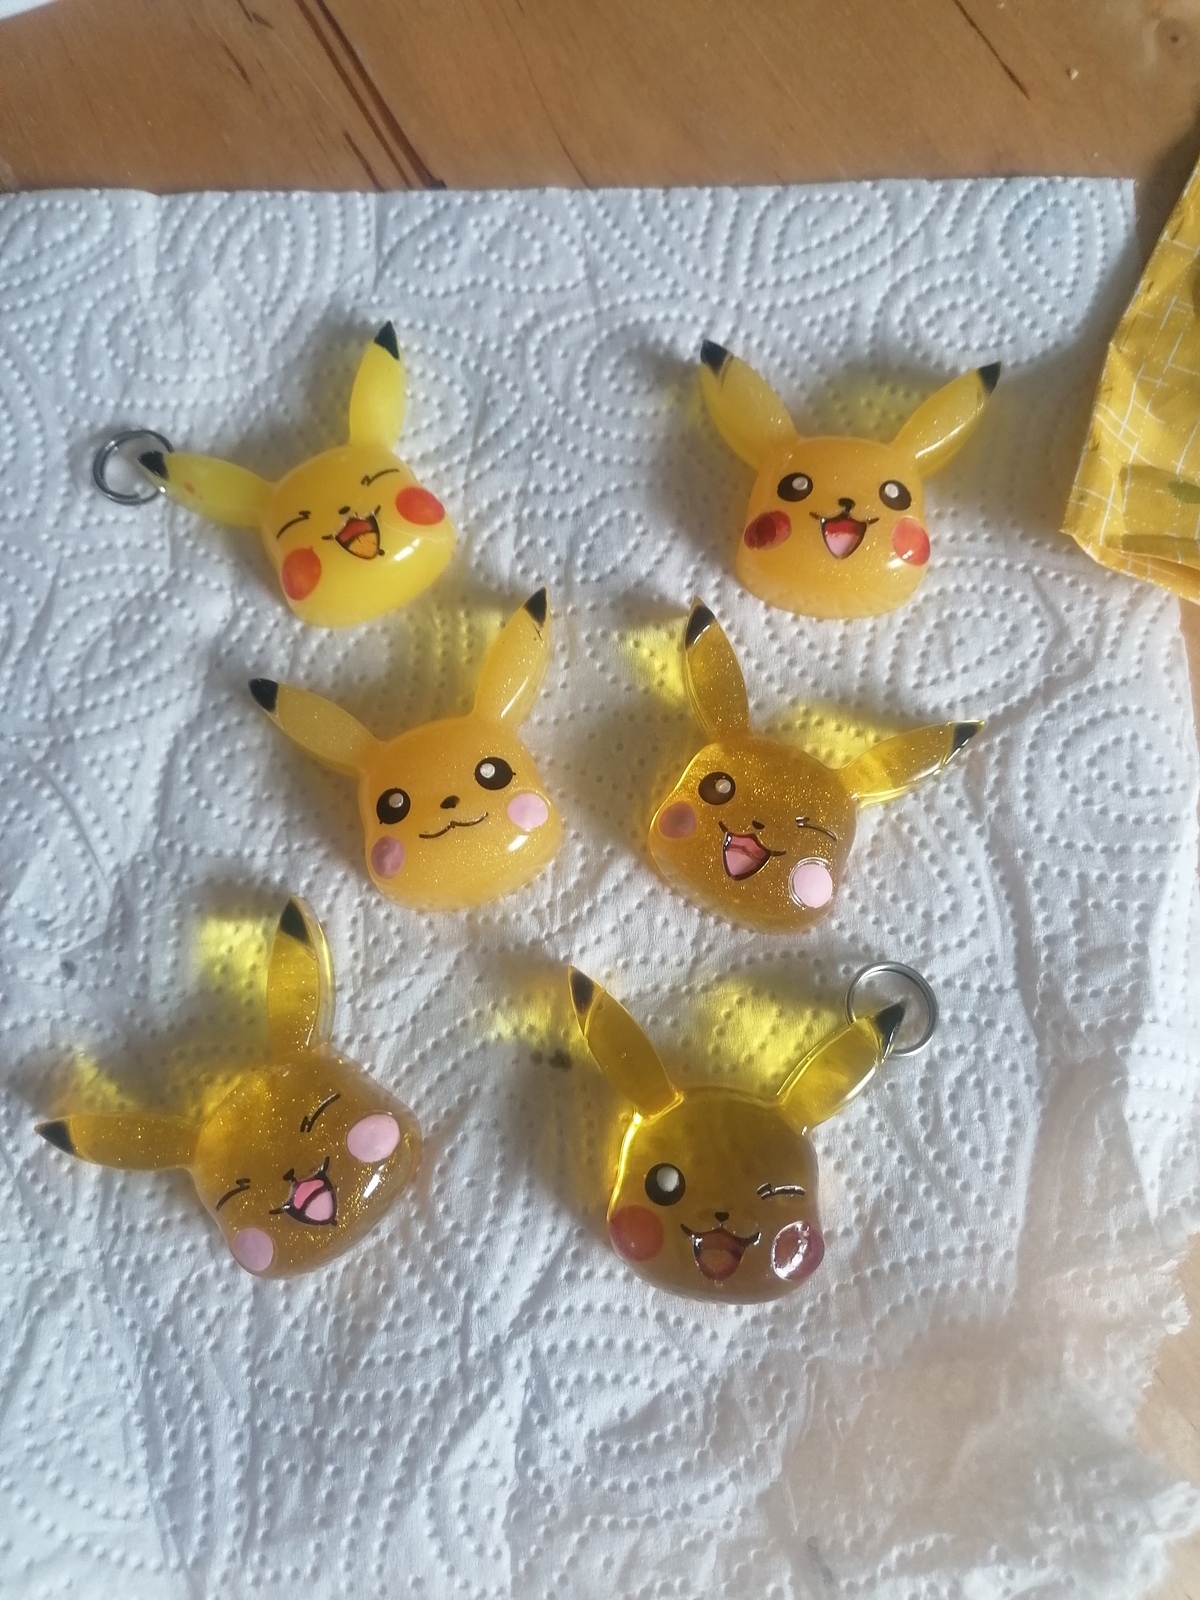
And here’s some bonus Pikachus. Because why not have a flock of them?
©Giliell, all rights reserved