When grinding blades, it is important to have the ridges, fullers, and similar as symmetrical as possible, especially before quench. An asymmetrical blade has a much higher probability of warping or bending in the quench.
On an unhardened blade, one can scribe markings with a scribing needle and/or compass, but once the blade is hardened, that is no longer possible. And I still want my blades to be at least mostly, even though not perfectly, symmetrical too.
I used to measure the symmetry with a help of a folded piece of paper that I have cut with shears so that it has two perfectly aligned points. When folded over the blade, I could easily-ish check if the points align on the ridge on both sides and thus check where I shall grind more during the polishing to keep the symmetry.
But the pieces of paper get wet and manky in the process, and I kept of course losing them so I had to make new ones over and over every day and sometimes several times a day. And today I finally got an idea how to replace them with something much better and hopefully permanent. I took one wooden clothespin and I ground it in about 5 minutes to sort of mini-calipers that can be clipped onto a blade
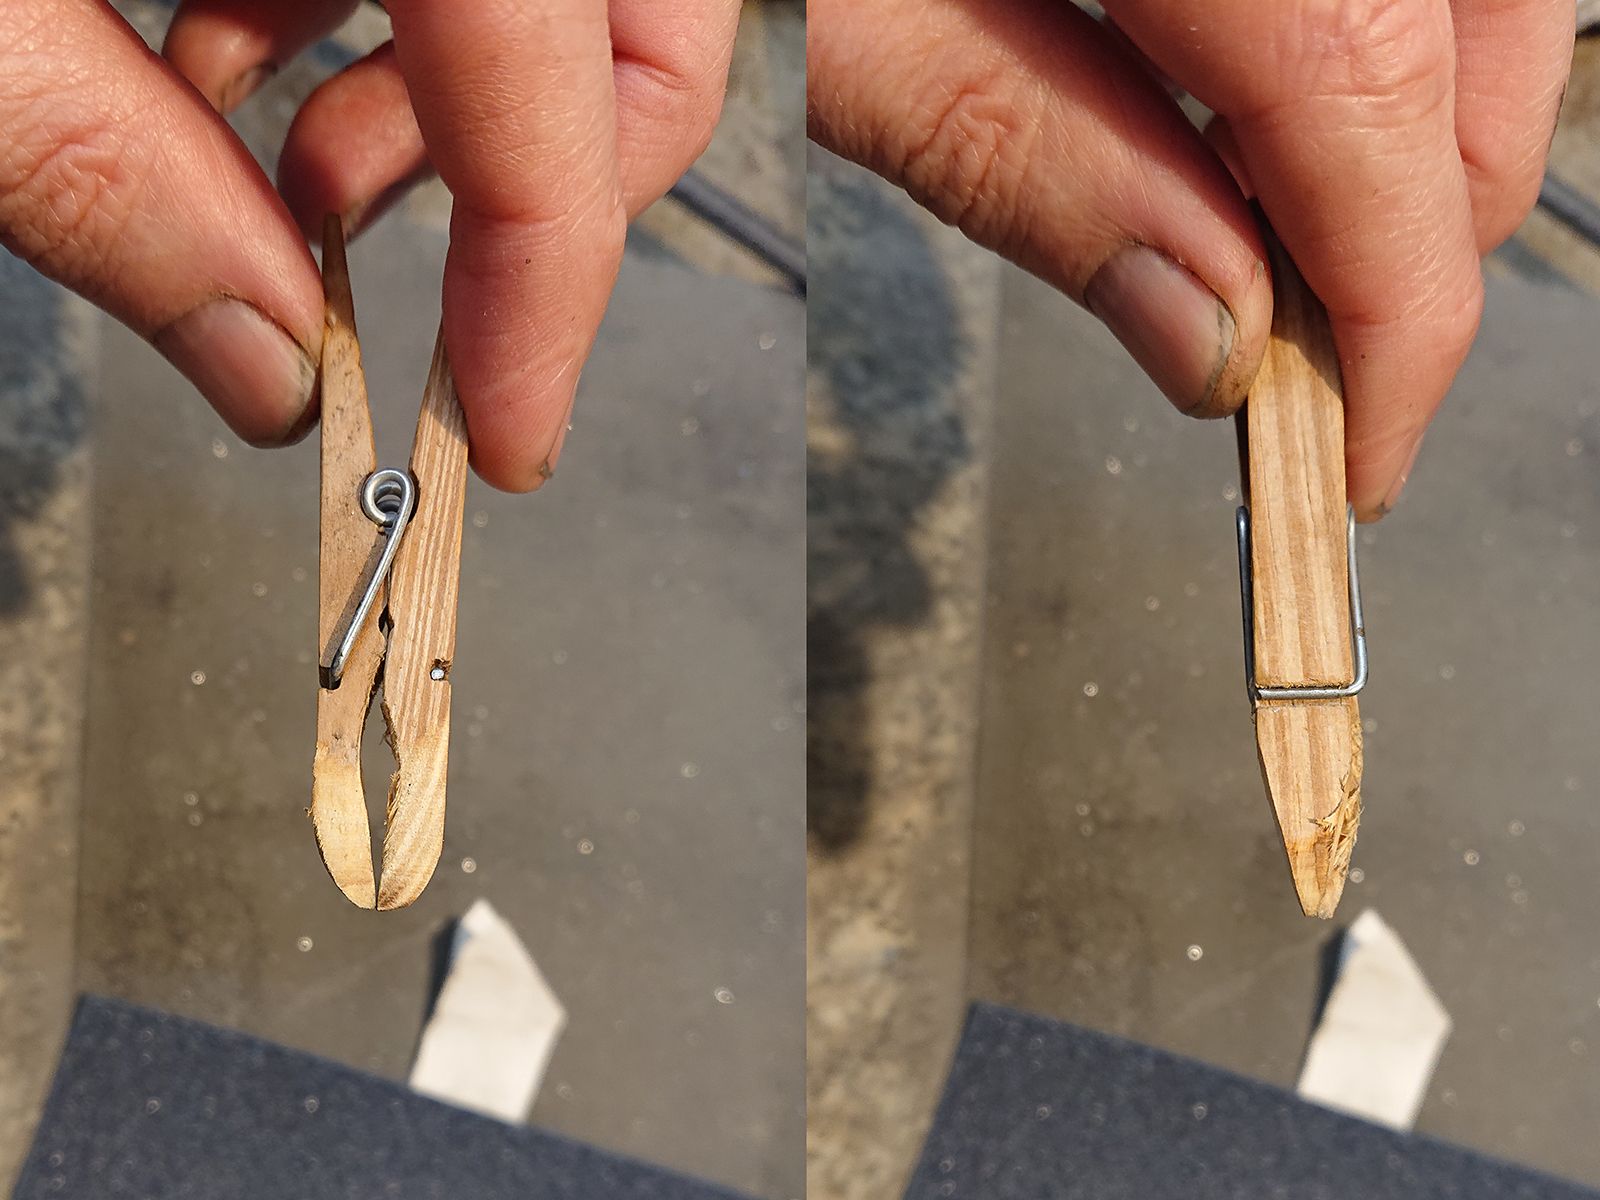
© Charly, all rights reserved. Click for full size.
This pin is made from softwood so I could not make the point too refined, but I do not need to. I want to make my blades mostly symmetrical, not perfectly symmetrical. And anyhoo, I shall, in the future, probably make a better and more precise one out of brass, this is just a proof of concept.
And it works well, here you can see it in use. It shows that the ridges on both sides are within few tenths of a mm apart, and that is good enuff for me, that is a difference that cannot be seen with the naked eye and is not easy to measure even with calipers.

© Charly, all rights reserved. Click for full size.
.