I got a commission for a knife, which did make me happy a bit. Making a commission has one huge advantage over making a knife just so – the existential dread questions “Will somebody want this?” and “Will they be able to afford this?” are both answered in the affirmative. And the requests were not unreasonable – a big camping knife with a striker and a ferrocerium rod. Handle from black locust wood, leather sheath with some black-locust ornament, if possible bark-like surface. Black locust has some personal significance to the customer, I did not ask what it is. And they have chosen one of my already finished blades, so I could go right ahead.

© Charly, all rights reserved. Click for full size.
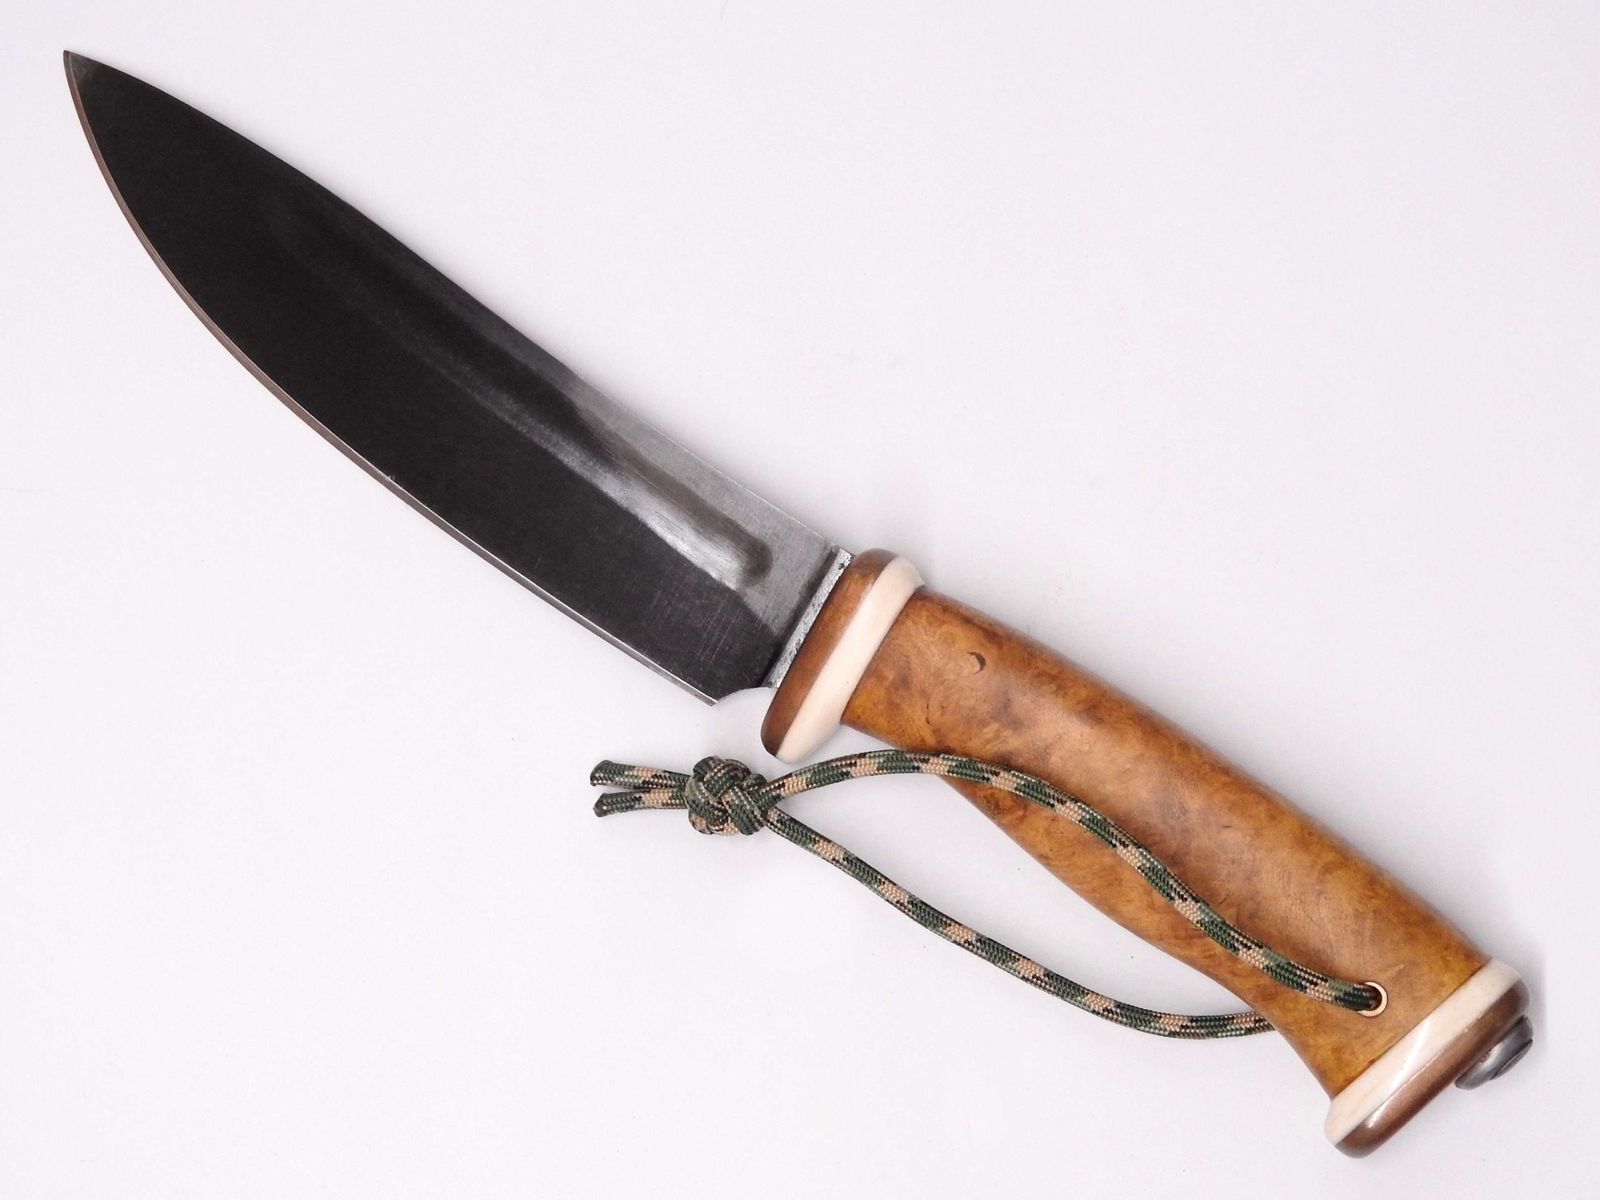
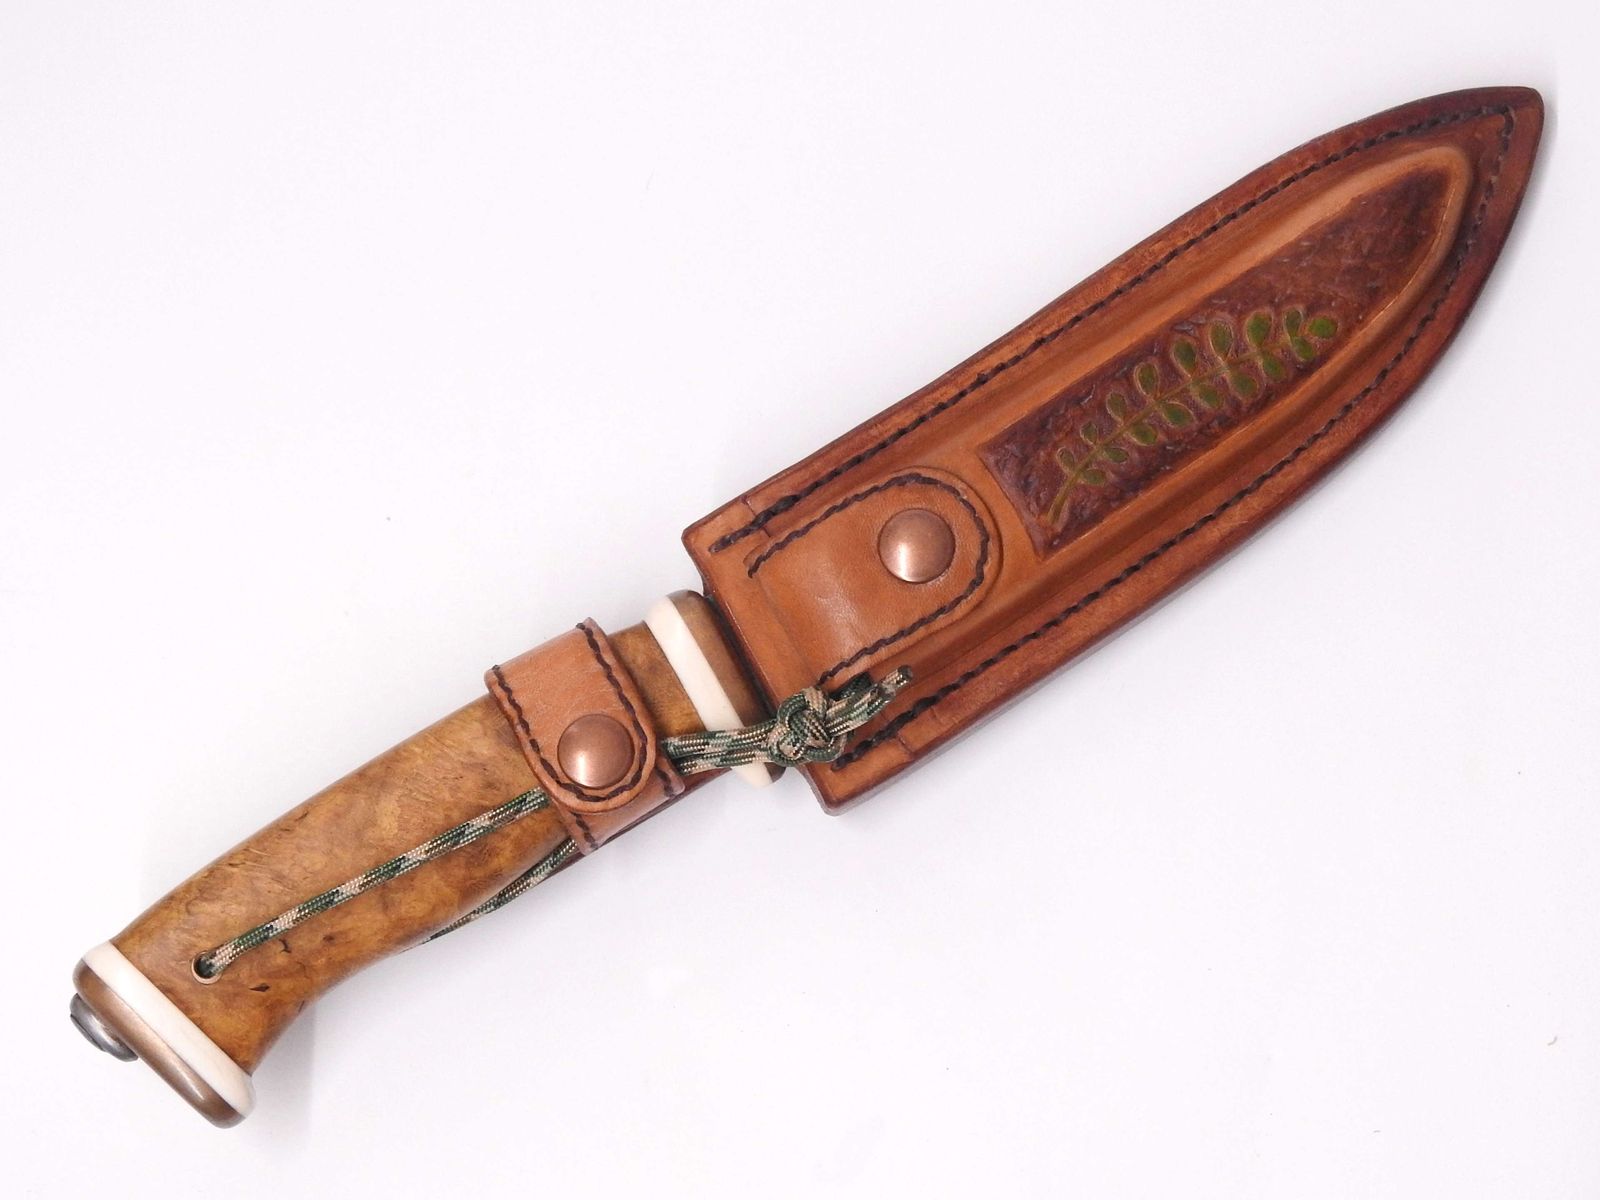
I gave them a choice of three types of black locust wood – untreated, treated with ammonia, and a very expensive piece of burl that I bought some time ago and did not deem worthy of a blade yet. They chose the expensive burl, and I must say it does look very fancy. I infused the handle with resin, although it is impossible to get a complete soak on wood as hard as black locust. But a few mm is just fine. The bolster and pommel are stamped 1 mm bronze. Not polished, just brushed with a steel brush and allowed to build up patina. Cow bone spacers for contrast.
© Charly, all rights reserved. Click for full size.
It is the same design as the “not a masterpiece” knife, but the blade is from oak bark blackened spring steel. For some reason the blackening reacts differently with the unquenched steel at the spine, making this funny light triangle on it. I would very much like to know the reason for this different reaction – the chemical composition of the steel is identical throughout, it is the crystalline structure that changes. Yet, evidently, various chemicals react differently with hardened and unhardened steel.

© Charly, all rights reserved. Click for full size.
Google yielded no usable results for putting tree bark texture on leather, maybe nobody managed it yet. So I had to improvise a bit. I ended up with finding several pieces of sharp basalt gravel and pressing the ragged edges into the leather. It does look tree-bark-ish, I think. On the sketch, it looked a bit empty though, so we agreed to put a black locust leaf in there too. With a bit more refinement the texture would probably look even more like tree bark, but I had to end the experimentation at some point, otherwise, I would not be done on time. The tip of the leather sheath is darker, I have applied patina shading there. Now that I think of it in the photos it looks a tad peculiar. It looks better hanging tip down. Lesson learned – photograph sheaths and knives in them tip-down. Next time, the lesson will be promptly forgotten.

© Charly, all rights reserved. Click for full size.
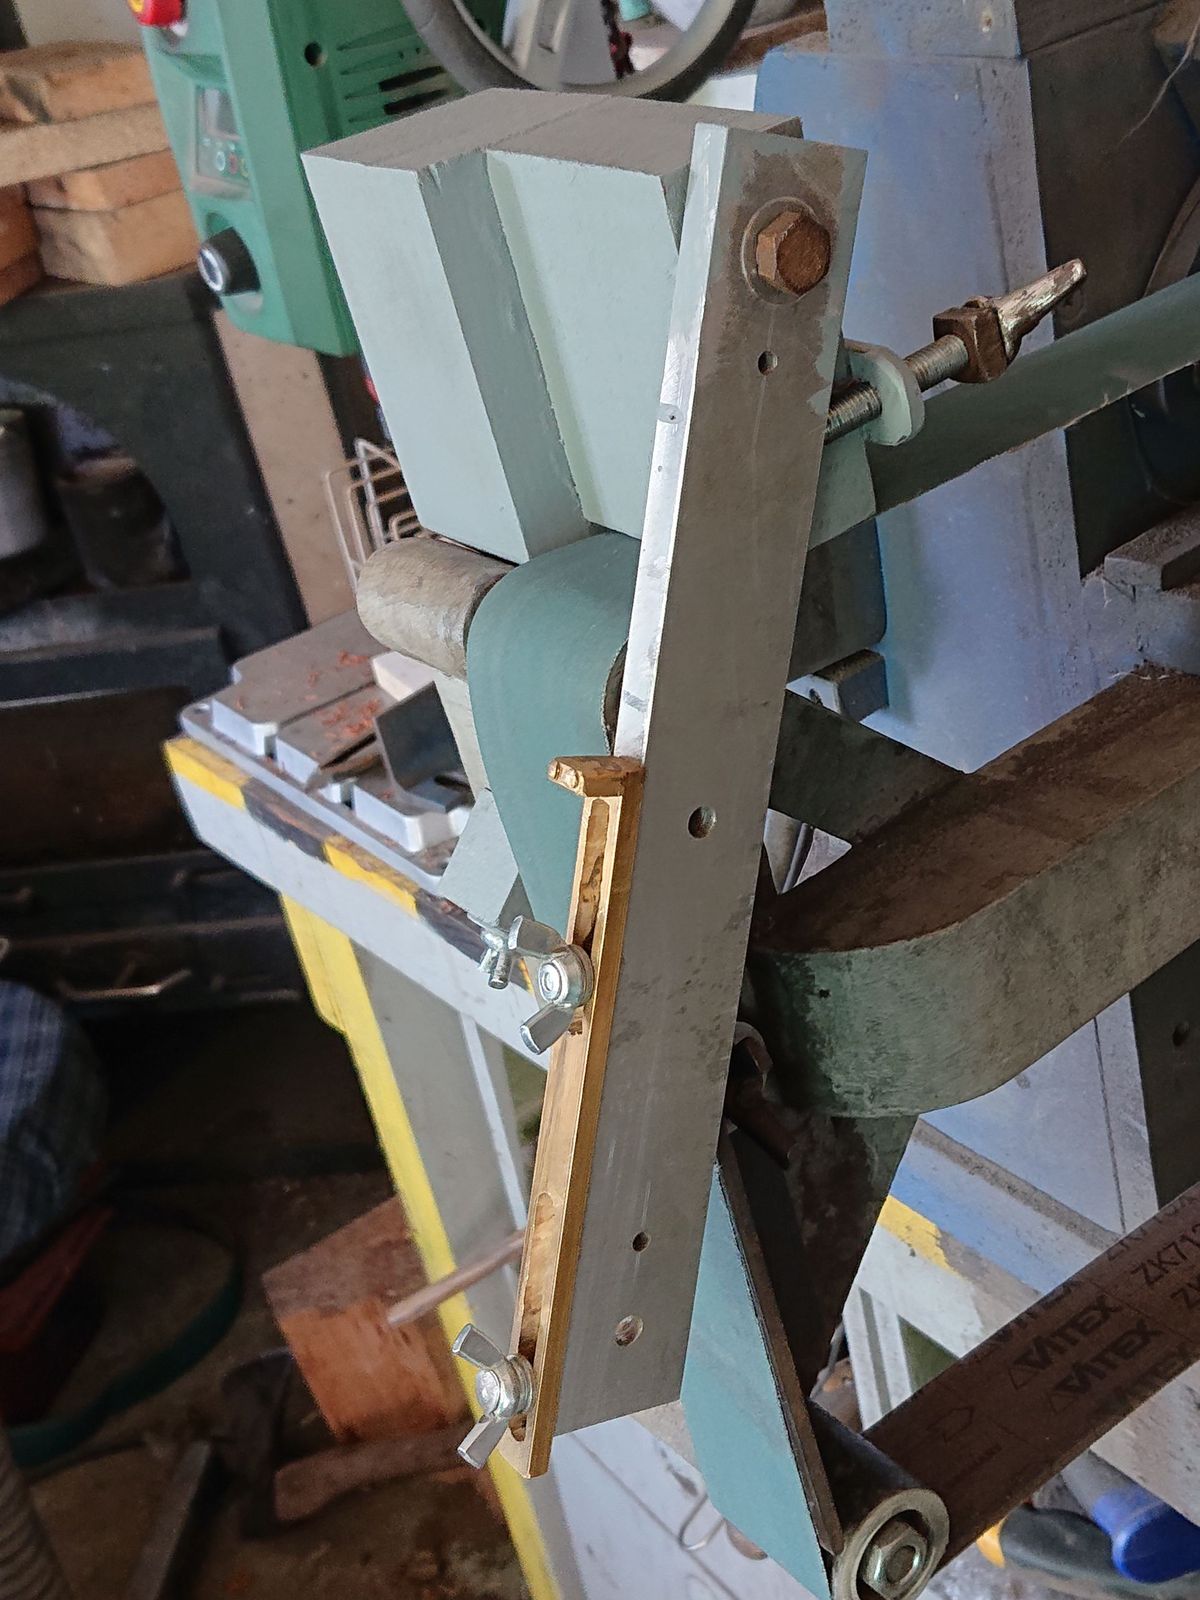
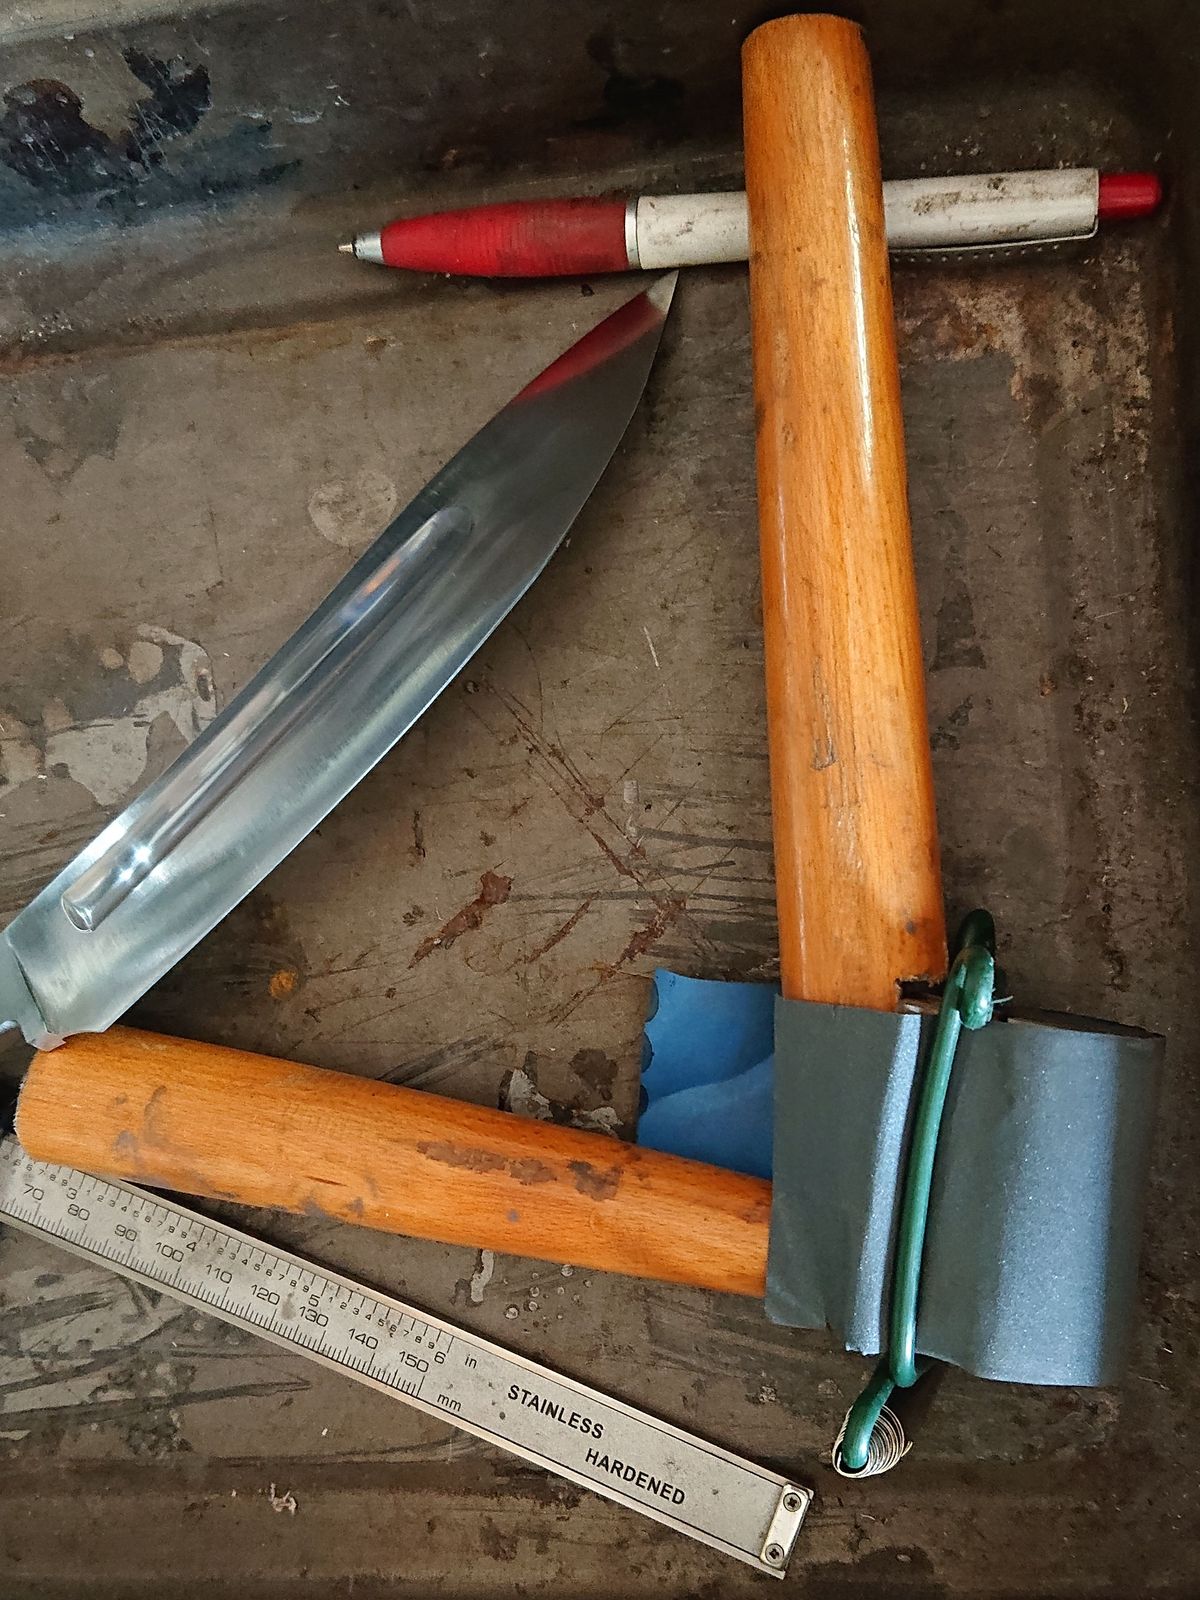
I could not buy bronze tubes for the striker and rod handles, it would seem nobody in CZ sells them. I have bought rods, but drilling a rod concentrically without a lathe has proven to be an impossible task so far. So I made the handles from brass and I coated them with a thin bronze layer electrolytically. The patina has built up almost immediately, which is nice. It took several days for it to build up on the knife bolster and pommel.
© Charly, all rights reserved. Click for full size.

© Charly, all rights reserved. Click for full size.
It is a big, heavy-duty knife weighing 224 g alone, 447 g with the sheath and accessories. Blade 4 mm thick at the base, tapering towards the tip. Fullered, flat grind. Point of balance at index finger right behind the bolster for a comfortable grip and control when cutting food. When the long grip is held towards the pommel, it gives the knife a nice heft for chopping, for example, when making splinters for starting a fire.
The knife will be given to its owner next weekend. I do hope they will be happy with it and get some use out of it.