The day before yesterday I had to make the leatherwork all anew, because I spilled some glue on the forefront of the sheath and it has proven to be irreparable damage, it completely ruined the leather. So I have made a new piece, this being, therefore, the fifth attempt. And when I was at it, I have improved my tools to make a better job.
© Charly, all rights reserved. Click for full size.
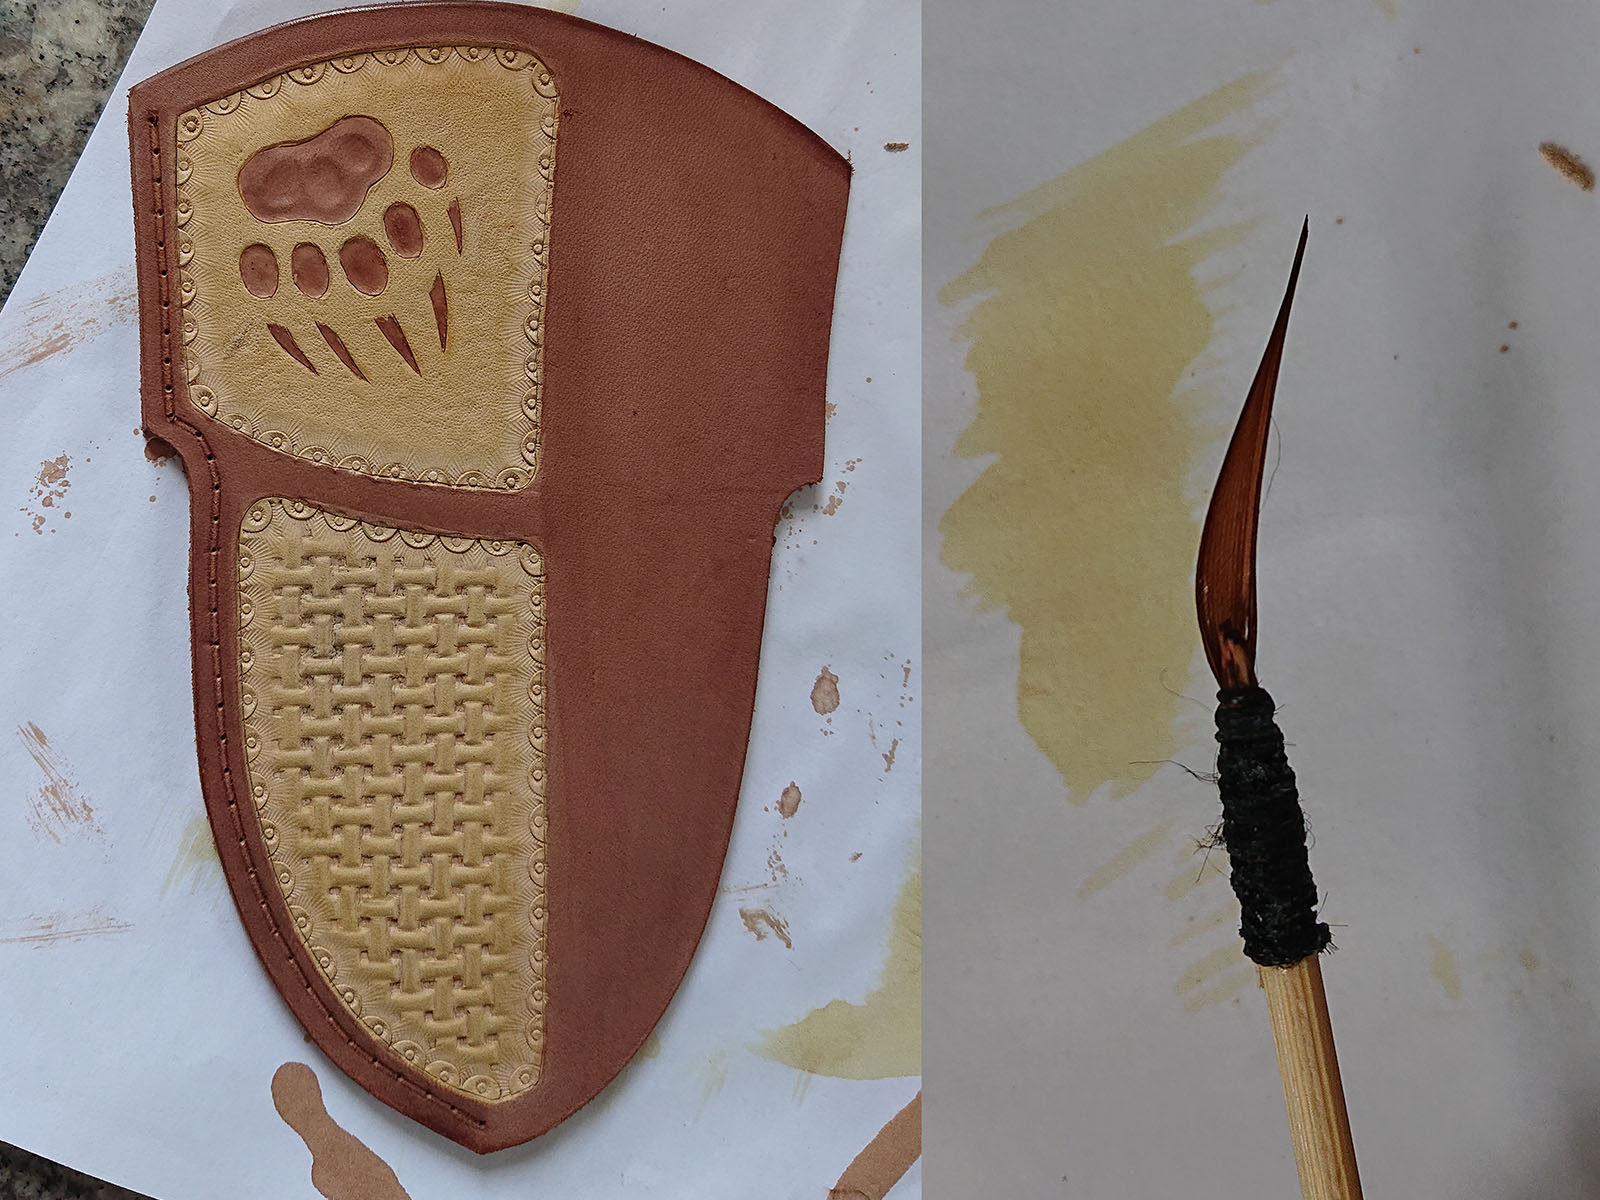
I have re-filed the basket-weave stamp to make it crisper and bite more deeply. That has allowed me to better feel the position of the stamp when moving it along the edge and positioning it in the next point on the pattern grid. I have also used a straight edge and I scribbled a faint line for each row before stamping along it.
To get the dye better into the tips of the claw marks I have needed a very fine brush, so I had to make one. And since I do not have any weasel hair, I have used a few strands from a goose feather. It has worked perfectly.
This is my first attempt at a sheath with a metal belt clip. I have first riveted the belt clip to a piece of leather and then glued/stitched that piece of leather onto the sheath. Only then have I glued and stitched the rest of the sheath together. This avoids any contact between the knife and the metal of the clip and secures the clip very firmly in place.
For making the holes I have used 2 mm drill bit in my drill press since I found that to be by far the most convenient method. For stitching, I have used saddle stitch, and I hope I have used it correctly. I had trouble finding a comprehensive tutorial on how it is done.
BTW, holding the work between my knees is really uncomfortable, I will have to make myself a proper tool for this. So many tools that I still need… Anyway, back to the stitching.

© Charly, all rights reserved. Click for full size.
Saddle stitching is made with two needles and here you can see how I do it. First I am pulling the right needle through the hole all the way to the end (top). Then I put the left needle in the hole whilst wrapping the thread from the right needle around it in a loop (middle). When carefully pulling the left needle through the hole (taking care to not stitch through the thread already inside) it creates a knot that gets tightened inside the hole when both threads are pulled to the limit (low). This kind of stitching is very strong and it does not unravel even when the thread is worn/cut/breaks in one spot.

© Charly, all rights reserved. Click for full size.
The almost last step in making the sheath was wet forming. I have put the whole sheath into lukewarm water and let it soak in there as long as bubbles were coming out of it. When it was all soft and pliable, I have wrapped the knife in food wrapping foil, put it in the sheath and formed it around it simply by finger pressure until it had a shape that I wanted. I have used clamps too, but only for a few minutes around the edge, I did not leave in clamps until it was fully dried, it was not necessary. In fact, to let it dry I have simply hung it on a window handle as you can see in the picture.
Today was the final day of this project. I did make some minor mistakes when making the sheath, so I had to glue a little wedge of leather inside with five-minute epoxy, but that is simply a lesson learned for the future and not something to worry about aesthetically or functionally. I must simply remember next time to make the blade portion shorter (and slimmer) and the handle portion longer. But it was working just fine, the knife holds in it strong enough to not fall out, but it can still be pulled out with just two fingers by the pommel. So I have infused it with beeswax and dubbin*, so it is hard almost like plastic, but still with a pleasantly natural and organic feel to it. That made it a lot darker and I applied some black patina too to make it look a bit aged, to fit the knife.
So, after a month of procrastination interspersed with bouts of hectic work and attempts at learning new skills, at least one piece of steel out of three has made it into a final product. I am going to try and make some nice pictures and tomorrow I will post them.
- The dubbin that I have made almost two years ago and which I stored at room temperature the whole time did not go rancid or moldy or bad in any noticeable way, and the leather on the products I used it on did not degrade in that time either.
Oh no! I know these things happen, but it’s always so horrible. All that wonderful work wasted.
The new one looks good, I can’t wait to see the finished knife and sheath.