I cut this off from yesterday’s post, as it was getting too long. I hope you enjoy my currently favourite piece:
The “magic carpet” bracelet. I loosely followed this tutorial on youtube, but my result was a bit different.
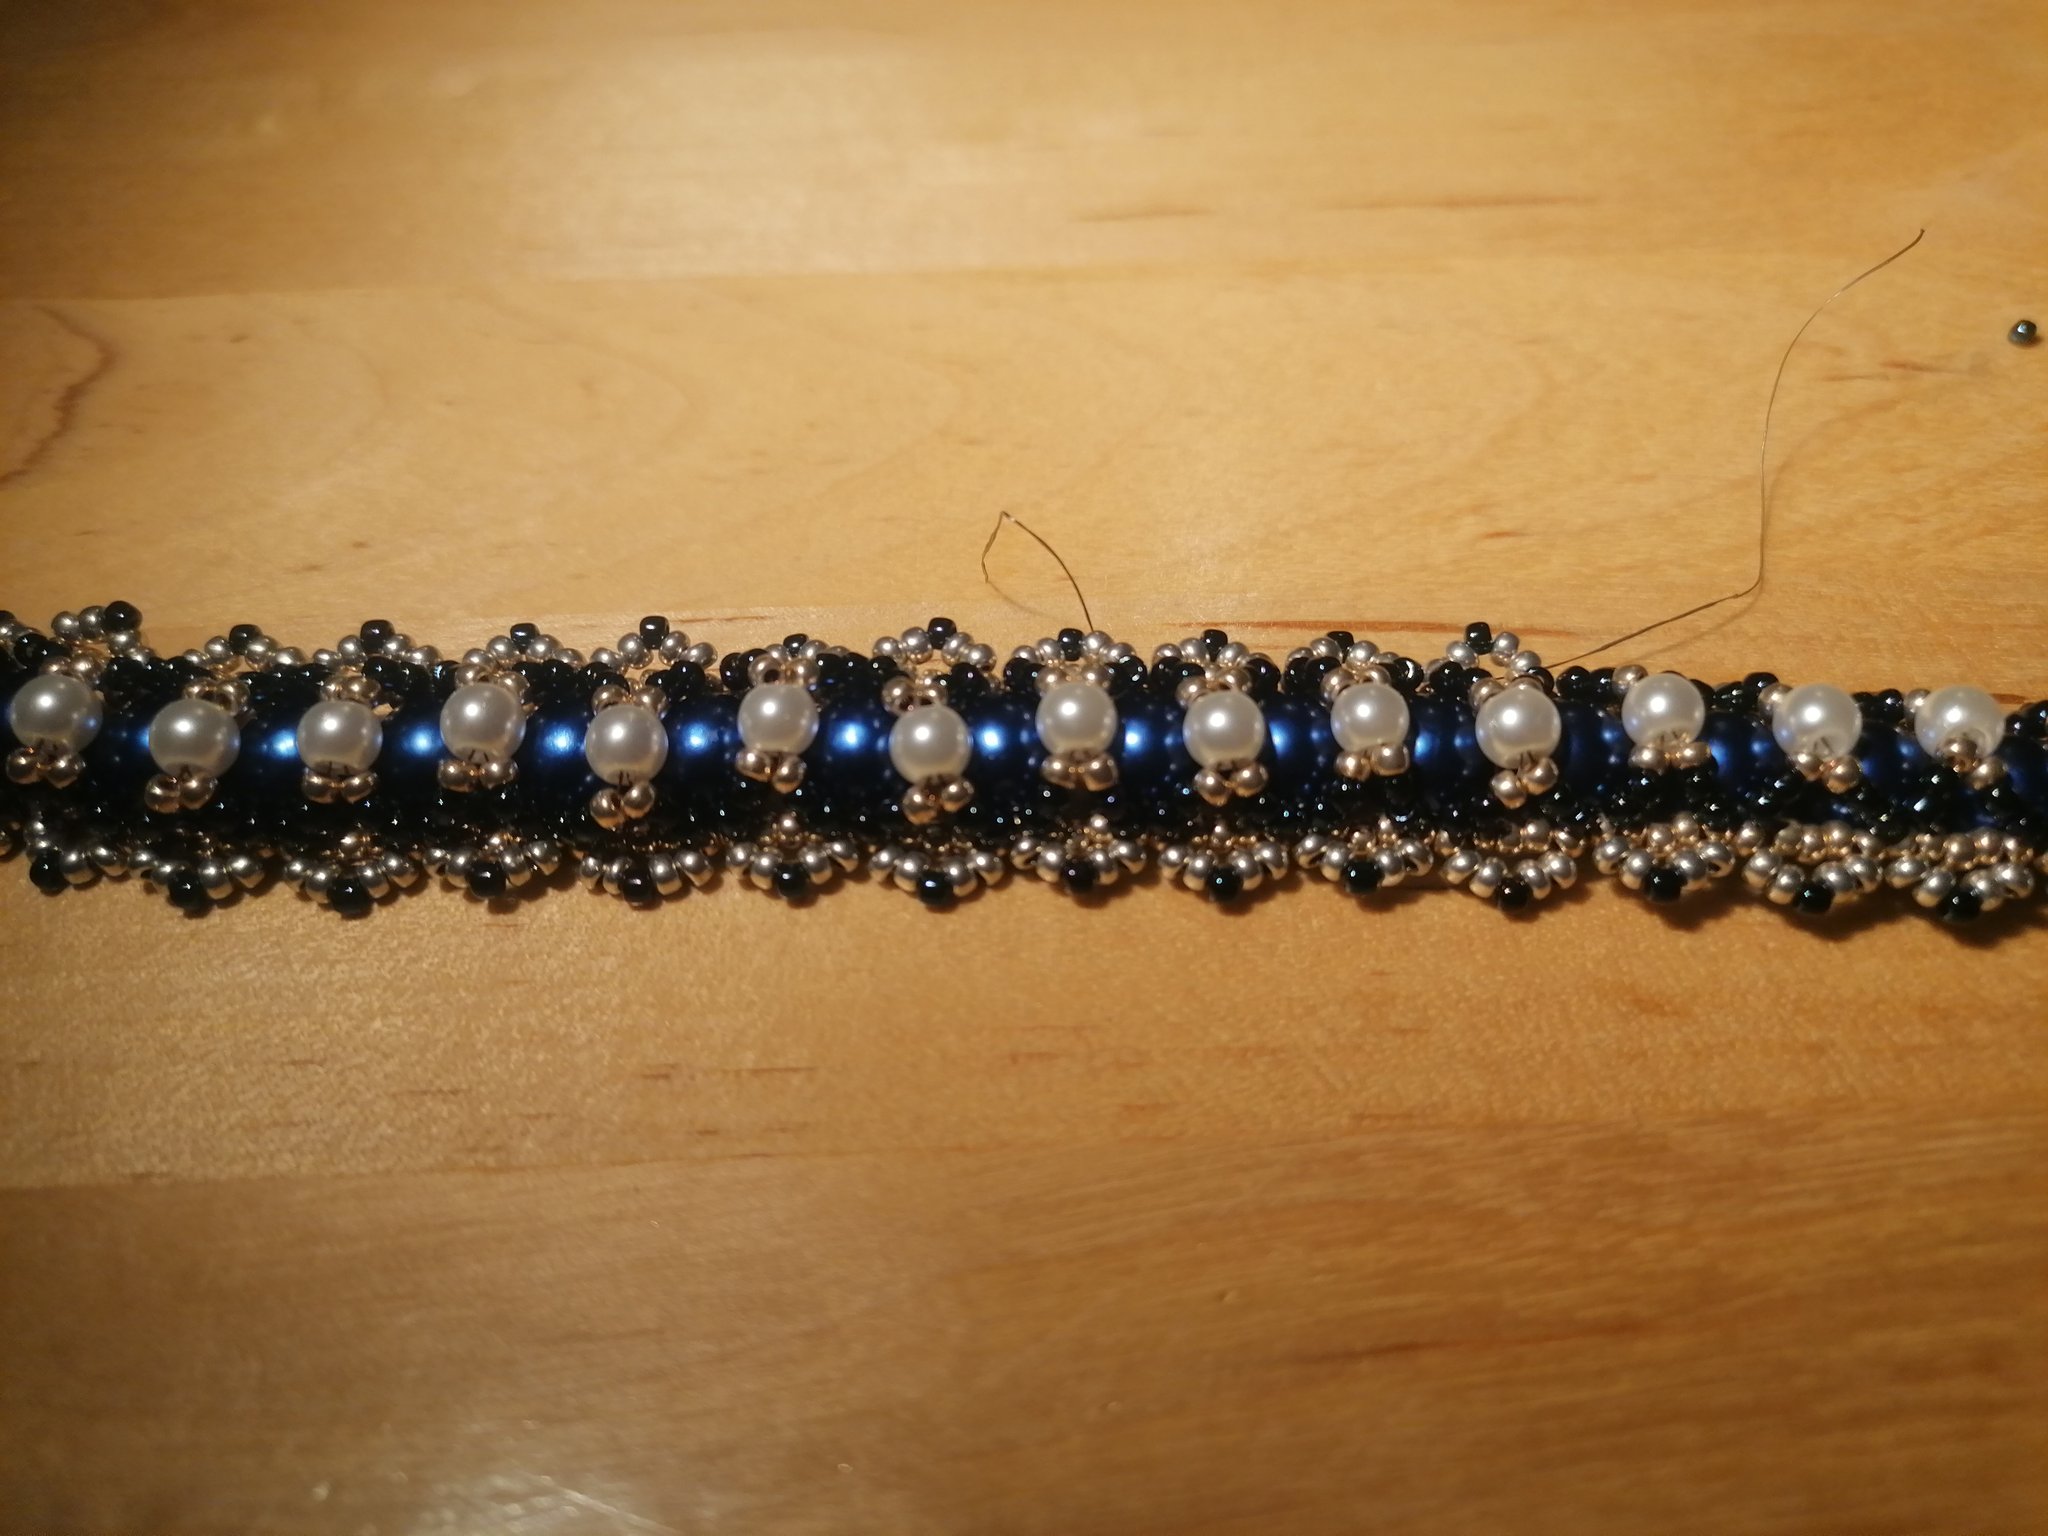
First, the base is a bracelet weaved in “brick stitch” and that alone took about 8 hours because you need to go through each bead several times, but I’m also sure that this will never tear.

©Giliell, all rights reserved
Remember what I said about the different sized beads? The lady in the tutorial uses size 6 seed beads. The smaller the number, the bigger the seeds, and she made rows of 6 beads. I only had size 8 beads and therefore made rows of 8. Now, the number of loops that are then stitched onto the base depends on the number of beads, so I was already adding more loops per row than the original. The next big difference is the beads used for the loops. I once bought a bag of “mixed blue beads” that ranged from size 6 to 13 (the 13 ones are too small for my needles), from white to black and actually, they are useless for anything else, but oh so pretty. I also used up some “mixed bags” of small Bohemian glass beads (again, what is it with me and those mixed bags?), with the exception of the red ones. The increased density of the loops plus the irregularity of the beads created a completely different look and do I love it. It’s got something organic, like an encrusted coral reef.
Now, the original pattern stitches the loops onto the bracelet by going through the beads, which I did up until the point you see above. It was hell. Getting in between those densely stitched seed beads on the base was horrible, it ruined my fingernails and my needles. At that point I simply switched to going between the beads and that was much easier and more comfortable. Not to mention faster.

©Giliell, all rights reserved
With the weight of that bracelet, a magnetic clasp was out of the question, so I made a toggle. Again I had to change this a couple of times to make it fit In the end I also added loops to it to make it fit optically as the original version looked too neat.
Here’s for the finished one. With having to alter the toggle a few times it turned out a bit wide, but it’s still ok, no risk of slipping over my hand.

©Giliell, all rights reserved

©Giliell, all rights reserved
Here you can see that it’s quite a size and also the many different colours and beads.

©Giliell, all rights reserved
Even closer. You can see part of the original “too neat” ring on the left.