I often casually promise things, like, “hey if you ever want to learn how to make a bowl on the lathe, come on out!”
Anyhow, I wound up with a student in the shop for a day, and she made a pretty credible olive wood votive bowl. Best of all, nothing got broken or hurt. A few days later I got an email that she’d signed up for a local makerspace near where she lives, and was going to take more formal lessons, and pursue wood-turning as a hobby. Once again, I have led someone mildly astray.
But then I thought, “may as well make some chisels.”
My extra-long and heavy chisels and carbide scrapers are a crucial part of my process. Unlike a smaller, lighter, chisel that can ride back and forth with the wood, a godzilla-sized chisel will stay put on the rest and there’s less impact on the user’s hands.

Some 15N20 and 1095 high carbon steel, welded into a stack with stainless steel flux rod. I’ve taken to using stainless steel because it is immediately obvious where the welds are, so I can grind them out, or ignore them, or take advantage of them, depending on how I feel that day. I love the stainless rod, it’s easy to light and it’s strong and pretty.
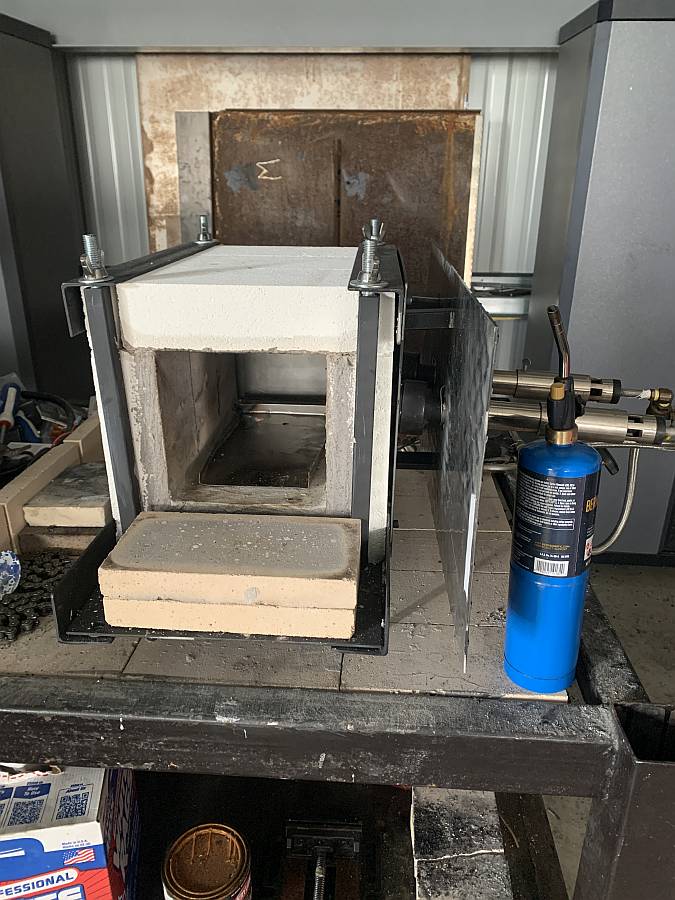
My current forge is a thing I put together quickly, aiming for something that heated fast and was well insulated. It works really, really, well. There are a few things worth noting about it: the heat shield and flux tray. The aluminum 1/8″ heat shield is bolted to standoffs and it does a fabulous job of keeping heat off the propane feeds. There’s just something a bit unsettling about seeing propane hoses starting to bend and bubble. The other thing is the bottom – the flux tray. That’s 16ga inconel plate I sourced on ebay, and bent with some pliers in the vise. Usually, flux is notorious for eating holes in forges and everything else it touches, but I was watching some show about building rocket motors and it was mentioned that inconel is what you use for insanely hot metal applications. (Platinum being another alternative, but.. platinum!) So I tried the inconel and now, after about 30 forging sessions, it looks exactly the same. In other words, I have solved the “flux eats your forge” problem. I called the folks at Coal Iron and Chili Forges and asked to talk to one of their tech people, then explained the inconel thing. I think they thought I was a crank caller, or something. Or maybe in the next few years we’ll see forges with inconel bottoms. Who knows?
Once that’s all done, the stack goes into the forge and gets a good soak in the heat and flux, then crushed in the hydraulics and consolidated into a bar. I’m not going to show all those steps because they ought to be pretty familiar by now. I find that when I’m at this stage of work, I just sort of “zone out” and vanish into the work. It’s very relaxing – I suppose I might be disassociating slightly? It’s almost as though I have taken a nap and I’m refreshed afterward.
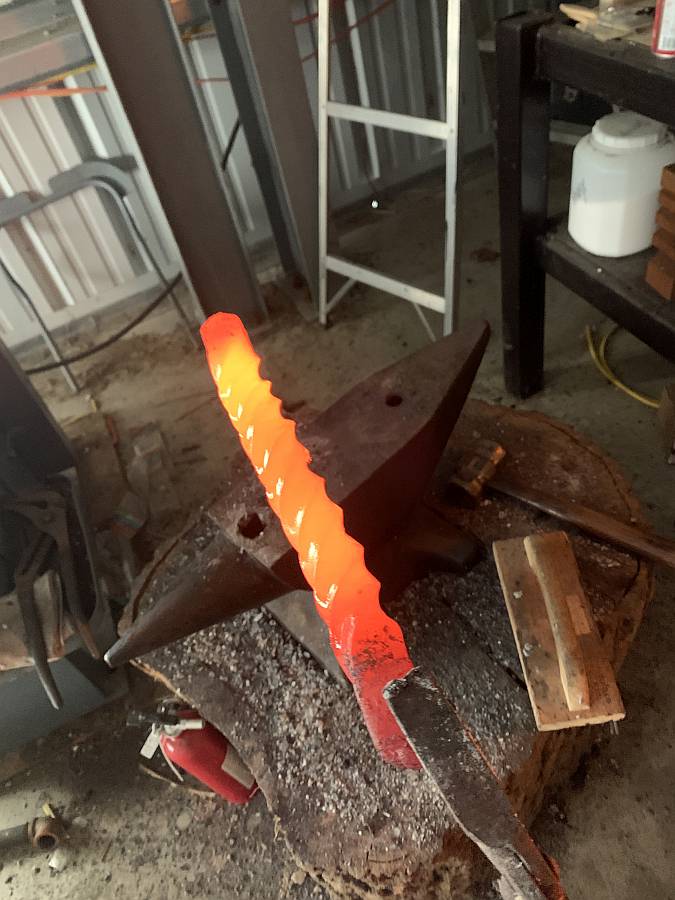
I want drama for this project, so I used thick chunks of steel for the stack, and then welded and twisted it. That should produce big, wide, angular stripes in the resulting piece. I used my amazing steel twister thingie, which has been giving good service since I made it. [stderr] The steel looks shiny in the picture, because I put a good dusting of flux on it in case some of the “lips” get folded over and need to weld. Usually, then you press a twisted bar back into normal bar-shape, the “lips” re-incorporate into the main bar instead of needing to weld. It’s a pretty fascinating process.

Next, I took the end that twisted the least, clipped the other end off with the press, to make it neat and even (and also to produce a well-welded edge) and used the press to draw out a 1/2+” by 1/2+” tang. The “+” is a fudge factor for the forge scale that I will need to grind off – maybe 1/100″ or so. Since the tang is an important part of this project, I put some extra care into making it even and (of course) straight. That also means I’ll spend less time turning it into dust with an angle-grinder.
The shape as you see it above was mostly done with the hydraulic press, with occasional nudges from a hammer. Mostly, though, this was done without “work” – I’m not into hammering away at something until my carpal tunnels are in shock; that just seems like a bad idea when there’s hydraulics around.
After it’s mostly shaped, it goes into the annealing bin (which is a fancy term for a steel garbage can full of pearlite) to cool overnight. The next day, I take it out, brush off the melted pearlite, and hit it with an angle grinder to see what’s under the forge scale.
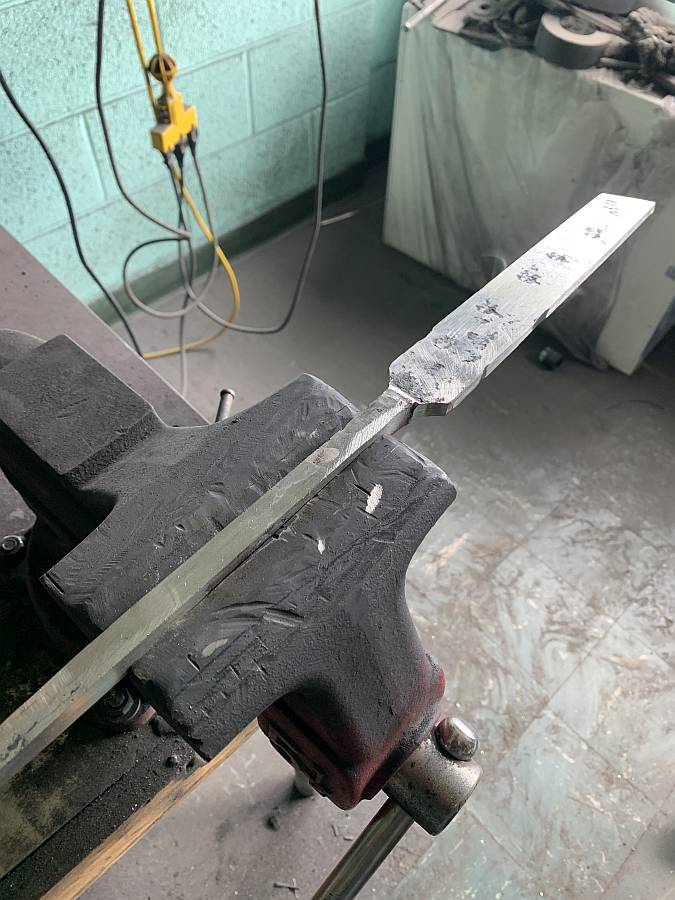
You want to keep the faces of your vice straight, because they’re a good rough-gauge of straightness. If you put something in the vise and skim it down with an angle grinder, then rotate it, it’s going to come out pretty square. Then you take it over to the sander/grinder and do the same thing on the platen and it gets straighter and flatter and straighter, etc.
The shape of the thing begins to appear, where the shoulders are shaped on the wheels of the grinder, and so forth. One of the things I find interesting and amusing is the way that made objects often adopt part of their shape as a consequence from the process by which they are made. Now, when I see a chisel, I see the process of its manufacture carried in its design.
I’ll post some more pictures from this project, eventually. Seriously, wouldn’t you rather see that than hear more about Trump’s legal travails?
Long ago I made a monster skew chisel out of a piece of automotive leaf spring (flame cut the tang). I didn’t bother to forge out the curve, and it still works pretty well. And of course if you have the facilities, you could fine tune the shape. The steel involved seems pretty good for the purpose.
Matthew Currie@#1:
Long ago I made a monster skew chisel out of a piece of automotive leaf spring (flame cut the tang). I didn’t bother to forge out the curve, and it still works pretty well.
I think all spring steels are high carbon; the grain structure that makes them springy is also the structure that makes them hardenable for an edge. (I may be wrong about that…) but I bet it works well! Nice thing about lathe chisels is that all that really matters is the angle and sharpness at the contact-point; there’s a lot of leeway.
I’m in the delicate zone of “I do these things because I can not because I think it makes the results any better.” If I wanted to make stuff that was merely good, I’d be welding Hitachi blue paper edges on wrought iron and that’d be that.
This is fascinating! Much better than hearing Trump’s voice in my head whenever those discussions begin.
Yes, seeing the process of making something is far more interesting, and in it’s own way relaxing than any of the political stuff. Thank you!
When I did this I was without much in the way of steel resources and needed a big skew chisel for some big posts I was making, and elegance was secondary anyway. I had a large wood bed lathe setup, which used 2 x 12’s as its bed and could be any length. It came apart for moving 35 or so years ago and never went back together, and I haven’t needed the enormous chisel since, but it still sits with the other tools at the regular lathe.
Wonderful. Like watching someone play the piano with metal.