It is not good for my ego to have the predictions mostly correct again, but this time there were things that surprised me a bit.
I have included a sharpening angle of 10° which I never use in praxis because it is not recommended for the N690 steel due to reduced edge retention at that angle (tendency to chipping), but that would not be a problem in this test and it is a data point of knowledge in case I make some carbon-steel sushi knives or razors in the future.
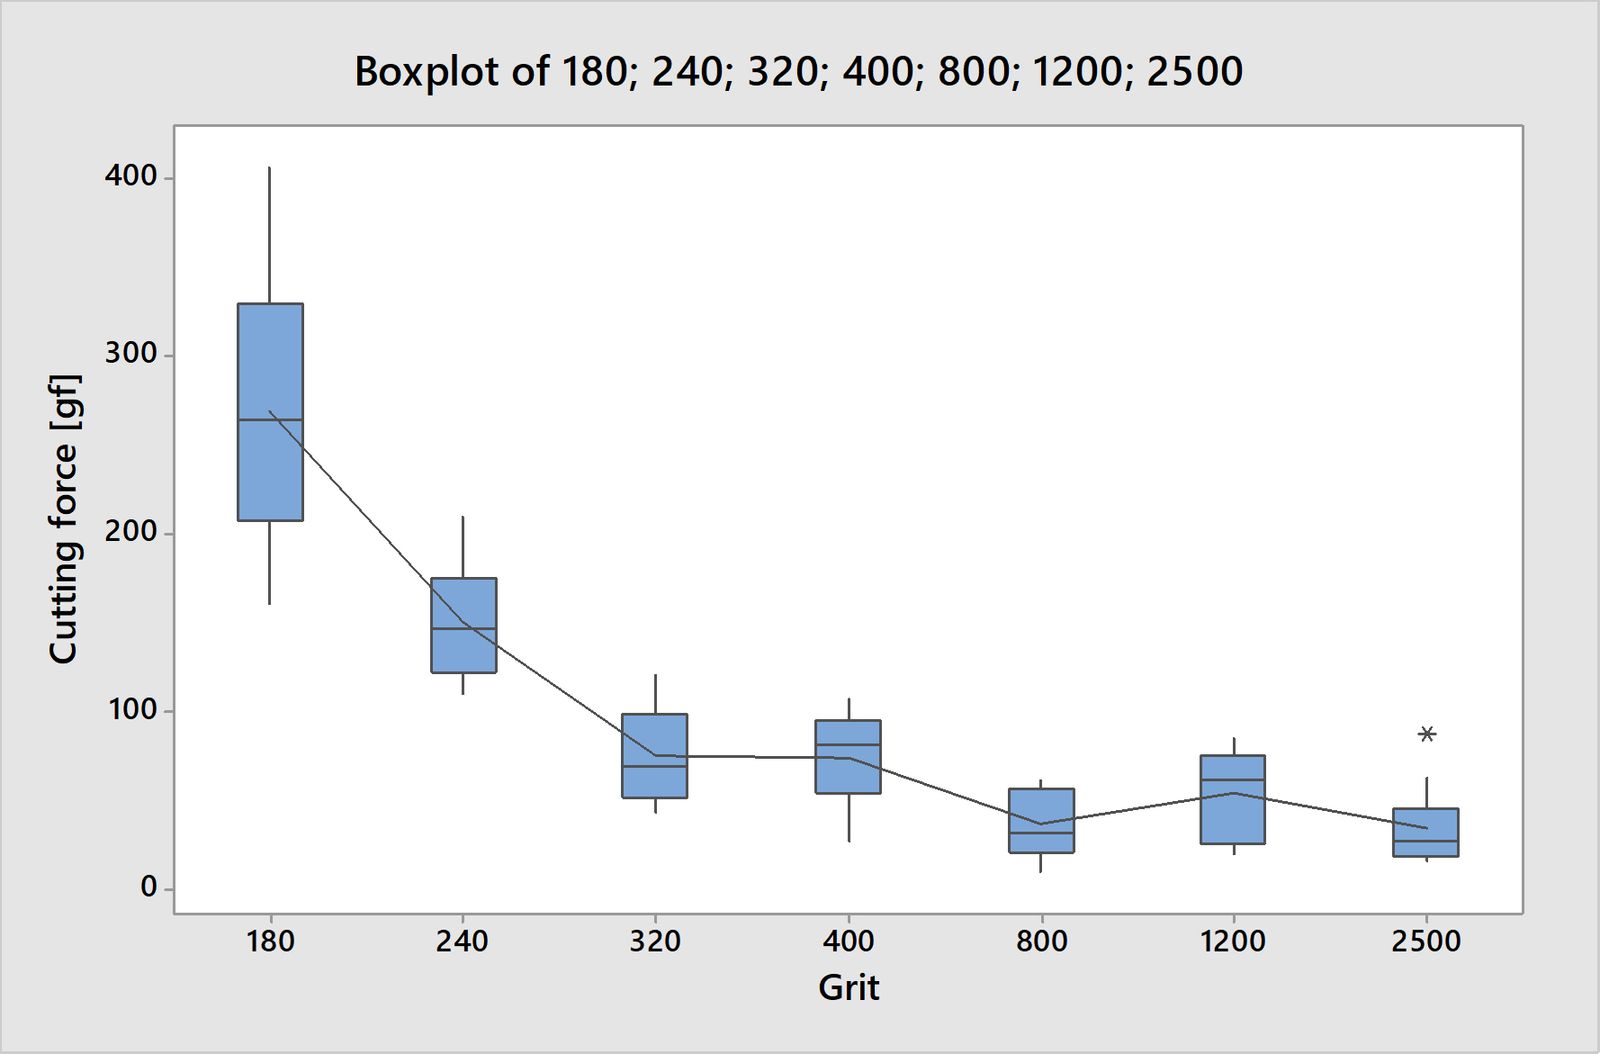
Now the boxplot:

© Charly, all rights reserved. Click for full size
So I got the prediction about how the cutting force will rise mostly correct. Mostly, not completely.
ANOVA test has found no significant difference between the first four angles but I am sure there would be one if I had performed more measurements and/or refined the testing method. The Lookandsee test does indicate a slow rise in cutting force from around 25 gf to around 50 gf.
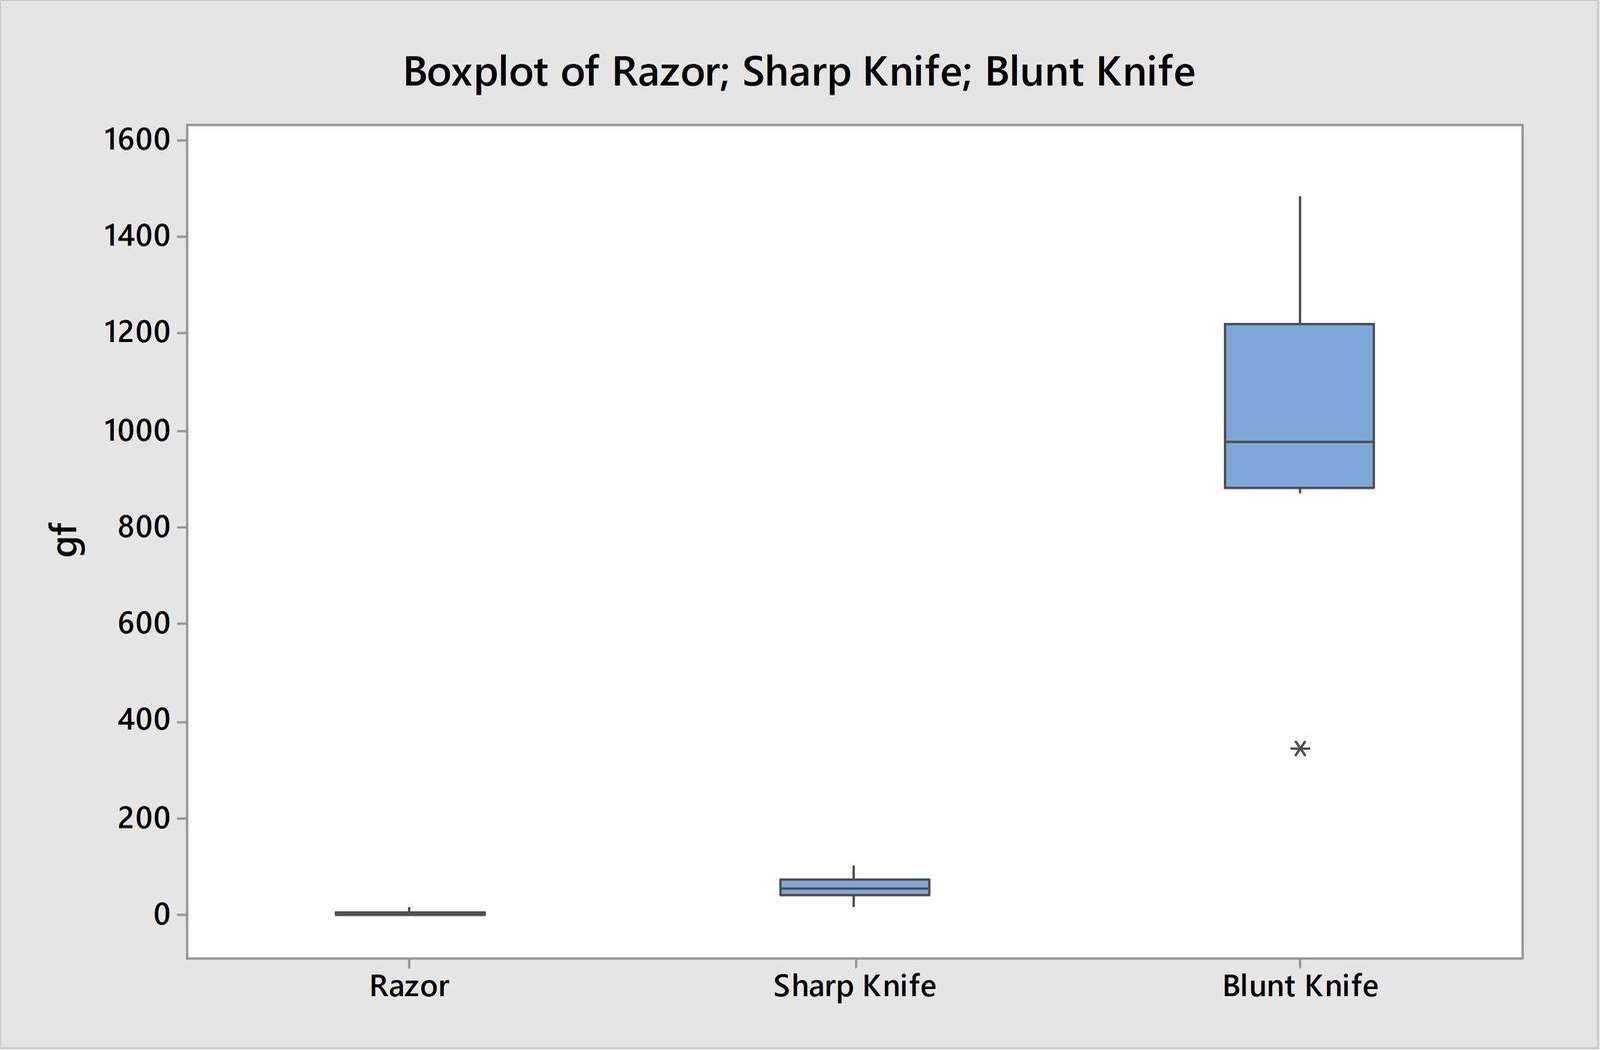
The jump at 30° is a bit more sudden than I expected. I suspect that it is a fluke. And then the rise at 40-45° was a lot less than I expected. It seems that the 90° cutting edge is still significantly better than no cutting edge, which would be somewhere around 3-4 times worse with a cutting force of around 1000 gf. I did not expect that. The best-fit function is quadratic. This is less drastic than the predicted exponential growth, although still significantly faster than simple linear growth.
So in conclusion, it does appear that my opinion that whilst there is a difference at angles 10-25°, it is not big enough to matter for casual knife users is substantiated. The angle 30° performed slightly worse than I expected, and the angle 45° performed significantly better than I expected.
I am going to think about all this some more and then I decide how to proceed from now on.