You may have noticed my previous iterations on building a chuck to help with grinding consistent bevels on kitchen knives. Well, I had a lot of thoughts about it and I thought I can significantly improve it. And luckily I have managed to buy some raw materials before the shops were closed.
I am not going to write full how-to instructions this time, a few words, and the finished thing must be enough for this time around I was still figuring some things on the fly and there were some issues that did not go as planned. However I will probably make another, smaller one, for shorter blades and if I manage to not mess that up, I will make a full tutorial on that one, with clean pictures and components and so forth.

© Charly, all rights reserved. Click for full size.
Here you can see the face with four magnet batteries up front and a tiny ledge on the bottom to have a reference point for the top of the blade. I have made magnets using the same method as last time, only this time I have glued pieces of aluminum between the faces of the mild steel slabs. The body is made from a square aluminum pipe. I cut openings for the magnets in it and to fill the hollows, I have used squared beech timber. That allowed me to simply glue everything together with epoxy and added a bit heft to the piece. I have also used square pieces of aluminum to glue in the sides of the pipe to get perfect seal all-around against water.
© Charly, all rights reserved. Click for full size.
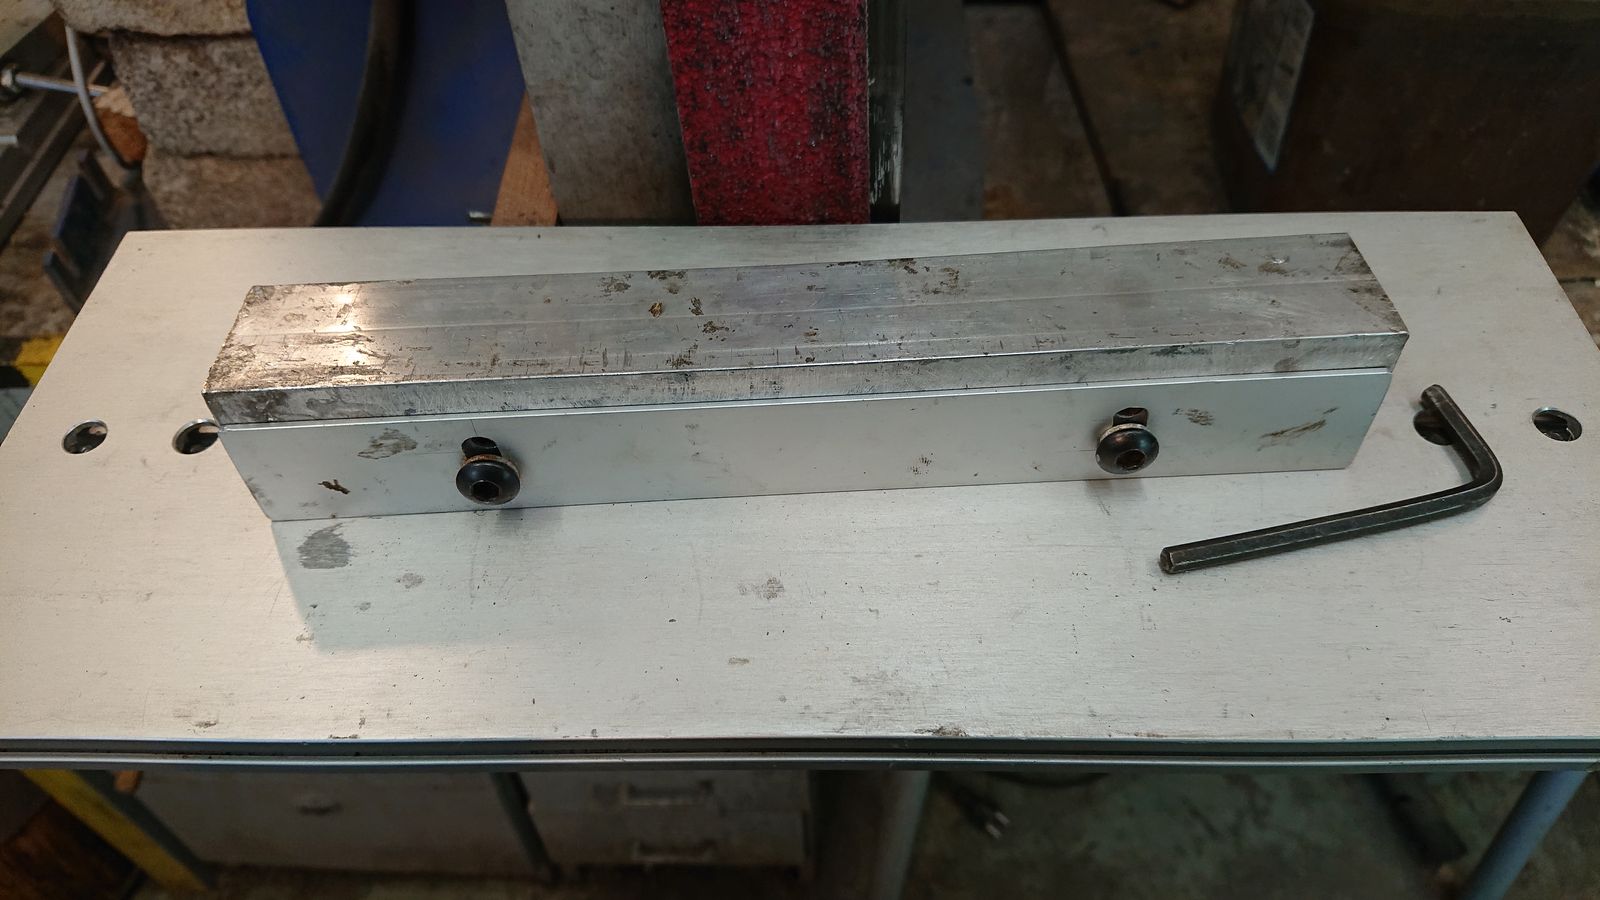
Setting the angle on the last one was a bit difficult. It was done by means of four screws protruding from the bottom, and if they did not stick out all exactly the same amount, it could wobble during work which is not ideal. And they did catch on the edges of the grinding table. Here you can see the simplest solution to that problem that I could think of. On the back of the chuck are two holes with M6 thread. On these two M6 screws hold a flat aluminum profile through two elongated holes. To adjust the angle I simply loosen the screws, slide the aluminum profile up/down as needed, and tighten them again. Against the last iteration, this has the advantage of full linear contact with the base plate all the time, even on the edges, and also it is much easier to set up.
I am trying to get my ducks in the row again, finishing finally the current batch of kitchen knives and preparing for the next one. I hope the two and a half days that I have spent with making this were well spent. I still have no functioning forge, but I work on that too, and hopefully, I will have something to say about that soon.
Leave a Reply
You must be logged in to post a comment.