As I mentioned, I tried to grow carrots for the first time in our garden since I was a kid. The experiment is not concluded yet, but there are some interim results. Firstly, about 10% of the carrots were destroyed or heavily damaged by voles, which forced me to harvest about 30% prematurely. Secondly, a lot of those that I already harvested looked like this.

© Charly, all rights reserved. Click for full size.
This can be caused in two ways, and both were present. The first cause is damage to the roots by, for example, a burrowing pest. The second cause is when the root hits a stone. Multifurcated or whacky-shaped carrots are perfectly edible, of course, but they are significantly more difficult to clean and peel. They also tend to be smaller in weight than those with a single root. Thus, I reached a decision – I will build three raised beds (to be able to rotate crops between them), fortified against rodents, and filled with sieved permeable soil. I found cheap metal raised beds online that I could afford, so I bought them and I started to prepare the terrain.

© Charly, all rights reserved. Click for full size.
I started flatterooning the terrain in the place where I have cured my compost heaps, since the compost conveniently killed all vegetation in those spots, which made the job a lot easier. It was (and will continue to be) hard work, nevertheless. For whatever reason, the topsoil in this part of my garden is relatively compacted heavy clay with lots of stones. I had to first soften it with a garden fork and break the lumps with a hoe before I could start sieving it.
© Charly, all rights reserved. Click for full size.
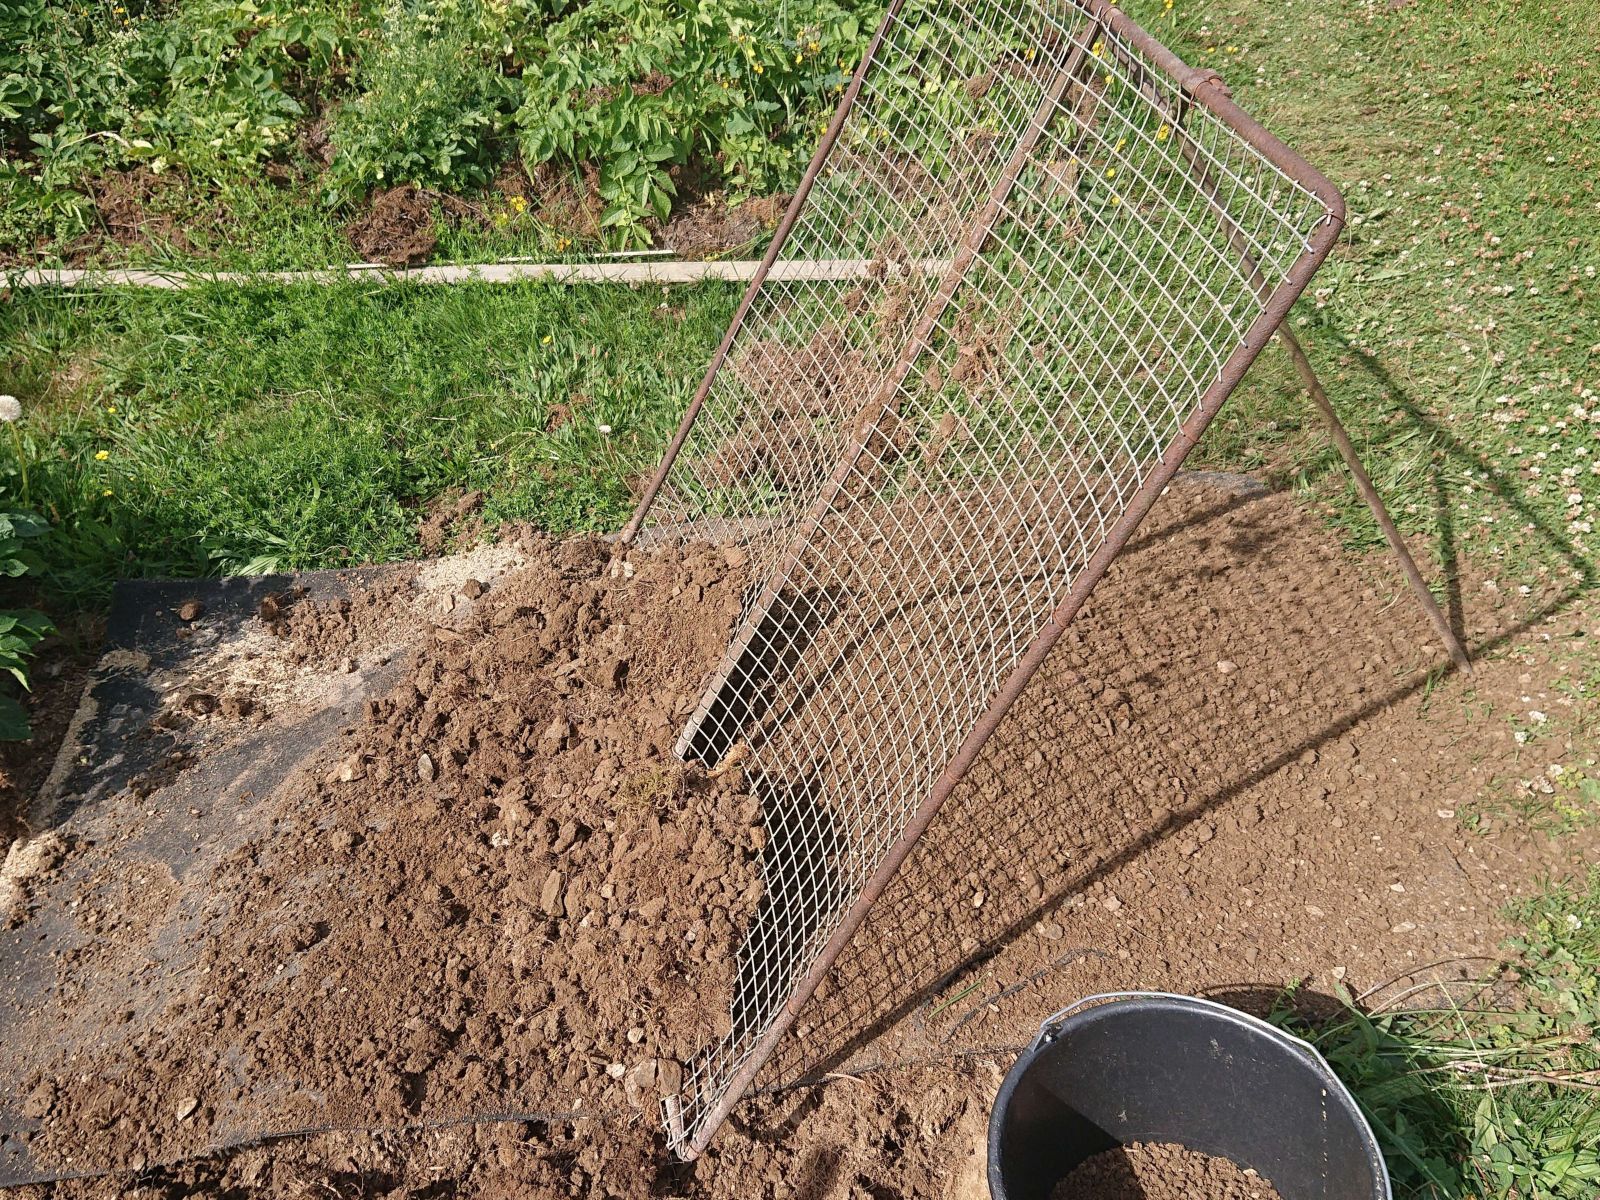
I run the soil first through a coarse sieve, with an approx 20 mm grid. Separating approximately 10% material from the clay in the form of large stones.
© Charly, all rights reserved. Click for full size.
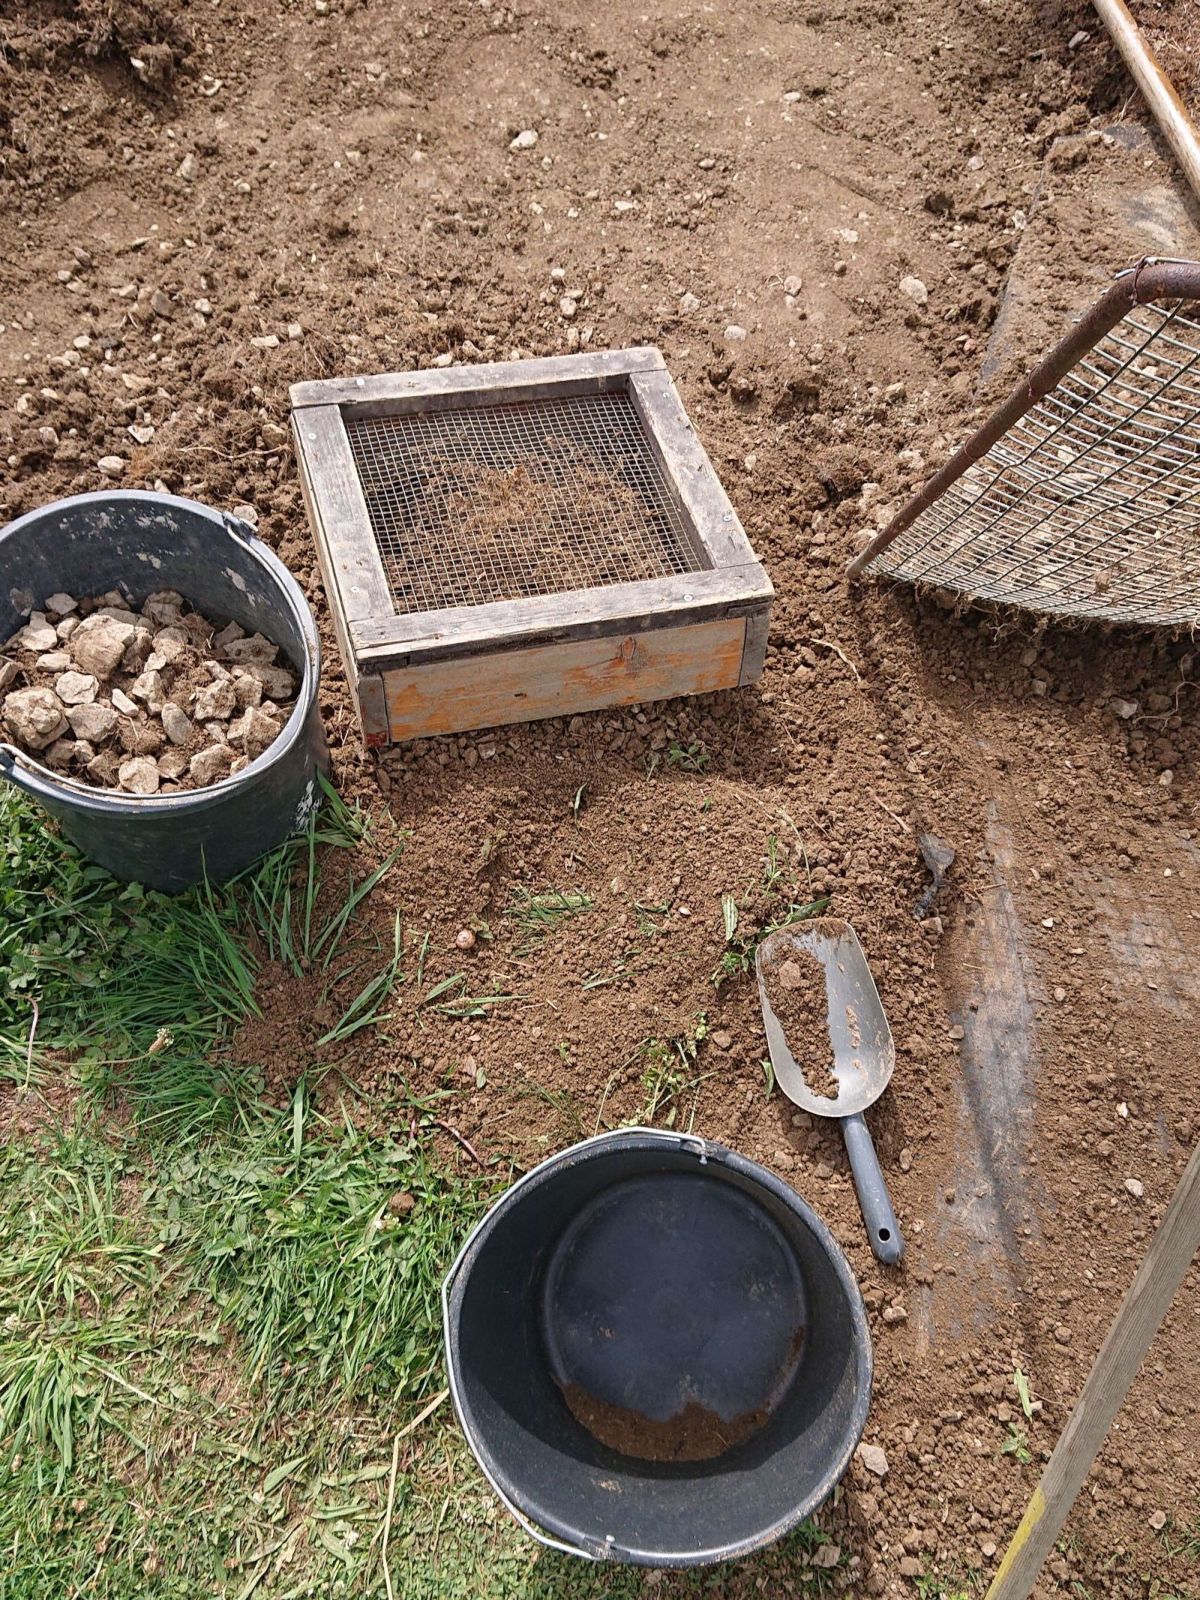
After that, I run it through a second sieve, with a ca. 10 mm grid. That removed circa 15% more materiel as smaller stones and left me with finely-sieved clay.

© Charly, all rights reserved. Click for full size.
As indicated by the relatively light-brown color when wet, this is not particularly rich soil. On its own, it would tend to become very heavy when wet and compact again when dry. Unfortunately, I have to use it. I do not have a lot of high-quality soil in my garden, and I do not trust bought soils at all; I got burned that way in the past. I still have to mix the clay with something to make it more permeable to water and less prone to compaction. For that, I had to go to another part of my garden.
© Charly, all rights reserved. Click for full size.
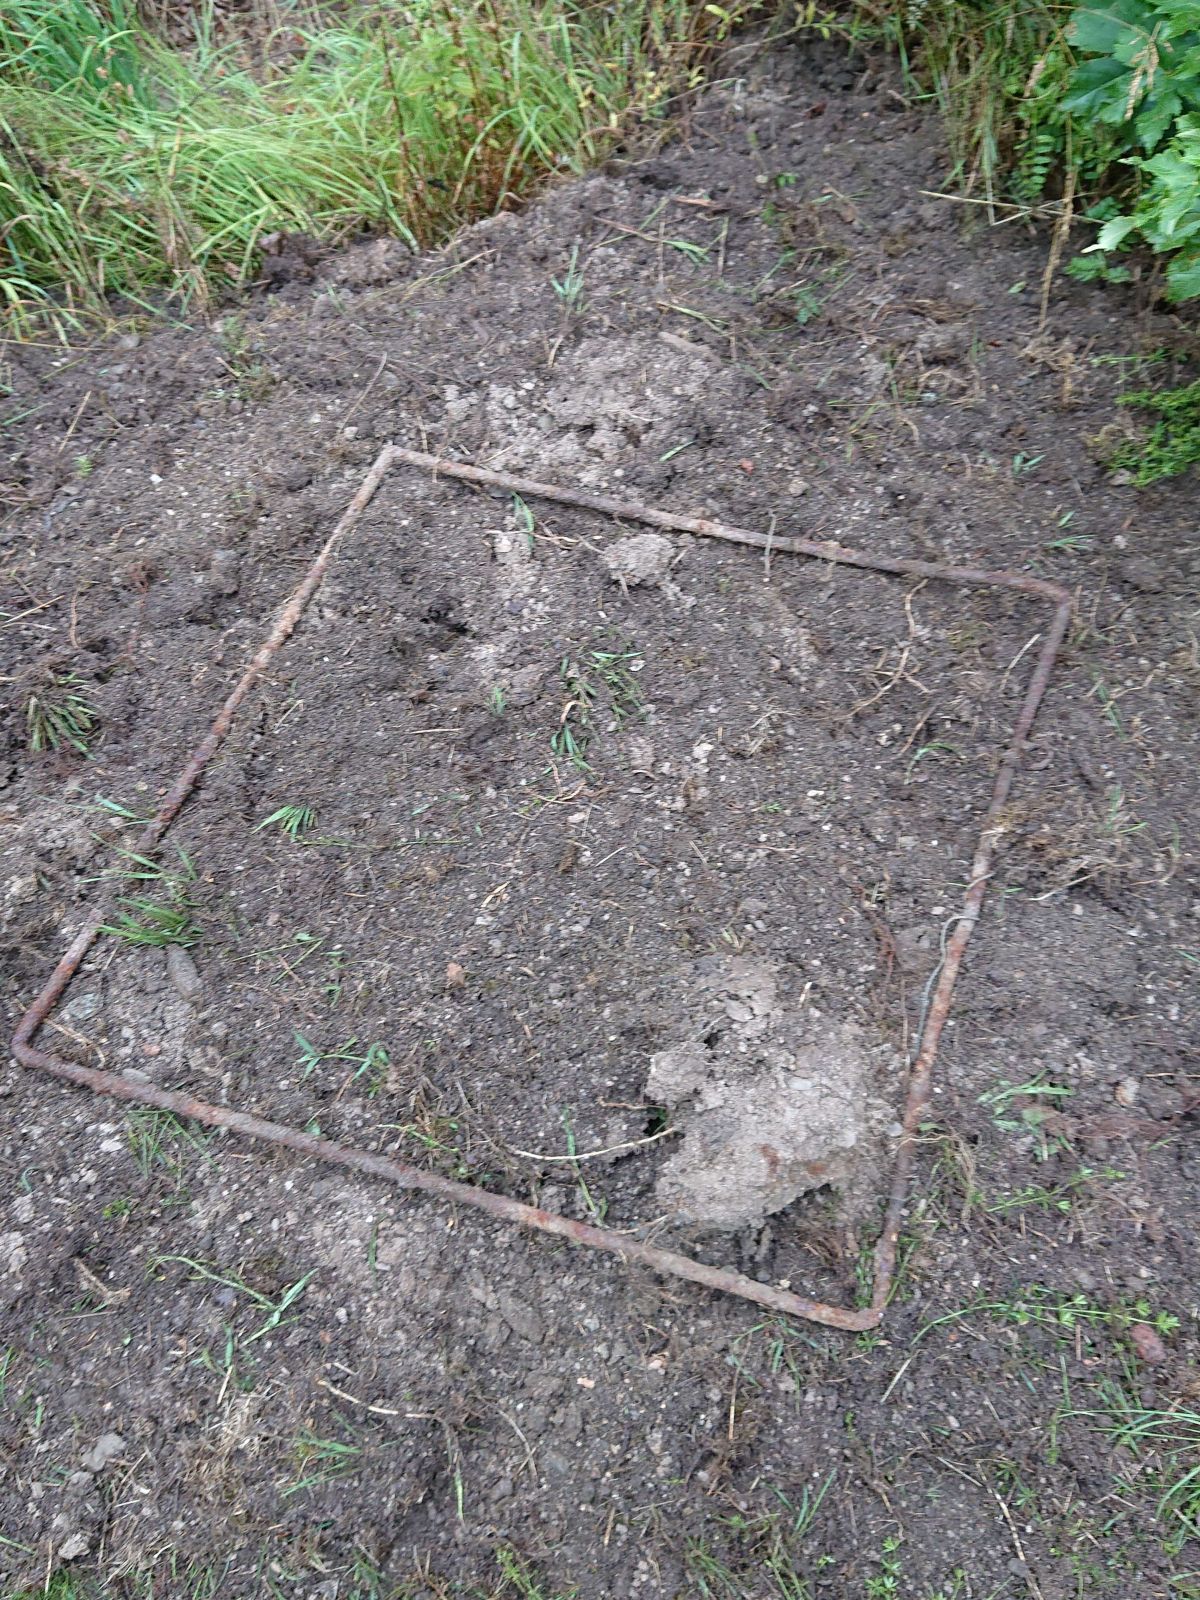
In the north of my garden is a huge pile that consists of a mixture of old coal ash/clinker and sand. It has been there for over five decades by now, completely overgrown with grass and occasionally small trees. Any harmful chemicals are probably completely leeched into the water table by now, so I do not think using it to lighten the soil will be harmful. I have been using it for my bonsai trees for about a decade by now, and it does not seem to harm them at all. This year, I started to dig it up in a big way, and as you can see, I dug out a metal frame of unknown origins. The pile also contained several bricks, a broken metal rake, some rusted chains, and quite a few pieces of wire and plastic rope. All gifts from my grandfather. I used this metal frame to build a bigger 10 mm mesh sieve to expedite the work.

© Charly, all rights reserved. Click for full size.
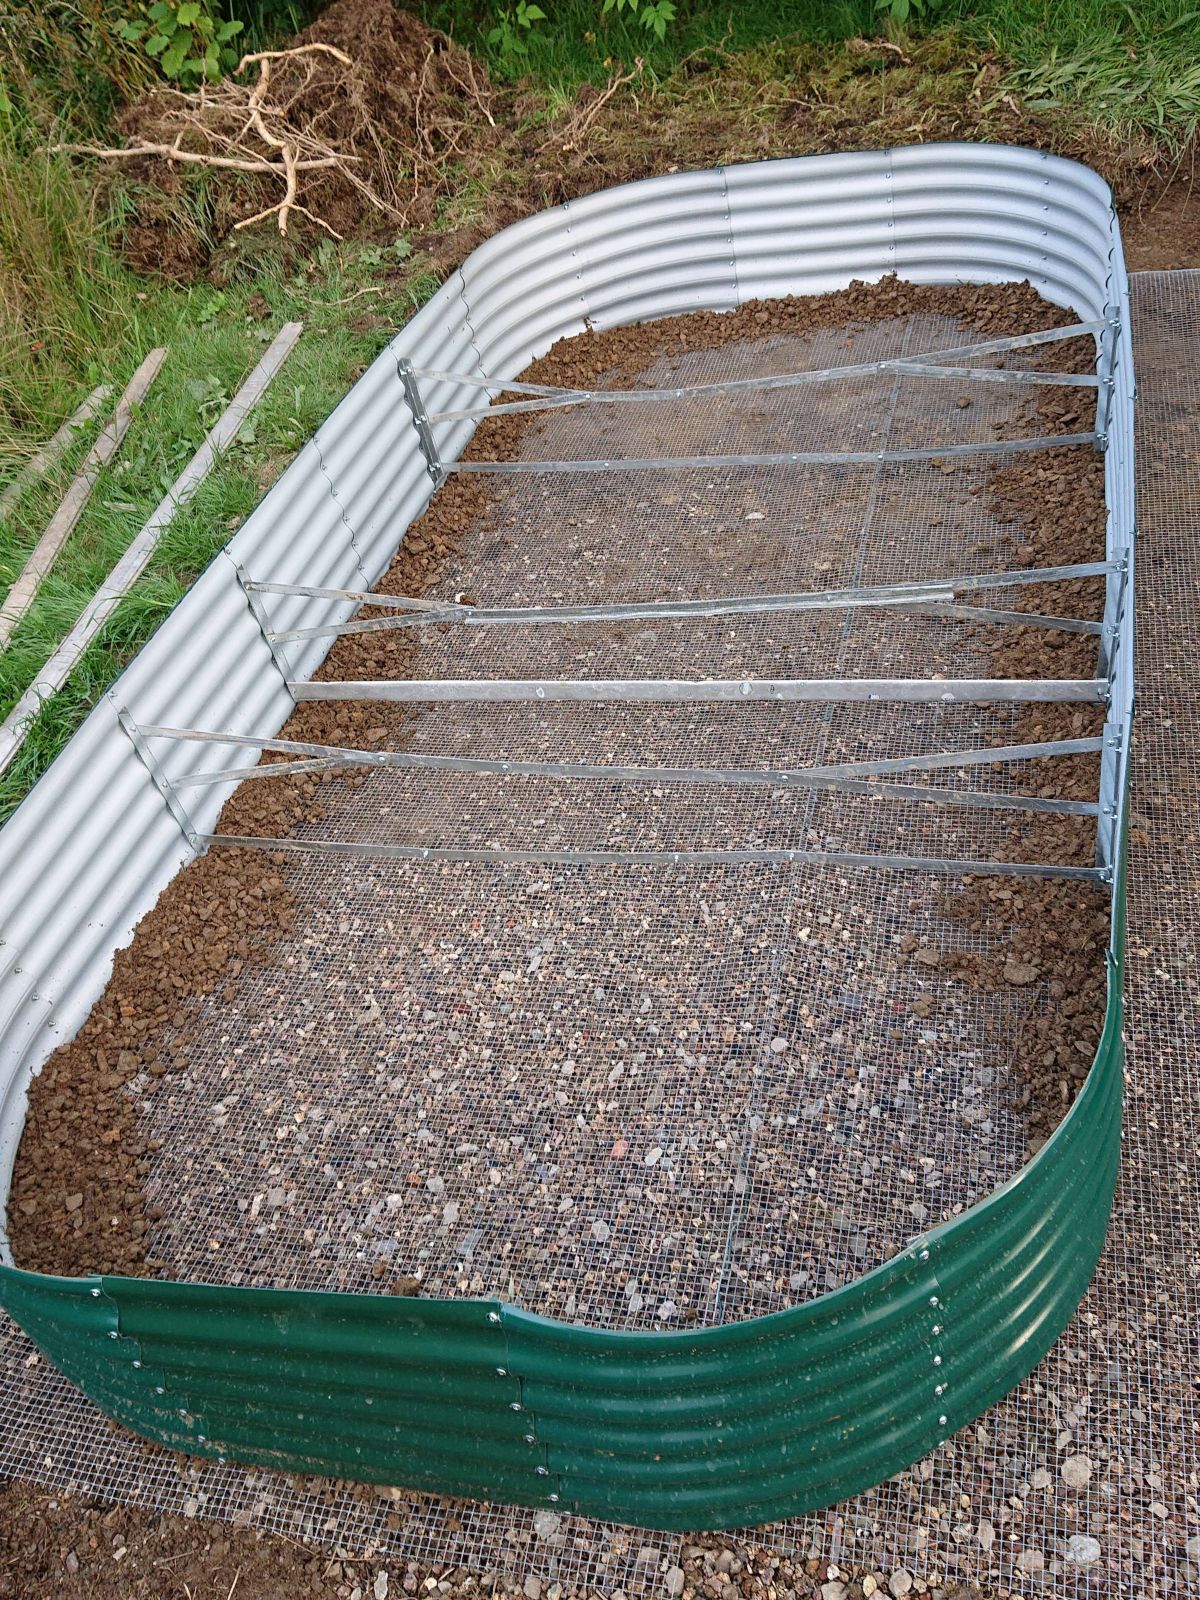
When I had sieved enough soil and sand for at least one bed, I used the smaller fraction of stones to level the terrain where I had dug out the topsoil. And I placed the completed bed on top of some anti-rodent metal mesh.

© Charly, all rights reserved. Click for full size.
I decided to use a 1:1 ratio of soil to sand. That should have moderately good moisture retention, while allowing for drainage of excess. It is a pity I could not prepare the terrain for all three beds at once – the potatoes are in the way.
© Charly, all rights reserved. Click for full size.
The beds should be 322 cm long and 100 cm wide, according to the manufacturer. But I realized that if I build them 282 cm long and 140 cm wide, I will have more space (approx 20% more), getting more bang for my buck, and the beds will still be comfortably accessible from the sides. It required a slight modification of the inner bracings, but that problem was solved with material from my scrap pile in a matter of minutes. I put some smaller stones around the inner edges of the bed, and I will also pour them around the outer edges when finished to prevent the rodents from wriggling their way inside between the bed and the mesh easily. Those assholes can fit through very small gaps, and anything to impede their progress helps to lead them away towards softer soil.

© Charly, all rights reserved. Click for full size.
With the bed fully assembled and in place, I started filling it. I parked my concrete mixer right next to it, I filled the mixer using buckets with approximately a 1:1 ratio of soil/sand, and I poured the mix directly into the bed to approximately 50% volume.

© Charly, all rights reserved. Click for full size.
With the beds half full with the arguably very poor mix, I sieved some higher-quality soil from a place in my garden where my father composted grass so long ago that it got mixed into the earth by earthworms alone. And I soaked the charcoal I made in the winter in NPK fertilizer.

© Charly, all rights reserved. Click for full size.
To fill the rest of the bed, I used a mix of charcoal/fresh compost/good soil/poor soil/sand at a volumetric ratio of 1:1:2:2:4. This should be enough nutrient-rich mix for most crops. It should get better with time, when plant roots permeate it and add more organic matter.

© Charly, all rights reserved. Click for full size.
One bed is now filled and complete. I might add some old garden hose around the upper edges – these cheap panels still have some sharp edges where they connect, and one can quite easily scratch on them.

© Charly, all rights reserved. Click for full size.
And since I still had some pea seeds left over, I planted them in the new raised bed. They might not have enough time to get a harvest, but they will test whether the mix is viable, show me how well plants fare in it, and they should improve the soil.
Now I am going to sieve more soil and sand so I can continue with the remaining two beds after I harvest the potatoes.
That looks like a really useful size, so many of the raised beds you see for sale are for such silly little patches -- 1m sq? -- and yet still very expensive.
You know you can eat pea shoots as salad? I rather like them, though probably mixed with other leaves rather than just on their own.