These knives have full-width tangs, but no visible pins. As far as I can tell, nobody else is using this type of construction, so it might be somewhat unique
A few years ago Walter Sorrels made a video in which he tested various glues for fixing scales to tangs without pins. He made several mock-up knives from mild steel for this and they all have failed his stress test. Which consisted of tossing them in the air and letting them fall on the concrete pavement. As it turns out, the shearing forces during these impacts were too big for the glue to reliably stick to the steel and they all delaminated. But he gave me an idea on how to overcome this problem. I have tested the idea on one broken blade and it held out to several hammer blows before the scales delaminated – and at that point, it was not only the glue that was failing but also the wood was starting to shatter and break. And since knife handles are not supposed to be hit with a hammer so I think it should be OK. I really hope it works out in the long term because I am going to make a lot of these. So if you want to know how this goes, read on.
One reason why I can do this is that I am making handles for kitchen knives thicker than they usually are – overall thickness between 20 and 25 mm. That gives me a lot of wood depth to work with – and that allows me to hide the pins inside the handle, giving the handle the benefit they provide with regard to shearing forces.

© Charly, all rights reserved. Click for full size.
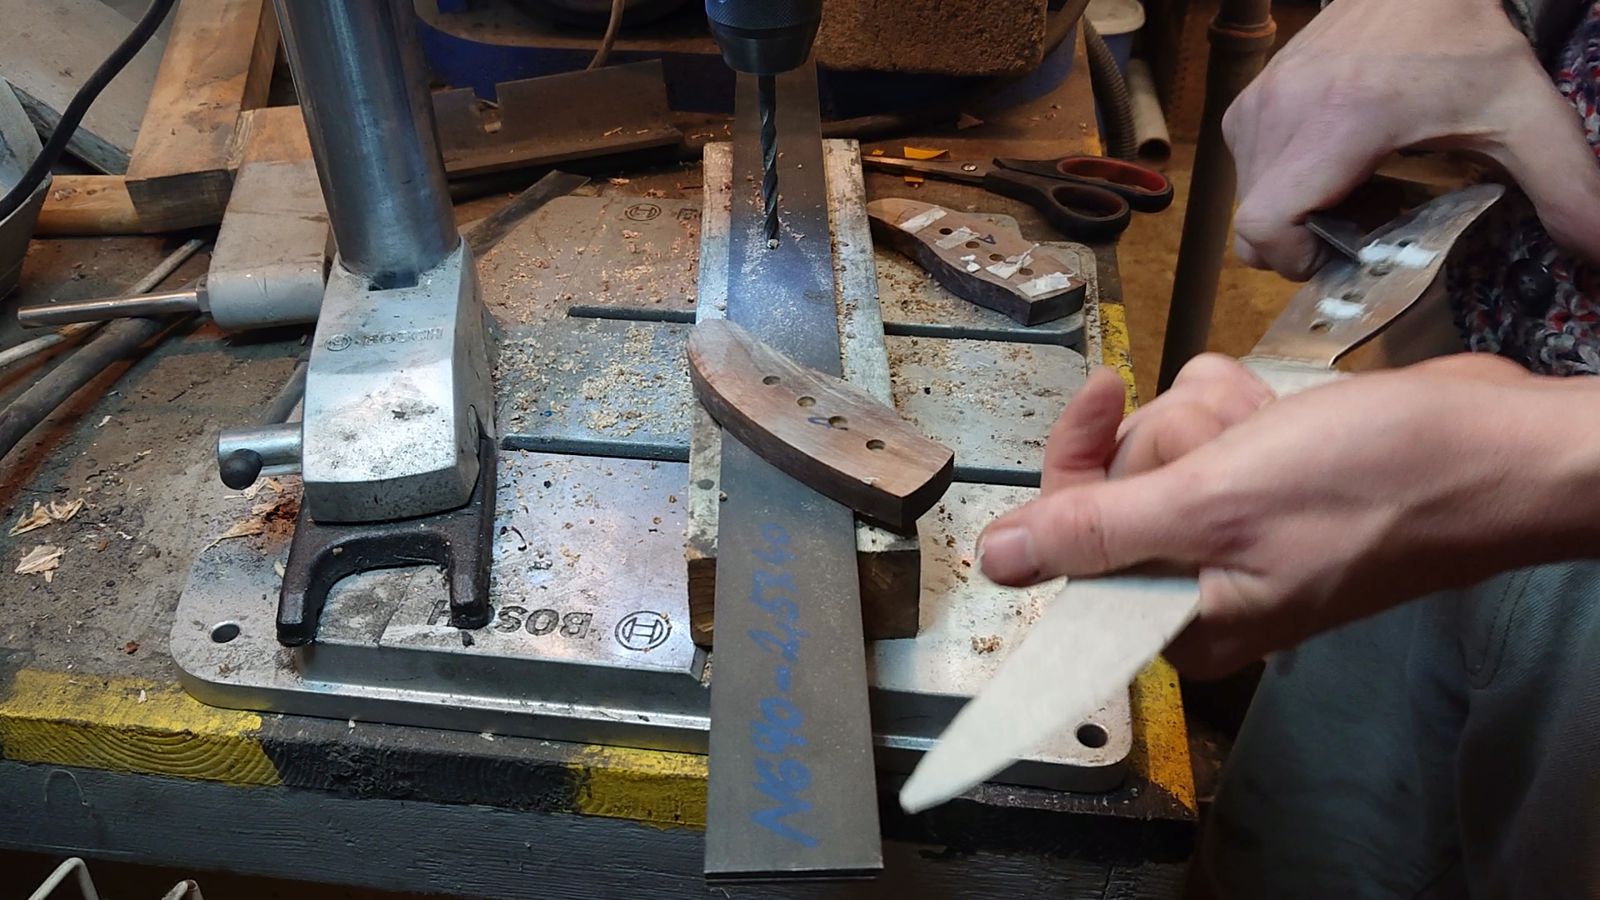
First I had to flatten the inside surface of the scales so they fit snugly against the tangs. I have also flattened the tangs and I ground gouges in them to give the glue a rougher and bigger surface to latch on to. I have also somewhat flattened the outer surface to make the next step easier. The next step consisted of drilling suitable holes.

© Charly, all rights reserved. Click for full size.
For this, I have first fixed the right scale to the tang with double-sided adhesive tape. Then I have set the hard stop on the drill press on the surface of the scale inside one of the holes in the tang (the one where the scale was thickest. So in essence the drill could not get into the wood at all. But placing 5 mm of flat steel under the scale has set the tang in the reach of the drill bit again and I could not drill more than 5 mm into the wood.
© Charly, all rights reserved. Click for full size.
After drilling the first hole I have inserted a pin in it to secure it against shifting and I drilled the remaining three. Rinse and repeat for the other side. This has led to me reliably drilling four <5 mm deep holes in each scale with the holes in both halves reliably aligning.
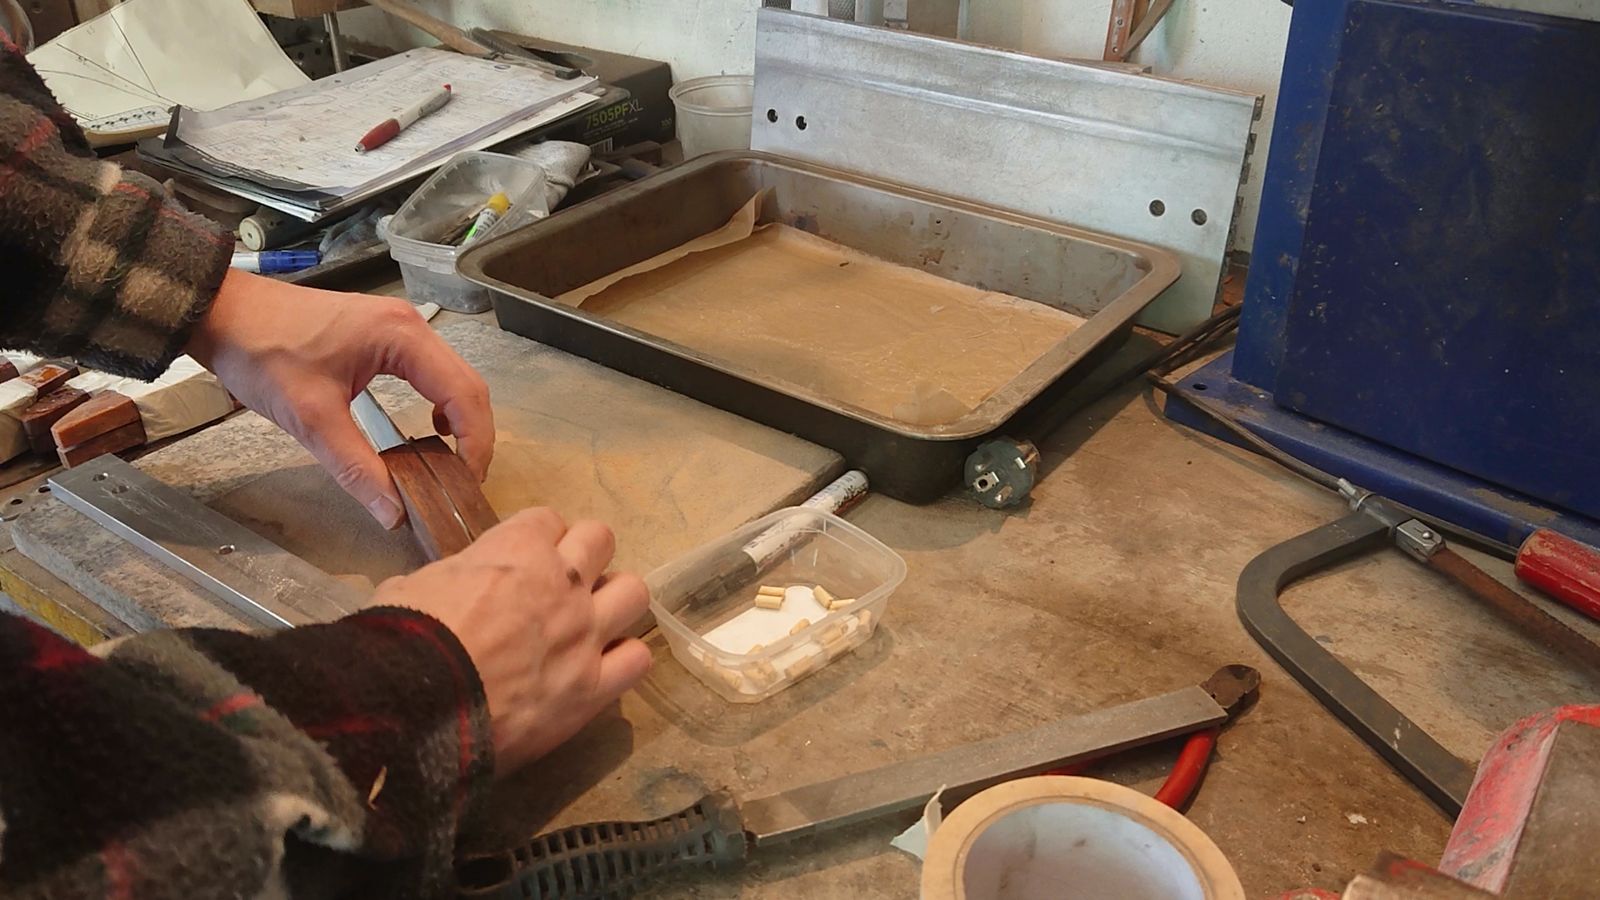
I cut two hollow brass pins and two bamboo pins for each blade. There is no particular reason for choosing brass over another metal, it is just that brass is what I had in stock. And I have chosen hollow brass pins because they should be enough against the shearing force but I could fill the hollow with wood to increase the surface to which the glue reliably and strongly sticks. That is also the reason why two out of four pins are from bamboo.

© Charly, all rights reserved. Click for full size.
I have filed all pins down to the same length with the help of a piece of scrap aluminium with a hole of suitable depth. Put the pin in the hole, file down to the Aluminium surface, etc. But because all holes were not reliably of identical depth, I had to make two pins for each pair of scales specifically, which was not a problem at all.
© Charly, all rights reserved. Click for full size.
Because for the next step I had to perfectly fit the scales with the pins and tangs, then remove the knife and assemble together just the pins and the scales. Before glue-up, there was one last step that needed doing -facing the scales.
© Charly, all rights reserved. Click for full size.
The two metal pins fit precisely enough to hold both halves fixed relative to each other so when I have wrapped them with masking tape, they held together exactly as they will later in the knife. I have marked with a black marker the areas that need to be sanded away and off to the belt grinder I went.

© Charly, all rights reserved. Click for full size.
Full shaping of the handles is done once the knife is assembled, but the front faces need to be completely done before that. Not only do they not align perfectly – aligning the holes is difficult enough on its own – they also cannot be reached for any major work after the assembly without risking damage to the polished blade. By sanding the front faces in a handle assembled like this assures they align perfectly. And sanding and subsequently polishing them on the slack part of the belt gives them a nice curve.
Once the faces were done, I could go to the assembly.

© Charly, all rights reserved. Click for full size.
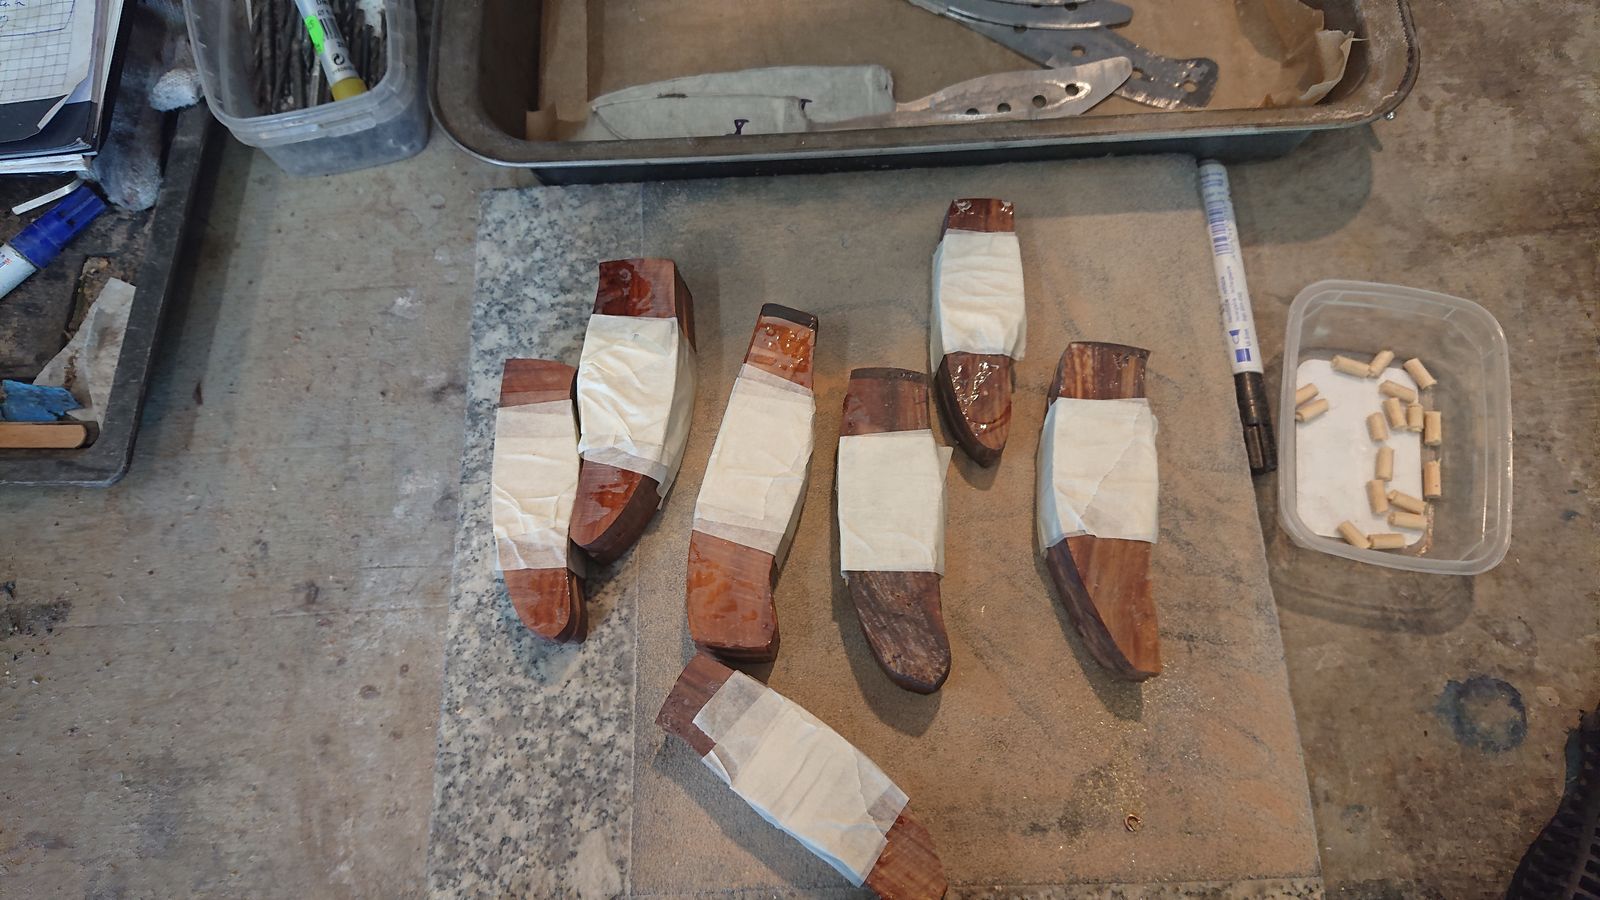
I applied slow curing epoxy first to four pins and inserted them into the right scale. Then I applied glue to the scale and the tang and pressed it all together. Then I have applied the glue to the left side of the tang and the left scale assembled the whole knife and pressed the handle together with a clamp until the glue sets.

© Charly, all rights reserved. Click for full size
And once the glue has set, I have of course let it fully cure on a warm radiator for best performance.
Once the glue has fully hardened, I have shaped the rest of the handles.

© Charly, all rights reserved. Click for full size
It is not very wise of me to keep making these ergonomic handles. For a machine, there is no difference between an ergonomic handle and a simple one. For handmade, however, there is a world of difference. But I like them, so I make them.
I have changed the shape a tiny bit during my last batch. Instead of starting by grinding the profile to a rectangle cross-section, I have started by grinding it to a trapezoid, circa 25 mm at the spine and 20 mm at the belly for the bigger knives, a little less for the small ones. After this, I have rounded the edges, finishing the snape into something that nicely fits in a hand.

© Charly, all rights reserved. Click for full size
There is a tight radius at the heel of the blade. It was really difficult to shape this part on my belt sander, so I had to build this new attachment in which the belt runs over a mere 10 mm radius. However I have to run the belt grinder really slow on this one, otherwise, the ball bearings would overheat. But it works well enough for me to not complain. Too much.
Once the handles were shaped, I had to polish the wood up to 800 grit.

© Charly, all rights reserved. Click for full size
For grits up to 400, I have used dry abrasive canvas instead of wet&dry abrasive paper. The canvas is stronger in tension so it allows me to use a long-ish strip to better grasp and to sand the curved surfaces, but the finer one goes the faster it clogs up with the epoxy. For the 600 and 800 grit, I went to wet&dry sandpaper again, which clogs up on the stabilized wood really, really fast too, but it can be wetted to wash away some of the dust. And because I do not want to use water in case the wood is not perfectly stabilized and could swell, I am using denatured alcohol. It works well and dries fast when the work is done.

© Charly, all rights reserved. Click for full size
Once the wood was polished, I had to go back to the belt sander for one last touch – polishing the spine of the blade and the spine and the belly of the tang. And because the blades are mirror polished, I had to mirror-polish all of this too.
To make sure there are no less than optimally water-proofed areas on the surface, I have applied a tiny amount of resin to the handles once more to seal any pores.

© Charly, all rights reserved. Click for full size
And once that cured, off to the final step.

© Charly, all rights reserved. Click for full size
That was of course buffing up the wood (and horn&bone on the honing steels). The last time I did this it did not work so well. If you can remember, I had some trouble last time with the haematite-based buffing compound I made. So I made a new one, colorless, which worked semi-well. The only problem was consistency – it was too hard to apply on the wood and too soft to apply on the fast-spinning buffing wheel. The wheel ripped the chunk into pieces and scattered quite a lot of it around, making a mess. But it buffed the wood and the horn well, so I will adjust the recipe and once I have figured it all out I will post it.

© Charly, all rights reserved. Click for full size
With the handles once buffed, I have corrected any minor mistakes in shaping and polishing (buffing highlights flaws that were not visible prior to that), re-buffed them where needed and, finally, the knives were done. Normally this would be an end of a project, but this one is a bit bigger. I have wrapped every sensitive surface in paper towels and masking tape because for the final part I want to make knife stands for these. That means three knife-stands for three knife sets. Work is progressing nicely so far so hopefully, I should be truly finished soon.
I love the curves in your handles. The hidden pins are a neat idea.
Very much works of art!
They look amazing already. Yeah, the whole holding together is one of my major headaches when approaching a certain project come spring.
I love these. You make me want to collect an FtB set, what with the knife I already have from Marcus!