The Great Gardening of 2025 – Part 27 – Sewage Surprises

I mentioned a few times that I have a sewage treatment facility at my home and that I do get some use out of it outside of it cleaning water. I will say a bit more about it today, since it is rather important these days.

I have a five-stage system:

  1. 3-chamber anaerobic septic tank – here the water undergoes the first stage of biological cleaning where it separates solids and the slowly decompose and ofgass. The sludge that is left behind needs to be pumped out and disposed of approximately once a year.
  2. Biofilter – essentially a column of plastic foam where some further biological shenanigans happen. The water that comes out can, under certain circumstances, be let out. In my case, it undergoes further cleaning because…
  3. Pumping station – the septic tank and biofilter have the water surface too low below the ground, so the biofilter is permanently and completely flooded. It was not supposed to be like that, and we had to insert the pumping station during production to compensate for a mistake in the project.
  4. Gravel reed bed – a 5×10 m hole, 1 m deep, lined with heavy-duty foil and filled with gravel. I actually built this first, illegally, to clean grey water only. It was a significant improvement over what we had before, which was simply to let uncleaned grey water to seep into the ground. To this day, many households here still have some semi-legal arrangements like that.
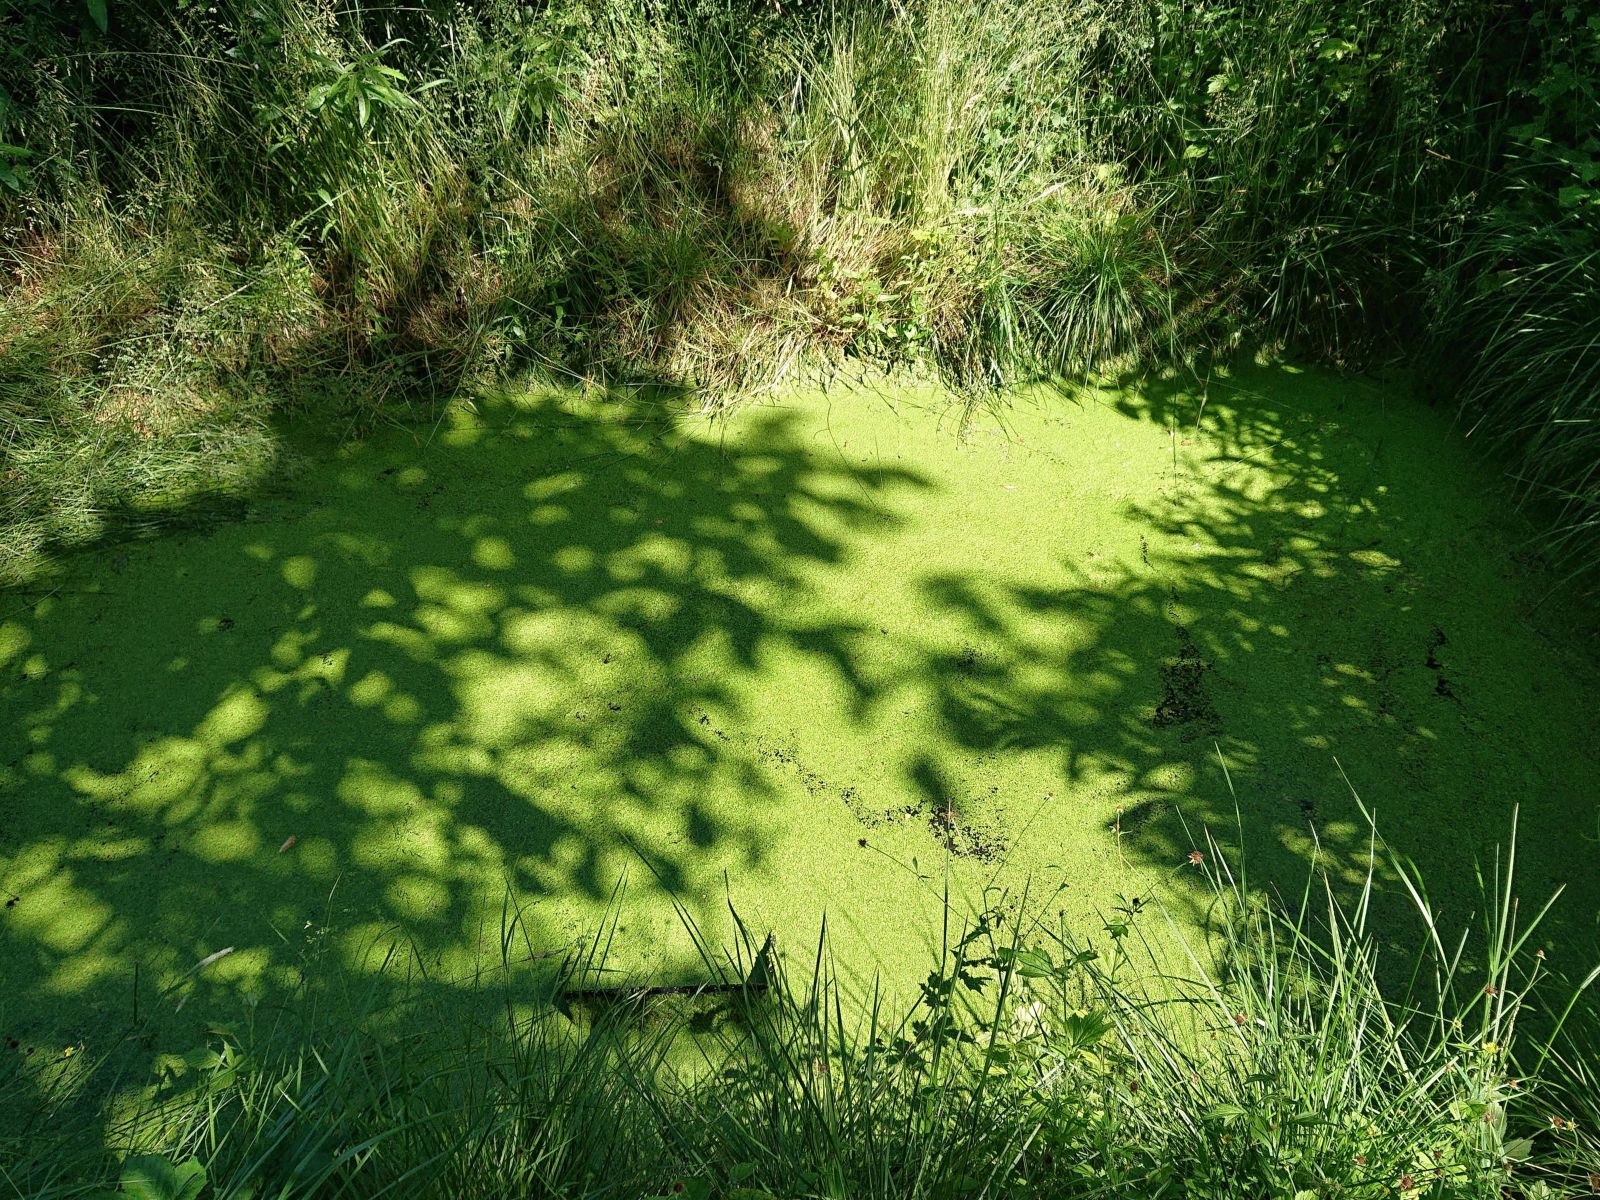
    The gravel bed is planted mostly with Phragmites australis. The reeds clean the water further, and although they are most effective during the vegetation season, they do work in winter too. In the summer, they use up nitrogen and phosphorus to grow and create biomass. In the winter, some of that biomass dies and provides carbon for bacteria that also use the nitrogen and phosphorus. At the very end of the gravel bed is a charcoal filter, where most particulate matter and remaining chemical pollution (still mostly phosphorus and nitrogen compounds) are further absorbed.
  5.  Seeping pond – a shallow (~50 cm at most) pond where the water seeps into the soil around the edges. Around the pond are planted willows and my mighty walnut tree. The willows provide me with firewood and long sticks for growing beans, the walnut provides me with food and shades the pond completely most of the summer. In the pond is a big growth of duckweed, which cleans the water even further – although that is no longer strictly necessary, since water is tested before the pond, after the charcoal filter. Ammonia is a bit of a problem, but not really.

I tried to have fish in the seeping pond and they did survive the summer, but not the winter. I would need to have active aeration in the pond for that – when sudden -20°C came, the fish suffocated under the ice. But the pond is full of life even without my interventions.

© Charly, all rights reserved. Click for full size.

I have introduced duckweed to the water, and it does not look very appetizing (to a human), but it is actually a sign of healthy water. I never had a harmful algal bloom in my pond, which is caused by cyanobacteria. Those thrive in environments with excessive phosphorus pollution but a lack of nitrogen, and they do release nasty chemicals into the water. This water is not drinkable, and it is not clear, because there are dead leaves, etc., in it, but it is healthy.

© Charly, all rights reserved. Click for full size.

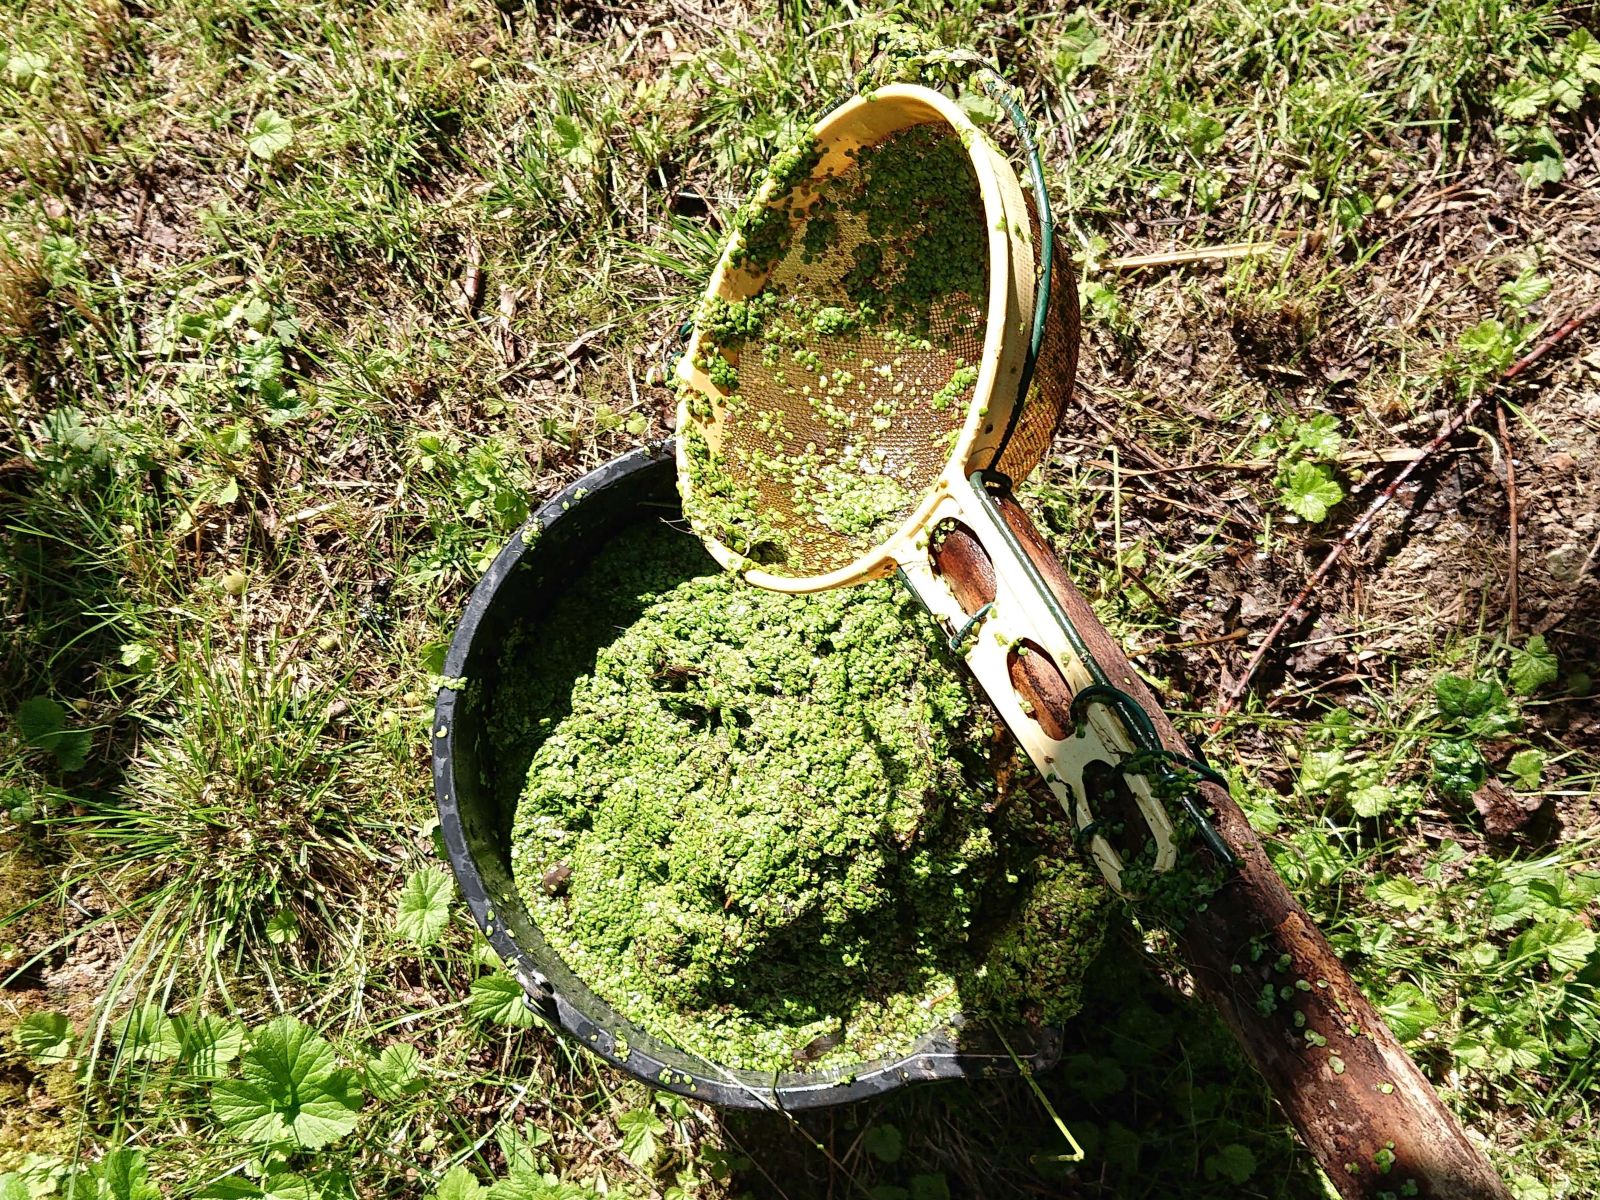
This year, the weather seems to be especially favorable for the duckweed; the pond is completely covered. Thus, I finally rigged a sieve with a long handle to scoop out some of it. I am composting it – it adds nitrogen and phosphorus to the compost heap and the life cycle of shit is thus completed. When taking it out, I took out some other life forms too.

© Charly, all rights reserved. Click for full size.

Damselfly larvae are a frequent occurrence. I do my best to toss them back as soon as I notice them. They are the main reason why I do not simply throw a pump into the pond when I need water for irrigation anymore. However, this year I got a surprise that made me really happy.

© Charly, all rights reserved. Click for full size.

Alpine newt (probably) –Ichthyosaura alpestris. I did post about frogs in the pond in the past, but newts are even more sensitive to chemical pollution than frogs. That is why I was happy to see one. Especially since this year is very dry and the amphibians need every help to survive they can get.

© Charly, all rights reserved. Click for full size.

For smaller amounts of irrigation water, I can use watering cans to scoop water out of the pond. But since I expanded my gardening this year, right when it seems we will have another climate-change-induced drought, I have to use it to irrigate my crops. And in this picture, you can see the pump under the water level in the last stage of the gravel bed, before the water goes through the charcoal filter. It is see-through for several decimeters even before that last filtering, and it is safe to water crops that are a long way away from harvesting and that are not eaten raw. Just to be on the safe side, I still do not use it to water strawberries or anything similar that could get splashed. Potatoes, tomatoes, onions, peas, beets, and bonsai benefit greatly, though.

The Great Gardening of 2025 – Part 26 – Making More Muck

The hot compost is a lot of work, but so far, I find it at least interesting. In the meantime, I learned that the white stuff that I thought was fungal mycelia is actually bacterial growths of Actinomycetes. An easy enough mistake, as the name suggests, there are similarities.

My garden needed trimming again, and this time it was too much grass to cut it all in one go. On the first day of work, I got a pile that was roughly the same size as both previous piles combined.

© Charly, all rights reserved. Click for full size.

Again, I did not wait for the grass to dry, and I piled it directly on the heap. The weather was so dry and hot, and it took me so much time, that the layers did wilt and slightly dry anyway. Even though this time it was mostly fresh grass, I added calcium cyanamide to the pile straightaway to see what happens. What happened is that it went all the way to 70° and higher overnight. I had to do other things for a bit, so it took a few days before I managed to mow the rest of the garden and add it to this pile again.

© Charly, all rights reserved. Click for full size.

This time the grass did dry up completely, because I had to mow grass around the garden too, and it is less walking to mow it and let it lay until it dries and then collect it with a wheelbarrow than trying to cart it to the pile directly from the lawnmower. So for the second (top) half, I had to water it thoroughly too. It took a bit longer to reach the temperature, a whole day instead of overnight.

Now it is going to sit in this place until it starts to cool off, then I will turn it and fluff it up a bit and leave it be again. Probably until next year – this pile is now on the part of my vegetable bed, where the soil had to be dug out when building my sewage cleaning facility. When filling it back, the workers were not careful enough to put the topsoil back on top properly, and it got mixed up a lot with the infertile clay underneath. It has been lying bare for a few years now, with grass and wildflowers working on the soil to improve it naturally. Now I want the compost to finish that process and expand my usable garden bed to its full former glory.

© Charly, all rights reserved. Click for full size.

The second muck heap is cooling off, but it is still higher than the ambient temperature, 30-40 °C. The first heap has been cold for several weeks now, so I decided to put it between the rows of the potato patches. It was five wheelbarrows per patch, and even though it is not completely decomposed and cured yet, it should add the needed shade for the tubers and some nutrients for growth. It will continue to decompose in situ, and potatoes do not mind a lot of organic matter around them – I grew them directly in non-composted grass the last two years after all.

The Great Gardening of 2025 – Part 25 – Pumpkins Planted

I was busy as a bee since the last article, and I did not have much time (and strength) for writing.

© Charly, all rights reserved. Click for full size.

For one, I had several tomato plants that did not fit into my greenhouse. Simply planting them outdoors would, in all likelihood, end in disaster, as it did in the last three seasons. Thus, I have built an impromptu shelter to shield them from rain. The roof is made from old and damaged PC greenhouse sheets. We will see if this really helps to stave off the Phytophtora infestans.

© Charly, all rights reserved. Click for full size.

Beans behind the house started to climb the supports, even flower, and the corn looked very promising. And today, a disaster struck. Voles dug holes right near my house, and they destroyed three bean plants and one corn plant. They never made holes this close to the house, so it took me by surprise. I put down bait and traps and I hope to eradicate those fuckers before they do even more damage. This year is relatively dry so far, which helps to keep the slugs under control. On the other hand, the dry weather suits voles better. Last spring, voles destroyed nothing, and slugs did significant damage. This year, it is the exact opposite.

© Charly, all rights reserved. Click for full size.

All three Three Sisters patches are now fully planted. The plants take it slow so far; most beans are not climbing yet, and the corn and pumpkins are still growing very slowly, if at all. I do hope that changes soon. It usually does. Especially the pumpkins tend to have kinda exponential growth – starting slowly at first and after a certain point becoming unmanageable in a very short time.

© Charly, all rights reserved. Click for full size.

I still had ten surplus butternut squash plants. So I took a fork to a patch of land between my greenhouse and the coppice, where compost lay in previous years. The soil is not very good, but it is relatively stone-free, and the grass was not very deep-rooted yet. I worked some fresh compost into it; pumpkins do not mind.

© Charly, all rights reserved. Click for full size.

I want to try to grow the butternut squash vertically on this patch, so I built an impromptu scaffolding for them to climb. These are old fencing panels that my father made from previously mentioned aluminium profiles when I was a kid. He used them to keep ducks and geese off the vegetable patches. They are useful around the garden to this day.

I was thinking about what companion plant I could add to these pumpkins, and I decided to sow the whole bed with red beets. Beets do not mind shade, and if the pumpkins grow vertically, it could work. We shall see. The green stuff on the ground is duckweed – I watered this patch thoroughly with water from the pond at the end of my sewage cleaning facility. A bit more about that next time.

The Great Gardening of 2025 – Part 24 – Agricultural Arithmetics

I have three “Tree Sisters” patches, with 10, 15, and 25 squares. In all the patches, I planted or I am planning to plant 2 beans in each corner, then either 2 corn in each square or 4 corn in every even square, and either 1 pumpkin in each square or 1 in every odd square.

So I crunched some numbers to see how much of the full capacity of these areas I am using concerning each plant:

~80% for the beans
~90% for pumpkins
~30% for corn

So overall, I am using only half the area that I would need if I were growing each of the crops separately at optimal spacing. Which is one of the points of using the companion-plant system.

I do not know whether this ratio is good, bad, or ugly. To be completely honest, I did not look it up, and I am playing it by the ear. I planted the beans as a main crop because I have marginal soil, and I know beans thrive on it and will improve it. Then I planted only as much corn as I had receptacles for. And I might plant even more pumpkins than I initially planned because one of the seed suppliers had almost a miraculous germination rate and I loath to toss a viable plant.

That last point is still not entirely decided. I already planted 10 marrow squashes, and so far they have survived and started to grow. Today I also planted the first 3 Hokkaido because they had three true leaves and thus should, hopefully, be sturdy enough to survive slugs (I will add slug pellets around them anyway). The butternut squashes still have a huge question mark over them, but if they survive, I might have to establish a solitary patch for some of them. I do have the place,  although I do not know if I will have the strength.

I will probably have to add some liquid fertilizer to the irrigation water due to the marginal nature of my soil. The improving effect of beans will only show up in the subsequent years. I do not know if the plants will grow to their full capacity or if the capacity of each species is going to be diminished. Unless it is reduced by more than half, the patches should produce more than separated ones would.

Based on past experience, if grown separately, I should get around 70g of beans, 50 g of corn, and 5000 g of pumpkin on average from one plant. So if all plants grow well, I might be looking at about 30 kg of beans, 5 kg of sweet corn, and 150 kg of pumpkins. I will only believe those numbers when I see them, and out of all of these, I am most inclined to believe the first and the last one. Of all these, it is usually the corn that performs the poorest.

I did try corn as a companion plant to potatoes about five years ago. I did not write about it, but it was a success – the potatoes grew at 100% capacity, and thus all the corn was extra, albeit a small amount. Shame that it is so much more work to grow everything here. I could get a lot more use out of my garden if I could just toss seeds in the ground and let them grow. It is one of many downsides of living in a semi-mountainous area. Sigh.

Now I’m going outside again.

The Great Gardening of 2025 – Part 23 – Garden Gym

The second heap of dry leaves did heat up to 50°C. Thus, I now know for sure that inoculating old grass and leaves with calcium cyanamide does help the decomposition process. And since I had to mow the grass (my garden was slowly becoming unwalkable), I mixed it with this old one again.

© Charly, all rights reserved. Click for full size.

Mowing the grass all around my garden was a whole day’s work, mixing it in alternating layers with the old grass did add some effort, but not that much. In the evening, I had a nice fresh green heap in the garden. That did not last long – the very next morning (today), the heap was already browning, and when I measured the temperature all around it, I got 55-60°C everywhere. It was perceptibly warm to the touch on the surface.

As an experiment with this second heap, I added no additional water whatsoever. For now, it relies purely on rain and the water from the fresh grass and decomposition. We shall see how that goes. I will again monitor the temperature daily, and I will only turn it, when it starts to cool off.

© Charly, all rights reserved. Click for full size.

I prepared a second three sisters patch, and I also reinforced the first one with poles connecting the tips of the outer rows. The tips were already connected with twine, but those only worked as reinforcements in tension. Connecting the tips of at least the outer rows with poles reinforced the whole structure significantly. Once the beans get established and get a few turns around the base of each pole, the whole structure should be able to withstand significant winds, hopefully. I did this already a few times (for beans only) and it worked.

Whilst doing this, the curse of my bloodline struck.

© Charly, all rights reserved. Click for full size.

I got distracted by an arriving package, and I put down the shears for cutting twine somewhere near the working area. I never found them again. My mother came by, and she was looking for them all over the place, too. And although she is very good at this, she did not find them either. Two days later, when mowing the grass, I found the plastic handles in the lawn-mower basket, but I never found the metal parts. Thus, I still do not know where and how exactly I actually lost them. It was definitely somewhere in the places where we looked, repeatedly.

I also planted all of my corn, which also took two days. Initially, I wanted to plant 8 beans, 2 corn, and 1 pumpkin in each square. I changed that, and I am planting either 8 beans and 4 corn or 8 beans and 1 pumpkin per square, alternating. For the 5×5 patch, I have 12 squares with corn, and 13 squares are so far empty, waiting until the Hokkaido pumpkins are big enough to survive slugs. For the new 5×3 patch, I planted 7 squares with corn, and the remaining 8 will get butternut pumpkins, possibly without beans, because of their poor germination rate. I am contemplating reinforcing the poles for these 8 squares so I may perhaps lead the butternut pumpkins up instead of leaving them grow along the ground.

I also put the beans outside in the shade to harden off for a few days before planting them in full sun.

© Charly, all rights reserved. Click for full size.

I was pretty knackered after all that work, so today, I decided to chill out a bit. I went to weed the onion patches, this time removing as much weed as possible. I managed to weed slightly over half of the patches before it started to rain, and I had to go inside.

There is still a lot of work to do. I reckon that once the beans are hardened off and can be planted, it will take a few days too, due to the sheer number of them (over 120 pots). After that, the pumpkins should go reasonably quickly.

And when the pumpkins are in the ground, I will, hopefully, have time again to do something else. It usually is like this in the garden – a lot of work in the spring, a lot of work in the late summer/fall, and relatively little in between.