
Carnegie Simpson. Love Never Faileth. New York, Chicago [etc.] F. H. Revell company, 1902.
Carnegie Simpson. Love Never Faileth. New York, Chicago [etc.] F. H. Revell company, 1902.
Simone Giertz is a cancer survivor and a bit peculiar YouTuber.
I have not watched many of her videos, but those that I did watch were mildly entertaining. But not very educational or informative, so if it is education you look for, this is not for you.
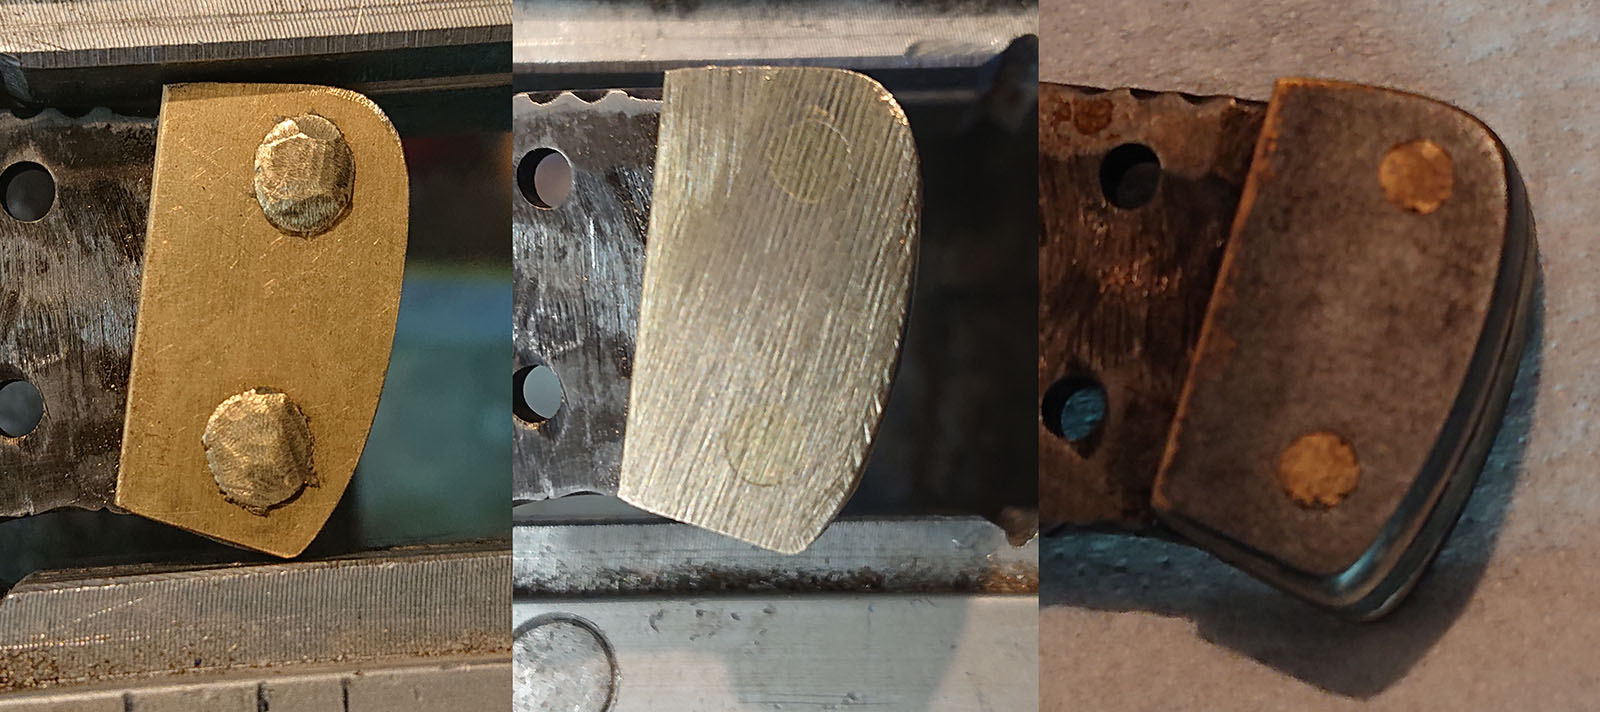
I have spent both Monday and Tuesday finishing flattening, drilling, and fitting the handle scales and the brass fittings.

© Charly, all rights reserved. Click for full size.
First I have sieved some bone dust that I have collected through a fine nylon mesh (from pantyhose – I do not wear them, but they can be quite useful in the workshop, so I have indeed several in a drawer). I mixed then the bone dust with five-minute epoxy, filled the hollow back of the bones with it and heated it with a heat gun to about 70°C (not so hot you cannot touch it, but hot enough you cannot press your hand against it for a longer time, a hairdryer would suffice too for this particular task) for quicker curing and stronger bond.
After it completely hardened I ground the back flat again and proceeded to drill the holes for pins.

© Charly, all rights reserved. Click for full size.
Drilling the holes was relatively uneventful. Double-sided tape was very useful in holding the scale on the tang and the whole assembly on a flat piece of wood for drilling to avoid chipping of the bone on exit. Also, I have used blunted and overheated drill bits to hold the scales in place for a good fit and I did not mess up the job terribly. I did make minor mistakes on the left handle scale, but those should be correctable when fixing everything together.
With the scales drilled and fitted against the bolster, I proceeded to make the brass pommel fittings. That went really well, and everything went smoothly. Too smoothly you might say. I glued the brass fittings in place, peened the pins and ground, and polished them over.
That is where the problems started, and I must say – they are not all my fault.
The first problem was that the round stock I have used for pins apparently has different chemical composition than the flat profile used for fittings. Had I known this, I would not file them flush and I would leave them slightly proud of the surface (“admitted” instead of “hidden”). However, there was no way back once I ground them flush, so I was hoping they will get hidden under the patina.
But the patining did not go well too, in three ways.
© Charly, all rights reserved. Click for full size.
The first – I have made a mistake – I have not masked the steel properly. I thought I did, but I just did not. And as one Czech rather rude but astute saying goes – ” myslet znamená hovno vědět” – “to think (assume/mean/guess) means to know shit-all”. So when I was giving the brass a nice hot bath to copper plate it, some of that bath leaked under the masking and copper-plated and etched the blade in some places too.
The second – the different brasses did not take copper plating identically, it was a lot more difficult to copper plate the pins than the rest. It took over an hour to do on the pins what took mere minutes on the rest (which exacerbated the problem with poor masking later on).
The third – when blackening, I have made the solution probably way too concentrated. It has covered the parts in a nice jet-black matt color almost instantly. But that color has completely rubbed off when I washed it with water and brush. I did not realize the true cause of this so I tried it two more times, but it just did not take, especially not on the pins, After the third attempt I thought I am done on the pommel at least, but it flaked off the next day again.
These mistakes are not catastrophic, but they are a major setback. I had to re-polish everything (done), re-etch with ferric chloride (done), give the steel new tannic-acid patina (in progress), and only after that is done to my satisfaction, can I again try to patina the brass.
However, I have to deal somehow with the pins now. They are ground flush already, but since they will not take the patina the same way the rest does, I must leave them visible. And that means probably leaving them polished and not applying patina to them at all. I will do that and then I will decide whether I like it or not. If not, then I will have to drill them out and either replace them or, if I bungle that job (which is very likely) to make completely new fittings. Either way, it is at least one day, and possibly several days, of work before I can progress further.
However, there did come one good thing out of this – I found two new recipes for black that do not require copper-plating the brass first. One requires hot-bath with ammonia (CuSO4+Na2CO3 – precipitates basic copper carbonate which after filtering and washing with water can be dissolved in hot water by adding ammonia), so it is a major stink and not exactly easy or quick. The second one works at room temperature but is rather caustic and dangerous to handle (HCl + potassium polysulfide). I will probably try the second one now, although I do not like very much working with caustic solutions, since my equipment, as you have seen, is not exactly suited for that kind of job.
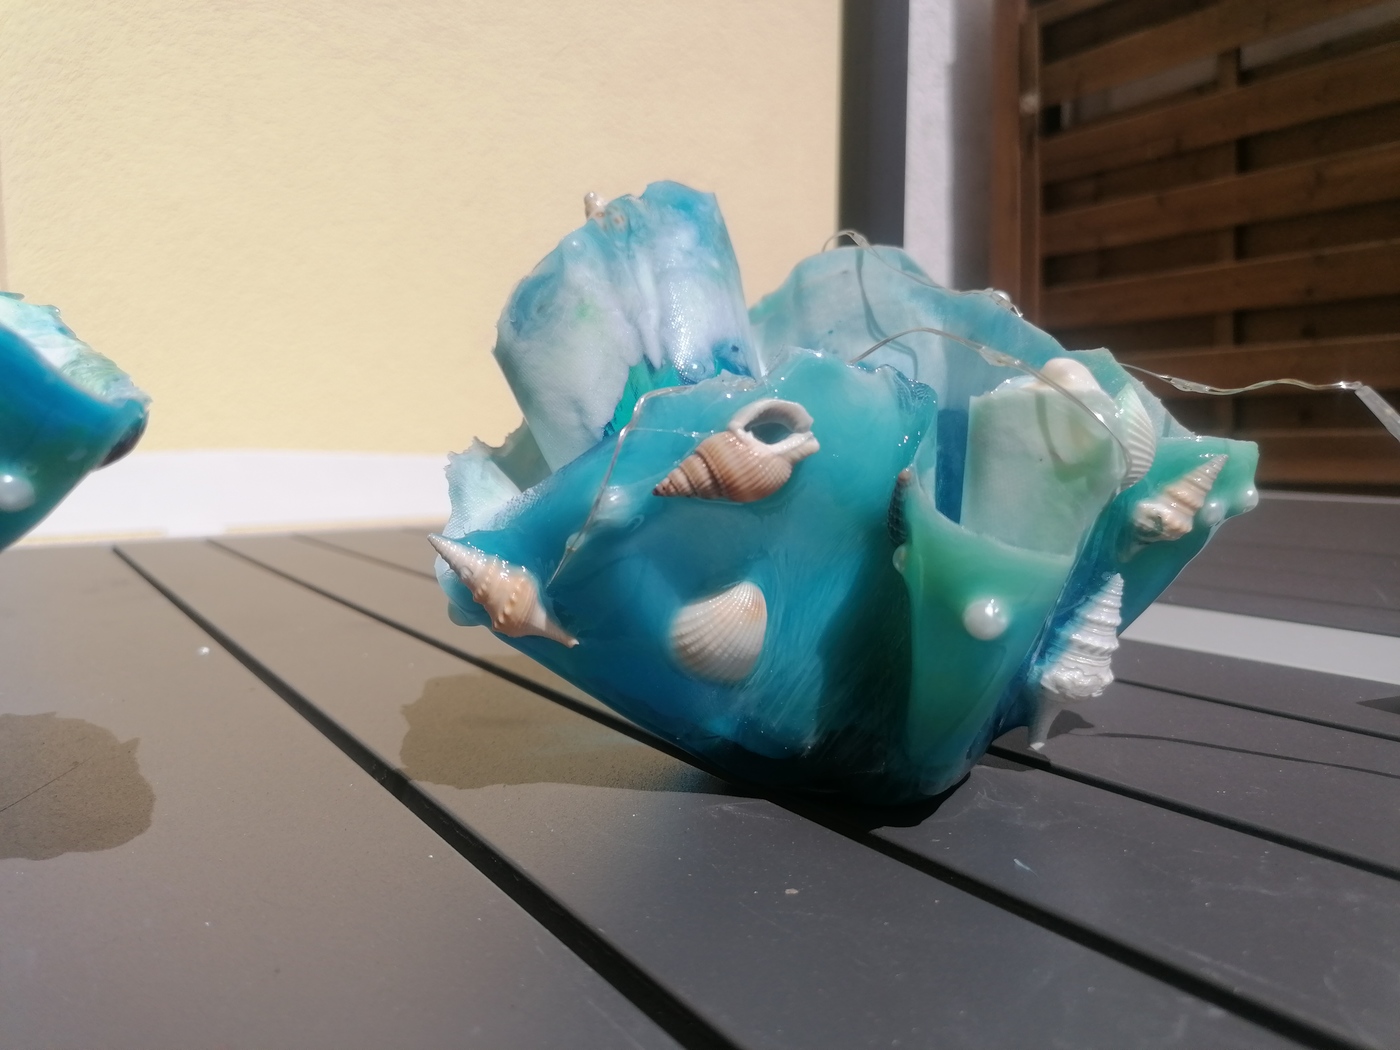
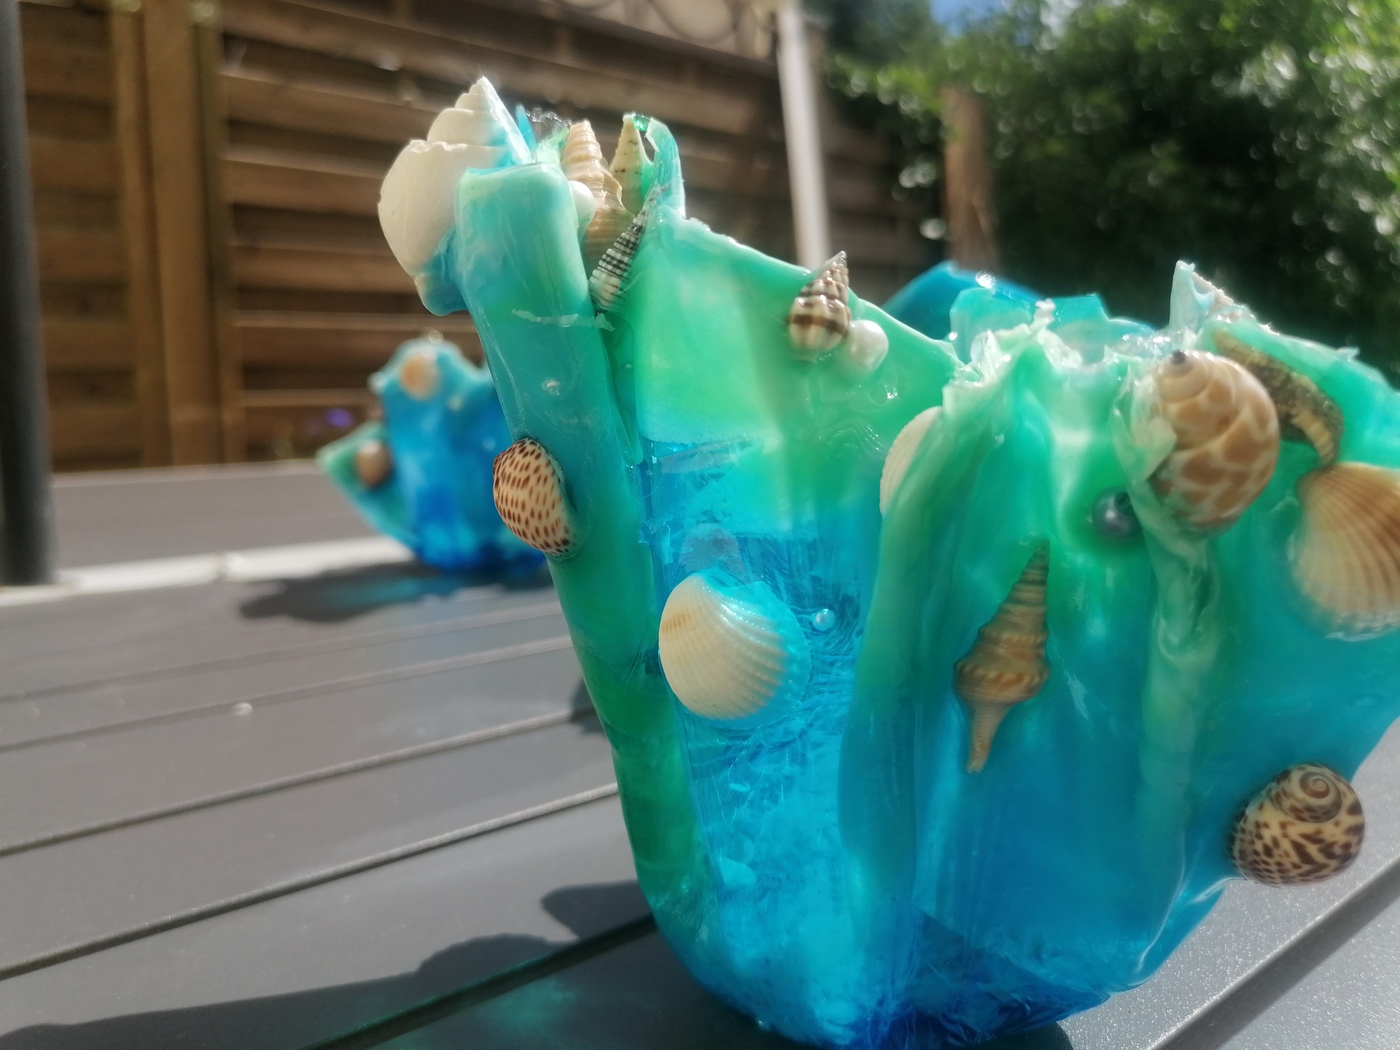
Remember the seashell resin bowl failure? Of course I didn’t want to leave it at that and made another one. This time I cast it in the early afternoon so I could form it in the late evening. Also the painter’s foil I’d used to pour it on was pretty matte, and I wanted shiny, so I used cling foil again. Well, only that the cling foil melted when I used the heat gun…
I could salvage the result and I actually do like it very much.

©Giliell, all rights reserved

©Giliell, all rights reserved
Only it’s got some gaps and slashes and you should be really careful when you handle it because resin can be sharp as a knife.
Next try: using a non stick baking sheet. That was definetely heat safe. But, you already know there’s a but, it was also quite rigid and didn’t fit the tray I use for pouring well, so the result became smaller and thicker than hoped for. Also they matte surface again.

©Giliell, all rights reserved
©Giliell, all rights reserved

©Giliell, all rights reserved
I had to glue some pebbles into the bottom because it’s asymmetrical, but the overall result is good.
OK, back to square one. Cling foil, no heat gun, just my lung capacity to blow the resin around. But also remember what I did wrong in square one? Right, pour at night, form in the morning. This time it didn’t tear, but it also didn’t move much. The result is so much off balance that I had to put a pound of pebbles into it and still the slightest wind couldmake it fall over

©Giliell, all rights reserved
And now for the last one, poured in the afternoon, no heat gun, on cling foil:

©Giliell, all rights reserved
©Giliell, all rights reserved
Here you can see how soft the resin still was and how easily it shaped. It is the tall, slender, wavy thing I’d been hoping for.