… landscape, by William Merrett Chase
I felt the need for the full, warm healing light of summer sun today and this painting by Chase fit the bill perfectly. Enjoy.

The Fairy Tale, 1892, William Merritt Chase. Image from Wikiart.
… landscape, by William Merrett Chase
I felt the need for the full, warm healing light of summer sun today and this painting by Chase fit the bill perfectly. Enjoy.
The Fairy Tale, 1892, William Merritt Chase. Image from Wikiart.
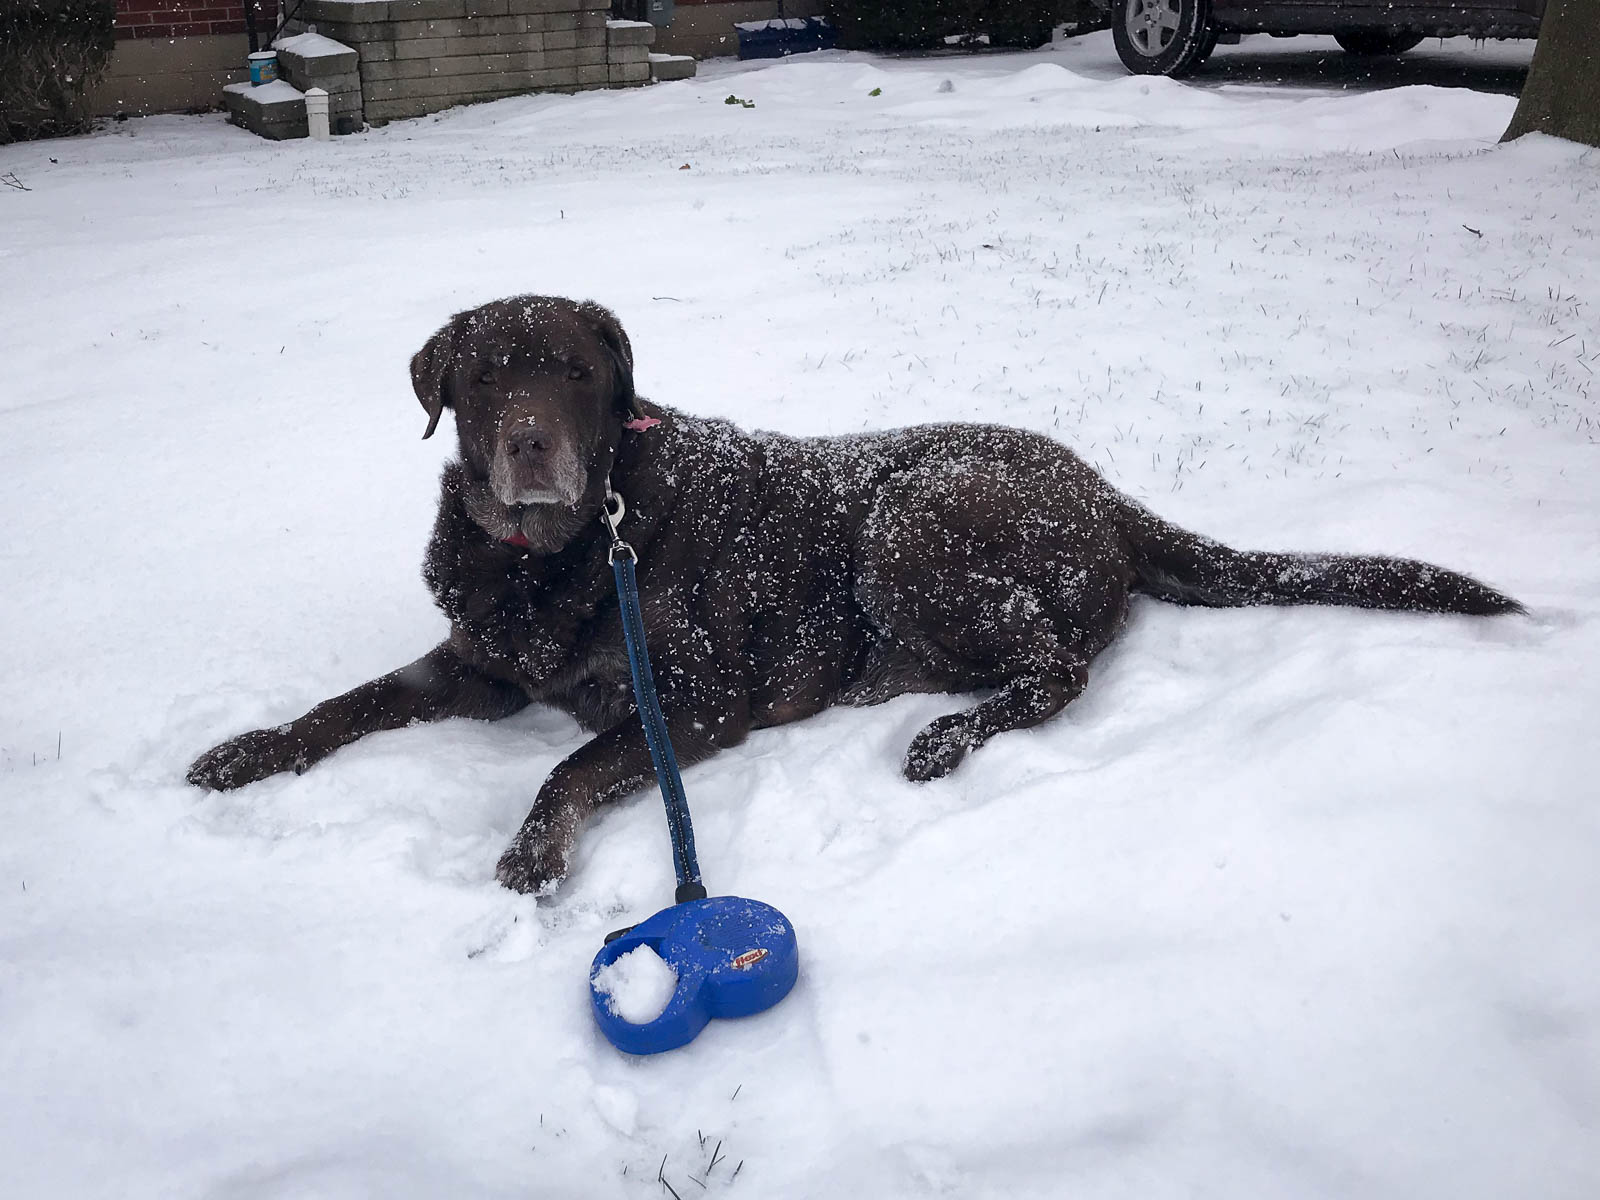
Brown dog with frosting. ©voyager, al rights reserved
Yesterday, over at Stderr, Marcus posted a piece outlining a project he’s tackling to resin(ate) Jack’s foot. I thought today I’d fill in the story of collecting the paw print.
About a month ago, Jack and I received a package from Marcus containing a dog foot-sized plastic frame, 2 bags of brightly coloured clay, 2 bags of plaster, a small, flat plastic device and a sheet of well-organized instructions. I talked to Jack about the project, and we decided to give it a go the next day. I’ve never worked with clay, so I read the instructions carefully a few times, then after breakfast, I plunged in. Marcus said to add water to one of the clay packages, which I did mixing well. Still, it wouldn’t absorb the full 1/2 c of water, and it was behaving like a non-Newtonian fluid, which is always fun but probably not what I was looking for. I was pretty sure the clay was too wet, but I put it into the frame anyway and tamped it down flat with the little plastic tool and called Jack.
Now, picture, if you will, Jack sitting on the living room carpet (he needs to be on carpet for stability), being a good boy and trying to do what Mummy says.
I pick up his good front foot first, but he can’t bear weight well enough on his other leg, and he wobbles a bit, so I let go of his leg before he falls over.
“Sorry, Mummy,” he says, “Maybe we should try the other foot.”
I tell him it’s not his fault and gently lift his sore front leg with one hand and moving the frame under it with my other hand, but this doesn’t work well either.
“Ouch, Mummy!” he says, pulling back again and again.
Finally, he looks me square in the eye and tells me, “I’m laying down now, Mummy. Go away!”
So I do, covering the clay in plastic wrap and putting it on my workbench.
The next day, I’d hatched a new plan to make a good impression. I’d wait until Jack was resting on my bed with one foot hanging over, and I’d press his foot into the clay with no need for him to stand up. Jack agreed that this seemed workable, and so after lunch, I helped Jack to bed, and we got the framed clay and pressed his foot into it. We made a good, deep press, and results looked great, except that our perfect paw pad impression disappeared less than a minute later. Vanished. Completely gone. Damn it, the clay was too wet.
“Nevermind, Mummy. Footprints are meant to be fleeting. This is a silly idea.”
I return the clay to my worktable, covering it only with paper to allow it to dry out a bit, but when I check it at bedtime, it’s dried hard, and I am unable to restore it with water. Now I understand why Marcus sent 2 packages of clay.
The next few days are spent negotiating with Jack, who finally agrees to try again if I provide him with a chicken foot. This is a treat introduced to Jack by Marcus, and so in the middle of a pandemic, I venture out to 3 various pet stores looking for chicken feet. I am pleasantly surprised to find them at a reasonable price, so I begin planning our third attempt at making a good impression. I’ve noticed that Jack can still pee like a boy on telephone poles, so he is able to raise a back foot without toppling over or pain. I discuss this with Jack, who sighs heavily and says, “sure, Mummy. Do you have my chicken foot?”
So, I begin again with fresh clay. This batch is a vibrant pink, and it looks pretty good to me just out of the package, so I decide not to add water this time and just press it into the frame as is. Jack and I position ourselves on the living room carpet with a chicken foot resting on the coffee table, looking poised for attack, and we begin. I raise Jack’s foot as if I were getting ready to towel dry it for him, then quickly place the frame underneath and set Jack’s foot down into it. He puts his weight on it for a few seconds, then I pick his foot straight up and pull the frame away. Jack sits down, looks at me pointedly, and asks if he can have his treat now.
“Good boy, Bubba. Go ahead,” I tell him, and he picks up the gnarled claw and walks away with it, crunching bones as he goes. The sound sets my teeth on edge, but I’m quickly smiling as I look at the clay. The impression is deep, detailed and not going away. It is, however, full of hair. Jack has bear paws for feet in the winter, and a bunch of hair has decided to stick to the clay. Oh, Oh. I tentatively try to remove some of it, but I’m making minor marks on the clay, so I stop and do the sensible thing and email Marcus asking if this can be fixed.
I am relieved to hear back that the hair won’t affect the outcome and that I should mix and pour the plaster and, once it’s dry, ship it to him as is, which is precisely what I did.
Bubba’s foot is now in Marcus’ hand, and he has wizardly plans for it, which he wrote about yesterday. (footy) I look forward to seeing what he makes of it. Jack is happy that the fuss is finished, but he still thinks that footprints are meant to be fleeting.
The project is going into its final stage, so I should probably update you on the process some more. So today I am going to write about how the two honing steels were made. Lotsa of pictures follow.
… Pablo Picasso, painted during his early and impoverished years in Paris. This painting was created during what is now known as the artist’s Rose Period.

Famille de saltimbanques, 1905, Pablo Picasso. Image from Wikipedia
… Flowers, by Spanish artist and master of still life painting, Juan van der Hamen (1596-1631)
Because Mondays are always better with flowers.

Still Life with Flowers and a Dog, 1625, Juan van der Hamen. Image from Wikiart.
This year we have snowy winter. The snow came late, but it came in droves. And with plenty of snow also came bramblings, a flock of about 30 individuals. They returned multiple times, and I have managed to get some pictures, although the light was less than ideal.

© Charly, all rights reserved. Click for full size.

© Charly, all rights reserved. Click for full size.

© Charly, all rights reserved. Click for full size.

© Charly, all rights reserved. Click for full size.

© Charly, all rights reserved. Click for full size.
… art nouveau advertising, by Alfonse Maria Mucha
I love Mucha’s style, but that toga looks a bit too formal for feeding the baby.

Nestle’s Food for Infants, 1897, Alfonse Maria Mucha. Image from Wikiart.
… flowers, by Raku Inoue
This Montreal-based artist uses fresh flowers to create images. The pictures below are from his Natura Insects series, and you can read more about it at My Modern Met. You can also visit the artist’s web site, Reikan Creations, or his Instagram page, where you will find even more awesome whimsicality.

Kabutomushi (Japanese Rhinoceros Beetle), by Raku Inoue. Image from My Modern Met.

Black Widow, by Raku Inoue. Image from My Modern Met.

Butterfly, by Raku Inoue. Image from My Modern Met.
… trash, by Portuguese artist Artur Bordalo
I recently discovered an artist who is bringing attention to the problem of environmental waste and, in the process, making treasure out of trash.
Big Trash Animals’ by Artur Bordalo is a series of artworks that aim to draw attention to one of the world’s most pressing problems: Waste production. The overproduction of things like plastics and metals, a general lack of recycling and the ensuing pollution that it causes has a devastating effect on the planet, and we shouldn’t just learn to accept it as a necessary evil.
The full story, along with more photos, is at Bored Panda.

Trash Cat, by Artur Bordalo. Image from Bored Panda.

Trash Bird, by Artur Bordalo. Image from Bored Panda.
… Impressionism, by American artist Robert Lewis Reid (1862-1929)

Girl in Blue Kimono, 1911, Robert Lewis Reid. Image from Wikiart.
… landscape, by French artist Paul Gauguin (1848-1903)
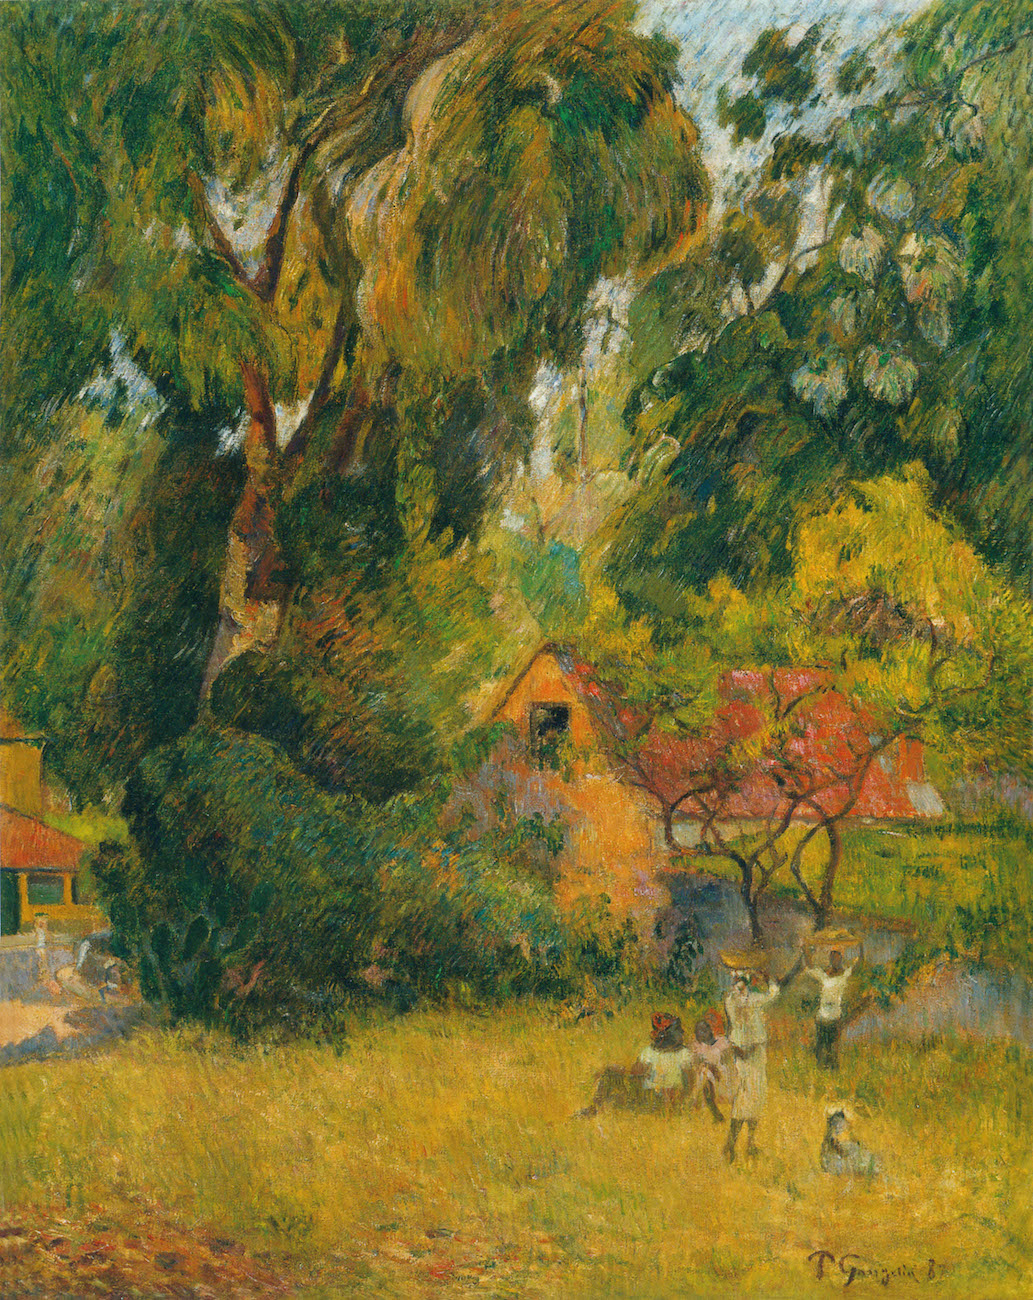
Huttes sous les arbres (Huts Under the Trees), 1887, Paul Gauguin. Image from Wikimedia Commons.
… flowers, by Dutch artist Piet Mondrian (1872-1944)

Amarylis, 1910, Piet Mondrian. Image from Wikiart.
Somebody somewhere in the comment section (I think on Marcus’s blog) expressed dislike for resin stabilized wood along the lines that it is the same as making the handles out of plastic. I disagree. Stabilized wood is a pain to work because it behaves like plastic in that regard, but it does not look like plastic and neither does it feel like plastic in the hand – it feels like wood. And as I was working on this project, I found out that it even sounds like wood – stabilized pieces give out very nice clonk-clonk when hit against each other. I think it might be possible to make musical instruments out of it, but I won’t try.
However, before said wood reaches its desired stabilized state, I have to work with epoxy resin. Lots of it.
I hate it.
It is gluey, it sticks to absolutely everything and it is transparent, so when it drops somewhere it is difficult to see in time. Tools and surfaces need to be cleaned with paper towels soaked in denatured alcohol, which is not cheap and the fumes do not smell exactly delicious. And the work needs to be done fast, because if the epoxy gels, it won’t soak into the wood no more.
With my macgyered vacuum pump I have reached a vacuum of 0,2-0,3 bar, which was sufficient for extremely porous wood, but might not be sufficient for this. Applewood has very small pores and is very hard, even the very decomposed pieces were still harder than for example poplar or basswood. So I have decided to bite the bullet and buy a small, cheap vacuum pump in the hope that it will work better. And it does – and it does not.

© Charly, all rights reserved. Click for full size.
Even with my poorly sealed pickle jar, I have easily reached vacuum 0,6 bar within a minute. The wood released so many bubbles that the resin developed foam head like beer.
However, the pump also got very hot after a few minutes of running, which made me a bit worried. My macgyvered pump was a bit cumbersome and awkward, but overheating was completely a non-issue. I am not so sure about this one. I hope it does not burn out before I at least get to sell some knives.

© Charly, all rights reserved. Click for full size.
Overheating aside, the wood soaked up the resin very nicely and although I have only used clear resin, it developed very nice and pleasant colors. The resin would cure over time at room temperature, but it is possible to speed up the curing by heating it to 60-80°C. So I did that the next day and I baked the pieces for two hours, after which I could appreciate the nice clonk-clonk that I was talking about at the beginning.
I have also approached the issue a bit more scientifically this time and I have weighed all the pieces before and after. Here you can see the results.

© Charly, all rights reserved. Click for full size
This made me very happy with the results. The relatively healthy wood has gained approx 30% in weight, the not-very-much rotten root wood doubled its weight and the more decomposed wood has almost tripled its weight. All pieces of similar size weighed approximately the same after the stabilizing process, irrespective of what wood they were made of. And finally, all pieces when put in water either sunk completely or just barely floated with 99% submerged. So even the relatively healthy wood should be soaked up with resin to sufficient depth.
Now that the wood is stabilized, the only thing that is left is to psych myself up to go into the freezing workshop and finish the knives. Which includes first a bit of grinding and drilling, and then a lot of gluing. Even more fun with epoxy awaits, hooray!