Or: I blame Charly. I wanted to make a jewellery board for a while and had already bought a white mdf board when Charly posted the video about making Ocean Waves Boards. It also coincided with our cleaning up the cellar so I finally had some space where I could work on something a bit larger and leave it for curing. Of course, me being impatient meant I fucked up several ways and had to spend more time fixing my mistakes. Will I ever learn?
First step: Pouring the ocean
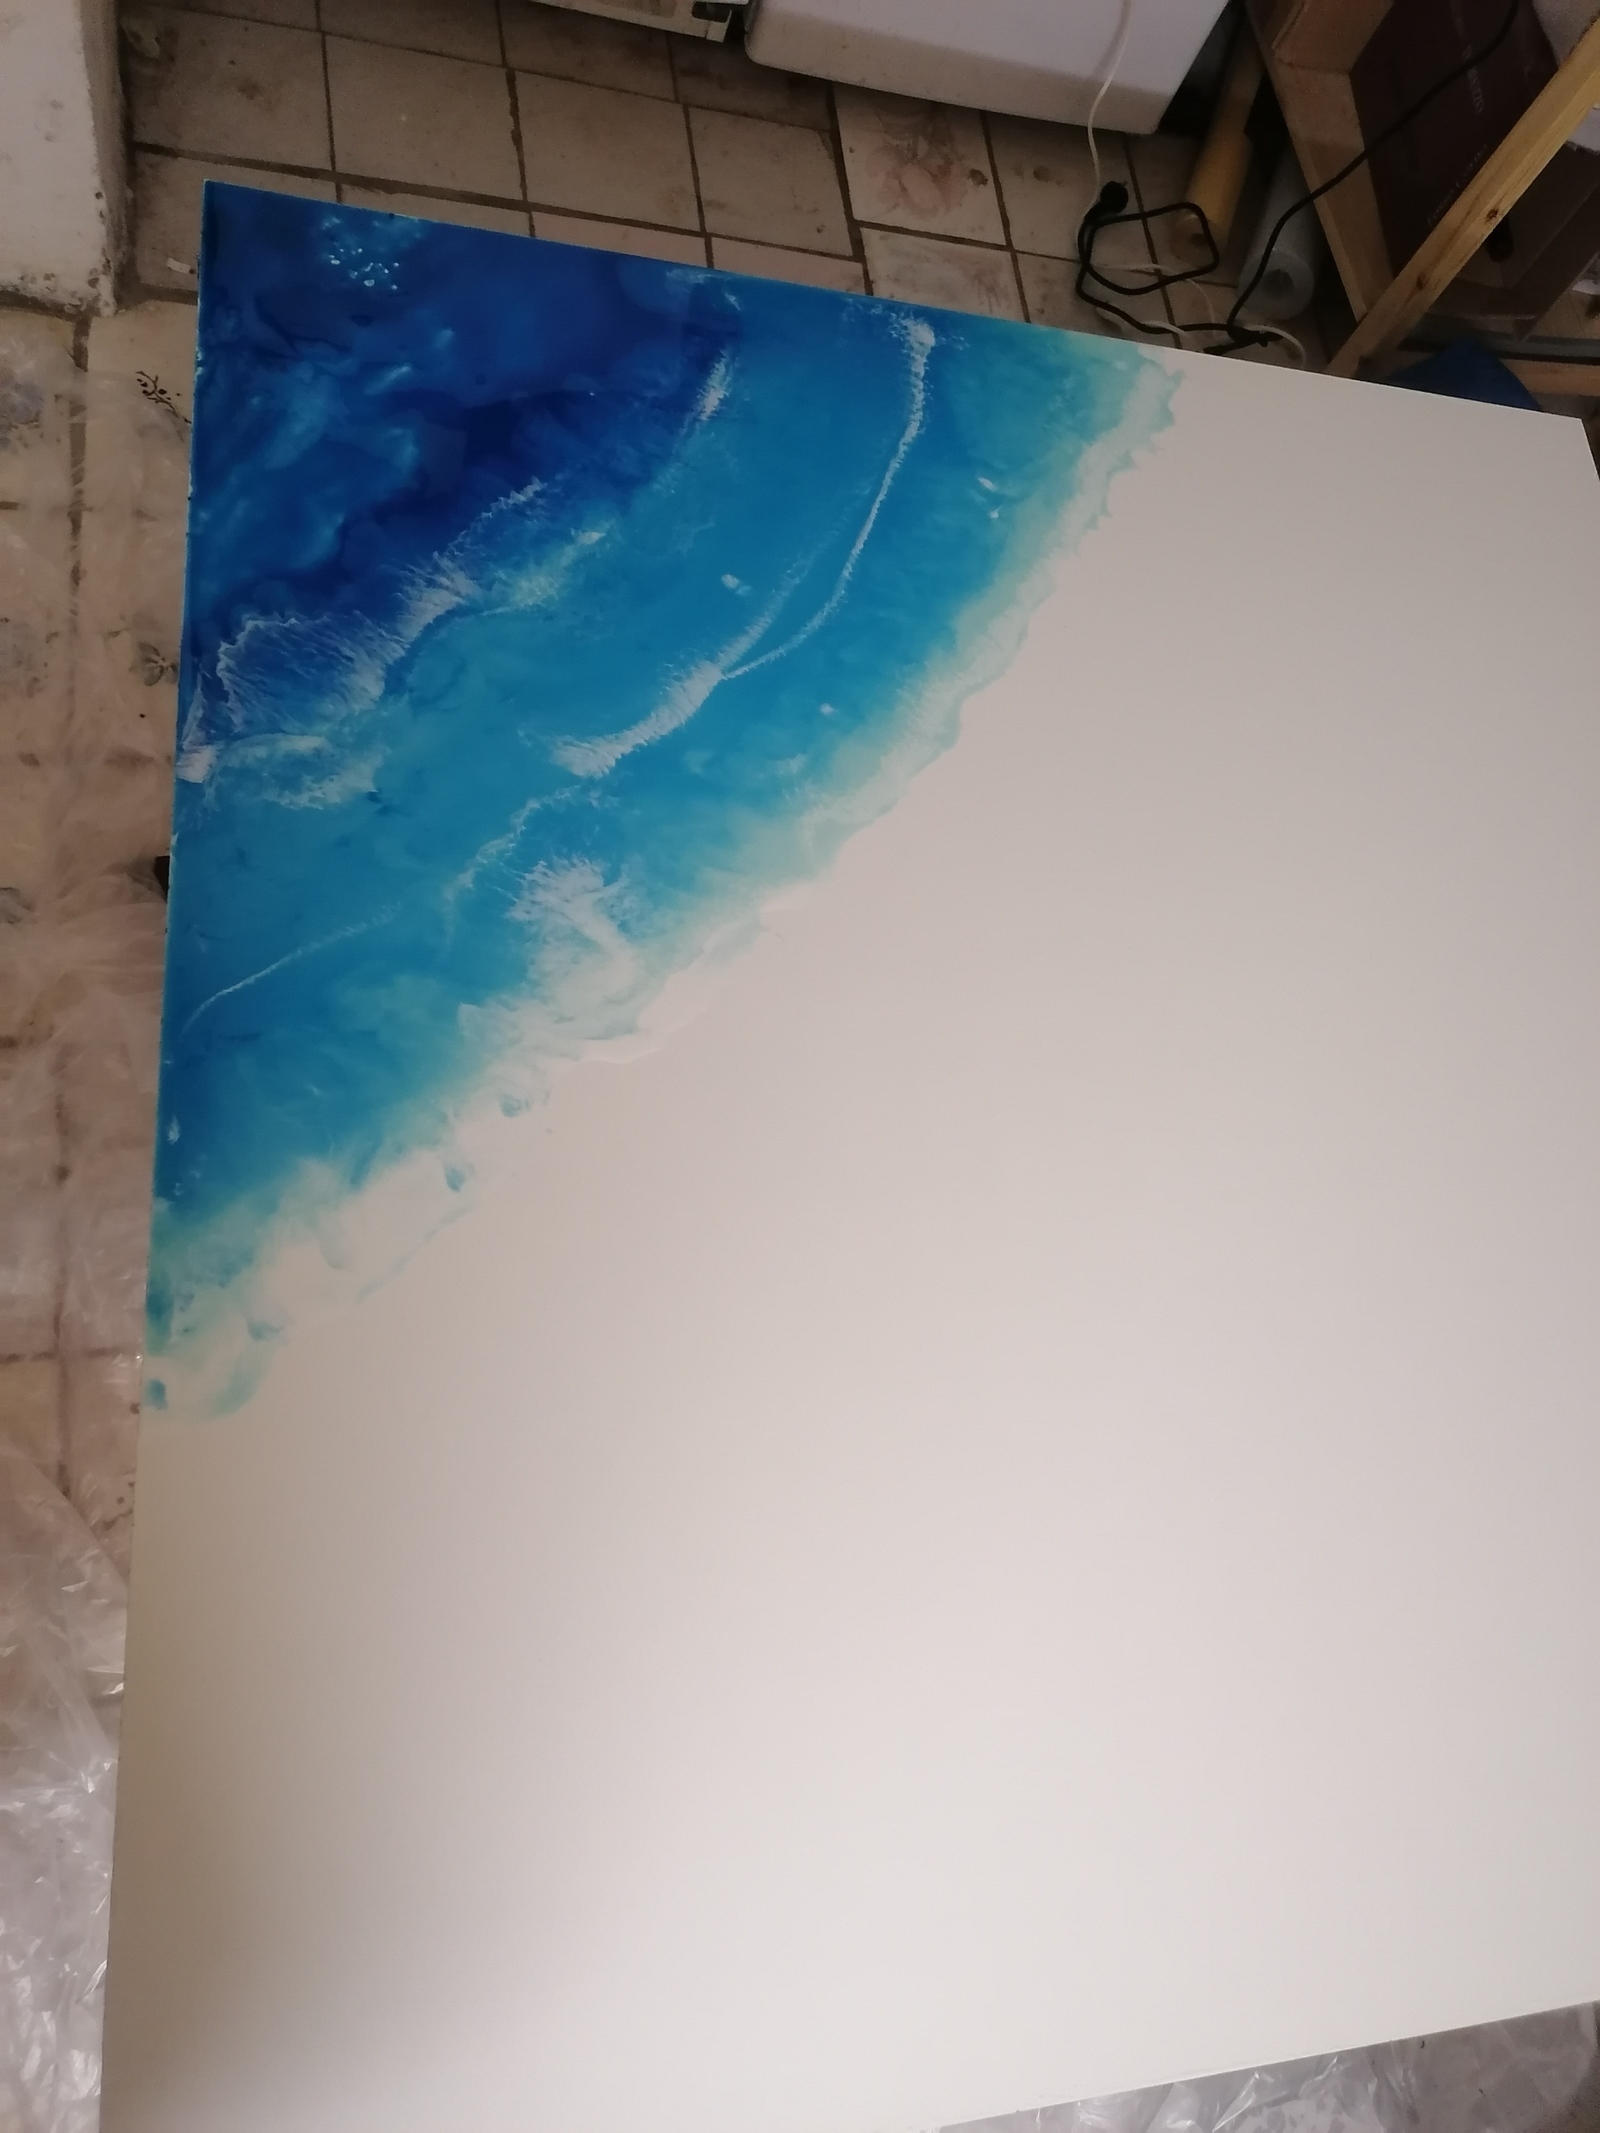
©Giliell, all rights reserved
First of all I forgot to tape the sides and underside, meaning I had to scrape off resin for about an hour once I was done. Second mistake: I should have sanded the surface to create a rougher surface so the resin would stick better. You can see a part in the top left corner where it refused to go at all. And last but not least, I greatly underestimated the amount of resin it takes. I ended up doing a couple more pours, both to extend the “sea” area as well as adding a “beach” because I didn’t like the white. I also painted the cleaned off sides. During that time I also created the knobs that would be added to the finished board and also the parts meant to become a little shelf for earrings.
When all that was done it was time to drill holes.
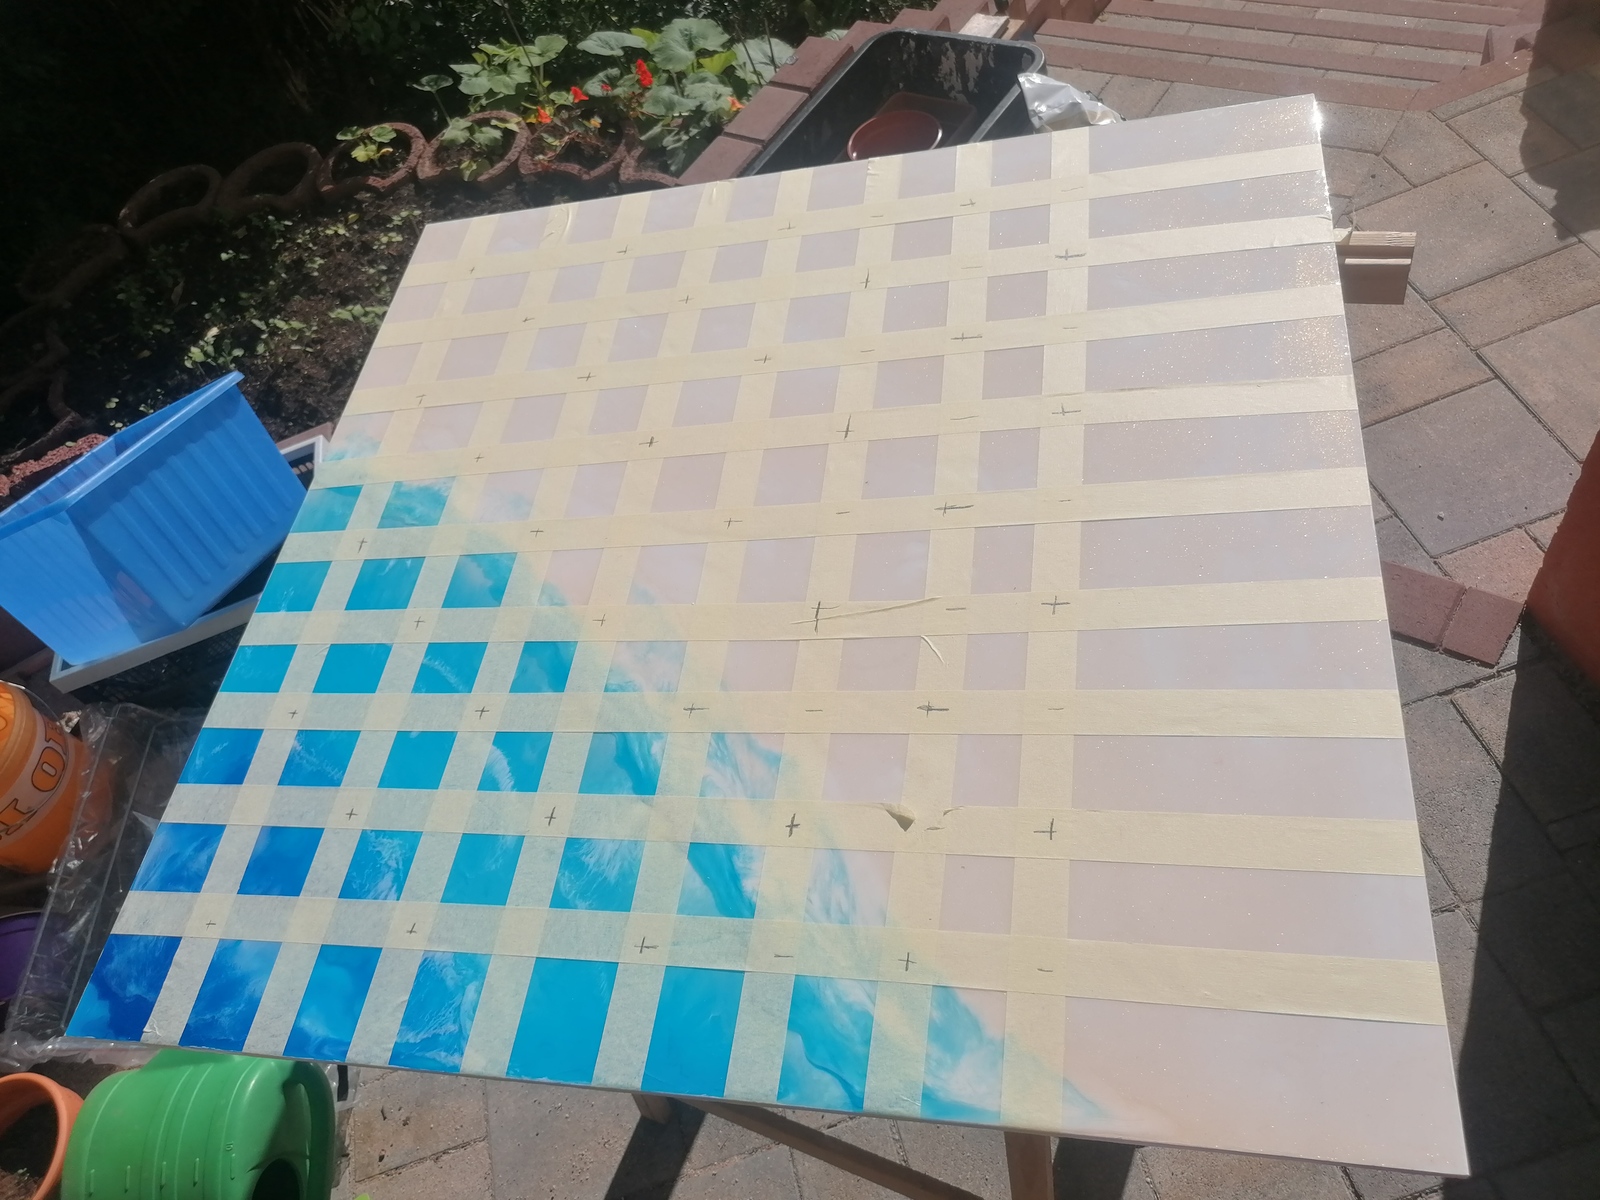
©Giliell, all rights reserved
That wasn’t much of a problem, but when I removed the painter’s tape I was in for a surprise…

©Giliell, all rights reserved
Something had reacted with I don’t know. Sunlight? Heat? Glue? I decided to leave it and do something else. Thankfully when I returned in the evening the stripes were gone.
Now to the “knobs”. A while back I made a pebble mould. I first covered some pebbles in UV resin to get a shiny clear surface and then embedded them in silicone. The resulting mould works really nice (except for one or two of them), but making the knobs takes time. I put some seashells into the moulds and added clear resin. Once that’s hard (or at least hard enough not to mix) I add a layer of opaque blue. This has to be pretty hard for the final layer where I add a bolt. The mould makes 10 at a time, so you can guess how long it took me to make enough for the whole project.
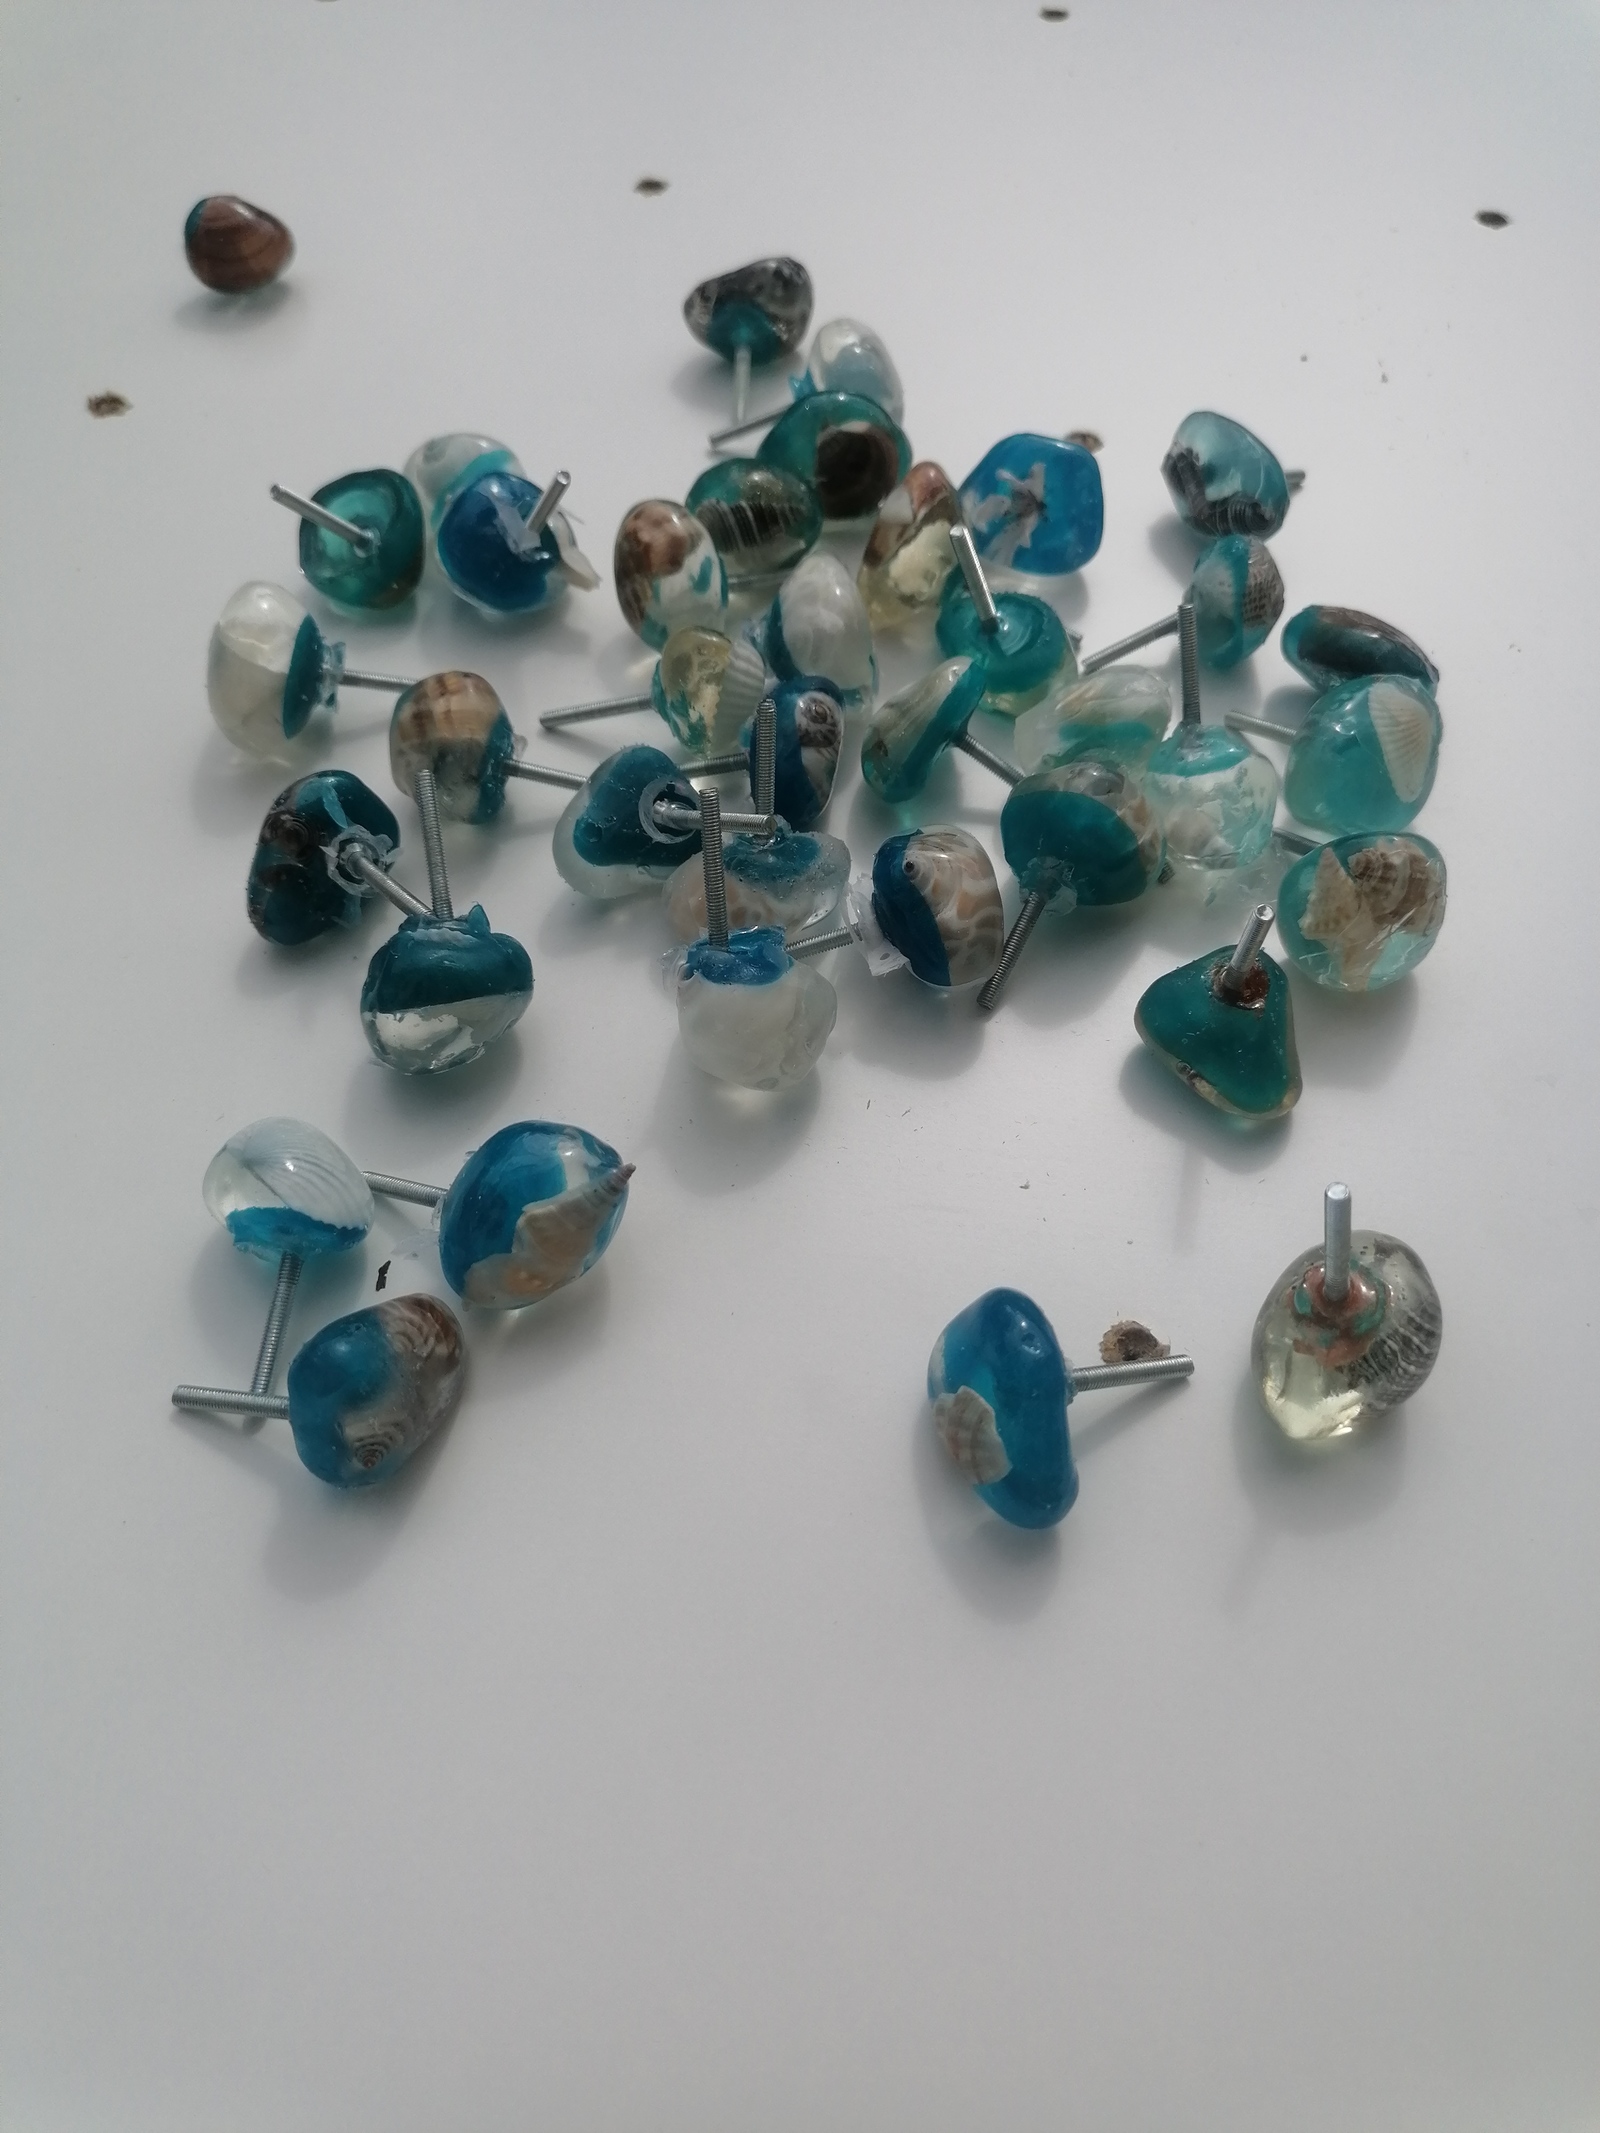
©Giliell, all rights reserved
The bolts are also pretty long. I couldn’t always say exactly how deep they would be embedded into the resin so I chose them a bit longer than necessary. I widened the holes on the back of the board so they’d fit the nut, screwed them tight and then removed the excess bolt with the angle grinder to create a flat surface, because after all it is supposed to lie flat against the wall, right? Then i sealed the back again with resin so everything would be fixed and also because the angle grinder did some damage to the back. The top left and right holes didn’t get one of those bolts. I made some big screws with the same technique that would be used to mount it on the wall.
Next step was the shelf, which is where I messed things up delightfully. Yeah, crafting is a good way to relax when you’re stressed out, but it’s also a really good way to make mistakes. The original board was 103 X 140 cm. I told the nice person in the DIY store to cut it to 103 X 100 and to cut me two 10cm boards from the rest. Question: How wide are the 10 cm strips? Exactly, they’re 103 cm. But smartass me didn’t pay attention to which side was a bit longer or shorter when I did the rest and I ended up with the 100 cm wide side at the bottom. And I couldn’t just turn it 90° because of the holes for the screws. Which means that the shelf is no 3 cm wider than the board.
And because that’s not enough, I managed to glue the two sides of the shelf together double wrong, with the ugly side of the drill holes to the front and the wrong board on the outside. This could be solved by just putting it on the other way round, but now my front was ugly and I did a resin pour there as well. That one actually turned out nicely, though I must caution against painter’s tape to seal the edged, do use gaffer tape.
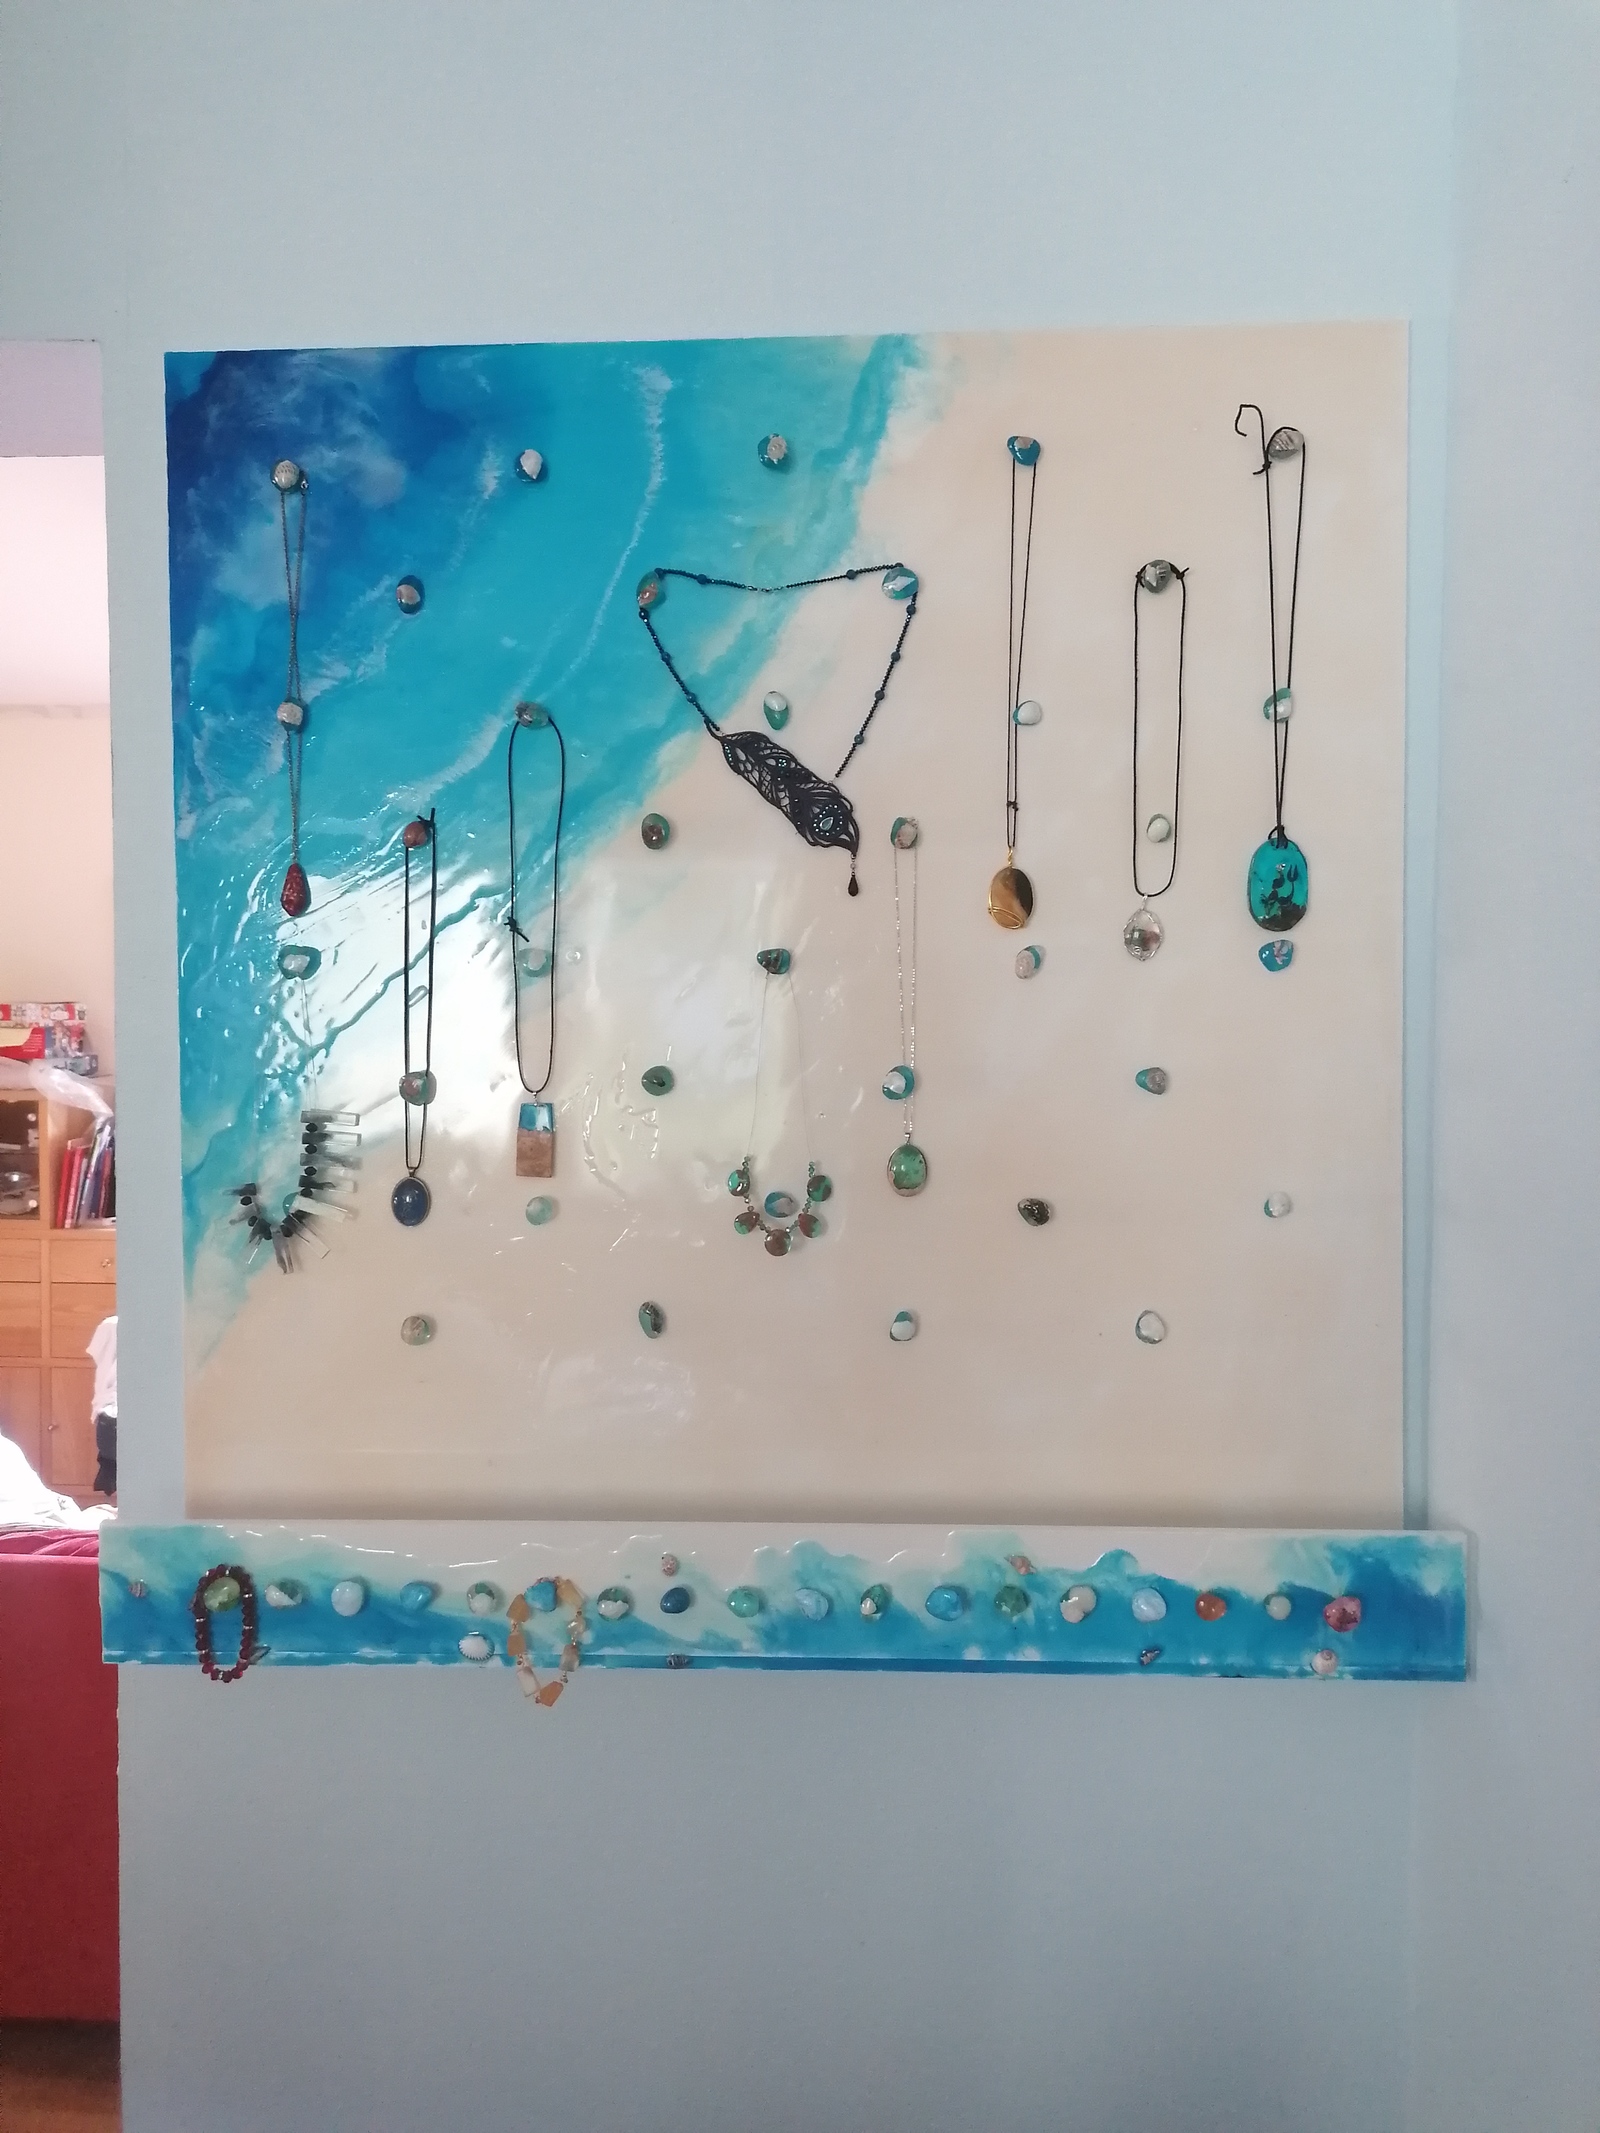
I attached the shelf with some metal angles and then all we had to do was mount it to the wall.
And despite all the frustration and mishaps, it was really worth it.

©Giliell, all rights reserved
And yes, the board hangs exactly right. It’s just that the people who built our house didn’t want to have anything to do with those newly invented “right angles bullshit”.

©Giliell, all rights reserved

©Giliell, all rights reserved

©Giliell, all rights reserved

©Giliell, all rights reserved
Getting a pic of the knobs is near impossible because the curved surfaces reflect light in any odd way.

©Giliell, all rights reserved
Still not perfect, but nobody will notice. I#ll still have to sew a cushion for the inside for my earrings, but I already started to put necklaces and bracelets on.
©Giliell, all rights reserved
Looks really good!
The knobs are a great idea and they came out great!
It turned out fantastic. I loved that idea too, of the ocean pour, this is a great use of it.
Awesome!
If you did not tell otherwise, I would assume that the shelf wider than the background plate is intentional, I think it looks better that way.
It is an interesting idea and it looks awesome, a piece of art in itself.
It looks wonderful, I love it! I wouldn’t be surprised if you get asked to make versions for other people.
Fabulous!