I’m done with seeking out spiders in their natural environment, for a while. I’m keeping an eye on a few outdoors (Jenny By-The-Front-Door still lives, despite the recent snow, and there’s a nearby compost bin I have my eye on), but mainly I’m settling in for a winter of laboratory observations now. So here’s a quick review of how I’m raising my spider family.
Last year, I relied entirely on keeping spiders in clear plastic tubes, 30mm dia. x 95mm, which is a standard in all the fancy real spider labs. I bought a box of them in bulk from a wholesaler for about 12 cents each, so I’ve got lots of these, and they work pretty well. You can just load them up into a test tube holder and fit a bunch of racks in an incubator.
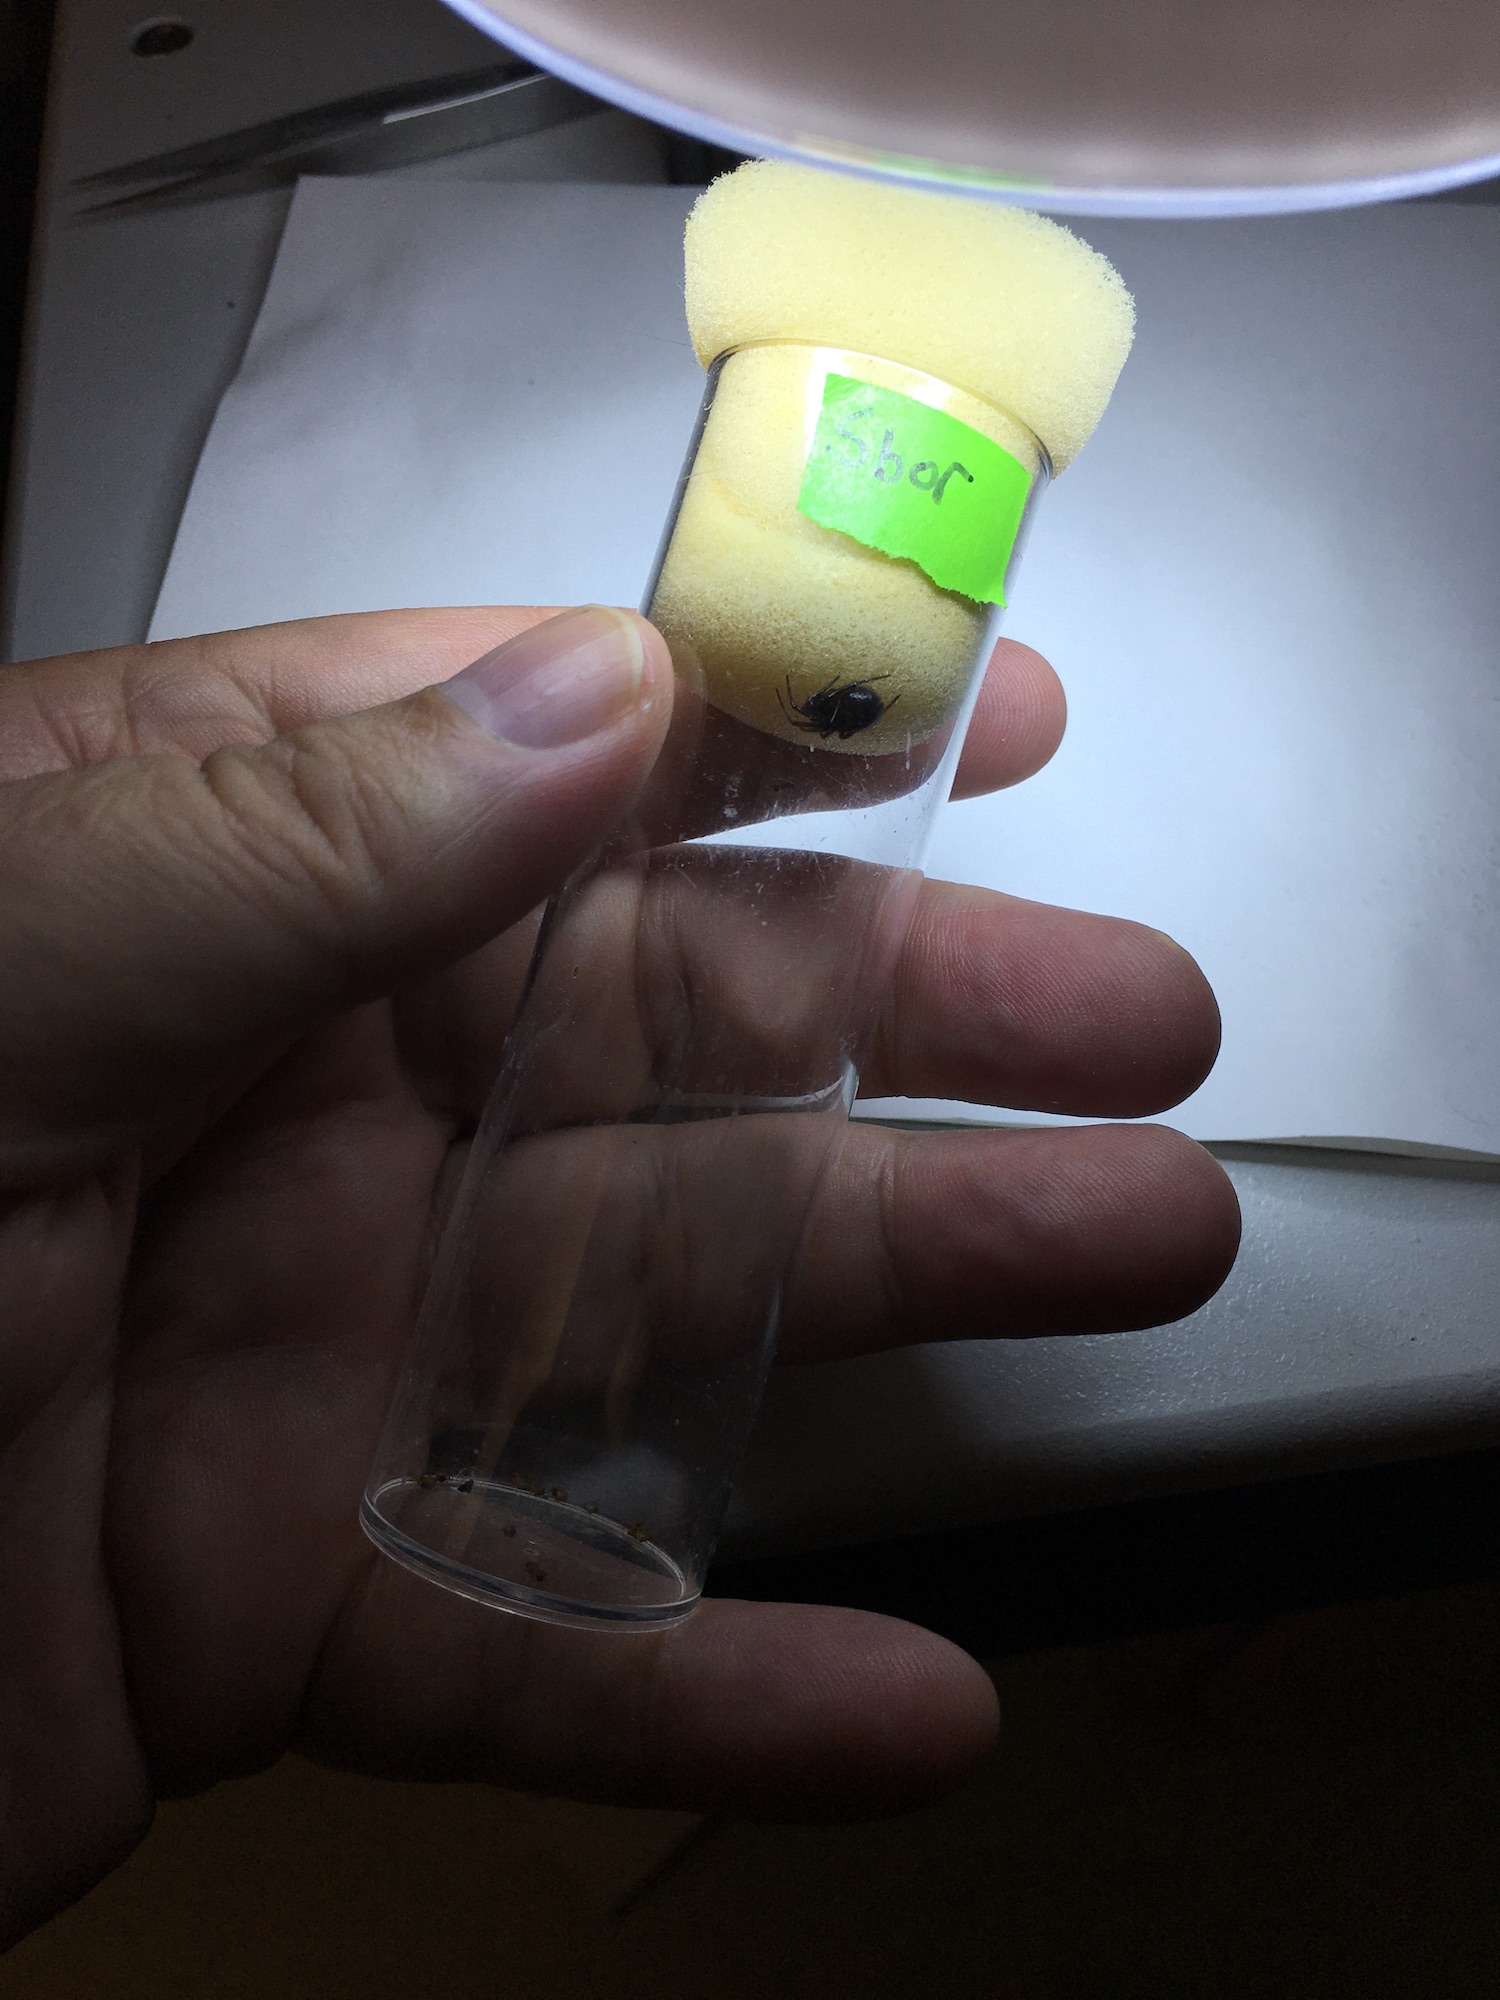
There are a few downsides, though. They’re unsatisfactory optically — shooting through curved plastic is less than optimal, and the reflections alone are messy and distracting. One project I’m starting now is to photograph pigment patterns in developing spiderlings, and they’ve been awkward. Also, these are worrisome for adults, who just seem stressed at the cramped surroundings, and they won’t tolerate sharing their space with other adults (a mate, for instance), so I feel like I’m going to be seeing damaged behavior, and behavioral studies are on my to-do list. I’m still using them, but as soon as the spider is big enough that I want to plan more elaborate studies, I move them to roomier housing.

Much roomier, like these sterilite clearview 4.7L boxes, which you can pick up for $38 for 12. They take up much more space, but they’re at least stackable, so it’s easy to have about 30 (and more soon) on a benchtop. I also put crude cardboard frames inside, which gives the spider structures to clamber on and corners to hide in. They seem much happier — or at least, active and interactive and cooperative — in these bigger spaces. They’re also great for photography, because I can open it up and lift out the frame and maneuver it to get a good angle on the occupant. Their webs are mostly strung on the cardboard, so it’s like you can just pick up their home and move it around with minimal disturbance and easy access.
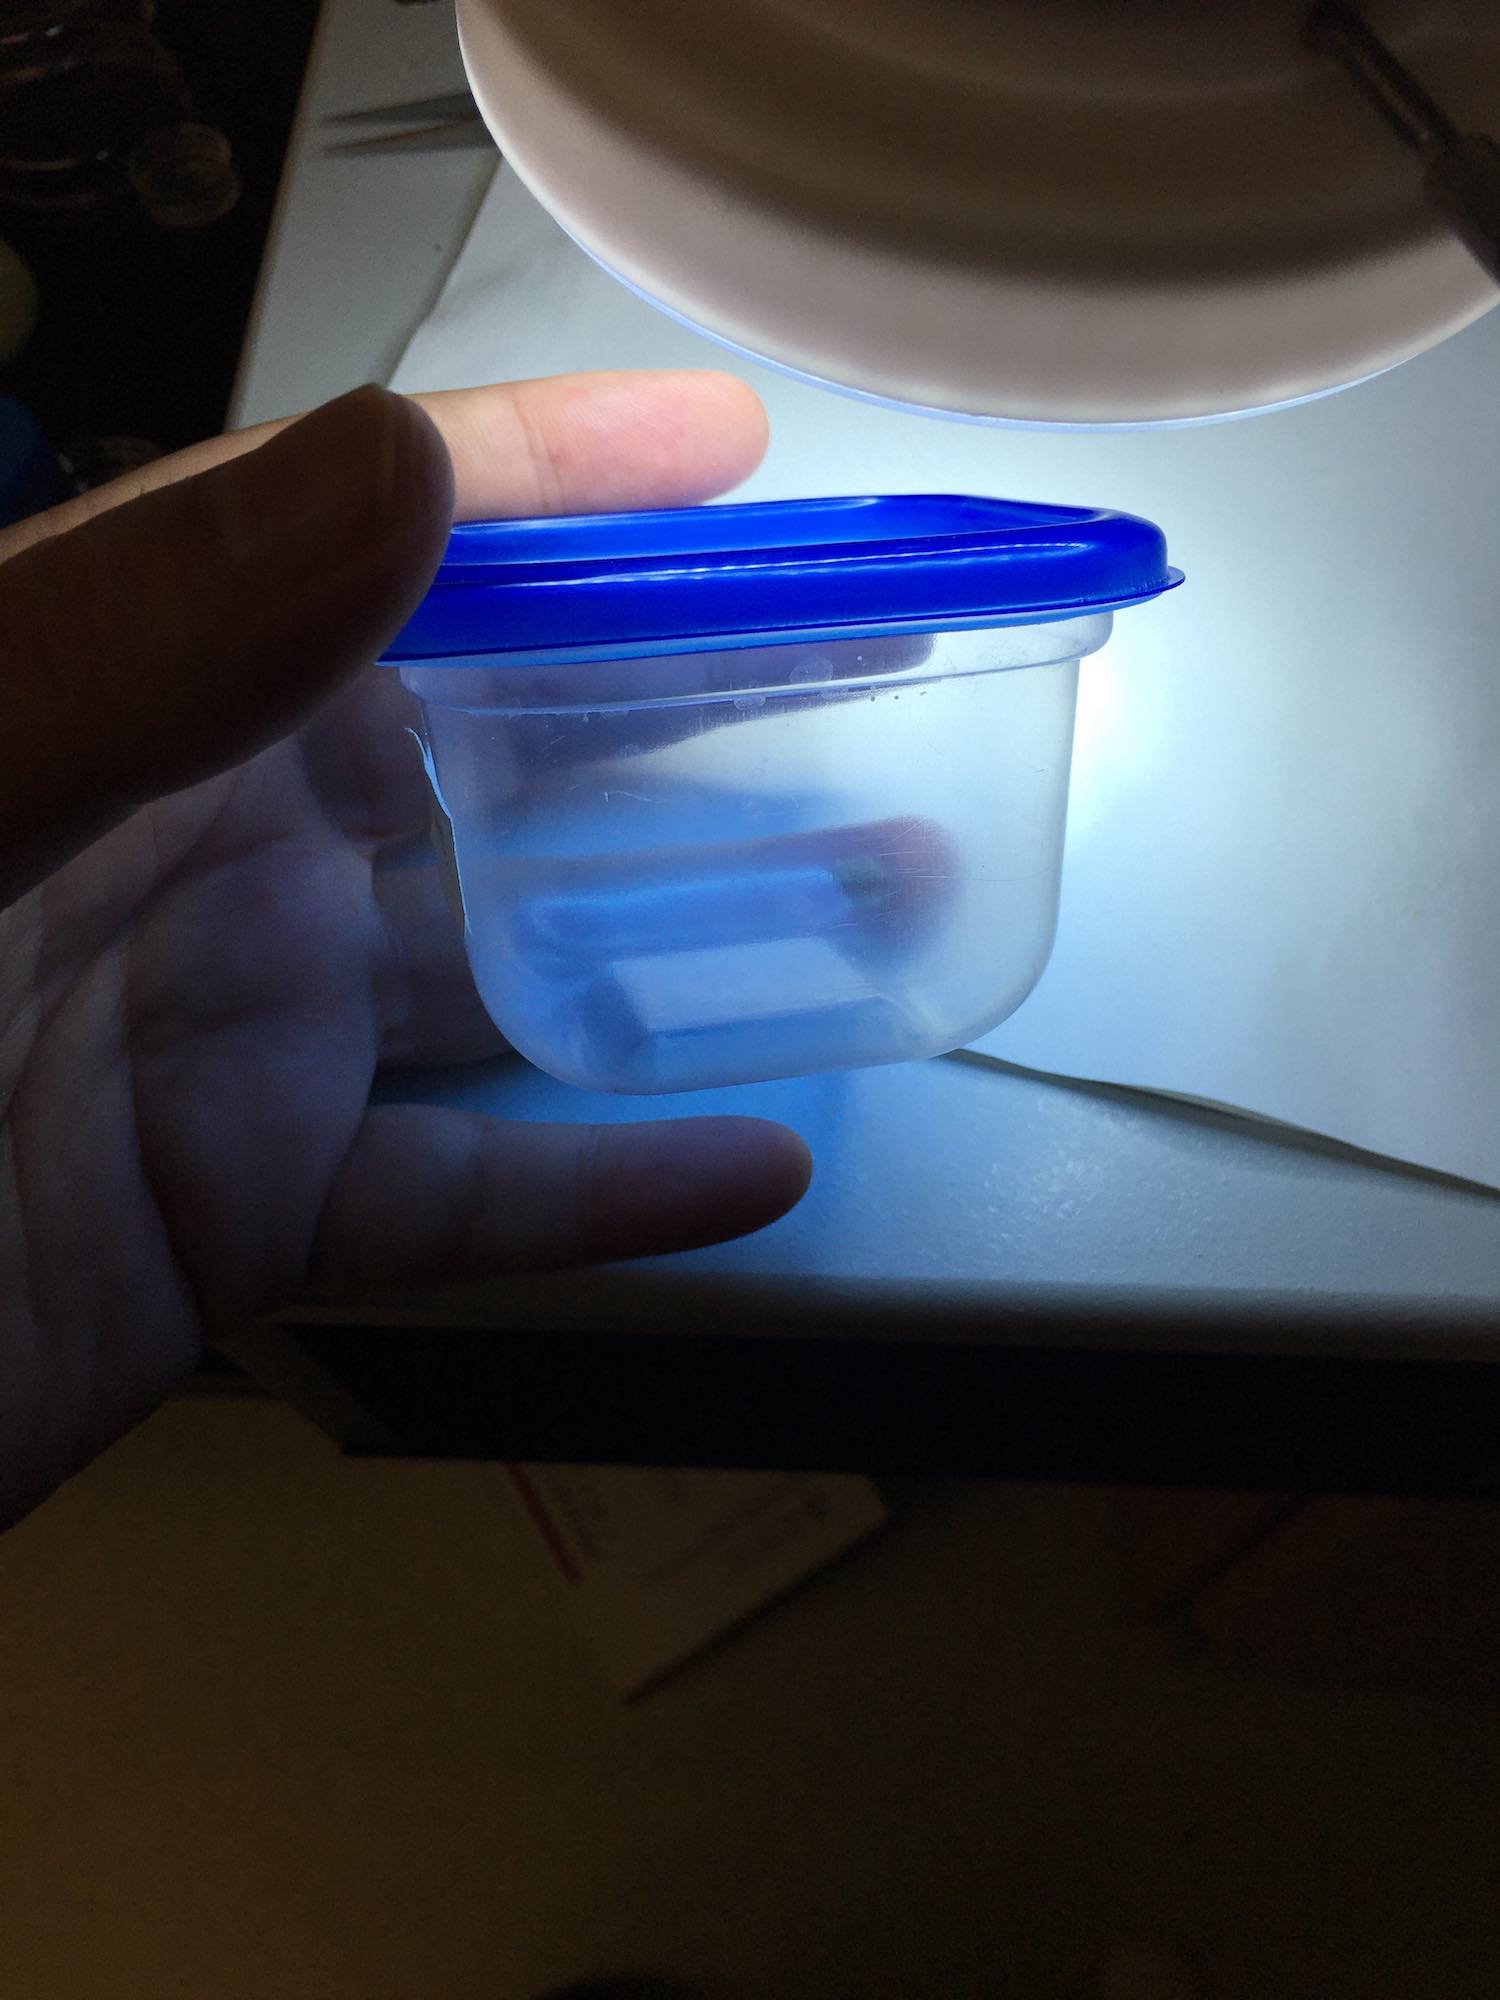
But then the first egg sacs started hatching, with over a hundred spiderlings from each. It was too much for the tubes! I tried something different, picking up a bunch of these small ziploc disposable containers, 8 for $6, from the local grocery store, and had stacks and stacks of these full of baby spiders (I still do!). They were OK as a stopgap measure, but they also have major deficiencies. They’re somewhat opaque, so you can’t see the spiders inside — you have to open them up. Photographing them inside is disastrous, with this weird bluish lighting to everything that looks exactly like chromatic aberration. I suppose I’ll keep them around because when an egg sac pops, I’m looking desperately for something to contain them all. They aren’t recommended, though, unless you’re in a rush and need something available locally for cheap.
I’m trying some other options now. One are these flat boxes, $14 for 24, which aren’t exactly clear, but since they’re so shallow it’s fairly easy to pop them open and there is the spiderling, in roughly one flat plane, making them easier to photograph. I don’t care for the tint the plastic confers on the images, though, but they do conveniently stack in the incubator.
![]()
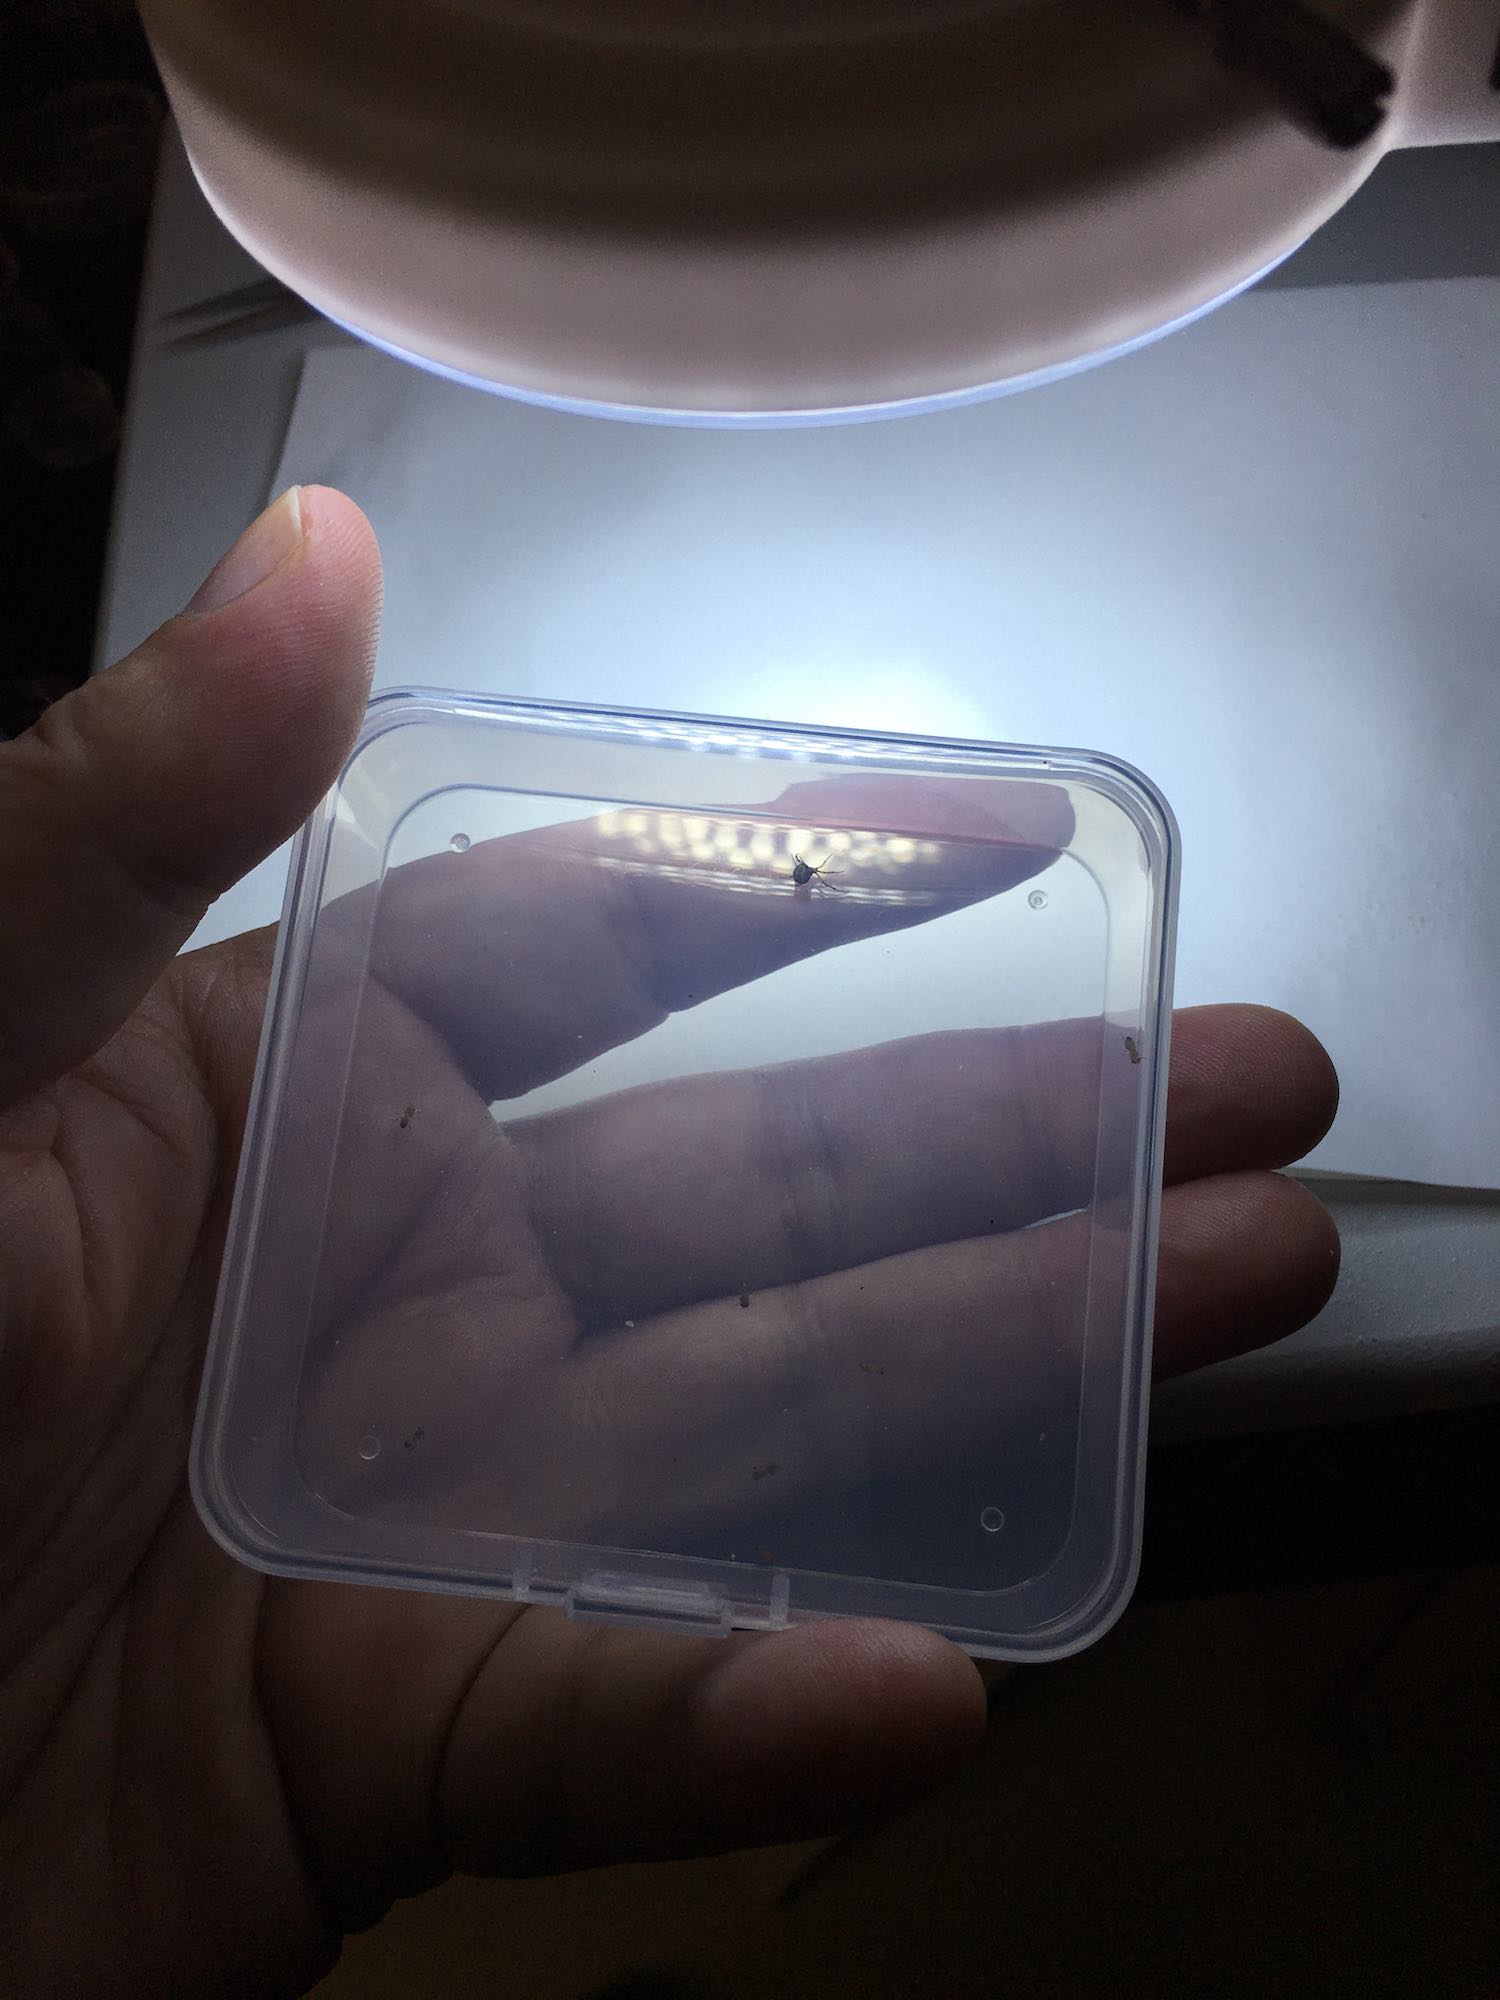
The other thing I found were these clear boxes, $12 for 16, which are a bit roomier than the tubes for the spiderlings, and has the advantage that you really can see everything going on inside, and I had hopes that I’d be able to rotate the cube to photograph spiders at any angle…but realistically, this is not glass, it’s fairly thick plastic, and it adds all kinds of distortions to the image. What I do now is pop the lid and photograph them from one angle. That works well! I like these a lot. You could also do behavioral observations easily — it reminds me of the time I was working with jumping spiders in grad school with Michael Land, and we kept them in these clear acrylic boxes we picked up at a craft store. You can see in, they can see you, and you can present all kinds of visual stimuli to them.
Easy tips here: I’ve complained before that baby spiders scamper wildly, making it hard to track them and photograph. But that’s only true if you’ve disturbed them and moved them to a new container. Normally, spiders are mellow and relaxed, just hanging out in their webs, so if you aren’t poking at them or chasing them with a paintbrush they’ll just rest there and you can take all the pictures you want. I just pick up one of these clear boxes, open the lid, point my camera inside, and they’re like supermodels happily voguing for me.
Another trick: normally, they rest upside down in their webs, which is annoying if you’re trying to photograph pigment patterns on the dorsal abdomen. The easy solution is to store the boxes upside down, that is, lids down, and then gently pick it up, rotate it, remove the lid, and the spider will be perfectly casual about its new orientation for a little while, and you can snap your photos.
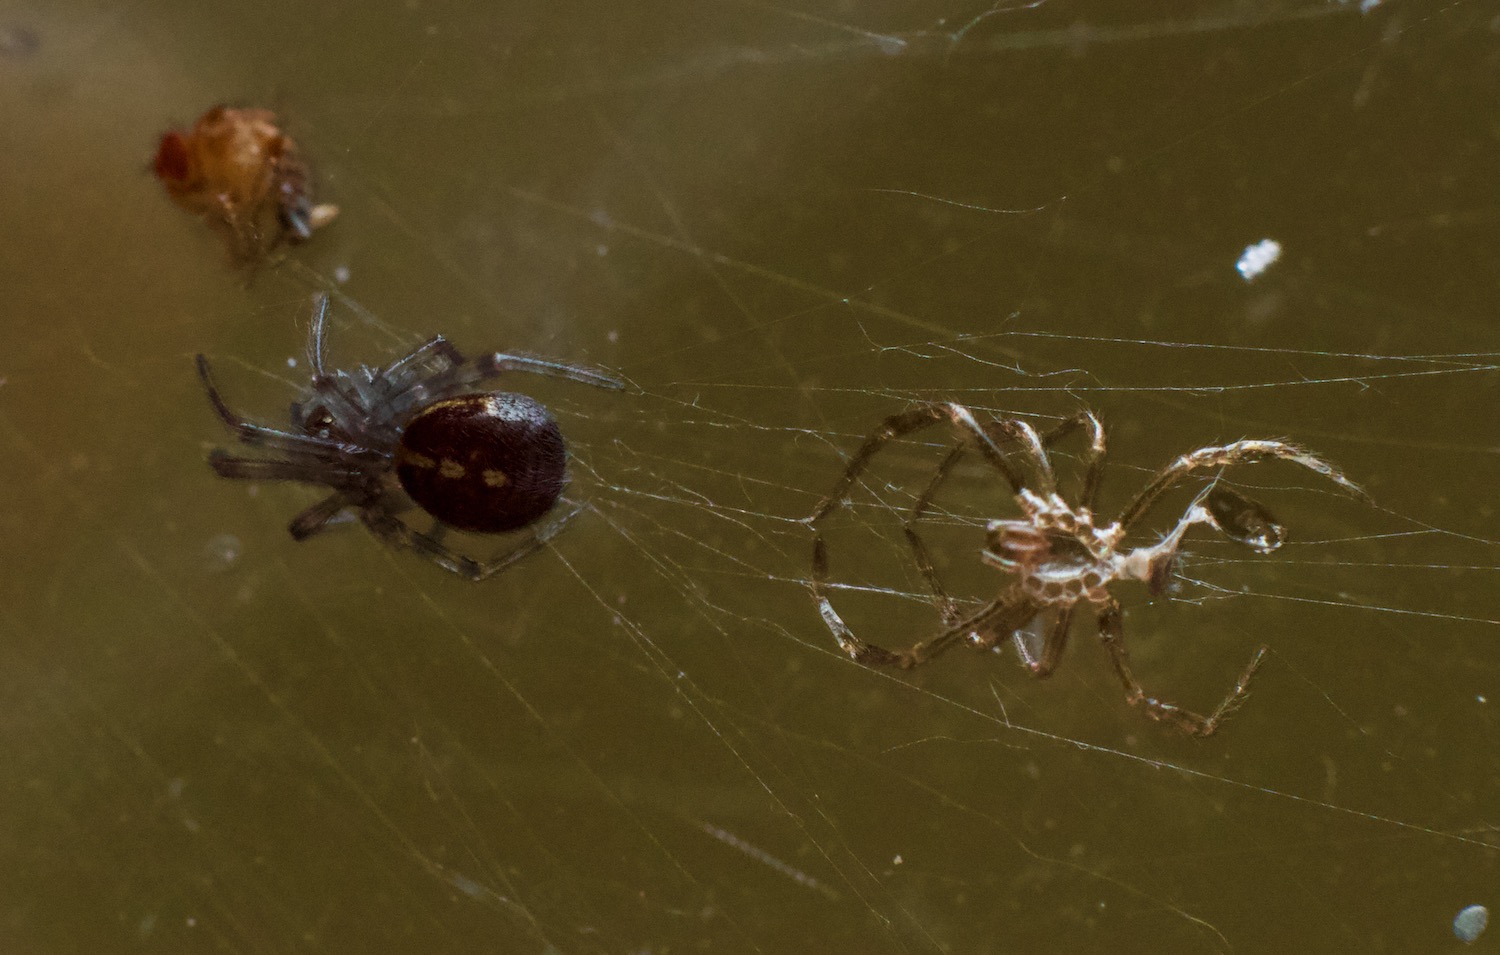
Here, for instance, is a young Steatoda borealis juvenile, dorsal side up (yay!), also with its recently shed cuticle near it. It has a prominent stripe along the dorsal midline; that recedes as they grow older, and big, fully mature adults may look like their abdomens are a solid purplish black.
This is a Steatoda triangulosa juvenile, also dorsal up. You can see the parallel zigzag stripes on each side of the abdomen.

I’m feeling comfortable with coming in routinely and getting reasonable images of pigment patterns, and with keeping young spiders happy and alive. Next step: I’m waiting for egg sacs for three spider species to hatch, so I can tuck them into these individual containers and do some daily tracking of the changes in their pigmentation, while also mapping out pigment variations, now that I’ve got the tools to do it all. Mostly. I’m still pining for a macro lens with a little more magnification.
I just need the time to do it all…

I’ve recently taken to photographing small things, spiders included, with a new lens. I’ve found that if you approach spiders in the wild too fast, they tend to scamper away to the edge of their web, probably in anticipation of some poor sap walking through the web and sweeping the spider along with it.
They’re shy in the lab, too. You have to roll over the container carefully and avoid bumping any of the cobwebs, or they scurry off to a new location.
It’s really neat to see the holes its legs popped out of when it shed the cuticle. It looks like it could just pop right back in if it wanted.
The latest ologies podcast is about spider silk. I think the one before that was just spiders.
I recently got some food in a take out container that looks like it might work well for what you need?
Not having much luck finding the specific model/type/whatever, but this looks reasonably similar:
https://www.webstaurantstore.com/16-oz-square-recycled-pet-deli-container-pack/999EV116.html?utm_source=Google&utm_medium=cpc&utm_campaign=GoogleShopping&gclid=EAIaIQobChMIrPzI75Sg5QIVi8BkCh3iYgSJEAkYBiABEgJXnvD_BwE
Do you have to purchase all of this personally, or can you order some of the supplies through the university by whatever sorts of methods they may have available?
@lochaber – Curved, plastic surfaces = distortions. No bueno.
@PZ, #2 – On the other hand, I have a very small one that has taken up residence behind my kitchen sink faucet who just sits there and watches me wash dishes. Its pretty small, maybe 2-3mm fully splayed out, and even with my 100mm 1:1 lens, is hard to capture in any sort of detail.
There are “ultra-macro” lenses that can do up to 5:1 magnification, but have an abysmal depth of field, on the order of < 1mm @f/16.