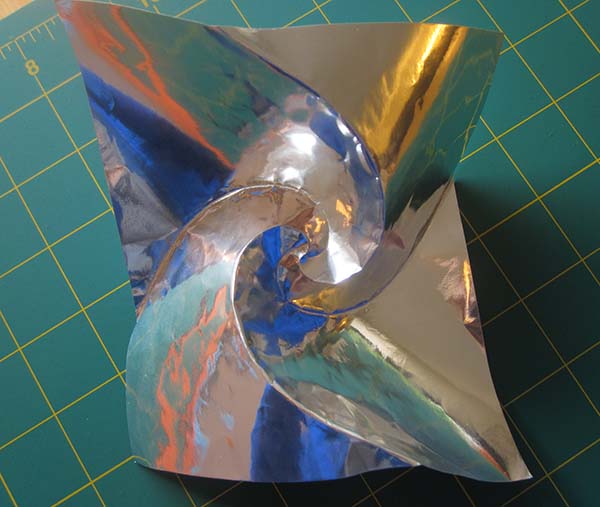
Four 45 degree spiral creases
This is going to be one of those origami posts where I talk way too much about math. But before I get to the math, I will explain how you can make one of these things entirely with ordinary arts and craft tools.
“Ordinary tools” is the relevant bit here, since my understanding is that experts in curved-crease origami don’t use ordinary tools, they use things like vinyl cutters. When I first tried making these, I could not find any instructions for how to make these models using ordinary tools (I later found an article by Ekaterina Lukasheva), so when I finally figured out a method, I wanted to share it.
Making a template
Before we draw the creases directly on the paper, we need to make a template. The template ensures that each of the four curves are identical to each other.
There are several ways you can make a template. My method is to take a thick piece of paper (card stock), draw the desired curve onto it, and then cut it out. Ekaterina Lukasheva also suggested using a French Curve. Personally I don’t like the idea of a French Curve because I want to know what kind of mathematical curve I’m drawing, but I’m sure the French Curve suffices.
Here I’m going to explain how to draw a logarithmic spiral on a piece of paper. Why a logarithmic spiral? Because I know a logarithmic spiral will work, whereas I’m not sure about other kinds of spirals. You can, of course, just go and look up a logarithmic spiral and then print it onto your paper. Here’s a spiral I generated from an online calculator, using a = 2.71828. Feel free to use this one.
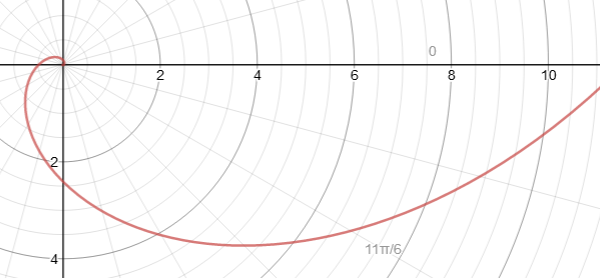
This spiral has a pitch of 45 degrees.
But you can also draw a logarithmic spiral using a ruler and pencil. To do this, I first cut out a wedge in the blue shape shown below. The length of the wedge should be at least 75% of the length of your origami paper. The “pitch angle” can be any angle, but I strongly recommend trying an angle of about 45 degrees first. I draw the wedge using a protractor, but you can just approximate if you don’t have one. (Larger angles work too, but sometimes smaller angles will not fold.)
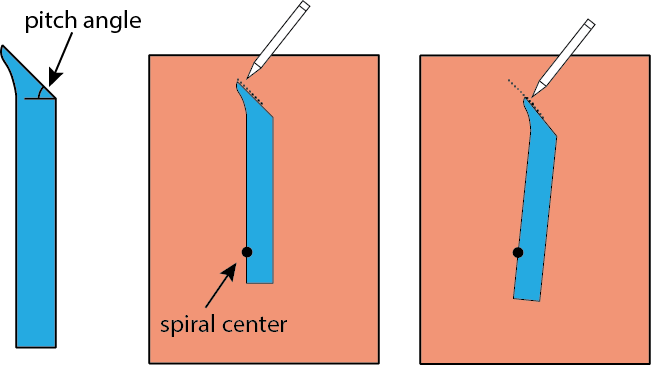
Next, we take a separate piece of paper, and draw a big dot on it to indicate the center of the spiral. We place the wedge onto the paper such that one of the wedge’s sides intersects with the spiral center. Then we draw a small line segment, which is a piece of our spiral. We continue drawing the spiral by adjusting the wedge just a bit (keeping the spiral center intersecting with the wedge’s side), and drawing more connecting line segments. Technically a logarithmic spiral will never reach its own center, but you can go ahead and connect the spiral to the center when you get close enough.
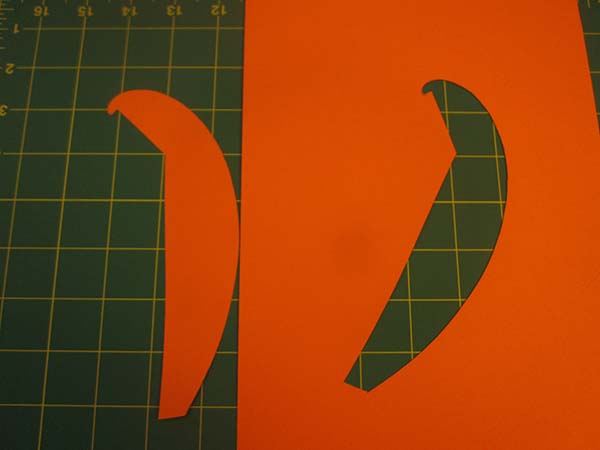
Finally, we cut the spiral out. I use an Exacto knife, but you can use scissors too. Make sure that the piece you cut out has the spiral center clearly marked.
Tracing the spiral
Next, we need to trace the spiral onto the origami paper. You should pick origami paper that’s light in color on at least one side, so you can make visible pencil marks on it. Use your pencil and ruler to draw the horizontal and vertical bisectors of the square. Then you place your spiral template onto the origami paper such that the spiral center is in the center of the square.
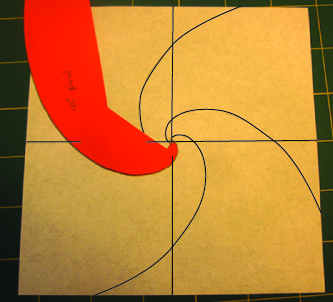
I’ve digitally traced over this photo to make the pencil marks more obvious.
The tricky part is to draw several spirals that are equally spaced from one another. What I do is I mark the template where the bisector lines meet the edges of the template. Then, when I rotate the template 90 degrees, the bisector lines meet the template at the same points.
Of course, this is assuming that you’re drawing only 4 spirals. You can draw any number of spirals, as long as there’s an even number, and at least 4 of them. But the geometry might be a bit trickier if you do more than 4.
Once we trace the spirals using pencil, we take away the template, and trace over the spirals again, now with a scoring tool. I used to use a ball point pen, but now I use a stylus that was originally intended for ceramics. You score the paper by tracing the spirals while pressing hard on the paper. Make sure that you have something behind the paper that can handle the pressure! I wouldn’t want people making marks all over their library books, or poking holes through their paper.
If you’ve scored the paper correctly, you should still be able to see the score marks when you flip over the paper.
Creasing the paper
Once you’ve finished scoring, you’re nearly done. With some coaxing, the paper should fold along the score marks.
To fold the paper, it’s important to keep in mind that the creases should alternate between mountain and valley. Furthermore, the paper between the creases is also curved, alternating between concave up and concave down. One way to make the fold is by pinching the crease, just a little bit at a time. Another way to make the fold is by applying pressure so that the paper on one side of the crease is concave up, while the paper on the other side of the crease is concave down.
It’s quite difficult to make the creases near the center of the paper. Just start from the outside, work your way towards the center, working over each of the creases multiple times.
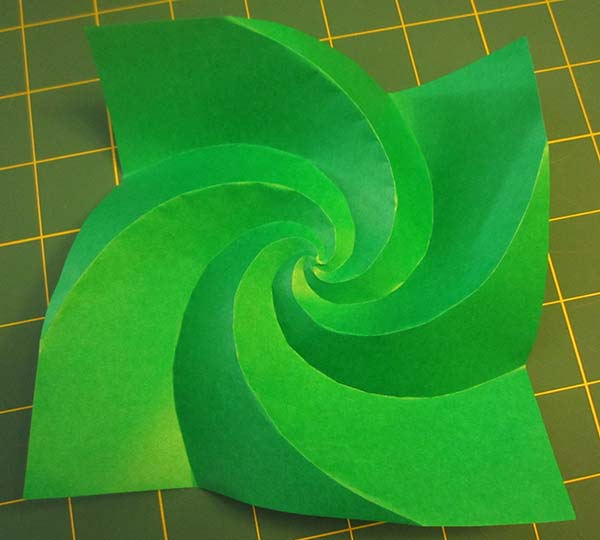
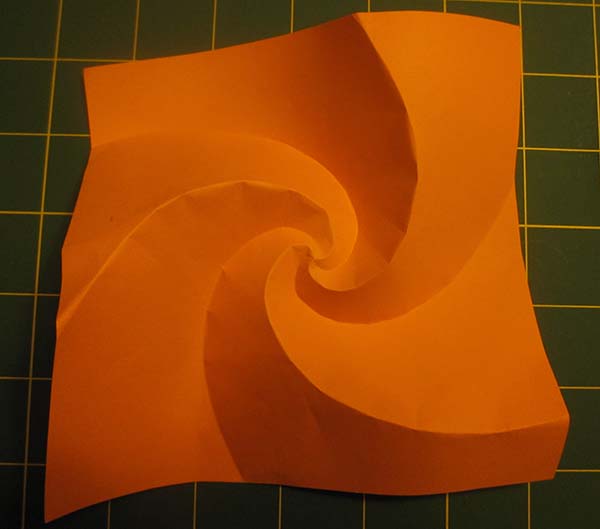
That’s the end of my instructions. Here are some more spirals (I made a bunch of them).
Now for the math…
Curved-crease origami is mathematically very complicated. There are a couple papers by Erik Demaine that describe some of the rules, but I feel like this is still only scratching the surface. I’ll pull out a few highlights from those papers.
If we consider uncreased paper (i.e. the behavior of the paper between creases), the paper can always be divided into two types of regions. There are planar regions, and curved regions (Demaine calls them parabolic regions). Mathematically, the curved regions are a kind of ruled surface. A ruled surface is a surface that can be decomposed into a set of straight lines (called rule segments).
Hypothetically, if you traced out all the rule segments, and unfolded the paper, then you would have a bunch of straight lines, each drawn from one crease to another crease. The rule segments never cross over one another.
Now, part of the reason I was interested in these spiral creases, is that in some ways, these are just about the most mathematically basic example of curved creases. I chose logarithmic spirals because they even have scaling symmetry; if you shrink down the paper and rotate it a little bit, you get the same pattern as the one you started with. The scaling symmetry greatly simplifies things, and I hoped that the problem would be solvable. (Also, I tried a freely-drawn spiral first, but that didn’t work.)
But I still could not solve this problem. Basic question: Is the spiral mathematically possible, or does it require stretching the paper just a tiny bit? I don’t know! Basic question: What angle do the rule segments make with the creases? I don’t know!
One thing I discovered from experimentation, is that sometimes the spiral doesn’t fold, especially when the pitch angle is too small. Here’s one that uses a small pitch angle of about 12 degrees.
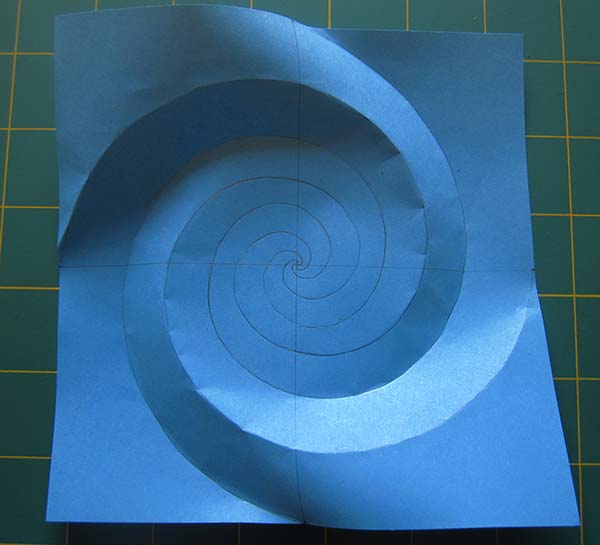
As hard as I tried, I could not get the inner part of the spirals to fold. Is that because it’s mathematically impossible? Or do I just need to try harder? Does folding the spiral suddenly become impossible at a particular pitch angle, or does it just slowly become more and more difficult to fold the spiral? If it suddenly becomes impossible, what’s the critical pitch angle? I tried to answer these questions, but I could not.
So how’s that for an interesting math problem? I hope to find a solution some day.
This seems more like a technical/mechanical issue rather than a physical/mathematical one.
I understand that I am not an expert in these things, but do any papercrafters talk about using water to make heavy paper like that depicted easier to fold? Or maybe some other fluid that might affect the cellulose fibers?
I’m thinking of a damp swab drawn along the score line, to start with.
@owlmirror,
I use card stock for the templates, but the model itself can be made from any paper. Granted, I haven’t tried it with many kinds of paper.
There’s a technique called wetfolding. You use thick paper, and dampen it a little to soften it (damp swap is the right idea), and then the shape hardens when it dries. That would probably work here.