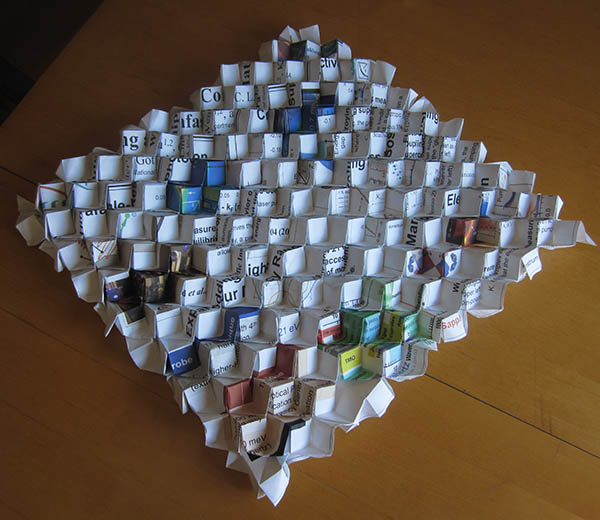
Cube Tessellation, designed and folded by me.
This model is a sendoff of my Ph.D. It’s folded from a poster about my research, created while I was writing my dissertation. It’s really big, about 25 inches (63 cm) across. It’s the third tessellation I’ve made from one of my science posters, thus the title of this piece is “A Deconstruction of My Research 3”.
For this third model, I wanted to do something special, so I tried designing my own tessellation completely from scratch. I was inspired by the Rhombille tiling, which looks a bit like a wall of cubes. So I tried making a wall of cubes. And after a long design process, I was able to perfect it.
Below the fold, I have diagrams and prototypes to document the design process.
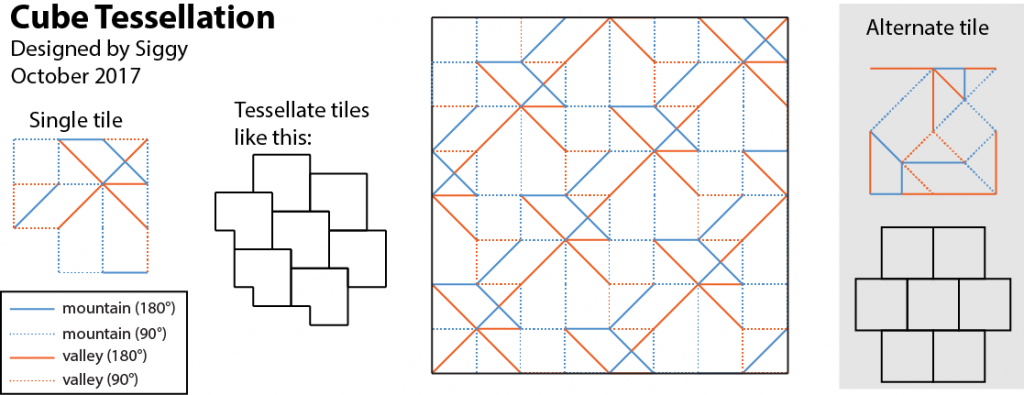
Here are the final diagrams for the Cube Tessellation, which should give insight into the design process. The tessellation is made of a bunch of tiles, and the tiles fit together in some sort of pattern. I spent a while mapping out what a single tile looks like and making sure it was mathematically possible. I alternated between diagrams and prototypes, making little changes to improve the structural stability.

This is the first prototype I tried. This first prototype established the major obstacle to making a cube tessellation. Basically, all the cubes pull apart.
Some of it is orange and some of it is yellow, that’s because I used two sheets of paper. Pro tip about tessellations: you can make multiple copies of the tessellation and just nestle them together. The reason I do this is because it’s easier to fold just a few tiles at a time, and attaching multiple pieces of paper gives me a sense of how it will look on a larger scale. Also, I wasn’t sure at the outset that I would fold the science poster as a single piece. I considered cutting it up into little pieces and attaching them together.

Here’s the second prototype. It’s also made of multiple pieces of paper (although they’re all the same color). This prototype I think turned out worse than the first, but that’s all part of the design process.
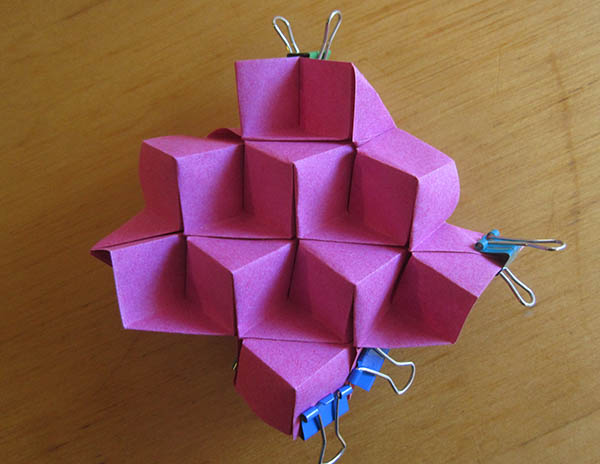
Skipping ahead, here is the final prototype, using the final design. Yes, I use clips to help with assembly, but it holds together even without clips.
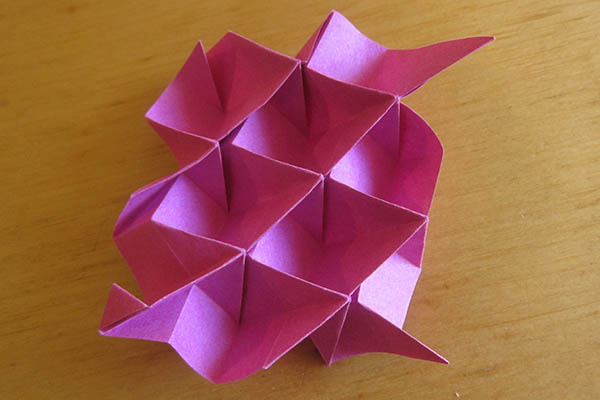
And this is what the back looks like.
I’m rather proud of this model. While I have designed a few origami tessellations before, this is the only one I’ve done completely from scratch, and it’s unlike any other tessellation I know of. There are very few books on tessellations (1, 2, and 3) and there’s clearly a lot more space to explore.
Beauty.
FYI, for anybody wandering in to this page, I’ve updated this design! You can find my folding diagrams here.
what is the name of this model, do u call it cube tessellation?
@The LegendSushanth,
Yes, I call it the cube tessellation.
yo can i give credit for u when i do your origami in 128x 256x 512x or even 1024x and selling it like for 10k euro or something and a guy is making your cube tessellation who is D.Hinklay without giving u credit and he changed the name of cube tessellation into stoneboard and he sells them for 5k euro and u can sue him if u want
You can’t copyright origami designs. Also, a lot of work in selling such a model is in the folding and marketing rather than design.
okay