A year ago I got my hands on a big piece of punky (slightly rotten) walnut burl, and left it sitting on the pile because, well, frankly, such pieces of wood are dangerous.
One of the reasons I made those ridiculously long chisels [stderr] is because I like to work from the side of a piece, and a long handle and blade makes it easy to offset my body from the path of flying chunks of walnut. As the size of the work-piece goes up, so does the inertia and the impact. Since this piece of walnut was big, uneven, and soft in spots, it was a recipe for disaster. So, I used a hybrid approach I’ve seen other wood-turners take: first, you set the piece up, then rough turn it, then stabilize the rough-turned blank with resin, then put it back on the lathe and finish it up. One advantage of that is that the thing is round(ish) and it’s a lot easier to find a bucket or whatever to soak it in.

Unfortunately, not enough bucket. So, “what could possibly go wrong”? Garbage bag and electrical tape. I cut back the top so that I had a place to pour resin in. To keep it in balance I just left the chuck ring screwed in; a bit of resin on that won’t hurt it at all and I have several chuck rings. The nice thing about this approach is it saves me having to use huge amounts of resin; I can get away with a cup or two and gravity.
The downstairs of my house is usually around 55F because I mostly live upstairs, so resins harden very slowly – which is really great if you’re patient. It gives lots of time for the stuff to soak in, too. In this case I was not trying to infuse all the wood, just the big holes and really soft spots.
When I was ready to see how things looked, I didn’t even unwrap it, I just screwed it on the chuck, spun it up, and hit it with the skew chisel. OK, that was not a great idea, as I got flap-swatted by shredded bag and electrical tape. But, it was easy. I chiseled off the main blobs of resin and took a look. Not great! There were still some big holes, one in particular. Looking at it closely I could see that it would penetrate through where the wall of the bowl would be, which is exactly what I was afraid of: hit that with a chisel while it’s spinning and I’d be standing in a storm of walnut rain.
Next I built a little clay cofferdam, mixed some more resin, and poured it in, let it cure, rotated the piece and filled a few more spots. This was definitely a patience game because I had cure-time for each pour. Meanwhile, the whole project looked like crap and as it acquired more knobs of resin projecting from the side, it looked crappier and crappier.
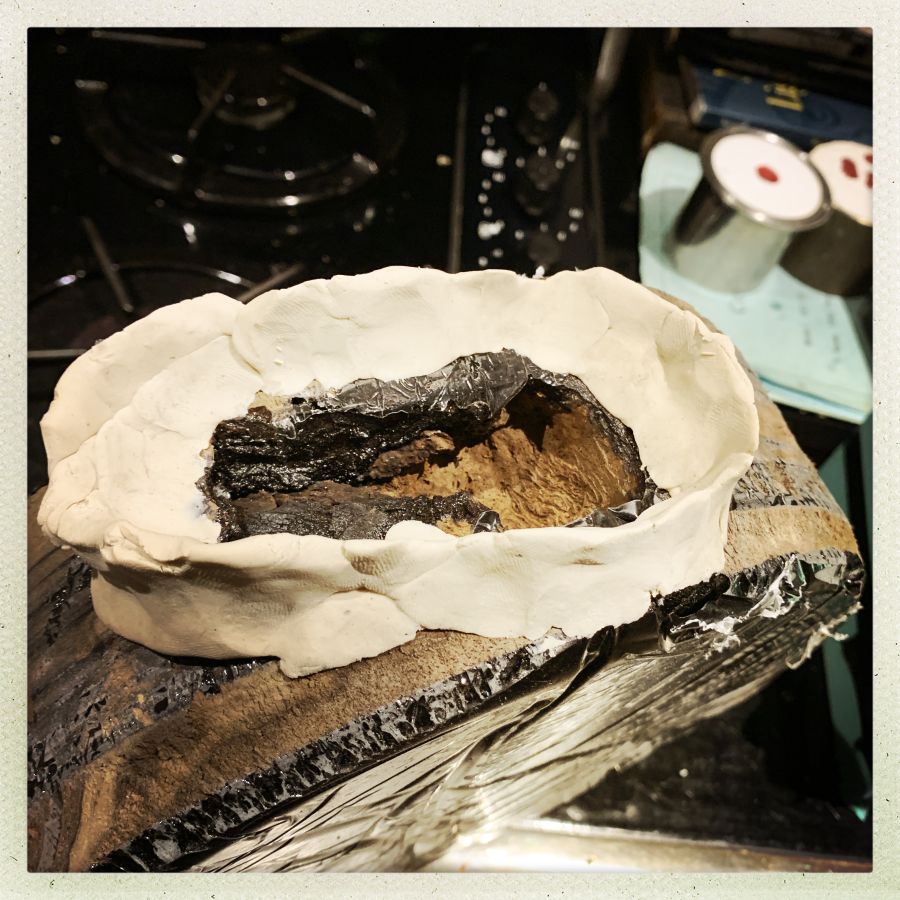
Sunday I decided things had gone on long enough, and did some finish-shaping. As usual, my main weapon was my carbide bar, which blasted the walnut and resin to dust in short order. To be on the safe side, I kept out of the line of fire of the spinning blank – it’s impossible to know what the interior of the wood is like until you get there.
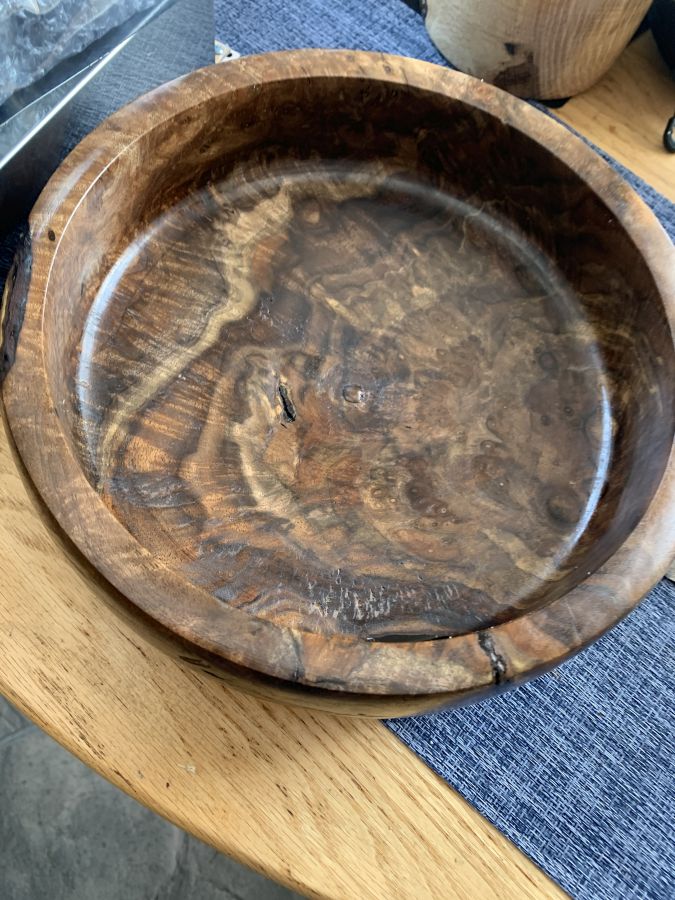
That’s the finished piece. It’s a bit rustic-looking with the tear-outs along the bottom, and the weird colors and grain – and it’s probably a bit thicker than it should be, but I have worked with walnut burl before and it can warp pretty badly over time. So, as they say, “it is what it is.”
If I were set up with some silicone vacuum bags and resin web like the carbon fiber guys use, I probably would have done another infusion of resin and that would have let me cut past the tear-outs and get a higher polish. But, if I may say so myself, it’s not bad as it is!
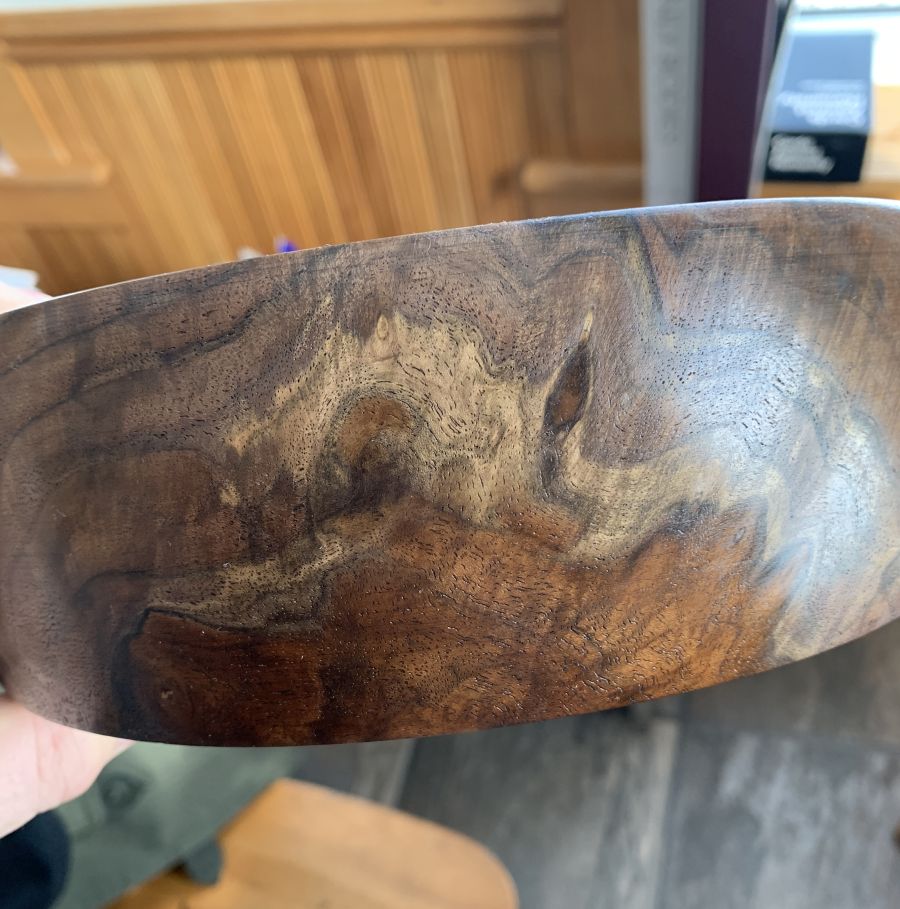
I like the pores in the wood. Another run of resin would have filled those and then it’d look like plastic.
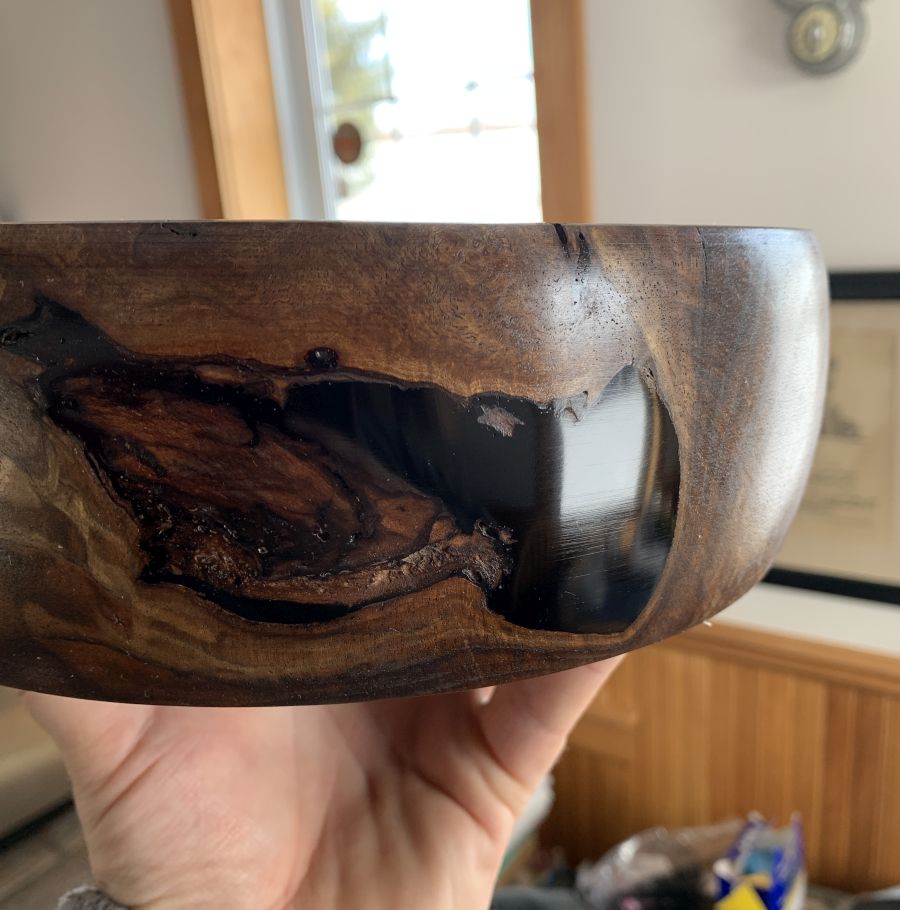
That’s the resin from the cofferdam zone. It’s actually (as I predicted) through the other side, so there’s a patch of black on the inside of the bowl, too. You can hold it to the light and see glow through the black pigment. It’s actually pretty cool. I’m glad I went with black instead of clear, because, I don’t know, it’s a more formal look.
The piece of burl that’s cut from is really large; I still have a 10″x10″x3″ chunk for another bowl and a 3″x3″x8″ chunk that I may make a vertical cannister out of – a sort of cylindrical thingie with a lid. They look pretty easy to do with something like my carbide bar.
One trick that is interesting in all of this is that everything gets epoxy all over it, which means that if I plan ahead I can epoxy on mating surfaces that I can screw chunk rings or blocks onto. That is a trick I have not gotten into, yet, but it’s one of those “oh, duh!” sort of things: you take a piece of maple that’s maybe 3″x3″x1″ and epoxy that right onto what will be the bottom of the bowl, then you can cut the chuck-grabber into the maple (which is already tough wood but now resin-soaked to boot) and do the bowl, then saw, chisel, and sand the maple block off when you’re done. Those Japanese saws with the teeth on one side: that’s what they’re for. (Do not try to bandsaw something round unless you build a sled for it, unless you want to wear as a hat)

I also now have a “designated resin bathrobe” with crusty edges on the sleeves and other spots. I love big bathrobes and they’re sort of my house uniform. Think Mr Badger in The Wind In The Willows for reference, except with resin spots instead of tobacco burns. One of the problems with this sort of project is that it’s just a bit of effort here and there – a few seconds sometimes – so it’s very easy to go “no, I’m not going to change into work clothes, I’ll just … oh, shit,” Unauthorized resin excursions are a big thing around here.
Gorgeous!! Walnut usually does have beautiful grain, but the burls are extra fancy.
I agree that the black resin was a more esthetic choice than clear.
Gorgeous. It has character that would be lacking if it were more refined. I like the black resin and think the bowl would be perfect for holding balls of wool, apples and pears, scarves or cat toys. Nice work.
A very beautiful bowl, with lovely grain in the wood. I’m so glad it did not explode on you! I saw the first finished pic and was almost afraid to read past it that the bowl had blown up further down the line. I’ve worked with just regular walnut and the grain on this piece is just outstanding – the pieces I worked with were nice and everything but downright boring compared to this.
Very disappointing, with that title I was expecting some kind of joke involving barrels.
Ketil Tveiten@#4:
Very disappointing, with that title I was expecting some kind of joke involving barrels.
I’m trying to “click bait” the 8chan crowd.
No, wait, what am I saying?! I don’t want more readers; this blog is kind of exclusively-sized.
Gorgeous, I like the less polished look, it balances out the smoothness of the resin.
There’s a turner who’s videos i watch who uses hot glue to add chuck blocks. I’ve done it a couple of times and it seems to work. Although I suppose if you’re already mixing resin you may as well just use that, judging by the home-made micarta i currently have glued to my workbench it seems to stick pretty well :P
I think the bowl looks really nice, the black works nicely with the other colours
dangerousbeans@#7:
There’s a turner who’s videos i watch who uses hot glue to add chuck blocks. I’ve done it a couple of times and it seems to work. Although I suppose if you’re already mixing resin you may as well just use that, judging by the home-made micarta i currently have glued to my workbench it seems to stick pretty well :P
I’ve seen that done. Then you use a heat gun to de-glue it. I don’t like differentially heating things, but that’s because I am a bladesmith and it gives me the willies. I suppose wood can take it but I think a saw and a sander is just about as good.
I need to build a V-sled for my bandsaw so I can just slice things right off. Problem solved. It’s on my TODO list, item 981,941
I’ve just chopped the glue block off with a handsaw, and cleaned the bottom of the bowl up with a gouge. A V-sled makes sense too