Last night we started to hit the wall around 4:00, but there was still work to do.
I started explaining my process of fitting bolsters and handles, and cut some maple and ebony. From there, the process is to drill some pilot holes that will take a jeweler’s saw, then the holes are shaped with files and other things until the bolster fits closely around the tang of the blade. Normally, this is finicky and annoying, but when your hands are used to working against steel, wood seems incredibly fragile and finicky. It also takes a certain amount of being able to visualize where the tang is getting stuck inside the block, then getting a file or saw blade to exactly the right place. I don’t even remember where the mistakes were, but the first bolster for the chef’s knife had an unacceptably large gap between the wood and the blade. So, I went and cut another one, drilled it with a larger drill on the press, and – oops – that was too large. It took 3 proto-bolsters hitting the garbage can before we had a good fit and could move to drilling the holes in the handles. Fortunately, that part is easy. Then it was home to put some burgers on the grill, mix some epoxy, and put the handles together.
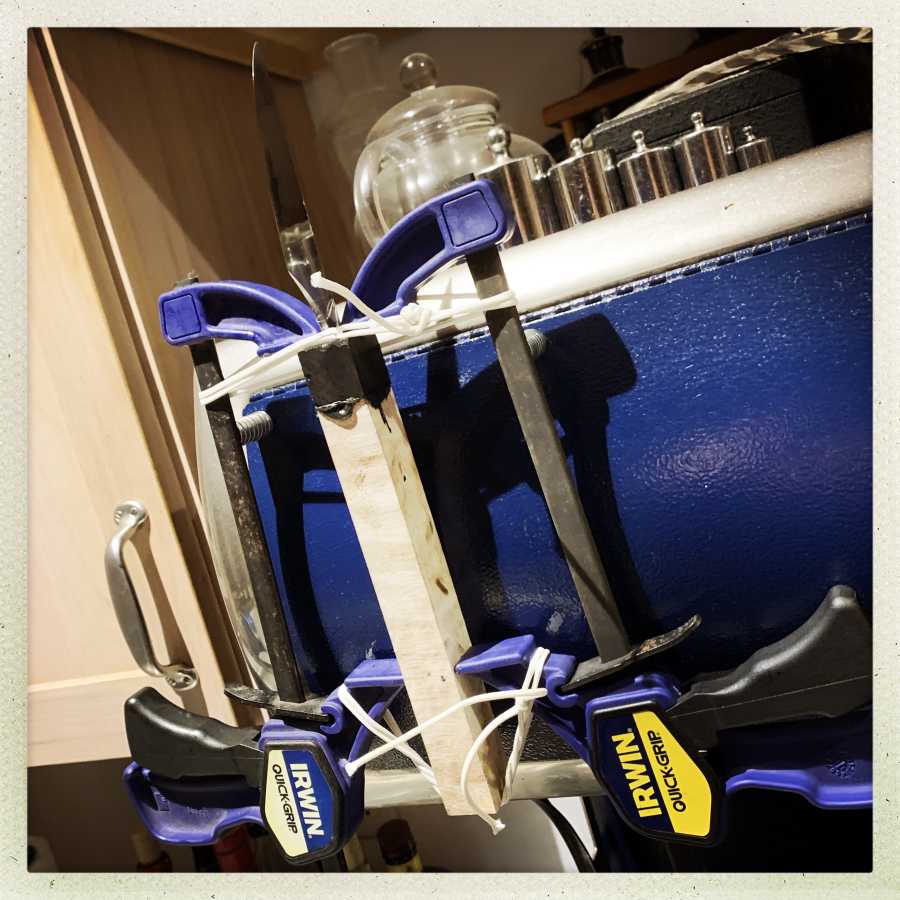
The clamps were not long enough, so I rigged some twine between the bottoms to make a sort of base, then tied the top together so it wouldn’t fly apart; problem solved. Pretty, it was not, but effective, it was. This morning it was time to shape the handle(s) and that’s a simple and quick process on the flat 6″ belt sander. I would not use the big belt sander I use for shaping steel, because wood just disappears like vapor in the presence of that thing – I’ve done it a couple of times but your grinding must be very precise because it can chew through the wood of the handle and into the tang in about the amount of time it takes to sneeze.
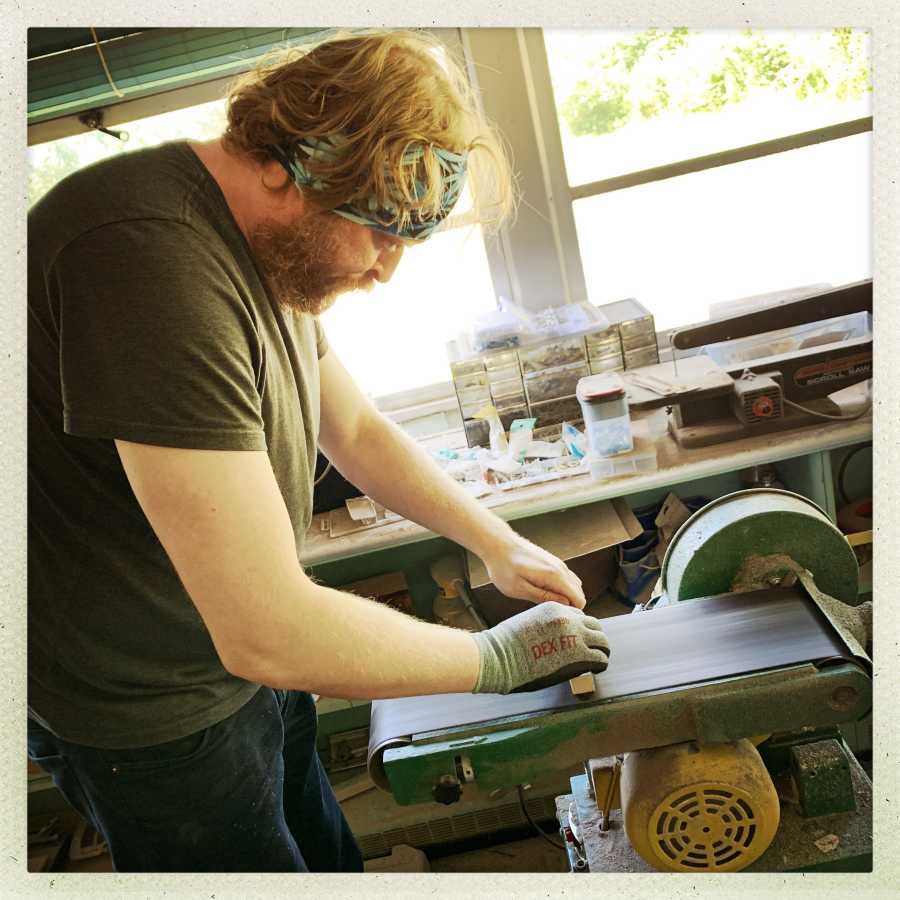
As it is, it’s intense work – the sandpaper will chew goodly divots in the wood if you hold it wrong for a fraction of a second. That’s exactly the worst thing to have to deal with when you’re mentally tired from learning new tasks that require eye/hand coordination. It’s easy to get frustrated and I can recall any number of times I’ve been at this point where I want to just throw a razor-sharp knife across the room in frustration.
But after a while, it comes together and the basic shape is good, then switch from 200 grit to 400 grit and up, back to the other room to clamp the blade in a vise (wrapped in electrical tape) and hand sand it with 600 grit sandpaper. After that, it’s ready for some oil and an unwrap and it’s as done as it’s getting, today.
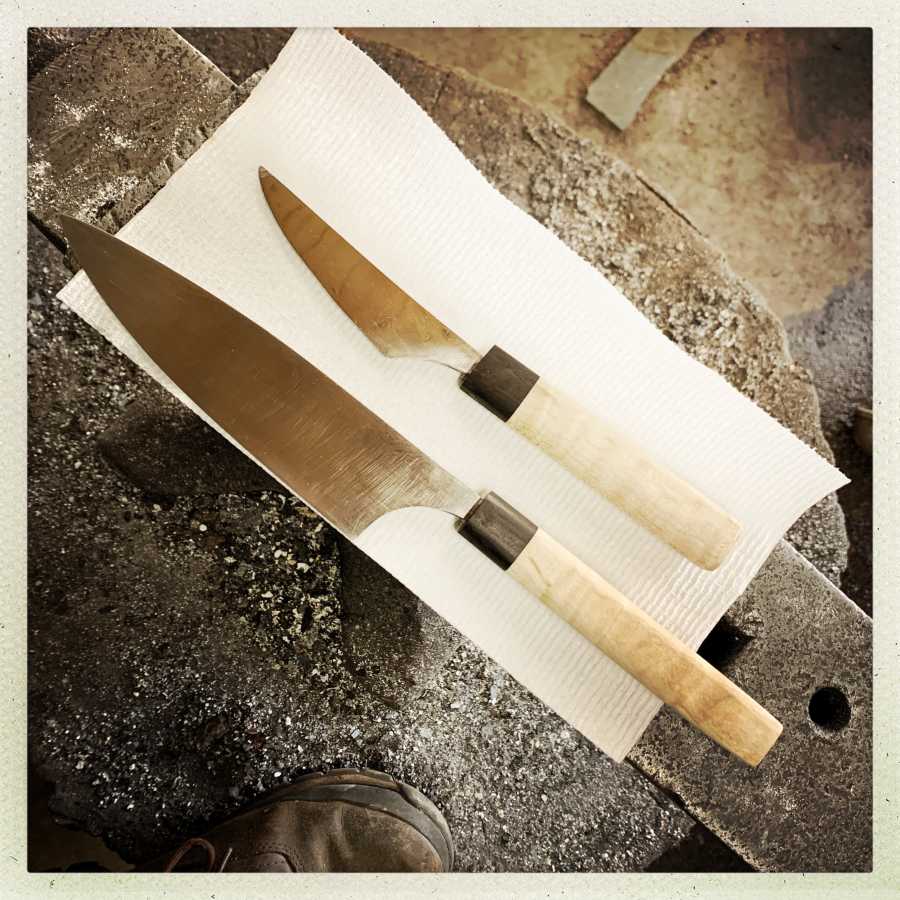
The first coat of oil doesn’t darken the wood or bring out the highlights in the maple. The ebony still looks relatively dull. That’ll get better over the course of a week of oilings. The little paring knife has a mirror polish, which I did, but that’s mostly because it’s only about 5 square inches of surface area compared to the chef’s knife. The entire blade is hardened, so polishing those scratches out will take 4-5 hours with 400 grit sandpaper (then 600, 800, 1000, 2000, 3000) but it’s there. The remaining sanding is just a matter of patience.
After that, it was time to go. Sam started putting stuff in his car and I ran around making little care packages of ferric chloride, handle oil, sandpaper, etc.
It’s really cool to see the understanding that happens along this path. Sam started out with a block of steel about the size of a pack of cigarettes, and wound up with a blade blank that was around 5mm thick, which he ground and shaped successively until it was 3mm along the spine by the handle, tapering to 1mm at the spine nearish the tip. The sides are great big flat planes (tested on the granite surface plate) that are accurate to around 1/1000 of an inch from flat, tapering to the edge which is, basically invisibly thin. When we started, Sam kept asking “how does it get sharp?” and I kept saying “successive refinement, it’ll get sharp, don’t worry.” No effort was made to sharpen either of the knives, yet, but when I wrapped the paring knife blade in electrical tape (so it would be safe to hold while shaping the handle) the edge popped right out through the tape. Yeah, when the time comes to give it an edge, it will take one. Because the blade gets thinner and thinner, it’s light and airy, with a center of balance right in front of the bolster. I don’t think there is a chef in the world that would turn their nose up at that knife and it’s Sam’s first.
Off you go, and safe travels!
Damn, best I ever got from my mum was gummy bears and meatballs.
The knives look amazing and I’d love to see them again when the handles have darkened.
First knife?! That’s amazing – it really turned out well! Good job, Sam! Hope you make many more.
That is a superb job for a first knife, I must say.
I am glad that I have the variable speed drive for my belt sander, it made working wood on it possible. Still, I prefer to shape the wood with a rasp first and then go to the belt sander for refining. I do not wear gloves when working on the sander, but I do wear a face mask, all the time, and when working wood I have turned on dust collecting too.
Nice work. Looks like you have yourself a hobby/ career/moneymaker. Whichever it turns out to be, have fun with it.