This is how I made the scabbard/storage sheath for the letter opener. [stderr] I cheated.
Normally, what you’d do is take a piece of wood and split it, then trace the outline of the blade and carve away at the wood with a saya nomi until you had a perfect fit. The problem was that I wanted the handle to also go part way into the scabbard, and I did not yet have a nice saya nomi. And I’m lazy, and I cheat.
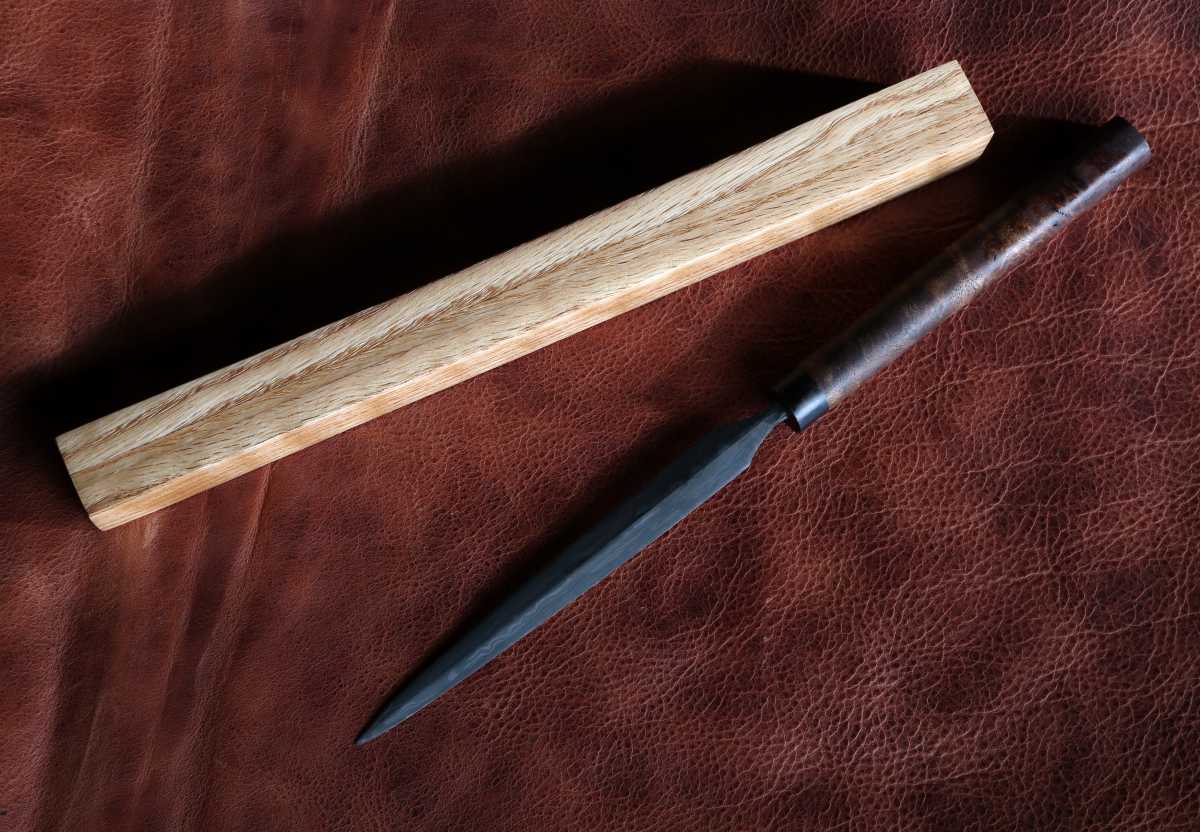
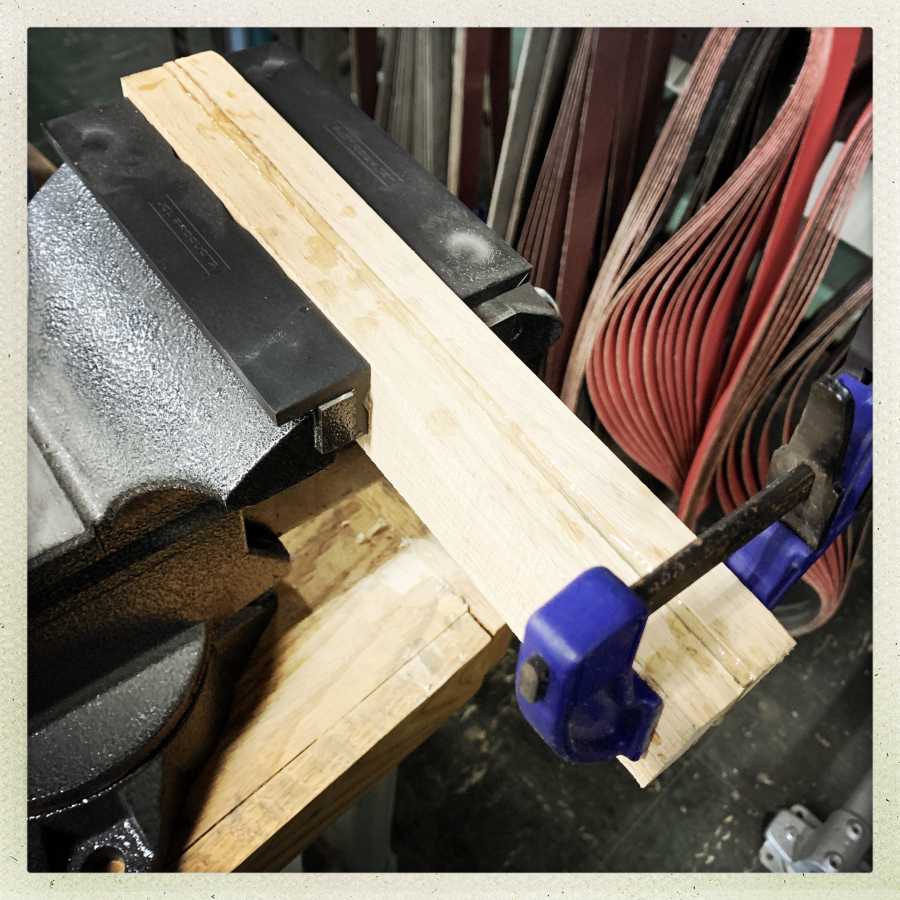
There’s actually a give-away in the picture above. If you look carefully you can see that there is not one glue-line where the wood was assembled: there are two.
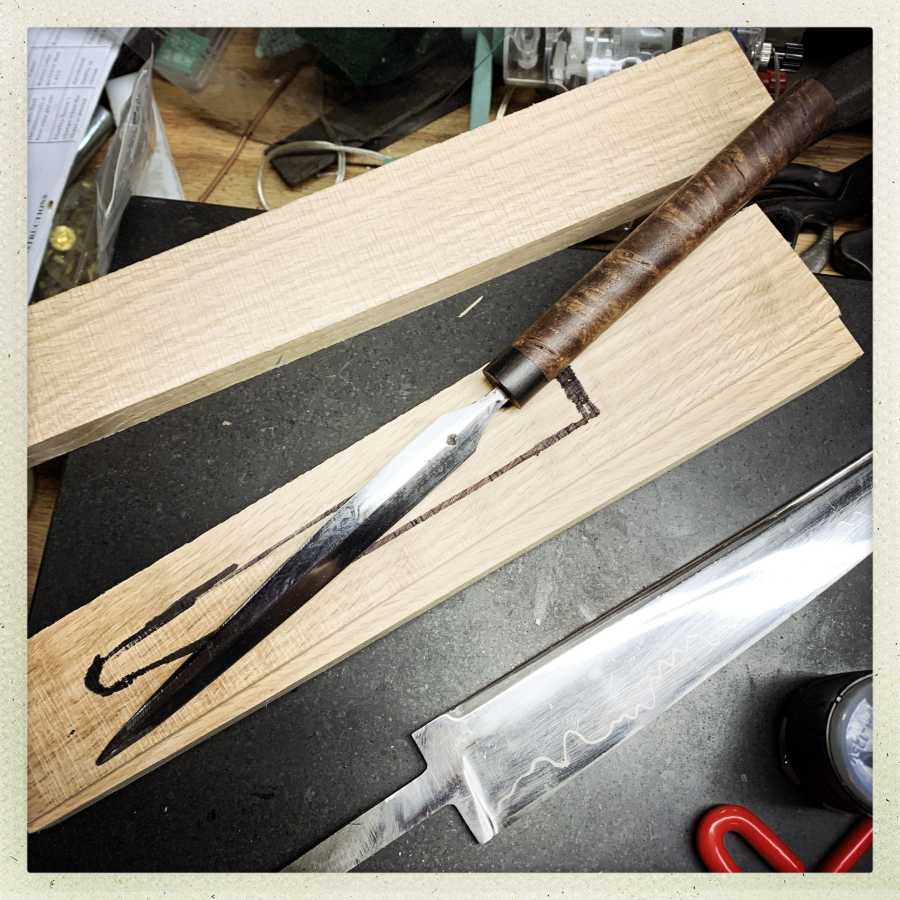
First, I cut a block of wood in half, lengthwise, with Mr. Happy Dancing bandsaw. Then I took my calipers and measured the blade at its thickest point, just before the flares where it starts to go into the tang. I bandsawed off another piece of wood that was a bit thicker than the blade (to allow for sanding) Lastly, I verified that the width of the blade was equal to the diameter of the handle – all 1/2″ in woodworkers’ measurements.
Then, I traced the outline of the blade where I wanted it to be in the middle of the block. The location of the handle is not included in the tracing because I plan to cheat.
Next I check and make sure the handle is straight (whew, yes, it is!) then draw a line down the axis of where the center of the handle will be. By now you’ve probably figured it out; the handle is round, right?
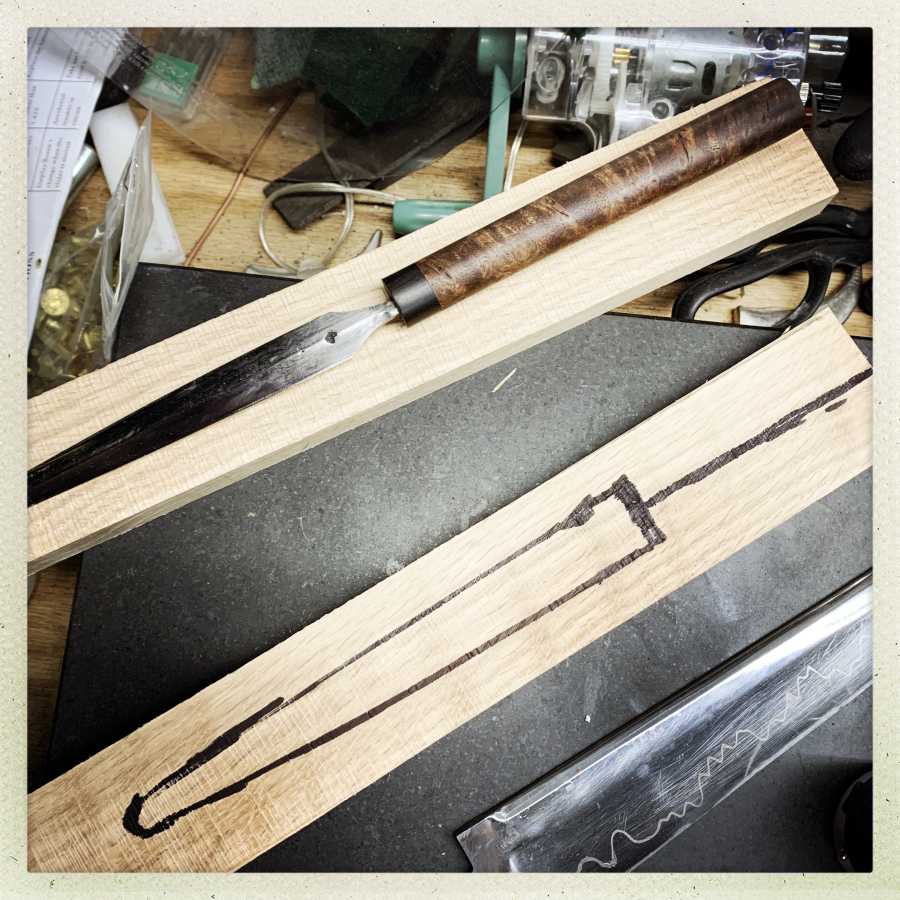
The center piece, the “spacer” goes over to Mr Happy Dancing Bandsaw and I carefully cut a very straight line down the center where the handle will go, as my way of getting the bandsaw blade into the spacer. After that, I bandsaw around until the place where the blade will go is a hollow. Everything gets sanded on the big flat 6″ sander until it’s nice and smooth and flat.
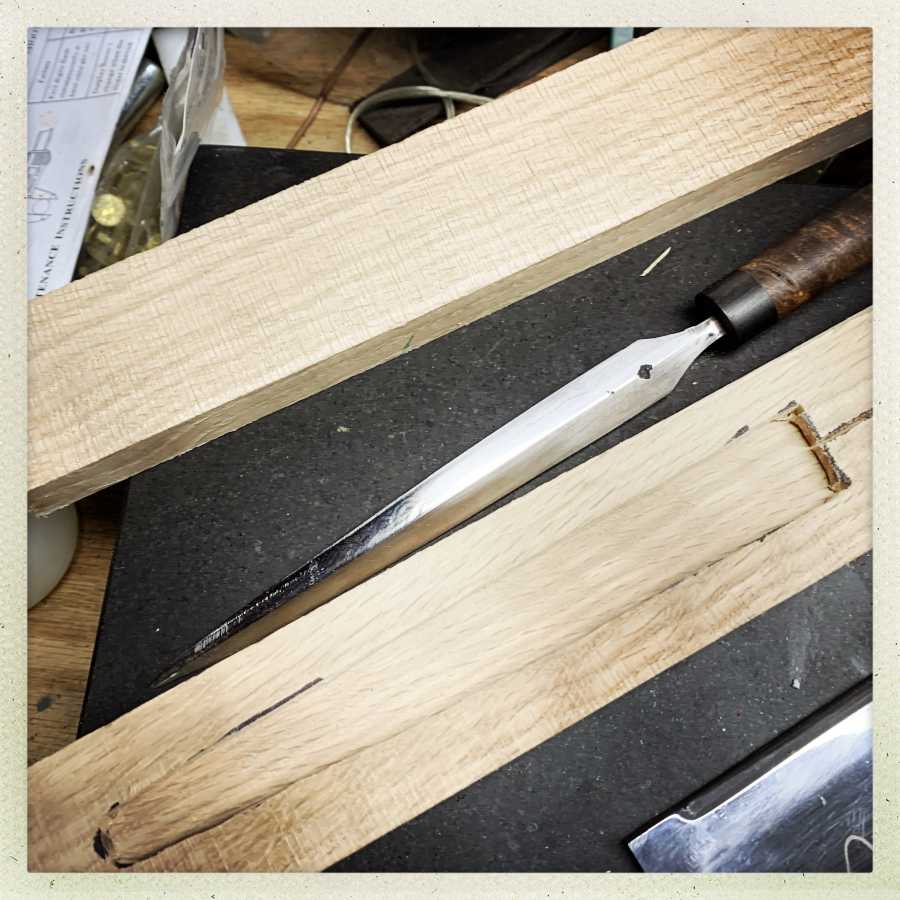
Now, everything gets a thin coat of epoxy and it’s all clamped together overnight.
One thing that’s nice is I don’t have to worry about glue squeezing in from the sides into the center area; the blade shape is a diamond – if that happens, the edge won’t hit them and they’ll actually serve to help lock the blade in place. As it all works out, I have no idea whether that’s what happened or not because you can’t see down the hole in the scabbard without an endoscope.
So far it has taken my more time to write it up than to do it. If I had been shaving away with a saya nomi I’d probably just about be done by now, but with this trick I had practically no time into it at all – maybe 10 minutes up to this point.
The last part is not shown because it wouldn’t look like much. So, remember there is a thin slit down into the center of the spacer, where the bandsaw blade went? I then took the glued up block over to the drill press, put a thin shim of steel (aka, a small long drill bit) down the slit, and used that to make sure the alignment with the drill was straight; I also checked that the block was square in the machinist’s vise on the drill press. I put a 1/2″ forstner bit in the drill press, then set the depth so that the bit would stop just at the “shoulder” point of the cavity in the center. Drilling that out took about 5 seconds and forstner bits make super clean holes, so there was nothing more to do except check the fit, sand the block down, finish it, and call it a successful experiment.
I did notice that the knife fits a little better in one side than the other, which means that my measures were a few thousandths off, one way or another.
To me, the best part of this whole process was that I did not spend hours chiseling away at a piece of oak. I’ll also note that this technique works much easier than a chisel if you’re using some exotic or hard to work with wood like that burl oak, which is about as fun to chisel as cinderblock.

I used a similar trick in the scabbard for Maat’s seax, and for Ciryaden’s everyday seax. I cut a piece of cardboard that fit around the edge of the blade, then used that as a template for a thin piece of wood, bandsawed off two pieces for the sides, sanded, glued, then sanded the assembled mass, and boom: scabbard! I have not done any pictures of it, and I’m not sure if I could find any if I did, but that’s how I made the scabbard for Jacki’s claymore:

The body of the scabbard is two pieces of ABS plastic sheet, 1/8″ thick, and one piece 1/4″ thick. I cut the fillet/center-piece thingie on Mr Happy Dancing Bandsaw, then sanded it until it was the right thickness (tapering to the tip) then used acrylic solvent to weld the sides on; making it a single, solid, damn near unbreakable mass. You can see some ridges in the leather: those are where I made a small hole in the ABS near the edge and wrapped 4 loops of 22-ga stainless steel wire around the plastic, then poked the loose end through the hole to hide it. That is because: I was giving a 4-foot-long razor blade to a petite person who is about 6″ longer than the entire getup; I did not want there to be any possibility of the scabbard-tip catching on something and breaking the scabbard lengthwise, in which case the blade would fall sidewise out of the scabbard and someone might not think, and try to catch it. I have a nice long scar on my thumb from when a katana’s scabbard did that when I was in high school, and it’s memorable. So, I did the metal wraps as a fallback safety, and they also serve to give the scabbard some dimensionality and make a place for the hanger to buckle onto, where it won’t slip. The leather is nice waxy goatskin that I glued and wrapped, with the opening hiding neatly under the black overlay piece down the center. The sword itself is a CAS/Hanwei I bought years ago; Jacki saw it leaning in the corner of my living room (where it used to be stored, without a scabbard) and commented that she’d always loved that pattern of claymore and she’d been super thrilled when she visited Edinburgh castle and the docent let her handle one. I said she was welcome to play with mine and marked it subconsciously as a possible gift. I believe she’s carried it to some reenactment events, so if you’ve ever seen a claymore go walking by with a small person attached, that may be my workmanship.
One more thing needs be said about the claymore: we all hate the trope where someone has a longsword on their back, and they whip it out like they’re Sasaki Kojirō or something. When you’re only 6″ taller than your sword, and you don’t want it hitting your ankle, it’s got to ride too high on your back to allow that. You can’t wear it at your waist, either, because it’ll drag like a sea-anchor. Look closely at the belt near the frog and you’ll see a claw-style quick release. I drilled that out and put a neodymium magnet in the claw as a safety on the safety-catch, but a quick flip of the thumb makes the shoulder-strap pop in two. So she got pretty good at popping the catch, catching the scabbard as it starts to fall, pulling the sword out, and throwing the scabbard in someone’s face. I approve; most sensible swords-people don’t want to get into a fight with a scabbard flopping around their waist or their back. (There is a whole area of deep art in Japanese swordsmanship involving techniques for getting your damn scabbard out of the way while you chop someone to bits, then elegantly finding it and re-arranging everything. But, then, the Japanese culture included surprise sword-attacks, which probably weren’t much of a thing when claymores were in style) (Someone correct me)
3-layer ABS scabbards are so easy that I’ll offer this: if you need one and want to send me a traced outline of a blade of reasonable size, I will be happy to make you one. I have lots of ABS and it’s a dream to work with. It even sands like wood on a belt sander, and sanded ABS has enough “tooth” that leatherworkers’ glue gloms right up onto it. There’s a leatherworker in LA who does gorgeous tooled work and I used to make the cores of the relatively small number of scabbards he made. He thought I was doing a nice thing and going way out of my way, so I never could bring myself to tell him that he was benefiting from minutes of my work, not hours.
I’ll just mention, in closing: anyone who has had a containment failure with a razor-sharp blade excursion will remember the experience. You have to be a really cool customer to remember to get away from the blade, and not to try to catch it as it’s falling toward the floor, because it’s picking up speed and it’s a razor blade, see? When the person who commissioned the letter opener was asking about it, I was immediately worried about double-edged blades, which are really a pretty specialized thing (mostly for adjusting kidneys) and I was super happy to be able to surround the entire thing with at least 1/2″ of oak burl on all sides. That’s not a scabbard that someone is going to put in their pocket, sit down on, and wind up with 6″ of razor sharp beautifully welded Badger Forge twist damascus sticking into or through part of them. Not on my watch!
I believe the traditional carry option for a claymore does not involve a scabbard at all… You wrap it in leather or oilcloth and sling it over your shoulder (or, preferably, in the baggage train) when you’re travelling, and you take it out when you form up for battle. It’s not the sort of sword you would normally need to deploy in a hurry, because it’s for taking down cavalry.
For surprise fighting in Scotland during that period, your main tools are the dirk or biodag (descended from the medieval ballock or rondel dagger) or the sgian-achlais (the concealed “armpit” dagger which later becomes the sgian-dubh we know today).
@Dunc that’s my understanding of how claymores and zweihanders were carried too
I’ll have to try the ABS when I get around to doing a covered scabbard. So far I’ve just been doing plain wood ones (in pine, cause fuck making them from Iron bark)
yeah, I remember being a kid and playing around with pseudoweapons when I realized drawing from a back-scabbard only worked for blades shorter than your arm. You can get quite a bit more length from a belt-carried scabbard, but it tends to bang into things and just generally make daily life more difficult…
I’ve spent some time thinking of scabbards of varying complexity that would allow both back-carry, and an easy draw, and looking at youtube, I’m not the only one…
and eventually I came to the conclusion that it’s much easier to carry a long weapon (this applies to both swords and rifles, imho…) across the back, especially while trying to execute non-weapon-related tasks, but if you expect to need a weapon at a moment’s notice, it’s probably best to carry it in hand. And maybe consider finding another line of activity that doesn’t require one to be an armed threat at a moment’s notice…