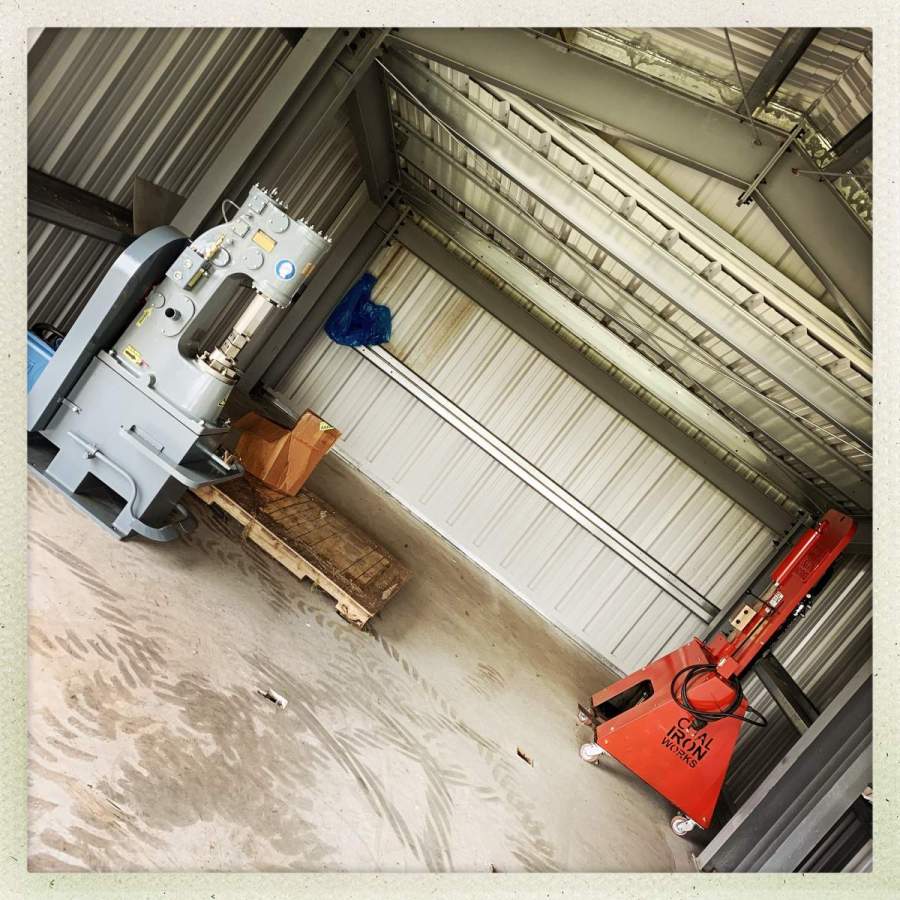
Things are beginning to get real at the shop; we moved the machinery in.
I’ll probably kick myself someday for not getting a larger hammer. But I do most of my work with the press.
The hammer hits with the force of a 33-lb sledgehammer. That’s far harder than a human can do, and humans have hand-shaped metal with hammers for a very long time. The object here is to move metal, not splatter it.
Between the machines will sit a workbench for the forge; I plan to have a shelf under it for tongs and whatnot. All that will be made of welded steel with a refractory concrete-filled top. I’ll build a fume hood over that. It’s going to take some welding but that’ll all be fun. I can’t do the welding and steel cutting until the building has power, which is the next step. After that, it’s pretty much a question of detailing the interior.
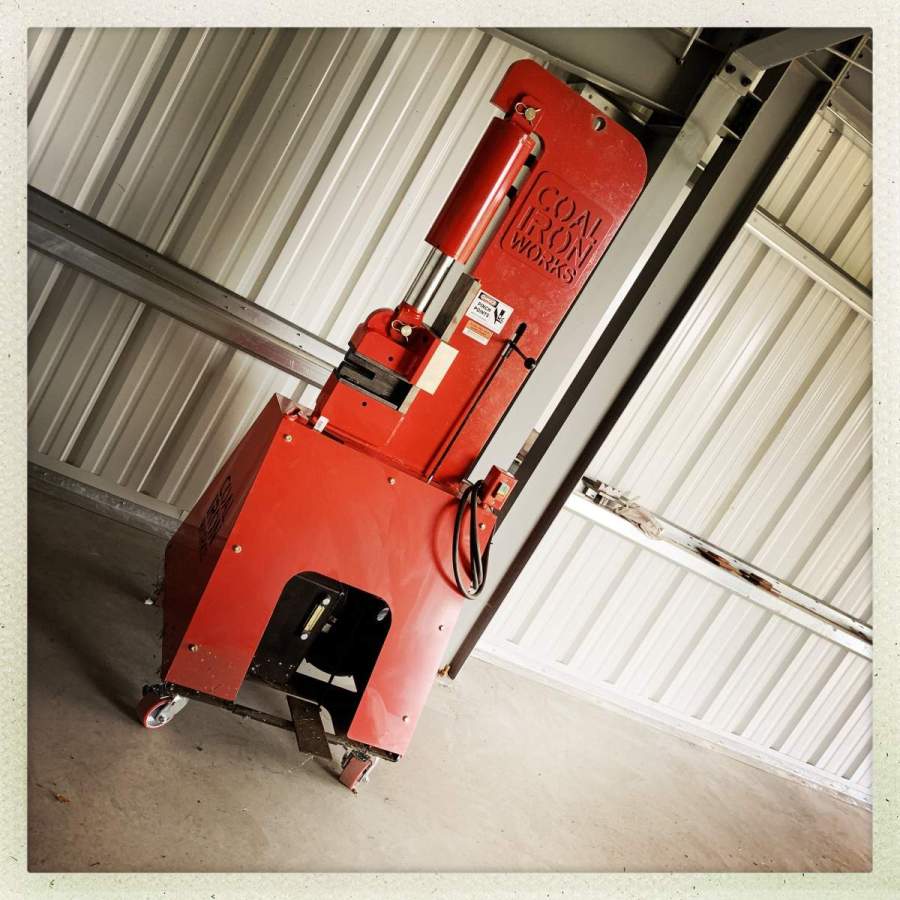
The Coal Iron Works press is a 30t model with a high speed hydraulic pump. It should be a lot faster and harder than the pink press, which I will move next to it (eventually) so I can keep a cutter mounted in it and use it for details like that. Changing press dies when they are hot and the press is running: not fun. I expect that the pink press will still get a lot of use. I may set it up so that the red press mostly carries a big flattener die, so I can use its greater power and speed to flatten and align bars.
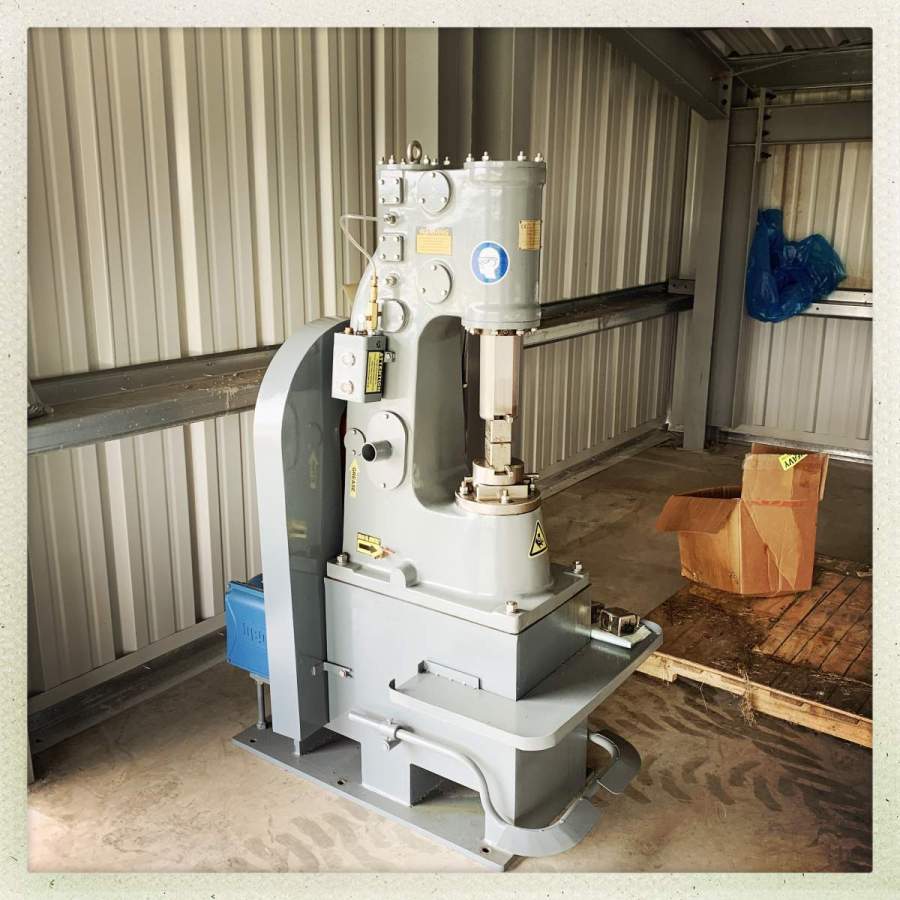
One thing you learn working with computers is that sometimes you need to read the instructions before you just start using something. When I cracked the book for the Anyang, the first thing it said was to remove the hammer-top with those 4 big bolts, and fill the base with sand to dampen vibration. That’s a good idea. Unfortunately, the crew already took their skid-steer home with them. I’m not going to try to lift the head with a come-along hooked to a beam (though it occurred to me) and get underneath it to pour sand. Nope.
It’s also recommended that the entire unit be placed on a plywood pallet then bolted down. That seems like a good idea, too; I will have to drill the anchor bolt holes with my impact drill; that’s going to be a mess and every inch of me will hurt the next day.
I’m impressed with the details of the Anyang – the tray to catch forge-scale has little cut-aways in the back so you can just sweep the stuff out, and the tray itself helps protect the operator’s leg/foot if something falls. The striking head is at an angle so there is plenty of room for the operator to maneuver the work-piece.
Nice! I think I’ll prioritise my relationship with my neighbours and not get one :P
You can’t loosen the bolts and leaver the top of the hammer up a cm or two? You only need a gap big enough to pour sand into
dangerousbeans @1: I was thinking something similar: remove three bolts and leave one loosened just a bit and spin the top just enough to expose an opening. But I don’t know if the bottom of it is smooth or if it is even possible to move it around.
Exciting and fantastic. PROGRESS! It looks terrific.
Once you have the Shop of Your Dreams, what amazing stuff you can make! It will be a total Palace of Fun and Creativity.
Similar to what dangerousbeans @1 suggested, how bad of an idea would it be to use a come-along strap to tip the machine slightly, push a piece of plywood under, and then brace the plywood against a wall with 2x4s or similar, and use come-along straps to drag the machine fully on top of the plywood?
I like johnson catman’s suggestion on #2, looking at the shape of the top part, and assuming the bottom is a single opening (and not chambered?), I think you should be able to rotate it enough to get an inch or two opening without the metal upright bits leaving the area above the base (not sure I’m explaining my thoughts well…)
Getting the sand in would be tedious, but that might be mitigated by lifting a bag/barrel up with a come-along strap, and creating a makesshift chute out of cardboard or sheet metal or whatever. And then come by every 10-15 minutes or so and hit the container with a stick…
@dangerousbeans had my idea first: remove two and loosen two on the bolts. Then pry it up enough for a length of tubing, to which is attached a funnel. Then fill ‘er up. A ½” gap should be sufficient, and plenty safe. (I’d still want to secure it to a rafter beam, if I were doing it.)
Very nice!
Nevermind trying to lever up the top to pour sand. This is obviously a problem that can be fixed by getting your very own hydraulic forklift for the forge. Just think of the possibilities!
Exciting!! Can’t wait to see the shop when everything is done.
Very pin-point for a landing from outer space (also, I can’t get the opening song out of my head).
Seriously though, it is cool to see the progress in on and around your workshop!
True for everything!
p.s. What confused me to no end was the word “die”, as I wondered how death was a good thing in the context. (Well I learned something today)
avalus@#8:
Very pin-point for a landing from outer space (also, I can’t get the opening song out of my head).
One of the great bits of theme music from the 80s.