Old school mold-makers and modelers like Adam Savage use a technique for framing molds in which they cut cardboard boxes and glue them together with hot glue.
This is a different way of making a mold, which I learned at Polytek plastics in Easton, PA. If you are interested in mold-making, by the way, I highly recommend their classes – you learn how to make complex molds with experts standing right there to make sure you succeed. [polytek] I took their workshop in 2005 so I could make cast concrete fence-posts for a horse-pasture. That never happened, but I wound up with a lot of cast plaster skulls that I stuck on pieces of rebar next to the “No ATVs” signs at the entrance of my property.
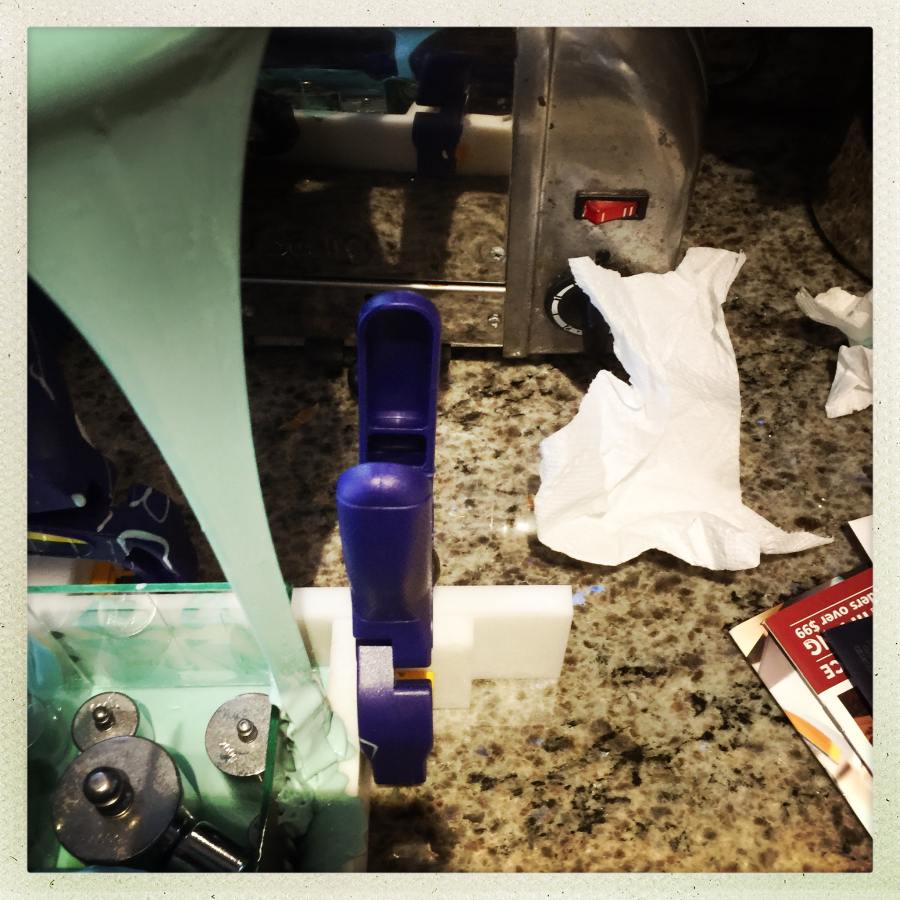
If you are reading this thinking “I need one of those mold boxes” just email me and I’ll whip one up for you. With a table-saw and polypropylene stock, it’s a piece of cake to make a superb mold-box that will work for a lifetime. The folks at Polytek make their mold-boxes out of MDF but I realized “hey I have a couple sheets of 1/2″ poly, why would I use puny MDF?”
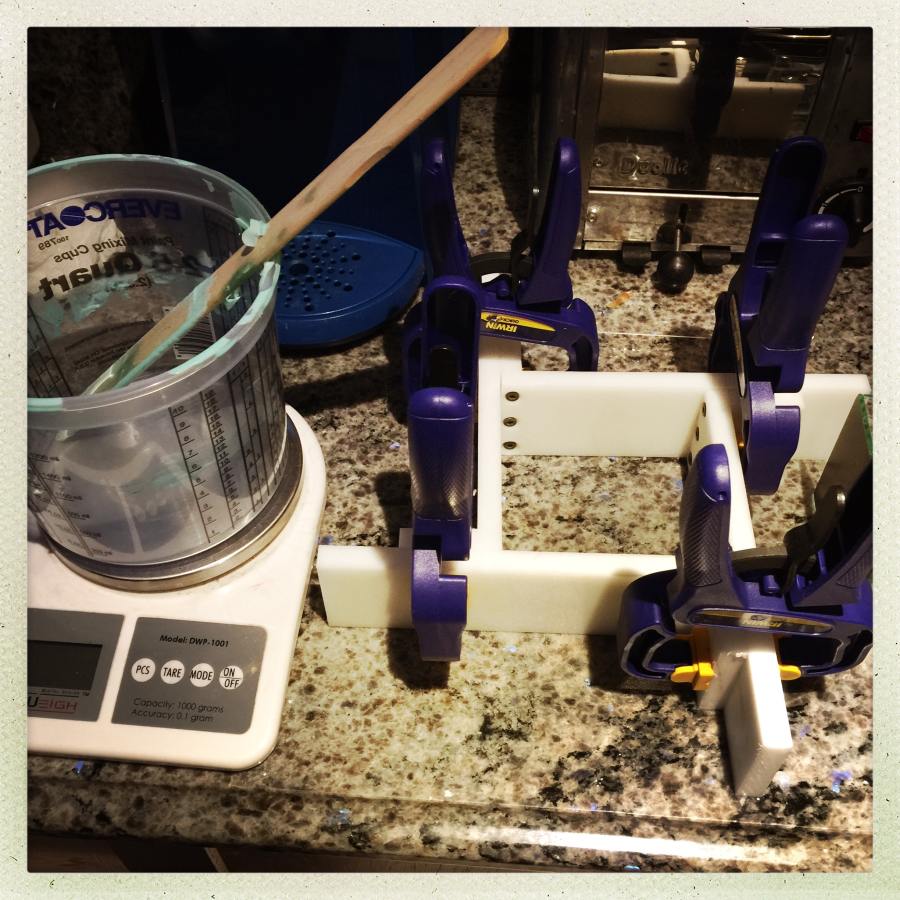
The mold-box is adjustable! And because the polypro is slippery, nothing sticks to it so it demolds easily. It’s also pretty indestructible, which is valuable in a mold-box. As you can see in the picture above, the size of the box is set by clamping it appropriately. It can be long and narrow or square or small or whatever.
I have become very good at estimating the volume of a mold-box, so I no longer measure. But, back in the day, I bought a large 25# bag of marbles. You set your object up and to calculate the amount of silicone you need you fill the box with marbles, then pour the marbles off into a graduated container and now you know the approximate volume of silicone you will need. Mess free! Unless you forget to clamp the mold-box and you lose your marbles. Yes, that’s how it happened for me.
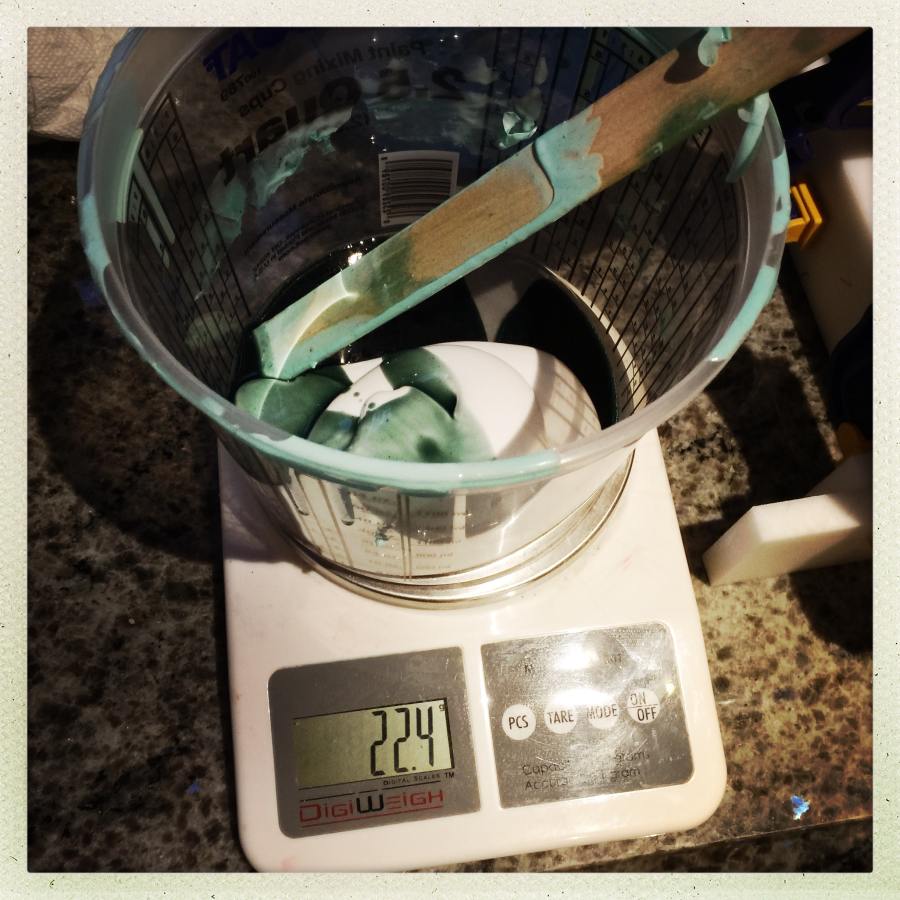
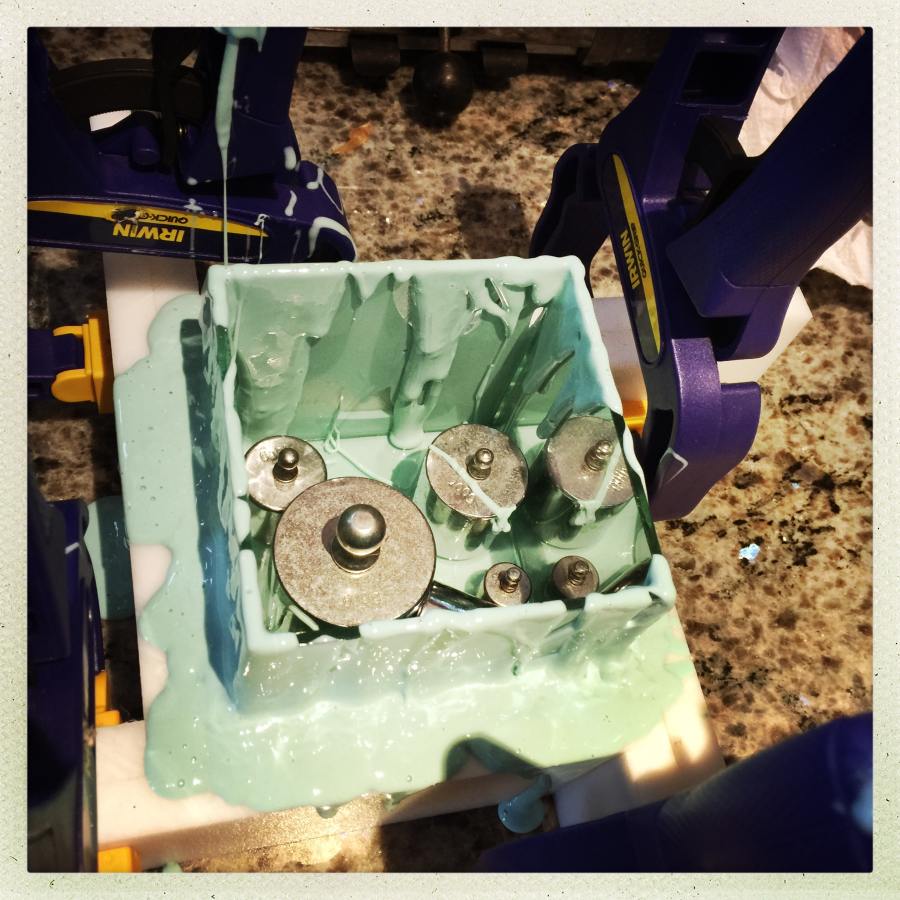
Here I am using 200g of silicone that mixes 1:10 catalyst (the blue stuff) to rubber (the white) – you can tell it’s mixed when it turns a nice toothpaste green. When you mix resin or silicone, work efficiently and sparely: don’t loft air into it and don’t hurry. Make sure you get the edges of the container and it’s thoroughly mixed then pour it so that it hits in one spot and creeps across the bottom of the mold and drives the air out.
Sometimes your mold will need a bottom. In that case, pour a layer to form the bottom, let it cure overnight, and then pour the rest around the object in the morning. I’ll post what that looks like, tomorrow.
Since I use my counter-top as a level plate for molds, I don’t need a bottom on the mold. But, if you need a bottom you can use cardboard or glass or another piece of polypropylene, or whatever. Make sure your object weighs more than the silicone or you’ll have a “floater” if you don’t run a screw up into the object through the bottom of the mold-box. Mortite (“rope caulk”) for home insulation is a great cheap mold sealant. I use vaseline sometimes, since a tiny bead of vaseline on the bottom of the mold-box is enough to make a vacuum seal on the countertop and it’s easy to clean up with a swipe of alcohol.
As you probably have inferred, I’m badger-like: my lair is my own special space and I don’t have to share my countertop with anyone who’d get annoyed at having to battle a bunch of silicone for space to make their toast. Be aware: silicone is easy to clean up. Silicone only sticks to silicone or to your nice bathrobe or your hair. It peels right off everything else. If you’re using resin like Alumilite, that stuff is epoxy. If your mold leaks and you pour Alumilite on your floor, congratulations you now have a permanent shiny spot on your floor. Or, perhaps a stalagmite of resin. If you make a stalagmite of resin you’ll need a very sharp chisel and a lot of patience.
Do not get resin or silicone on your cat’s fur or the gods will smite you and you’ll have litterbox duty in Valhalla for eternity.
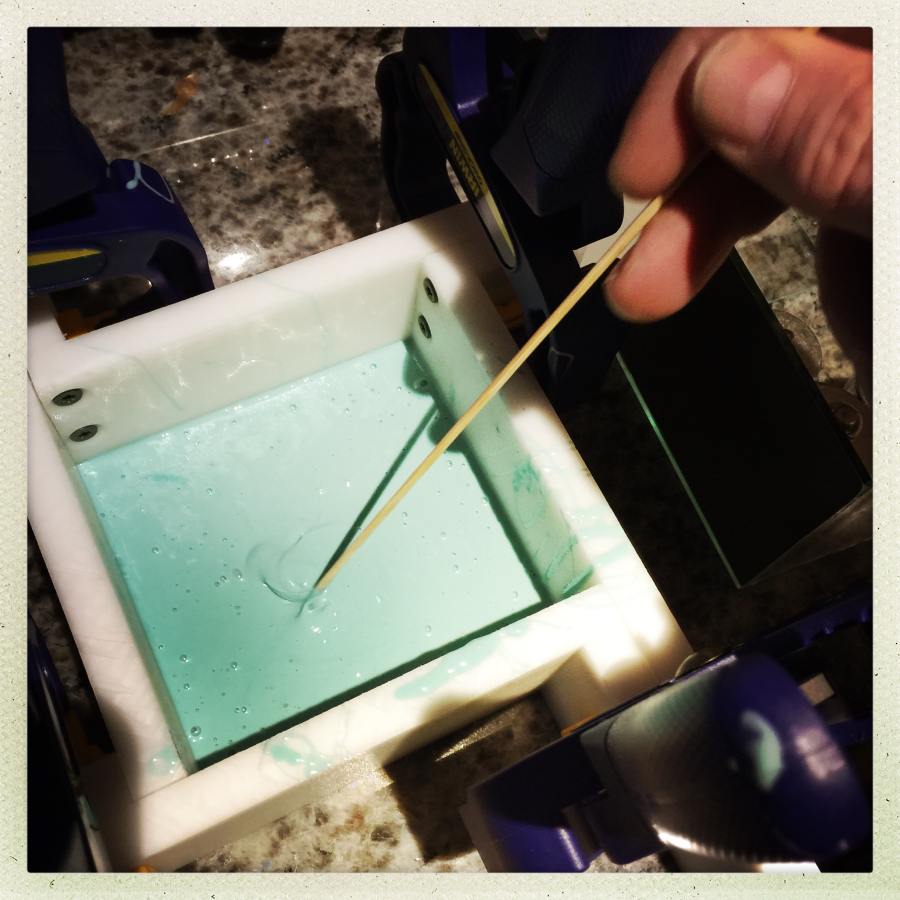
I usually mix my silicone, let it sit briefly for the bubbles to rise, then pour it carefully. More bubbles are inevitable so be prepared to pop them by stretching them with a chopstick until the surface tension breaks. Besides, it’s fun. Don’t wipe the silicone off the chopstick on your pants.
There are two metrics: pot life and cure time. Pot life is (roughly) “how long you can mess with the stuff before it needs to be in the mold and you better stop messing with it” and cure time is “how long until it’s solid enough to demold without deforming.” Cure time and pot life are affected by moisture in the case of urethanes, and temperature in the case of resins, silicones and epoxies. Know your materials! Also, know your material compatibility: silicone pigments ruin urethanes and vice-versa, whereas powder pigments or metal pigments are a crap-shoot. Some silicones will not cure if you add bronze (bronze may have tin, and that’s a catalyst for some silicones). Always be careful with resins – some are exothermic as hell and can “cook” up to just below the boiling temperature of water. Every year someone winds up in the hospital by having an idea like “I am going to make a really quick mold by wrapping resin-impregnated sheet around my friend.” A friend who then gets skin-grafts. The faster something cures the more likely it is to be exothermic, and the more likely it is to form bubbles.
All that said, the exothermic urethanes are a blast. Polytek sells a self-skinning urethane foam rubber that inflates like a balloon and cures in a few minutes. It fills a huge amount of space quickly (hard urethanes are sold as “gorilla glue” or “foam insulation”) and you can make your own packing frameworks with them very easily. The Polytek website has a lot of good tutorials on how to use their products, but their selection of products is large and daunting, and the materials are expensive enough that you don’t want to do a lot of experimenting. Unlike virtually any company, they have a tech support line that actually understands their products (!) you can call Polytek and ask “what would be a good filler for a resin that would keep it light but strong and workable?” and they’ll tell you “well, Dupont Corian(tm) is just polyurethane resin with colored cat litter in it, so… you can extend your resin a long way for $5 and have it ‘fresh paw scent’ besides…”

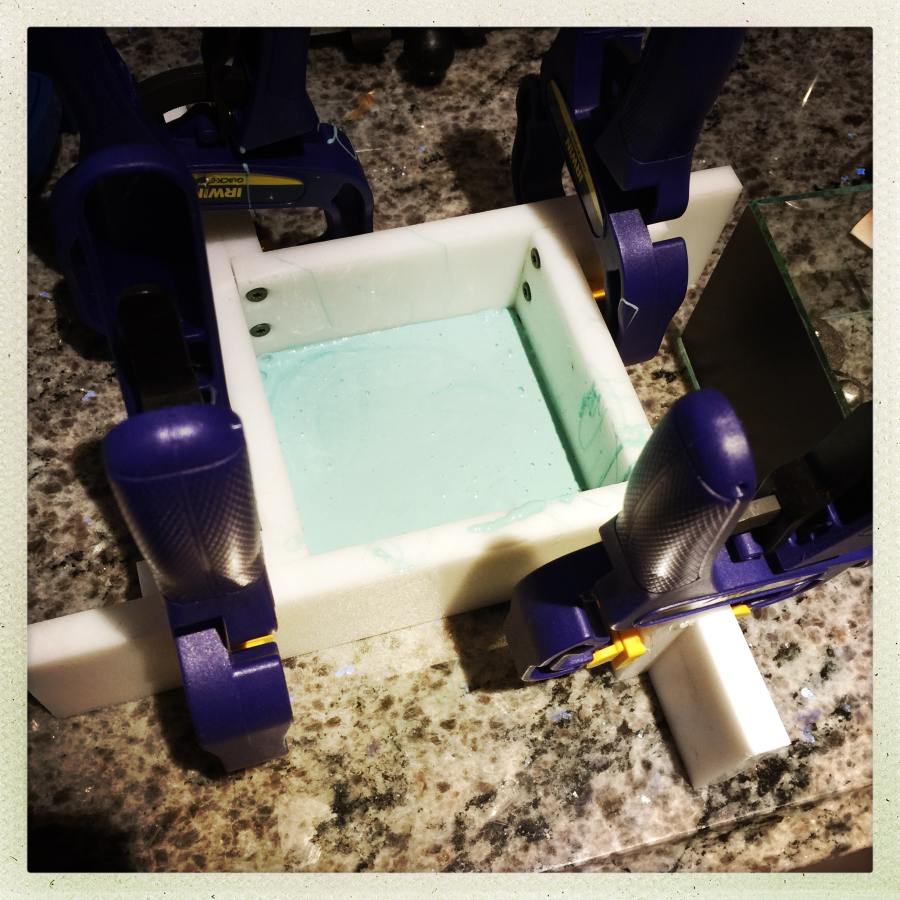
Update! Second pour.

See the nice even green on the bottom glass surface? What I did was took a stick and spackled a thin layer of silicone right onto the bottom and lower edges of the glass. That will keep bubbles from forming right up against the edge. And when I put it in the mold-box I angled it and slowly pushed it down so the bubbles squeezed out one side.
Pouring the silicone this way helps get any big bubbles out because they immediately float to the surface or pop during the pour. It’s hard to tell where I am aiming but what I try to do is hit the outer edge of the object so the silicone sheets down over it and fills the mold from the bottom up.
It makes a tremendous mess.
The great thing about silicone is: it only sticks to silicone and cats. So you can clean it up by getting a thumbnail under one edge, and pulling the whole thing up like a great big rubber band. Sploop! I suppose you could use a cat to lift the silicone but… just don’t.
When that cures, I’ll break apart the mold-box by undoing the clamps and pulling the sides away, then I’ll lift it up from my counter-top and trim the edges with scissors so it doesn’t look like such a horrible mess.

Tip for silicone workers: since it tends to cure slow (check the labels, though) you should use the same container for both the ‘a’ and ‘b’ parts. That way, when you mix it thoroughly, you can just peel it right off the next day and re-use the container.
I use little silicone lab beakers for mixing epoxies because the cured epoxy just peels right out. Don’t use those to mix silicone! I use polypropylene lab mixing containers, which are inexpensive on ebay.
I quite like cats. The “cats and silicone” is an oblique reference to a certain cat that was trying to rub on my leg while I was pouring silicone. It got a glob of silicone on its head and it did not want to have the silicone removed with alcohol, so it had a sticky spot on its head for a few weeks, during which time it (rightly) blamed me for the whole experience.
Cast plaster skulls… now there’s something nice to have around, just in case.
The class sounds really cool. I make molds but for a completely different purpose using a completely different process. This would be a fun way to learn a new process, too bad the commute is so far. I’ll just stick around and glean tips instead.
Fascinating. I love seeing how things are made. Now I’m curious about how you make a mold for concrete skulls. I have a couple of Crystal Head Vodka skulls and I see possibility, but since I’ve never done this before I suspect I need practice with more simple shapes first.
DuPont Corian….i think my countertops are made of that stuff.
voyager@#2:
Fun Dupont facts: fuller’s earth is “fine clay with bubbles in it” and it was the secret ingredient in Dupont’s signature product, dynamite. If you have a cat, it’s also known as “cat litter.” I believe that it’s used as a binder in other explosives but that sort of thing becomes a trade secret.
Anyhow, when Dupont researchers were experimenting with polyurethanes someone noticed that fuller’s earth (which Dupont has vast supplies of) makes a great extender. Dupont has made a bazillion dollars off of Corian(tm) which is light, wicked strong, machineable, and best of all – inexpensive.
Fascinating.
Molding plastic is all pretty new to me. I’ve never done any of that. Closest thing was pouring, watching the instructor pour, aluminum into sand molds in Junior-high school. Different deal. I got an aluminum eagle out of it. They were preparing us to work in foundries that would close years before we were old enough to work in them.
I had a friend, she was two doors down in the apartment complex, thirty years ago who poured something in molds. Wax I think because I clearly remember getting a big candle for Christmas. She made a point of showing me her new tool after I asked, rather delicately, about the buzzing noise. It was an ancient, 60s era, plug-in electric shaver. She said it was used to eliminate bubbles’ after pouring’.
I was imagining something completely different. A mind is a terrible thing to waste.
I wonder if something like that might work for getting the bubbles out.
lorn@#4:
I wonder if something like that might work for getting the bubbles out.
Some people use vibration but I don’t think it works very well with silicone. The silicone is basically rubber even when it’s liquid (it just sets up “less liquid” when catalyzed) – I have tried vacuum degassing and that helps a bit but really not much. The main trick to keeping bubbles out is to pour so you don’t trap any bubbles.
One of the Polytek guys took a work-piece and a stick and made a thin layer of silicone on the work-piece to keep bubbles from forming right against it during the pour. That was a really clever technique which I use all the time, now.
Closest thing was pouring, watching the instructor pour, aluminum into sand molds in Junior-high school. Different deal. I got an aluminum eagle out of it.
Nowadays the way that’s done is you make a silicone mold of the eagle, then make a bunch of beeswax replicas in the silicone mold, and you’ve got semi-disposable originals for your sand-casting. People who are doing production mold-making often do a silicone master and then make temporary objects out of ${whatever} – the high-foaming self-skinning polyurethane can be burned out of a sand mold with a touch of an oxyacetylene torch.
“Concrete vibrator” is a thing. FYI.
kestrel@#1:
Cast plaster skulls… now there’s something nice to have around, just in case.
I keep meaning to cast a small stack of them in refractory cement so I can make a fire-pit with burning skulls. Because, I can, that’s why. I have a few 50# sacks of refractory sitting around but they’re probably rock by now.
One interesting thing I learned from the Polytek guys is that you need to really understand what you plan to cast in your mold and make sure the rubber you use is appropriately tough. Plaster doesn’t wear a mold out but concrete just rips them apart. You can make an infinite number of wax objects in silicone. Etc. You’ve kind of got to think about that. So I have this great block of yellow rubber that’s the size of a human head (plus some) and I am reluctant to use it because I don’t want to wear it out. I did do one in bronze resin and it came out awesome. I could probably rotational cast white urethane in there, too, except the mold weighs a lot and I can just imagine what happens if it leaks. That’d be a casting to attempt during the summer when I could do it over my bonfire pit.
Making molds is fun. I wonder what this contraption will be in the end.
This brings up memories from 10 years ago when I made tabletop scenery for my wargaming/warhammering friends. (plaster and epoxy).
And from pouring fesh molten iron from a thermite reaction, but we miscalculated the volume and did only get a blob. (It was in extra curricluar school chemistry, I am not quite *that* insane and like my appendages unburned, thankyouverymuch) Don’t do it at home, kids!