One of the things I love about science is that it proceeds not just by learning what is true, or what works – but by learning what is not true or what does not work. Naturally, we’d all rather make great leaps of understanding, but sometimes we can learn a bit, and push things in a good direction if we can handle a bit of failure.
Today, I advanced the art of blade-smithing a tiny bit by discovering another thing that does not quite work.
When you’re trying to weld stainless steel and non-stainless steel, you need to prevent an oxide layer forming on the stainless; that’s how stainless keeps from rusting – like aluminum, it forms an invisibly thin, very tough, oxide layer that doesn’t react any further and which shelters the rest of the metal from atmosphere. The problem is it’s hard to weld to that oxide layer. With a MIG (metal inert gas) welder you are using an electric arc to bring a small part of the metal to welding temperature under a bubble of argon or other shielding gas, which prevents that oxide layer from forming, and the weld takes.
If you’re trying to make a thing called “San Mai” you want to take two pieces of stainless steel and weld them as facings onto a piece of high carbon steel. It’s a cool technique and you get some beautiful effects. This is not a blade I made:

HHH custom knives san mai of 1095 and random pattern stainless damascus
I suspect the HHH knife has a bit of nickel in the area between the stainless and the high carbon steel; that’s a popular trick: it looks great and the nickel acts sort of like a very very strong solder.
Making san mai is a pain; some blade-smiths stack the pieces of metal then run a weld all the way around the sides, to keep the air from getting between the slices. It’s labor-intensive, and you have to grind the weld off later, which is also a great pain in the neck. Then, I was drifting in and out of consciousness on the airplane to LA, thinking about beating on hot metal, and an idea occurred to me: mokume gane! The way mokume gane is made, you press it so that there’s basically zero atmosphere between the plates. Then, another idea occurred to me: furnace cement.
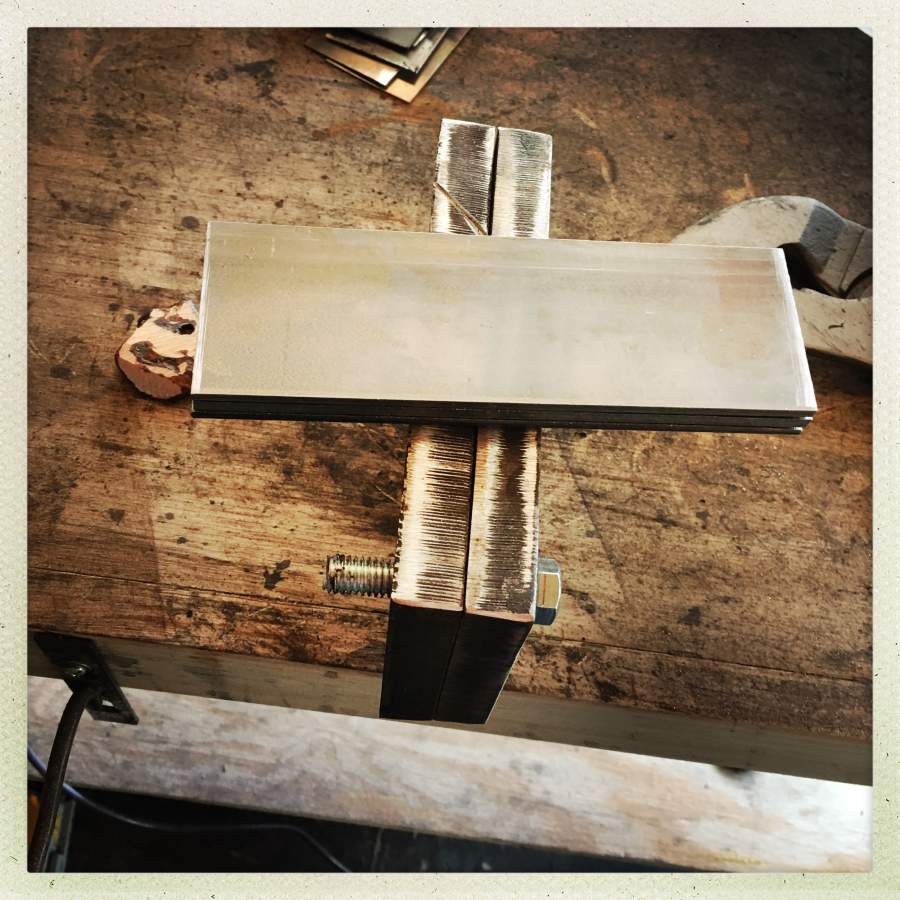
Two pieces of 304 stainless steel and a piece of 1095 high carbon steel. The thing they are resting on is my prototype “Simple San Mai” press – it’s just two blocks of 6×3″ 5/8″ thick mild steel that I got four pieces of on ebay for $10. The US Postal Service has these “flat rate” boxes for VHS cassettes and a lot of metal moves around in those; you can imagine how much the postmistress in Morrisdale appreciates occasionally picking up a little box (always for Marcus) that weighs 20lbs. The press was a snap to make on the milling machine – nice precise holes on demand is what milling machines are for.
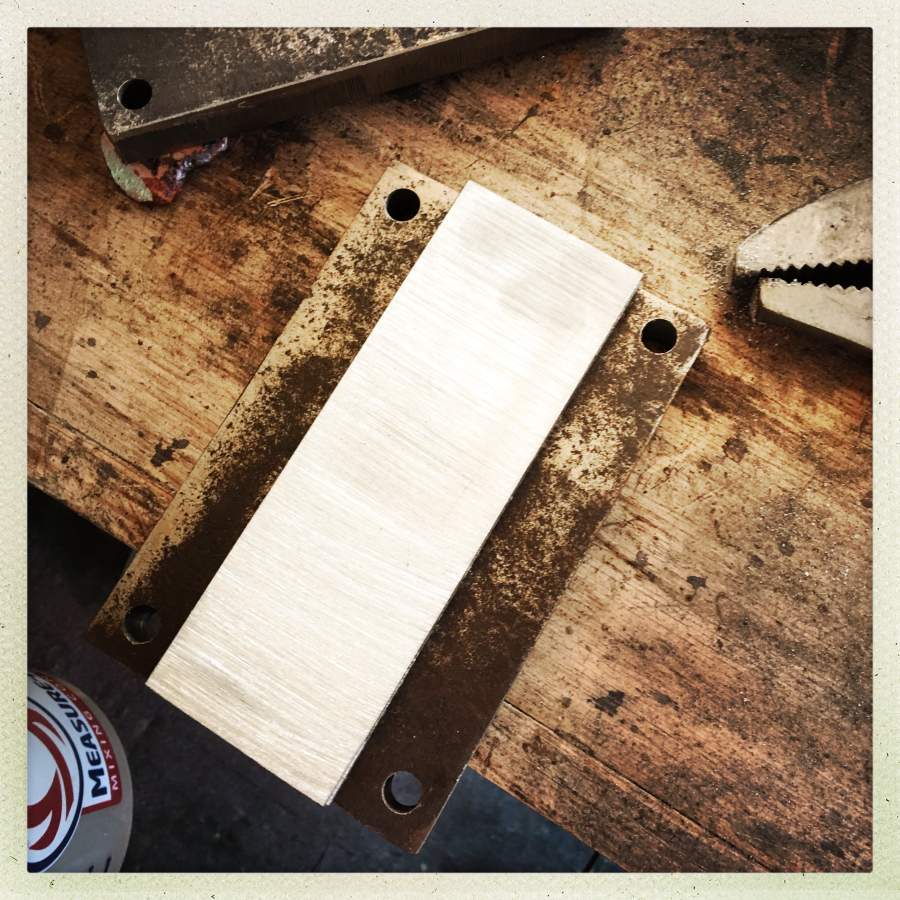
I surface-ground the pieces of steel, then bolted the stack between the plates and tightened the bolts until they absolutely would not budge any further. Then, I took a small paintbrush and painted furnace cement around the cracks in the edges of the steel stack, to keep air out.
Part of my reasoning behind the huge steel plates for the press: thermal mass. One thing that helps screws up your welds is when you put the metal on an anvil and it immediately begins to transfer its heat into the anvil – if it drops below welding temperature, you have just wasted your time. So, I was thinking a great big thermal mass with my stack of air-proofed steel in the middle: sure-fire winner!

Then, I let the whole thing soak in 2300F+ heat for a while until it came up yellow/orange. Because I was busy doing some other stuff, I forgot to take as many pictures of this process as I should have.
Here you can see the furnace cement dried rapidly and foamed up a bit. But: so what? It’s disposable and it’s $20 for a half gallon – very very much easier to get off a bar of steel than welds. The chunk of stuff in the lower right is a chunk of damascus I was forming for another experiment (smaller pieces heat and cool faster so you can work at different time-scales on multiple projects).
When the moment was right, I brought the whole mass out – it’s about 7kg/15lb – put it on the anvil – and gave it a bunch of good raps with my hammer to set the weld. I was happy to see that it held its temperature a good long time, so I gave it some great poundings after the initial rapping. Then (while it was still glowing malevolently on the anvil) I used a cut-off saw to grind through the bolts at the corners. The moment of truth had arrived!
The top didn’t want to come off, so I took it over to the vise and used a pry-bar on it, carefully. The red-hot top piece popped off. The bottom did not. It’s stuck there like it’s welded… uh… it is welded.
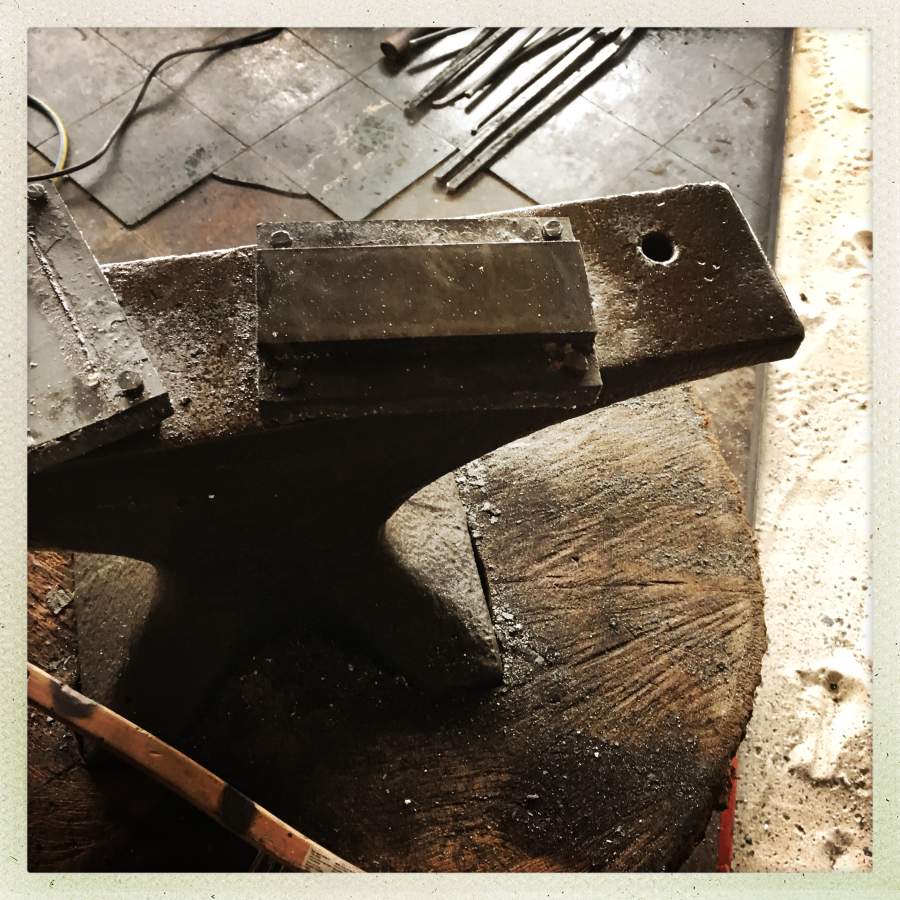
In fact, I got one more excellent weld than I had bargained for: the billet is permanently married to the crusher. It’s a beautiful weld. The bars are beautifully welded, too. What Marcus has joined, let no one put asunder.
So, I would say I have almost invented a vastly simpler way of reliably making san mai. Obviously, the only thing I need to do is repeat the experiment, using a thin coat of furnace cement on the top and bottom of my billet as well. Furnace cement appears to be a good “weld resist” – at forging temperature it prevents metal from sticking to other metal. Some smiths use White-Out(tm) for that purpose and I suspect that furnace cement may prove to be a great cost-saving for them. [I have another experiment in progress on that dimension, as well!] I will contemplate mixing a teaspoon of titanium dioxide to some furnace cement and coating the top and bottom of the billet, and using pure furnace cement on the sides. Titanium dioxide, I predict, would be the archenemy of a weld – it’s basically a high temperature-capable version of that oxide layer, anything with titanium dioxide on it ought not to weld to anything, so I want to keep it at arms length from my work area.
All in all, I would rate this test a “near miss.” If this technique can be made to work, it’s about 10 times easier than the current prevailing method for making San Mai.
Does anyone want a nice san mai billet? It would make a good cooking knife. There’s only one little problem with it…

Edison was the master of failing usefully. I believe he once said that he figured out thousands of ways of not making light bulbs, before he figured out how to make a light bulb.
I still haven’t managed to actually make anything except experimental chunks of stuff which are mostly winding up in a “stuff” box. That frustrates me but I understand it’s how these things go. I could be just grinding up a storm if I chose to use someone else’s metal, or not to forge-weld my stuff. I’m reaching for a much more difficult set of techniques and it’s a struggle – but I will prevail!
The other technique I am experimenting with is called “canister damascus” – the technique involves assembling a bunch of bars and/or powdered metal in a steel tube with the ends welded shut to keep the air out, except for one small hole; the whole thing is then soaked in kerosene to replace the oxygen, and brought to welding temperature, then smashed. Canister damascus requires welding the canister airtight. I have a pair of experimental canisters I am slowly working on, which are tack-welded instead of airtight-welded, and I have used a long paintbrush to air-seal them from the inside using furnace cement. Again, if furnace cement works, it will be much faster, easier and quicker to clean up. Another problem with canister damascus is removing the canister once the whole mass is welded. If the interior of the canister is painted with furnace cement and a bit of titanium dioxide, I expect the contents to not weld to the canister at all – another huge time-saving, and a cost-saving on all the White-Out.
If either of these techniques (“simple san mai” or “simple canister damascus”) work, I will save my fellow blacksmiths a few thousand hours of their lives every year. So the failure and investment of my time is worth it. Besides, if it works, it’ll save me hours, too!
It is unsettling how a couple hammer-blows will bend 5/8″ thick steel when it’s yellow-hot. If this technique works, I’m going to probably make a better press out of something hellaciously tough like S7 tool steel, and I’ll make sure I flatten it back out on the anvil each time I use it.
Brains are funny things: I use ether for my wet plate photography, and titanium dioxide for soap-making and casting. So, when I saw someone using White-Out for forging, I immediately figured out what White-Out must be made of: ether, titanium dioxide, and a tiny bit of acrylic glue. I could, literally, go to my supply cabinet and whomp up about a half a gallon of the stuff – except my ether supply is precious to me. That stuff is hard to get nowadays. Thanks, methamphetamine addicts!
Amazing – out of the Maw of the Dragon comes beautiful metal. These are great ideas. Sometimes it’s really good to come up with these on your own – you don’t have anyone else standing around telling you that your idea can’t possibly work, why waste the time etc. and you can just get on with it and try stuff. The idea of canister mokume is really cool and exciting – I hope your idea works!
It seems that correction fluid uses naphtha and/or white spirit (turpentine substitute) as solvent these days, not ether nor 1,1,1-thrichloroethane or such. You could probably hold the acrylic glue and use rosin dissolved in white spirit as the base instead.
“Ever tried? Ever failed? No matter. Try again. Fail again. Fail better.” – Samuel Beckett
As I finished reading the paragraph beginning with “I surface-ground the pieces of steel, …” I thought “um, what about between the billet and the press?”. I literally LOLed later. I’m still smiling. Stuff like that happens (especially in the “heat of the moment” 😉)and its good see I’m not the only one.
This post is incredibly useful. Thanks for the write up.
Couldn’t you rescue your san mai experiment by cutting away the mild steel? You do have a milling machine, after all.
DonDueed@#5:
Couldn’t you rescue your san mai experiment by cutting away the mild steel? You do have a milling machine, after all.
I have decided to establish a Shelf of Shame to store chunks of experiments on.
Also, yes, I could mill it off but it would take a huge amount of time to do so and would make gigantic heaps of chips. Since it was an experiment, I only used small(ish) chunks of metal.
My next experiment will be bigger, better photographed, and I’ll put furnace cement on the top and bottom, too. Then (if it works) I’ll post a bunch of walkthroughs on knifemaking websites.
YOB@#4:
As I finished reading the paragraph beginning with “I surface-ground the pieces of steel, …” I thought “um, what about between the billet and the press?”. I literally LOLed later.
I kept alternating between hissing like a cat, and giggling. It was very annoying, but also funny as hell.
I am 99.9% sure the technique will work in other circumstances and will also allow crazy mixups like wrought-iron-faced stainless laminate, etc. Next week I will be experimenting more heavily and doing better photos of the process. If it works, I plan to do a few more formal write-ups and post them on some blade-making forums.
I’m especially eager to try some kiridashi out of wrought-iron-faced 1095. And, if I can do the assembly and welding this easily, it suddenly becomes practical.
call me mark@#3:
“Ever tried? Ever failed? No matter. Try again. Fail again. Fail better.”
I always liked: “the great thing about never living up to your potential is you’ve still got it.”
and: “who has never failed has never tried.”
I’m perfectly happy to learn mistakes; that way I know both what to do and what not to do.
cvoinescu@#2:
You could probably hold the acrylic glue and use rosin dissolved in white spirit as the base instead.
Good suggestion. I am going to try just using furnace cement, first. After all, I’ve already got a can of the stuff sitting right there, and a paintbrush covered with it. If furnace cement prevents the weld, then the process is fine. If it doesn’t, I could probably mix a small batch of furnace cement with some aluminum oxide or titanium dioxide in it. (and sell it as “Mister Badger’s No-Weld”)
kestrel@#1:
Sometimes it’s really good to come up with these on your own – you don’t have anyone else standing around telling you that your idea can’t possibly work, why waste the time etc. and you can just get on with it and try stuff.
This idea came to me while I was dozing on the flight to LA, and was pretty much exhausted and thinking about mokume. Sometimes when I’m tired I get out of my own way.
Years ago I supplemented college loans by selling off the tail ends of the collection/accumulation of antique cartridges and reloading supplies and equipment my grandfather left behind when he died. Those flat route boxes were always fun when someone bought one of the lots of cast lead bullets.
(Note to the non-firearm inclined: I mean the inert lead projectiles, not the entire propellant containing cartridge, when I say “bullet” here. Mailing live rounds USPS is a felony. I just sent thirty pound boxes of lead slightly larger than, as Marcus says, VHS cases.)
As a chemist I woull after grinding also shortly rinse the stainless steel just before work with muriatic acid for better weld.
One more thing, you can get hard martensitic steel on soft but tough stainless steel body by pack hardening with charcoal/soda/urea mixture. I tried it once -click-. It loses some corrosion resistance in the process, but the same goes for welding carbon steel between stainless sheets – the cutting edge won’t be stainless too. And the edge is extremely hard (also brittle, but that is not a problem for kitchen knife properly used).
“It is unsettling how a couple hammer-blows will bend 5/8″ thick steel when it’s yellow-hot.”
But jet fuel can’t melt steel beams!
Charly@#12:
As a chemist I woull after grinding also shortly rinse the stainless steel just before work with muriatic acid for better weld.
As a non-chemist, what would that do? Don’t acids produce oxides? That’s what I need to avoid.
I’m trying to perfect a way of doing this that is really easy, so if I can get the weld I want with just a surface grind I’ll leave anything else out.
One more thing, you can get hard martensitic steel on soft but tough stainless steel body by pack hardening with charcoal/soda/urea mixture.
Yup. I’m lazy and I’m just sticking to layups where I can put something that will harden at the edge of the knife. That’s what I’m trying to do with wrought-iron-faced 1095, for example: I can make things like a chisel body with the bottom/edge out of something that’s a flashy.
Eric Weatherby@#14:
But jet fuel can’t melt steel beams!
There’s lots of air up there.
I don’t know the exact numbers but the strength of various steels begins to drop pretty quickly once you get around 1000F
Don’t acids produce oxides? Depends on the acid. Muriatic acid dissolves oxides – so called activation. Nitric acid can produce oxide layer – so called passivation.
Charly@#17:
Depends on the acid. Muriatic acid dissolves oxides – so called activation. Nitric acid can produce oxide layer – so called passivation.
OK, that’s good to know. I had assumed I’d need some kind of reduction chemistry and that’d be specific to the alloy. Muriatic acid is something I have lots of.
However – I want to see if this process works without that; with basic surface cleaning. The whole idea is to simplify it and still have it be foolproof. Since I got the 304 stainless and the 1095 to weld so beautifully, I have hopes that this process is going to save huge amounts of work and time. I need to test with a couple of forms of stainless-on-stainless and stainless on high carbon. If this method works on both of those cases, I’m going to declare victory. It already looks really good.
I suspect furnace cement is various plaster and aluminum oxide with some polymerizers, which means it should neatly solve the “weld to the squasher” problem.
To be clear, I think the muriatic acid is not necessary if the layer is freshly ground. However should the steel lay around for some amount of time before you come round to welding it, I think it would be good to use it.
Furnace cement is indeed aluminium oxide with some binding agent, like liquid glass.
It is excellent sealant. I used it succesfully to seal the containers for pack hardening. Recently I used too big layer and could not break it afterward and had to grind it off with angle grinder.
@Marcus somehow I did not notice this: Yup. I’m lazy and I’m just sticking to layups
I do not think it has anything to do with laziness, but more with one is capable of doing. I cannot do forge welding (not yet, and it is questionable whether I will ever be).
BTW. pack hardening is easy, but it takes a few hours per blade. I am currently trying to develop a process for getting visible hamon on fully hardenend spring steel blade.
Charly@#19:
To be clear, I think the muriatic acid is not necessary if the layer is freshly ground. However should the steel lay around for some amount of time before you come round to welding it, I think it would be good to use it.
Definitely.
I noticed that smiths like ‘shurap’ seem to store their billets in cans of kerosene; originally the reason given was that the carbon from the kerosene acts as a flux in welding but I think it has a secondary benefit (perhaps not understood?) of keeping the oxidation from happening while it’s being stored.
Recently I used too big layer and could not break it afterward and had to grind it off with angle grinder.
Interesting – yeah, sounds like glass. I always just hammer it to powder. The simple san mai process winds up with very little left after the squasher and billet have been hammered on.
I do not think it has anything to do with laziness, but more with one is capable of doing
“Laziness” is a sort of internal codeword for me: it’s the combination of approaches that optimizes time and effort and complexity and likelihood of success. Programmers sometimes use “elegant” in the same way.
I am currently trying to develop a process for getting visible hamon on fully hardenend spring steel blade.
I’ve seen a few people do edge-quenching using a propane torch and a water quench. It seems pretty high-risk to me (risk to the blade, not the operator).
@Marcus, that surely sounds like a sure way to crack a blade.
But I do not mean edge-quench, but full quench. What I am trying to achieve is fully hardened blade tempered to spring steel, but with visible sharp transition betwen the steel on the edge and the spine. I think this can be achieved by using spring steel with 0,5% carbon content, carbonitriding the edge thus increasing its carbon and nitrogen content, and then hardening the whole blade. carbonitrided steel has different color than normal hardened steel, so if I manage to do it right, the results will not look like a katana, but should look interesting nevertheless.
My first test did not go so well. I fluffed up first try, on second try I did the quench but the blade has bent and subsequently broke when I tried to straighten it. If possible I will try to make something of it anyway just to see the resutl of the pack hardening. If something comes out of it I will write about it.
Sorry for double post.
Ad kerosene – it definitively protects the bilets from oxidation. After all kerosene is used to protect highly reactive metals like sodium against oxidation – these metals are kept in bottles submerged in kerosene.
Charly@#23:
After all kerosene is used to protect highly reactive metals like sodium against oxidation – these metals are kept in bottles submerged in kerosene.
Ah, right! I guess one nice thing about kerosene is that you can tell when it’s oxidizing…
(My policy on double posts is that they are fine. Bits are bits.)