So far, everything I have tried to do, today, has failed. Everything. I’m afraid to even try to boil an egg for lunch.
First, I tempered some blades. I was worried that I had ground them too thin in the process of grinding the scale out, and I was right. Watching the pros do it, I catch myself thinking “that’s awfully thick” and I need to switch to “that’s awfully thin” apparently. Because the blades were thin and bi-metal, they bent a bit when quenched. That’s also normal. Unfortunately, the quench had over-hardened the steel and the tip popped right off, with just a slight nudge.
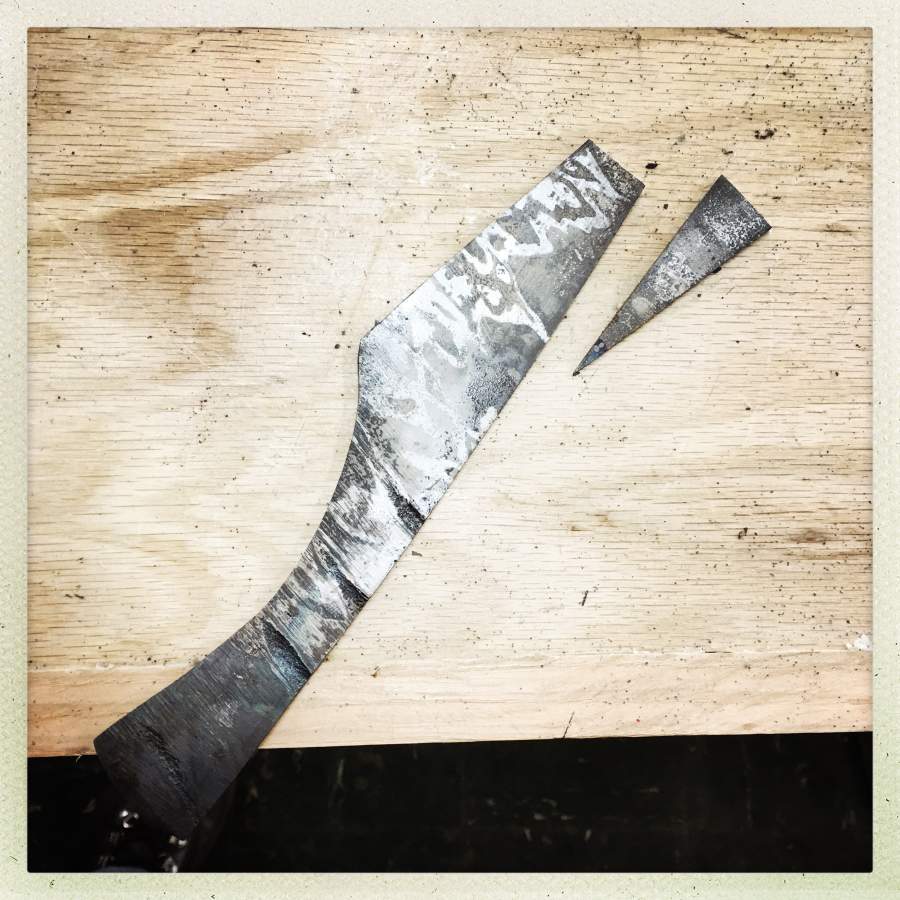
That was more than a bit demoralizing. I’ll try again, of course – but not today.
I quenched the blades while the forge was coming up to heat so I could try welding and splitting a billet. That’s for a technique called “feather damascus” that I am pursuing (though currently failing) – for an example of how it’s done right, see [Kevin Casey] Anyhow, I charged right in and stacked and welded my blocks, hammer-set them, and squished them with a vertical cutting die in my press. The vertical cutting die” consists of a wood-splitter chisel with the top cut off, welded to the die-plate.
What happened then was: 1) my welds popped open (bad!) and 2) the chopper get stuck in the billet. Oops. #Awkward. Then comes that interesting time when you sit there with your hammer, trying to apply gentle persuasion – the only kind you have with a hammer – and it stubbornly refuses to let go.
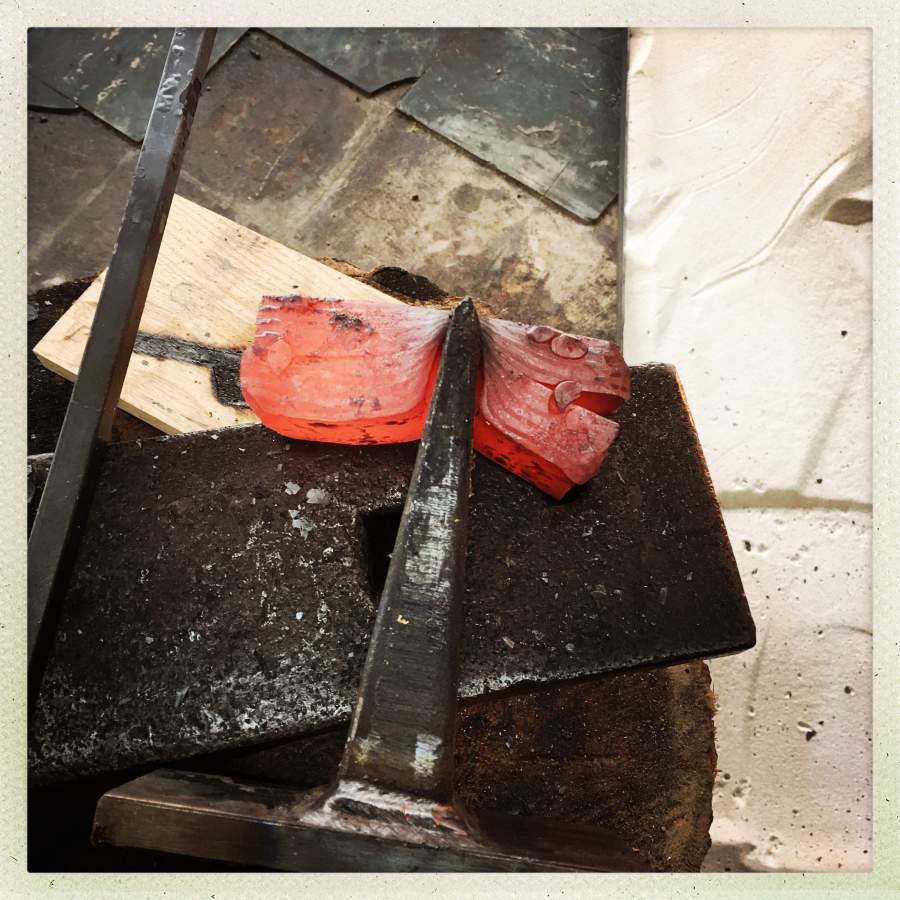
Meanwhile, heat is transferring into the wedge and doing who knows what to the wedge and the die.
Eventually I got it off by using a cutoff wheel on the back of the assembled mass, and it came apart. Somehow in all that process, the edge of the wedge turned into paste.
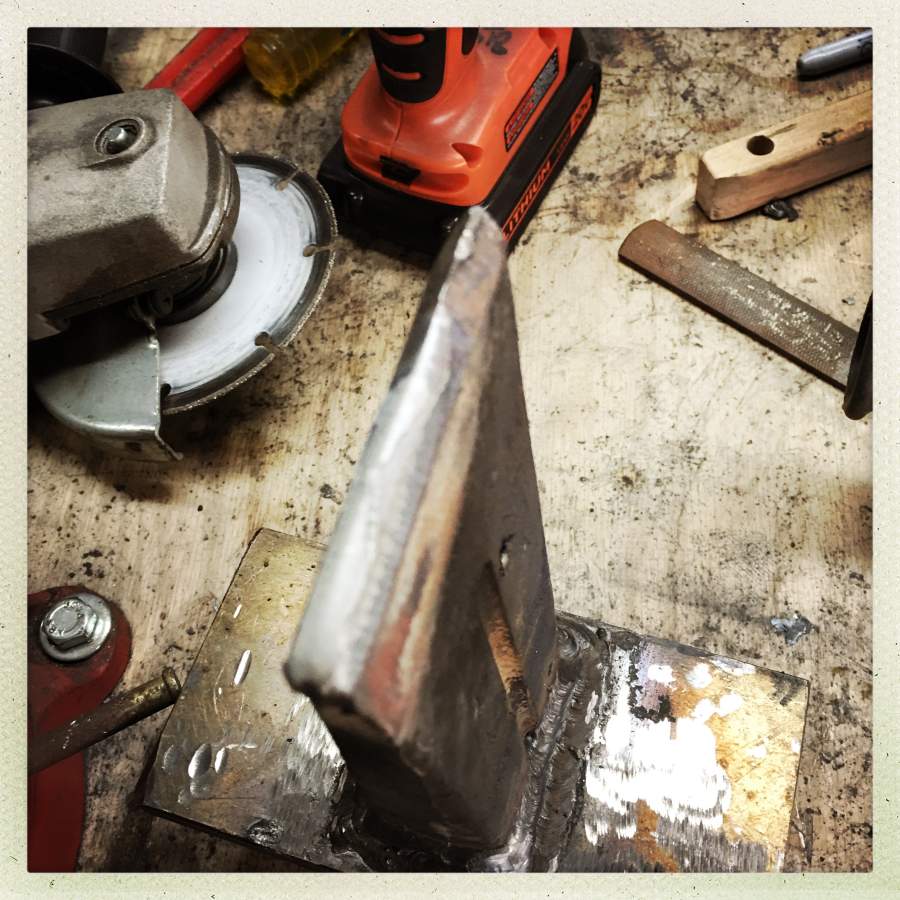
These are not intended to be one-shot disposables. It’s wrecked. OK, but I don’t know why it wrecked and how to keep it from wrecking again. I suspect that the wedge needs to be polished so it’s not as sticky, and probably made of some other kind of steel that won’t turn to mush. Meanwhile, I have a die with a piece of junk welded to it.
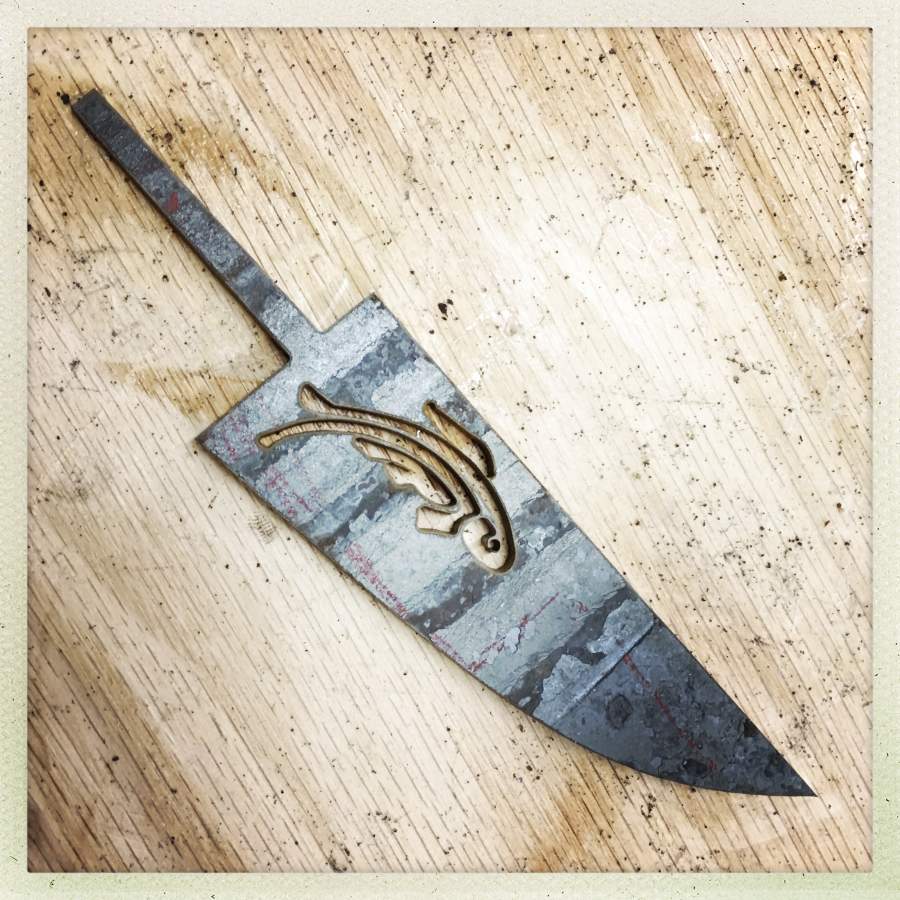
So I decided to make myself feel better by going to the fabricators to pick up the experimental pieces I had them do on the water-jet cutter. There was more fail there, too. It turned out as I had feared the kerf on the water-jet was not tight enough for my design (or: my design was too tight) and the pieces not only fit loosely, there are pieces that were cut though, and fell out.
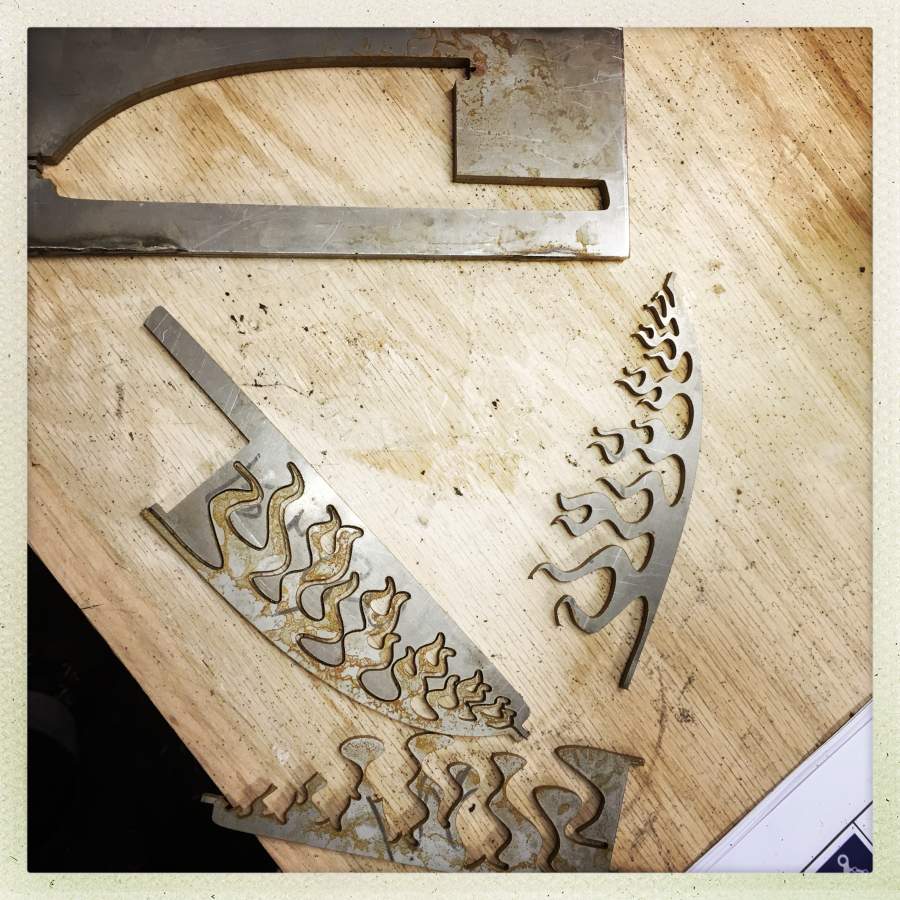
The little spuds at the head and tail are so I can tack-weld the pieces into position. My idea was to forge-weld the inserts into the edges and then draw the edge out with the hammer a bit, and I’d wind up with a knife with hot rod flames along the edge. Clearly, that’s not going to work (there are holes in the edge!) and I need to re-think the whole idea.
Meanwhile, I had another billet coming up to temperature so that I could weld it, except that when I whapped it the tack-welds broke and the yellow-hot piece of metal slid apart into two pieces, one of which fell and wound up on the side of my anvil-log. No big deal, it’s just some scorching and whatnot, but the billet’s not going to weld up cleanly into a nice big mass of steel.
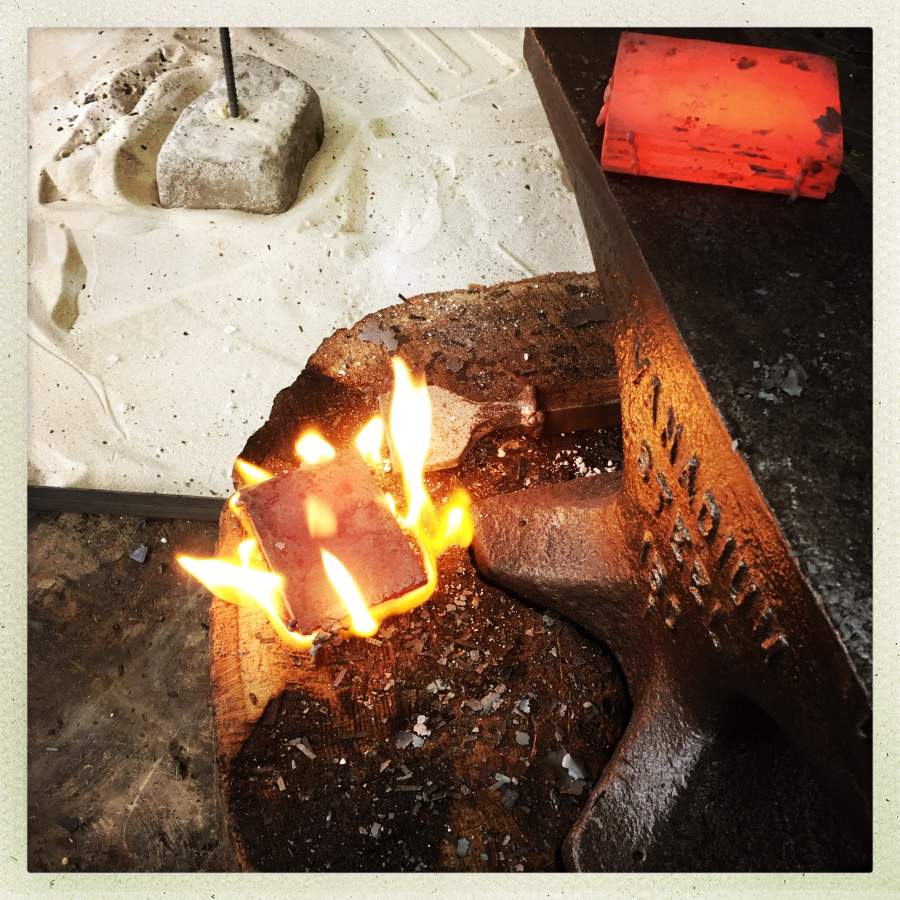
I suppose eventually I’ll see what happens if I drop a big thermal mass into the sand tray. Glass? (Glass happens at a balmy 1700F and that block was close to 2300F when I dropped it) Observe how the chunk that is on the anvil is rapidly cooling as its heat transmits to the anvil. Everything is going to hell. Around that time, I grabbed my tongs and – because my glove had gotten a bit damp – steam-poached my left index finger. Just a bit; it’ll be fine, but, ow.
There are other things that went wrong: I decided I’d shut down the forge and do some light wood-work but I wound up screwing up the piece of wood I was working on.
Then there’s another failure: the fish knife. I did a small bar with some simple layering and gave the fabricators a shot at cutting the blade outline on the water-jet. I wanted to see if it was going to be a cost-effective way of turning scale-covered bars into grind-worthy blanks. It came out pretty good-looking:
The experiment there was to see how well the water-jet could cut the blade without damaging it with heat. That’s pretty cool; I am going to keep that as a useful trick up my sleeve and maybe someday I’ll do some more open-work blade designs. Where’s the failure?
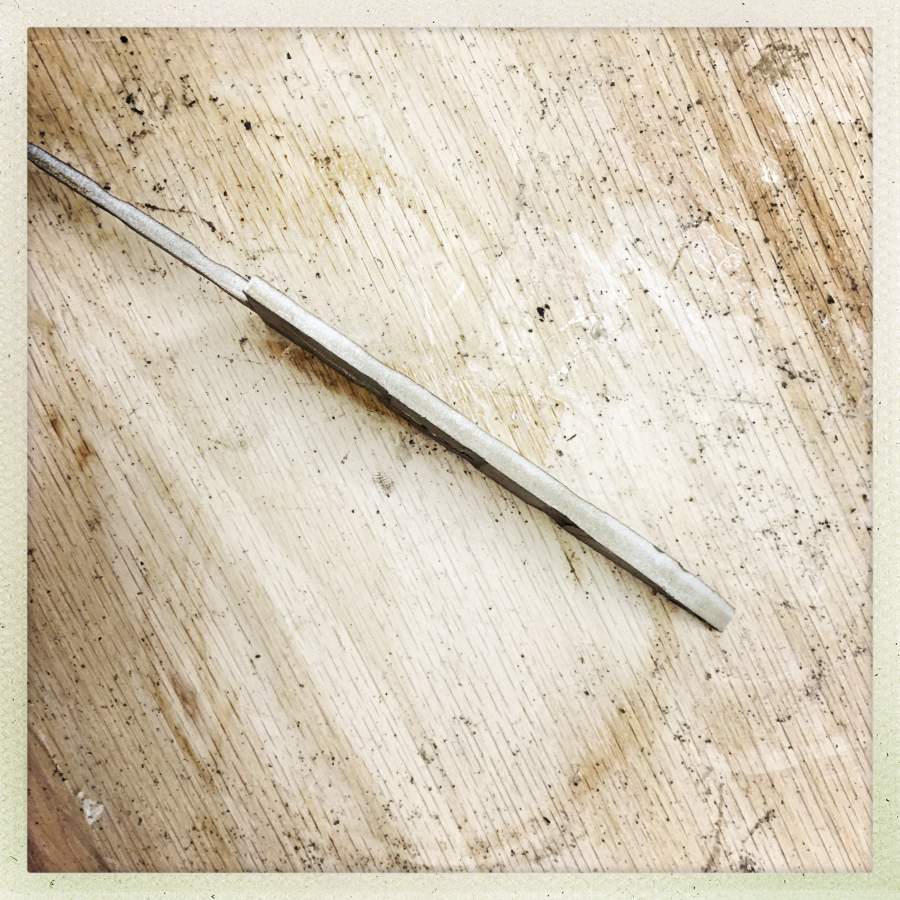
The guys with the water-jet cut the blade out of the bar from the wrong end. I had it marked on the bar, but oh, well. This one may not be a total loss – I may just thin it a bit and quench it and see how it comes out. That bar is a simple 3-piece: 15n20 on either side of a piece of 1095.
At that point, I decided to sneak carefully home (so as not to hit anything with my car) and hide under the covers.

Operational note: I am currently producing abalone refrigerator magnets. It takes about 2 days of clock time and 2 minutes of work to produce them, so it’s a slow queue. Several of you have sent me mailing addresses and I’ll be sending you magnets when I have enough of them done. I have also decided that if I am going to send people stuff, I should make a batch of soap, too. So I will be doing a walkthrough of how to make my incredible chocolate fudge cream soap. (Anyone allergic to cocoa or coffee?) I’ll do a walkthrough of that, and include the recipe, but now I am waiting for some more olive oil for the soap, another couple days. Projects, to me, always seem like a lot of “wait, wait, wait, get parts, wait, gather parts, make something.” It’s rare that I have a day where I feel I have all the parts to really charge into something, and it’s a really nasty feeling when I do that and fail hard.
I could draw a prettier flame design than the one you have cut in that photo. Usually people commission me to draw animal shaped designs, but I can also do flames and abstract tribal-ish stuff in general. In fact, I have already drawn something flame-alike here https://avestra.deviantart.com/art/Sun-Kissed-Snow-549925075 for the sun rays.
Just let me know what shape and size and amount of detail you need so that it works for your technique. I’m willing to draw something cool for you free of charge if afterwards I can get a pretty knife with my design on it.
Again, I could draw a prettier design. Just because my tribal designs are usually pretty detailed (customers usually commission me to draw detailed images for them) doesn’t mean that I cannot draw something less detailed that would work for a knife.
What a day. Ouch. All I can say is “keep on keeping on.” The successes make up for all the fails.
For your inlays, have you looked into powdered steel? I have no experience with it, but I’ve talked to makers that have had some stunning results with it.
Search terms: mosaic Damascus, canister Damascus
https://youtu.be/eRiubNeCGe4
That vid is an ad for his tutorials, but is also a super quick summation of the process.
Well… it looks like you’ve killed some hantavirus around the shop, so there’s that…
I think your cut-outs are really cool and a great idea. Really aggravating they have not worked out yet, but they will. As long as you stay home and away from the tools, perhaps a lovely lager is called for, or maybe even a scotch, and a good rest.
Update: I am told that the way to keep the cutter blade fron binding is to dust it with charcoal before using it, and to take smaller “bites” – not just one gigantic smush.
Marcus @4
I agree with that advice.
Also, do you have any idea what steel that cutter blade is? If it’s not mild steel (it should *not* be) it can be rehardened but you’ll either need to know what it is or just experiment.
YOB@#2:
What a day. Ouch. All I can say is “keep on keeping on.” The successes make up for all the fails.
Yup. Failure is a normal part of doing stuff. I just happened to hit a nodal-point where everything failed at once.
For your inlays, have you looked into powdered steel? I have no experience with it, but I’ve talked to makers that have had some stunning results with it.
I did some experiments and the results were iffy because the test objects were probably too small. I took a piece of 304 stainless grid and wrapped it in some stainless foil with a few tablespoons of powdered 1080, then got it up to welding temperature and hammered it a few times to set it. It actually sort of worked but I decided to subject it to thermal shock and the powder re-powdered. I’m pretty sure that if I pursued the process I could sort it out, but I’ve filed it away for now.
There are some cool videos of people using it in canisters, sort of in the role of flux. I’ve been wondering why the canister-makers weld the canisters so much, instead of just tack-welding and sealing with furnace cement. It wouldn’t be as hard getting it off. Also, I notice a lot of canister-makers paint the inside of the can with white-out to keep the steel from welding to the canister. Well, white-out is just titanium dioxide and ether. (judging from the properties and the smell) I’m not going to make my own white-out but I suspect some butcher’s wax and a dusting of the powder would work as well.
YOB@#5:
Also, do you have any idea what steel that cutter blade is?
1095 and 15N20.
I should dig it out of the trash; I admit I just threw it because I couldn’t bear to look at it.
The hardness can be pulled back down with a few tempering cycles. It’s just … kinda not the same without the tip.
kestrel@#3:
I think your cut-outs are really cool and a great idea. Really aggravating they have not worked out yet, but they will
I keep reminding myself “experiment. It was an experiment.”
I am not sure about sharing facebook links, but someone posted a video of John Emmerling doing a feather cut:
https://www.facebook.com/grant.leeser/videos/1426743237364460/?multi_permalinks=2195948077351402¬if_id=1523910566485003
Sorry, days like that are shit. Hope your finger isn’t too painful, steam burns are nasty. Have you got proper plasters (bandaids) for burns? The gel ones you can get help burns heal a lot quicker and less painfully.
Ieva Skrebele@#1:
If you’re game to do a vector for a “jagged edge” or “shattered edge” that’d be cool. It needs to not have any dangling pieces (obviously) or any pieces that are likely to fall out. The edge drama should occupy about 3/4 of the height of the blade (I’ll have to scale the vector to the blade design) Also, large regions will hold up better under the hammer when I weld it. Big and dramatic rather than detailed. Basic sushi-knife shape blade, and I can scale it up or down.
I’m willing to draw something cool for you free of charge if afterwards I can get a pretty knife with my design on it.
I am very reluctant to promise anyone knives. For one thing, at this point, they may be crap. They also may just not work out right, in which case I’ve got nothing to trade.
I’ll email you some blade drawings so you have a rough idea what we’re talking about.
jazzlet@#10:
Have you got proper plasters (bandaids) for burns? The gel ones you can get help burns heal a lot quicker and less painfully.
Good suggestion. No, I don’t. I have several first aid kits including some military trauma packs (celox) on the walls of the shop. Hopefully they’re only going to serve as visible reminders that I need to be careful.
Water-gel burn dressings: ordered.
Marcus @6 & 7
Re: canisters and welding
I suspect its to create an oxygen free environment that is still mashable. That’s my guess anyway.
Re: the cutter blade
One of the cool things about smithing is, oftentimes, if you need/break a tool, just repair it or build another. :)
I was told once by an old timer…
“You’re not a blacksmith until you’ve built a tool used to build *another* tool so you can build the thing you wanted all along.”
It’s okay to fail. No shame in that. The trick is knowing when it’s time to shut down the nitrations and turn off the heating blocks and rotovaps before you blow yourself into the ceiling crawlspace.
YOB@#13:
I suspect its to create an oxygen free environment that is still mashable. That’s my guess anyway.
That’s exactly right. There are some people who are doing really interesting variations including argon-atmosphere cannisters in induction heaters to melt damascus titanium. And there’s a company in Vegas that makes billets of stainless steel damascus of all kinds of crazy sorts.
The reason stainless steel is stainless is because it forms a thin oxide layer that doesn’t react easily with other stuff (that is a lame explanation, I am sure some of the scientists here could do better) – so if you manipulate it in a controlled atmosphere you can get it to weld and not oxidize.
Most of damascus-making history has depended on flux (usually borax) to make the welds take better. But it turns out that higher temperatures and some carbon work fine – that’s how the Japanese did it for ages (using burned straw as carbon). So some smiths started experimenting with 2300F temperatures and dunking it in kerosene or spraying it with WD40 first. But then JD Smith and a few others started experimenting with dry-welding in a reducing atmosphere and it worked just fine. I have been avoiding using flux because it chews up your forge and it splashes about when you hit it. On the other hand, it makes my welding work a bit harder, which is probably contraindicated for a beginner but I never like to begin at the beginning.
Raucous Indignation@#14:
The trick is knowing when it’s time to shut down the nitrations and turn off the heating blocks and rotovaps before you blow yourself into the ceiling crawlspace.
Being blown up doesn’t bother me, as long as the transition from alive to pink mist is pretty quick. What worries me is burning. A friend of mine saw a former gestapo officer commit suicide (in a public park…) using gasoline and he had years of nightmares. It turns out (surprise!) that burning to death hurts a whole lot.
Raucous Indignation@#14:
Solid advice!
Marcus @#15: You have a propane oven, creating a reductive atmosphere around the billet should be possible. (I only have experience for some tiny cubic cm volume flames, so I do not have real advice to offer on the “doing it to scale” side.)
Fail Days are terrible. On such occasions I opt to do nothing dangerous and stay away from the lab. And the kitchen.
May all your fail days never lead to any serious injury!
avalus@#17:
You have a propane oven, creating a reductive atmosphere around the billet should be possible.
Most forges (including mine) have a jet and a variable-sized intake for air. So, you can adjust them to run a reducing atmosphere pretty easily by just choking up on them a bit.
Oh well, then I’ll just have to accept the risk and hope that you do succeed.
I’m sorry to hear about your day and your finger. You work on a lot of difficult projects, and you always figure things out in the end. Some days are “Murphy’s Law” days. Kudos to you for all of your interesting projects!
I’m sorry to hear about your day.
Some day are clearly used and not in mint condition.