Sometimes when I’m working on a project, I just can’t seem to get the right parts at the right time. I got all the Kee clamps [sb] to build the first (welding) table, but I kept ordering the wrong size connectors for the grinder/assembly table.
Finally, I got it all together. Assembling stuff with Kee clamps is interesting – you cut your parts then sort of tinker-toy everything together, then rap it into balance with a few blows from a hammer, and tighten it all down with a hex-wrench in a ratchet. It sounds easier than it is; the pipes don’t have a lot of “give” in them so you have to hold the cross-members in place while you’re assembling risers – it’d be easy with two people.
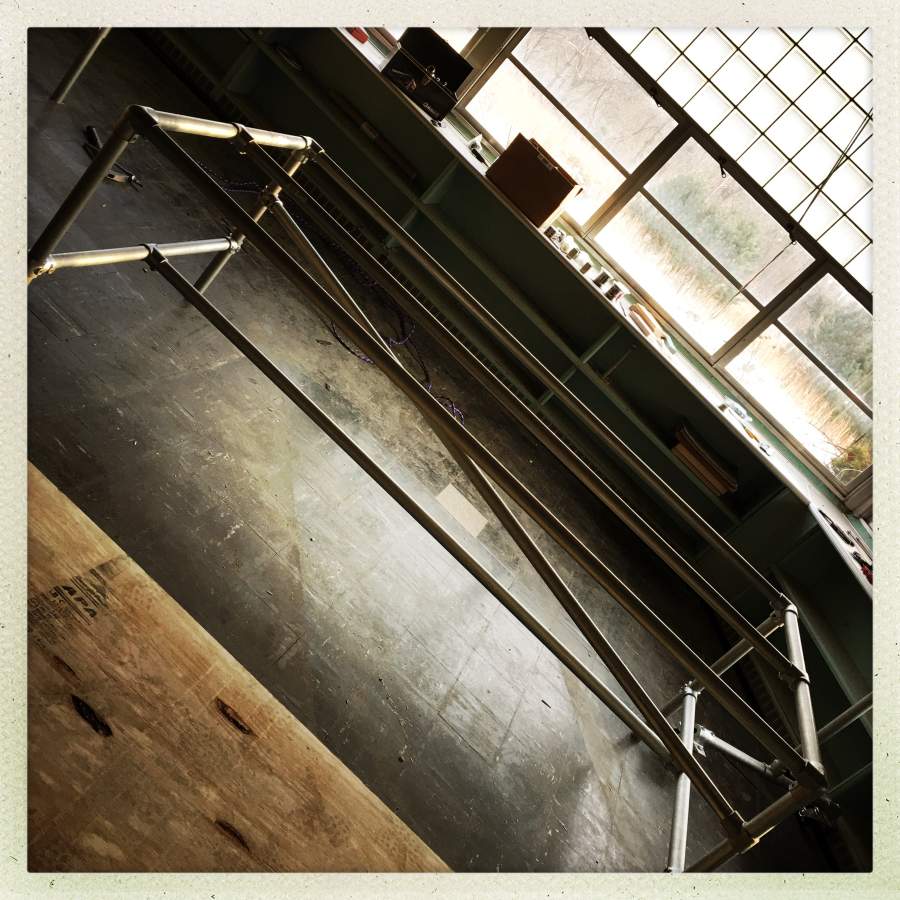
I used galvanized steel conduit, 1 1/2″ (which is nominally 1 1/4″ clamp size, because – ARRGH!) the whole frame weighs about 150lb and it ought to be able to support several tons. The cross-brace is for two purposes: 1) to tie-wrap power wires to, to keep them out of the way 2) to keep the table from vibrating at all. Since I’m going to have grinders bolted to the table-top, I don’t want anything to move.
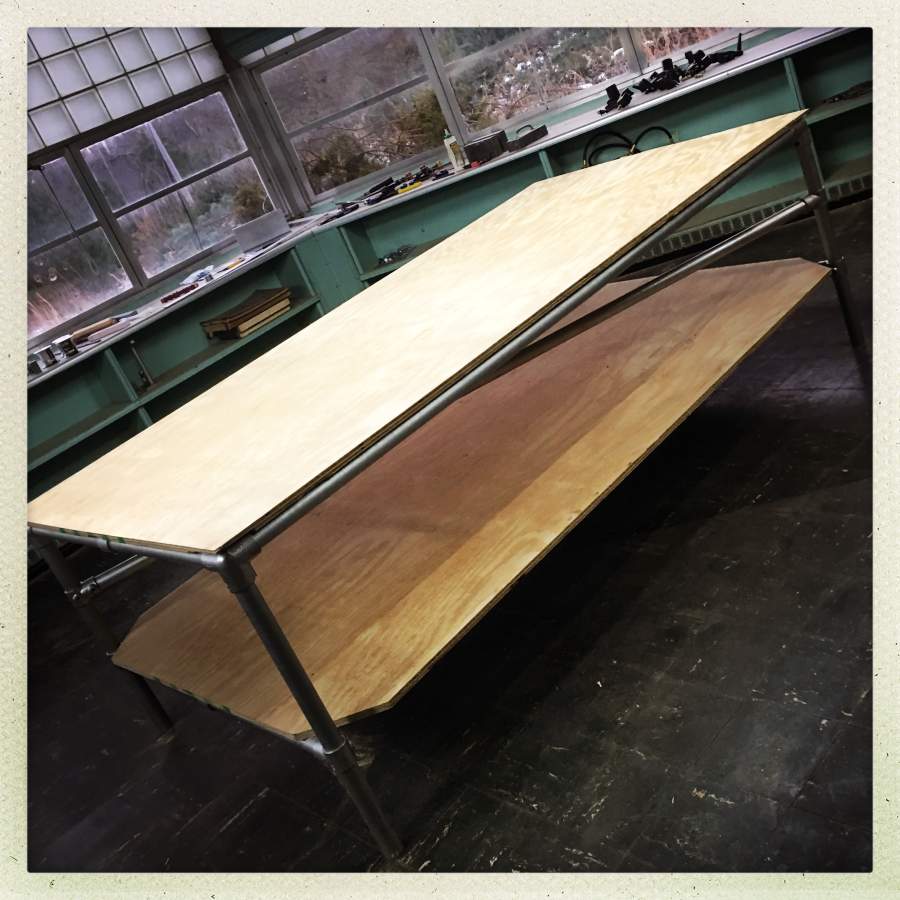
So the top wouldn’t ride on the edges of the clamps, I routed back the wood so the weight will rest on the tubes not the clamps. This is the plywood layer; on the top I added an entire bottle of gorilla glue, then a 3/4″ oak veneer plywood sheet, weighted it down with lead bricks, clamped it, and let it cure.
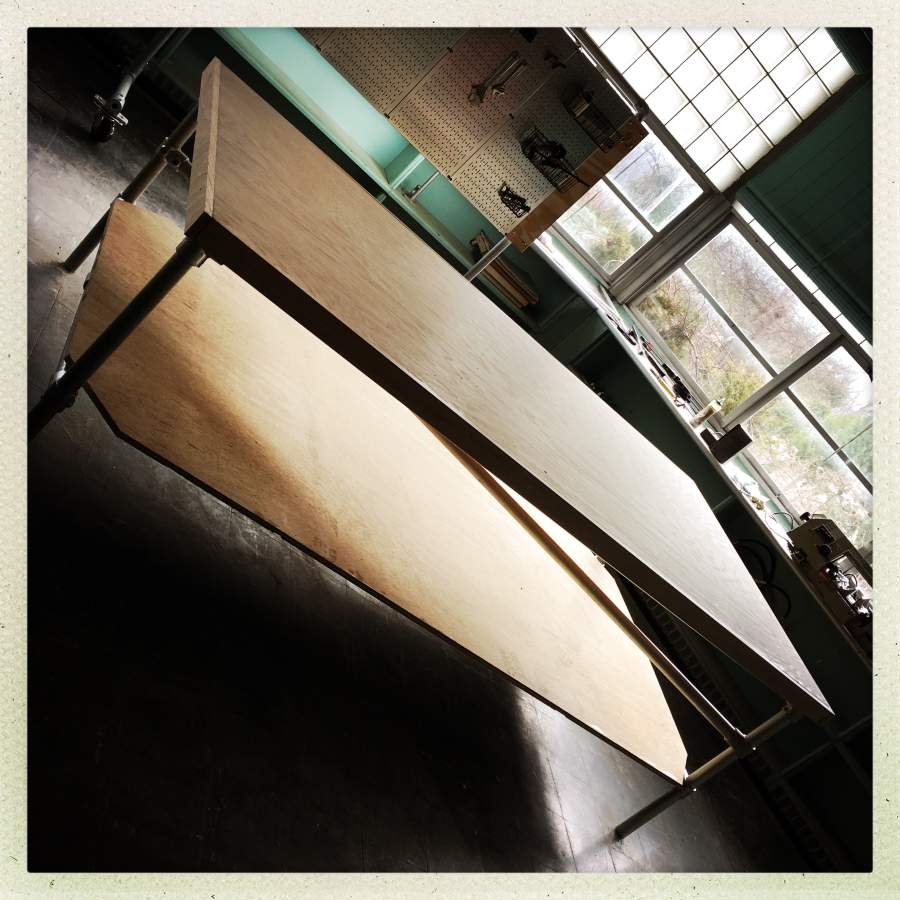
Trim! Because, why not? I’m probably going to be rubbing up against that edge a lot and I don’t want raw plywood.
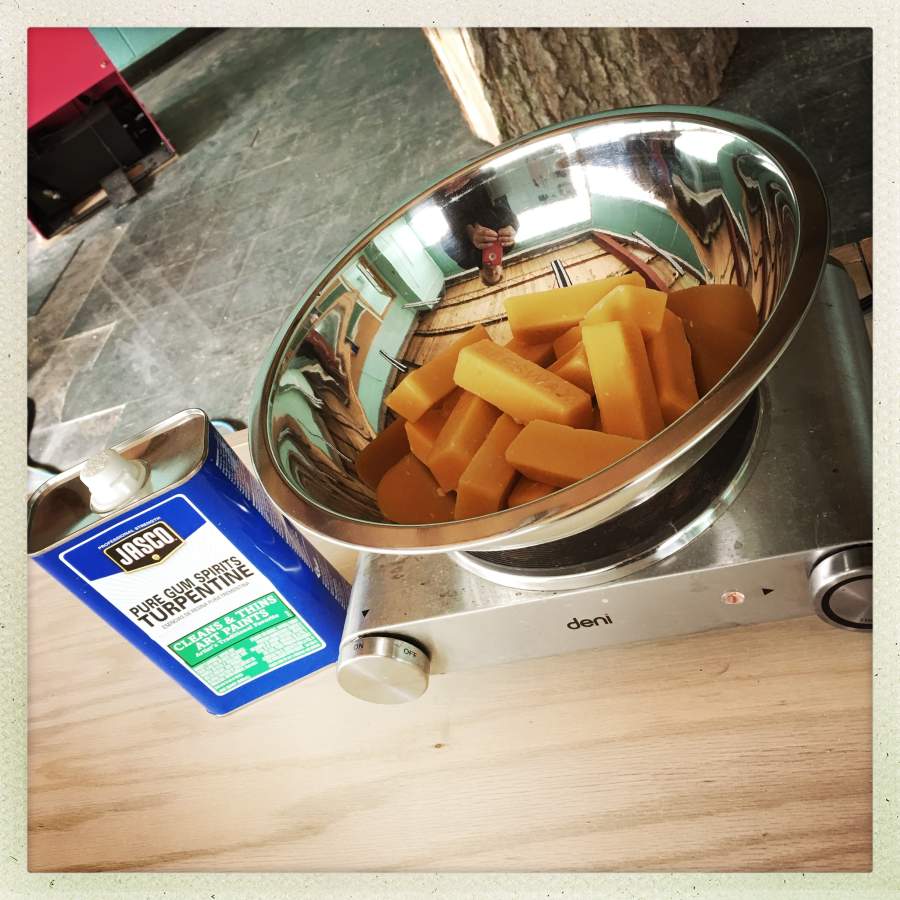
My grandfather had a great trick for finishing a workbench: you melt a bunch of beeswax with some turpentine (about 50/50) then just paint it on while it’s hot. It instantly soaks in and seals the top. That’s the recipe for “butcher’s wax” by the way – that smell is immediately familiar. If you buy it in the can, you’re looking at two cans to finish a workbench, or you can use $4 worth of beeswax and a paintbrush.
One thing to remember: when you’re melting beeswax (fuel) in turpentine, you’re vaporizing flammable stuff into a little cloud around you. You don’t want to have open flames while you’re doing this. So, I turned the reddi-heater off so it wasn’t blasting a great jet of flame right at where I was about to start pouring hot turpentine.
Yeah, if you figured out what was going to happen, you’re smarter than I am. I poured the molten wax/turpentine mixture on the below-freezing surface of nearly two inches of wooden thermal mass, and it instantly set up into goop. Not a lot of soaking in going on there. But, actually, that’s OK. It’ll get up to about 80 in the summer, and I’ll have the forge burning, so eventually it’ll melt in. In the meantime, I just don’t care.
The thing that’s neat about this finishing technique is that anything – paint, glue, blood, whatever – just scrapes off with a scraper. Once you’ve got the finish done you can touch up any spots with canned butchers’ wax if you care – or scrape the surface down every couple years and re-wax it.
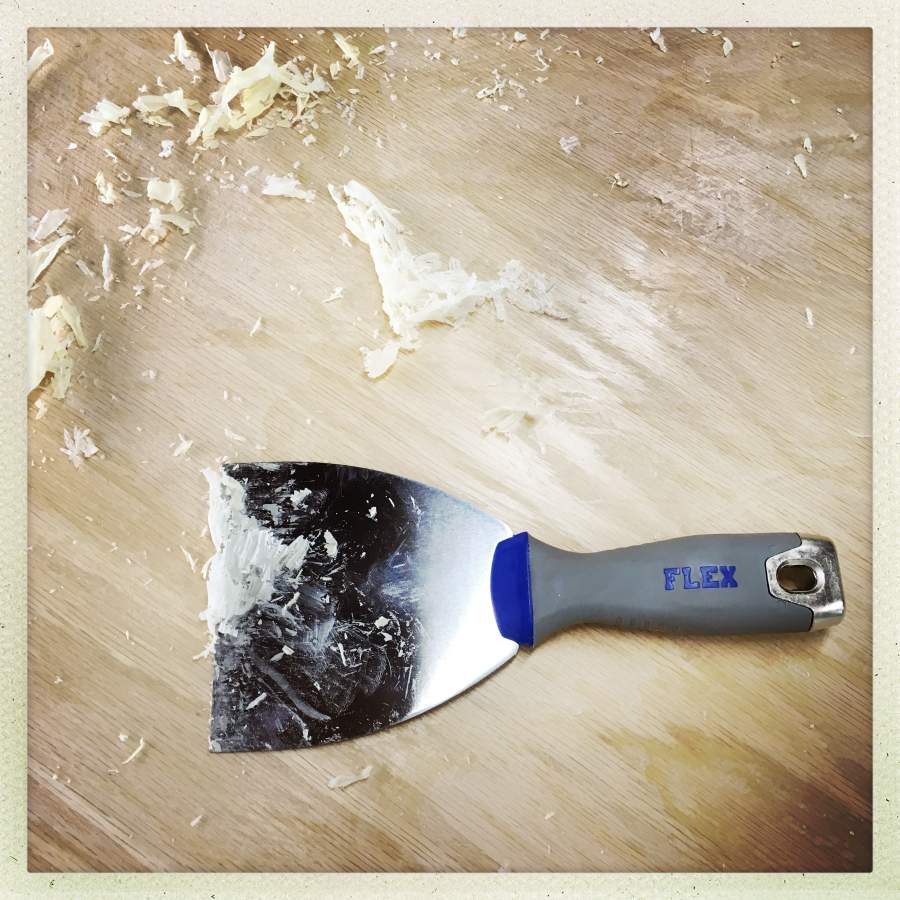
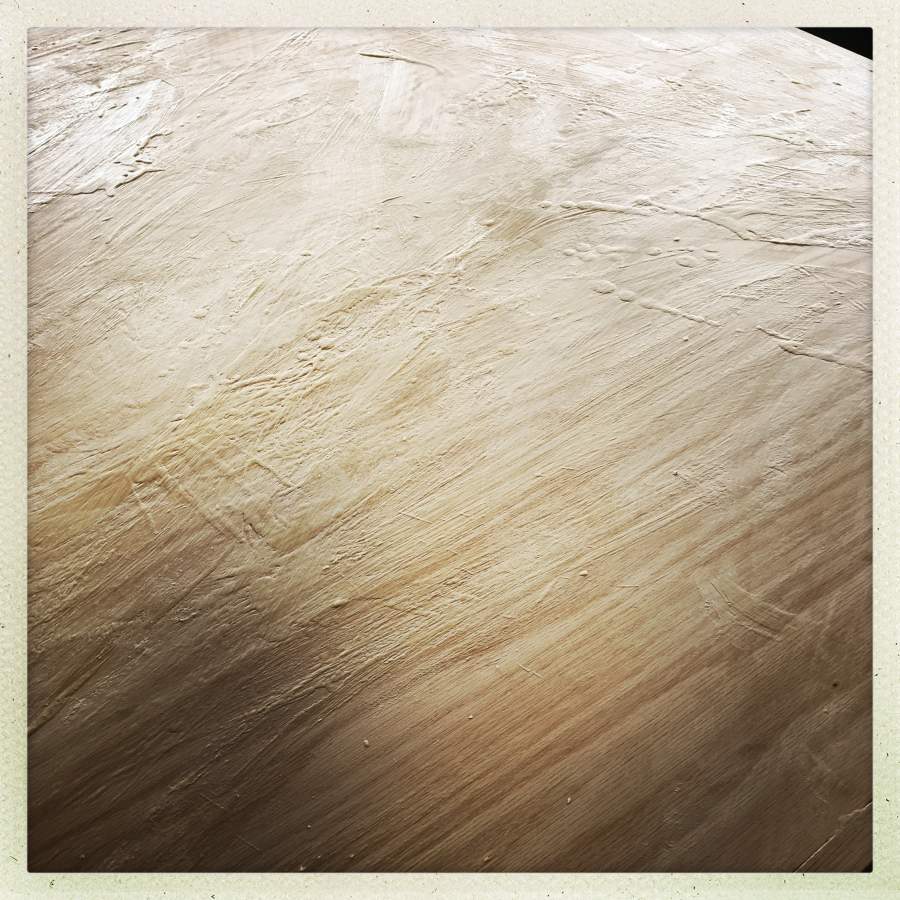
Hit it with a scraper, and it’s glassy smooth. All the pores and grain are sealed.
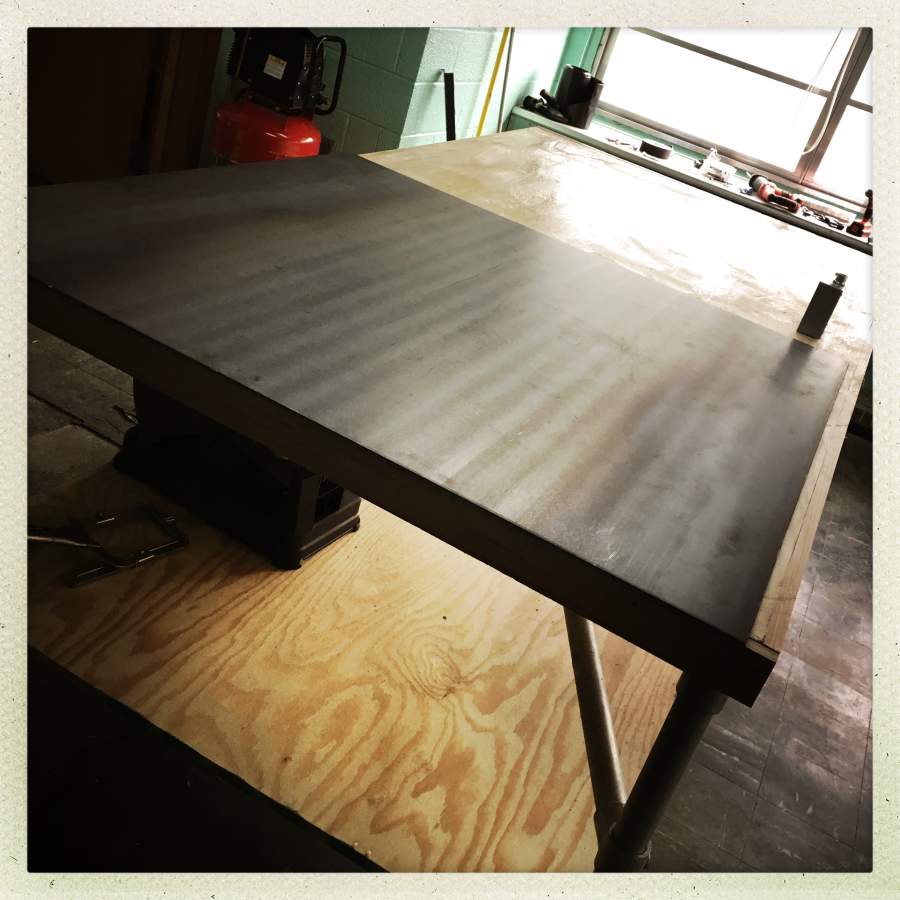
The welding bench is taller than the grinder bench; I’ll probably be working with stuff that I want a bit closer to my chest. Then I dragged the 4′ x 4′ 3/8″ steel plate bench-top across the building and somehow levered it up onto the bench. Because I added the trim, it doesn’t fit flush, which is fine – I want a slight overhang on two side so I can clamp under it, if I want to, or if I’m cutting I’m away from the wood. I’m not sure where the plate is going to wind up, exactly. It’s not as though I have to bolt it down.
The box in the middle of the bench is a 4-outlet electrical box. I haven’t hooked up the power, yet, but I’m going to run a conduit up to another box in the ceiling, and drop power down to it. There’s a hole in the bottom of the box, through the top of the bench, and I’m going to have a power bar hard-mounted to the underside of the bench. I don’t expect I’ll be drawing a lot of power, but I want to have plenty of outlets and I want them protected from whatever comes their way.
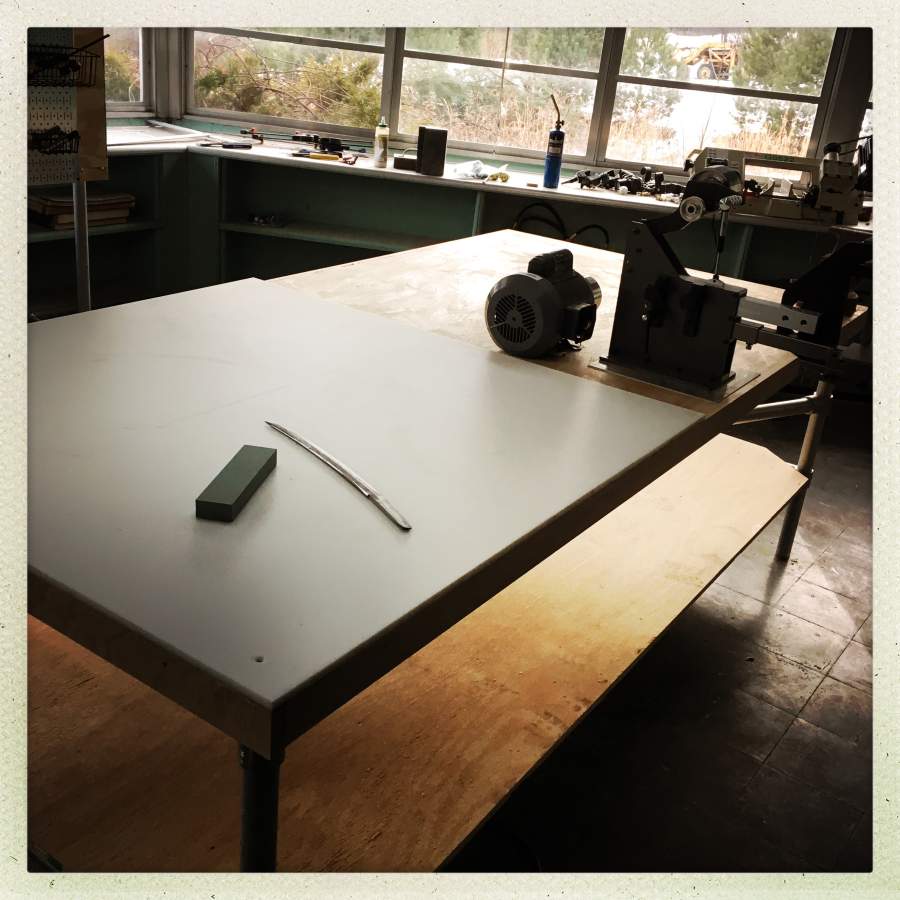
The grinder bench has a 4′ x 4′ 1/2″ polypropylene butcher’s block on half of it, for assembly/clean work/stuff I don’t want to get scratched. The other half will have the grinder (mocked up in position) and vice (on the corner at camera right) I am not sure yet what else is going to go where. Since everything is going to be bolted down I want to think pretty hard about not blocking any of my work-angles.
Next week the propane company is dropping off the tank, and by then I ought to have the grinder rigged up. It’s going to take some wiring; I have a foot-switch I aim to mount on the floor and I’m going to have to wire that and make a dust deflector to keep grind-matter from falling into the switch – worst case scenario, I may just zip tie plastic bags over the switch.
There’s really not much more to do; hook up the electric to the bench, bolt down and wire the grinder, hook up the propane, and set up and aim the ceiling spotlights.

Oh, right: safety gear. I need to make myself a shop apron; I’ve got some nice leather and I’m trying to decide if I should back it with kevlar or not. I’ve got a breath mask, a couple face shields, gloves, etc. One trick I learned working in darkrooms a lot: have safety gear by each work station. That way, it’s always right there and you don’t ever have the temptation to go “screw it, I’m not walking across the room just to get gloves, I’ll just pour this concentrated nitric acid really carefully … oops.” (by the way, the Kimble/Contes polyurethane-coated glass reagent bottles: they are great)
First projects in the queue: get the welder set up and in operation. I have some steel plate and an I-beam that I want to make into a grinder-stand for my old sanding drum that I use to shape handles. Then, I want to make a welded iron picture frame for a painting Caine gave me. I have plans in my head for a sharpening/polishing bench for my wet-stones (that I can take home and set up on the porch in the summer, so I can spend an hour or so every evening polishing blades and scaring the deer)
I have also been designing a rolling press, which I’m trying to get the guys at the machine shop in Clearfield to help me with. If I can make a working rolling press, that’ll be a game-changer for small-lot damascus forging. Some of the work-arounds I’ve come up with make me absurdly happy – I just hope they work!
Wow! You’ve gotten so much done, and it’s all marvelous and impressive! That’s going to be one rockin’ forge.
Do you watch “How it’s Made” videos?
Have you considered making some of your own?
It could be useful for yourself, even — when you watch them again, you might note the “error” part of the trial and error, and say “Oh, yeah, I did that. Future self, avoid doing that again.”
That is a righteous table.
And a fancy ass hotplate.
Owlmirror@#2:
Do you watch “How it’s Made” videos?
Generally, I’m sticking to the stuff I already know (roughly) how to do. So I don’t do much research except for on specific problems. At this point in my life, making another set of benches is “been there, done that.” I just made these a few times more solid than they need to be.
The last nice bench I made was in ’05 and it was a 5′ x 10′ butcher block leather cutting table in solid oak, with dovetail edges and an internal frame so it could be disassembled into smallish bits, and a big leather storage area underneath. That one went out of my possession for a few years but came back – it’s currently my sewing table.I do with I’d kept pictures of making that – except I was working in an unheated barn in Pennsylvania winter so I didn’t even want to take my gloves off long enough to use a camera! I invented a pretty cool technique for constructing sand-filled glued-up wooden legs – that would have made a good “how to” except now I’ll never use that technique again and I think relatively few people are wondering “how to make a workbench that is even heavier!?
Have you considered making some of your own?
I may when I get to forging some knives. Most of this stuff is “infrastructure and operations” and I barely remember to snap a picture now and again while I am assembling things. Besides – the important bit is the photo showing the arrangement and quantity of the Kee clamps; the rest is pretty obvious.
I have some ideas for metallurgy for knives, which – if I can make them work – I will definitely post some “how to” on. Video always seems very time-consuming to me because of the time-cost of editing and rendering. Photography is bad enough…
Also, I know people would be far too amused if I posted video of things like “my first experiment with the plasma torch, AKA why you never pick up a cut-off piece of steel until you are sure it’s cool and thank god for my leather gloves.”
Raucous Indignation@#4:
And a fancy ass hotplate.
I used that to keep my wet plate chemistry warm while I was experimenting to figure out the temperature range of the process. One cannot have open flame or sparks near collodion (nitrocellulose dissolved in alcohol and ether)
That hot plate’s fancy ass knobs nearly got me horribly dead. But I’m not sure if I’m going to tell that story because it’s really embarrassing.
Caine@#1:
Wow! You’ve gotten so much done, and it’s all marvelous and impressive! That’s going to be one rockin’ forge.
It’s pretty nice. When I do stuff for myself I let my tendency to crazily over-engineer everything get out and strut around a bit.
Rick would have probably gotten a temple-clutching moment from watching my first experiments with the plasma torch. I definitely have adjusted my priority for making the leather shop apron after I set the crotch of my jeans smouldering.
I also need to get 220. I was avoiding it, but I didn’t realize that, basically, you can’t weld or cut anything except thin stock with 110. More power!
Marcus Ranum@#7
I also need to get 220. I was avoiding it, but I didn’t realize that, basically, you can’t weld or cut anything except thin stock with 110. More power!
At the lab I’m a postdoc at, high bay areas and other places where heavy work may take place had these really heavy duty plugs a few feet up some of the walls. The plugs have their own breaker panel box above them with a big lever and if you look at the box you will see arc flash warnings and you will also see that the box handles up to 100A of 3-phase 480V electricity. For the longest time I had no idea what they were and I finally asked one of the pipe fitters what they were when I was walking past them making a repair near one. Turns out the plugs are welding sockets. They have big welding machines that can plug into those and use it. My response was:”Holy crap!”
James Matta@#8:
box handles up to 100A of 3-phase 480V electricity.
Oh boy, when those go wrong, I bet they go way wrong and it’s very exciting.
In my darkroom I have a 200a switch from the 1900s. It’s one of those big copper knife-switches (I wired it into the sound system as a “mute” switch – you just unhook it and the sound stops – it’s currently carrying, what, 5v?) The fuses on stuff like that are outright terrifying.
Every so often a bird lands on the wrong place in the copper-farm outside Shawville power plant; it sounds like a gunshot.
Are you putting some nice flat feet on the legs of that bench? My little work/vise bench made a mess of the concrete below before I gave it some plate steel shoes to wear.
Wow that looks great! Very well thought out.
You mentioned grinders… I am sure you know about these: https://www.gesswein.com/p-9694-arbe-benchtop-polisherdust-collector.aspx although maybe that one is too small for you. They are nice because they have that big fan behind them that sucks up a lot of the dust, and in addition, that little sort of awning on the top is sure nice when the wheel snatches what you are working on and flings it at you. Amazing how fast that can happen.
I’m sure you will be spending many happy hours in your new forge.
Lofty@#10:
Are you putting some nice flat feet on the legs of that bench? My little work/vise bench made a mess of the concrete below before I gave it some plate steel shoes to wear.
I’m not sure! I was thinking of making some footers out of ABS plastic (I have a lot of that stuff lying around) or polypropylene, but I actually don’t want it to slip. And I’m not sure I care about the concrete – the studio is built right on the slab; they just glued down those horrible fiber tiles and called it a floor.
So I guess “we’ll see”? Simplified building sells steel caps but they’re pretty pricy and they don’t solve the abrasion problem anyway. I suspect those plastic plugs or vinyl covers would just fall apart under the weight.
kestrel@#11:
You mentioned grinders… I am sure you know about these: https://www.gesswein.com/p-9694-arbe-benchtop-polisherdust-collector.aspx although maybe that one is too small for you.
I’ve got breath-masks and face shields. Usually for blade-making you come at the abrasives from lots of angles so stuff pretty much gets thrown all over the place. Mainly, we worry about not having a “helicopter incident” or a buffer wheel grabbing a blade and throwing it through a thigh or taking a finger along.
You are going to have such interesting times in there, it is looking good already.
It’s a completely different scale to what you are thinking of as it was used for rolling the steel for armour plating ships and so forth, but one of the coolest things I’ve ever seen is the River Don Engine. http://www.simt.co.uk/kelham-island-museum/what-to-see/main-museum-enid-hattersley-gallery/river-don-engine Steamed up the power is physically overwhelming, pushing people right back from those railings in the picture, often to the back wall.
jazzlet@#14:
It’s a completely different scale to what you are thinking of as it was used for rolling the steel for armour plating ships and so forth, but one of the coolest things I’ve ever seen is the River Don Engine.
Holy moley! That is on my list of things to see if I make it to England again. Wow! (Look at the size of the grease-fittings on that bearing!)
As much as I dislike warfare, it’s caused some really impressive technology to happen. A rolling press for battleship plate … now, that’s a thing. I don’t even have words. 3 hrs drive East of here is Bethlehem PA, where they used to make battleship parts for the US fleet. The buildings are mostly down, now, but they were gigantic – multi-story cranes for hauling gigantic buckets of hot steel to be poured into molds for battleship turrets. So much work! What is the radiant heat like when you’re hauling around a thermal mass like that? I got to visit when the plant was cold, before they tore it down to make a casino, and one thing that was just sitting there was the main drive-ring for a turret – a massive gear about 20′ across and 2′ high. I have no idea what it weighed. And the mold for it was right next to it: a big ring of steel that, I suppose they’d just pour into. The mind boggles a lot.