One of the pleasant surprises is that forging is not anywhere near as kinetic as I expected it to be. There’s a lot of “wait for the metal to heat” then “find the right spot” and hit it a few times, followed by “figure out where to hit it next” and back into the heat. So you’re not emulating a trip-hammer and just wailing away at the metal, which means it’s not tearing up the wrists or elbows. Mostly you lift the hammer and let gravity do its thing.
It’s another beautiful morning, with low-lying mist in the valleys, and sweet clear air. Other than the occasional mega-tsunamis, the weather here is very nice.

There’s a heron (?) [big white predatory wading bird with a needle beak] that has been at this spot each morning so far. Today I stopped to take a picture and the bird cussed me out in a dialect of high birdish before it flew off.
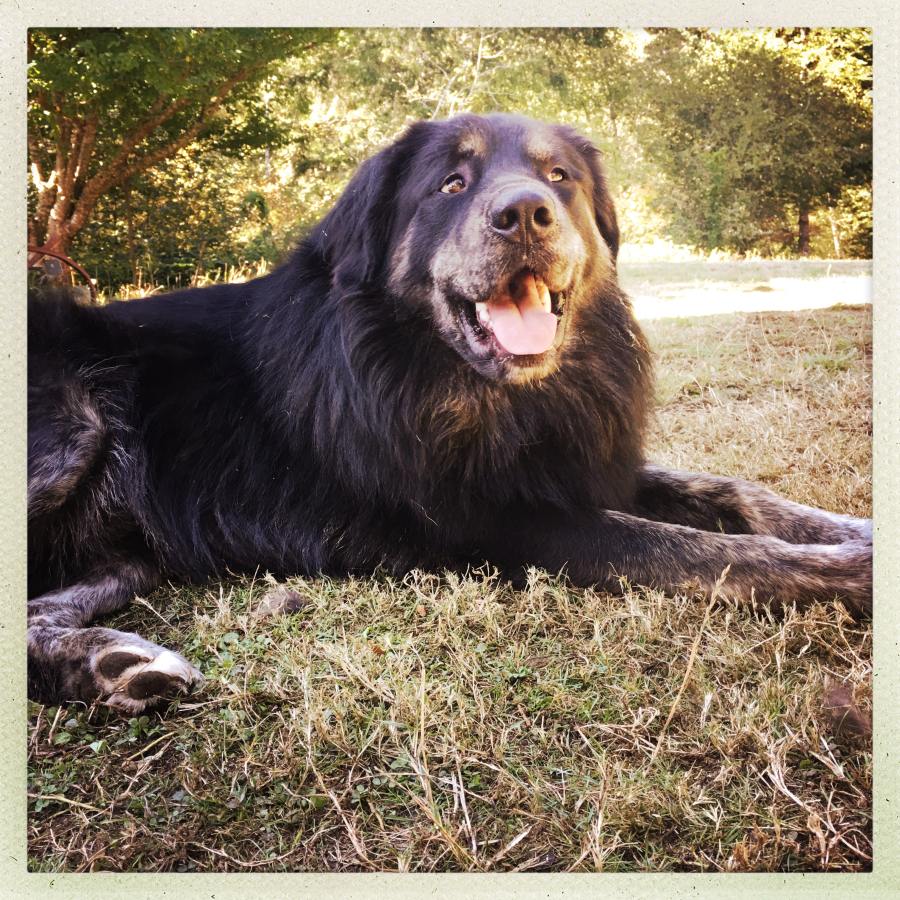
I shared a big mug of coffee with Samson, which is to say he watched me while I drank it and occasionally thumped his ribs and rubbed his ears. There are other dogs around but Samson and I appear to have hit it off – probably because he resembles my dear departed Jake, who was also huge, black, and serious.
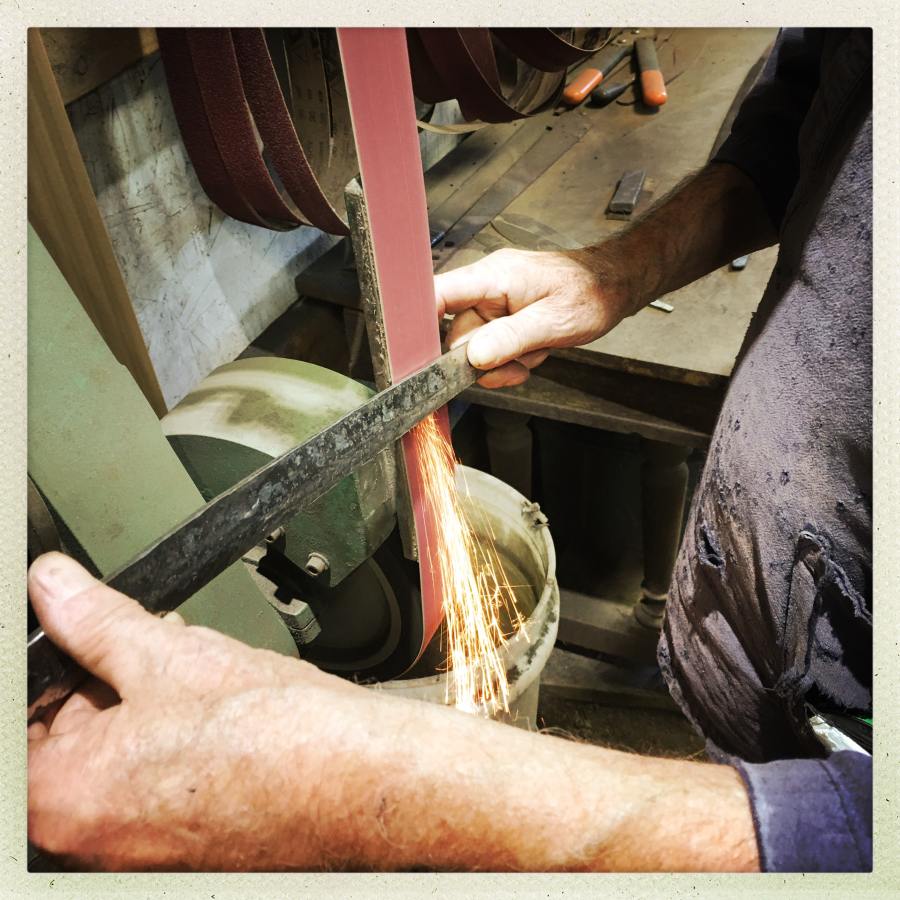
This morning’s project was to start the fine-shaping of the blades, beginning with grinding off the surface junk and scale with an angle-grinder. Scale is pretty tough, apparently, so it’s easier to use an angle grinder than the sander, and the rough surface of the scale can eat into the fabric of the sanding belts.
In most of these pictures, the hands aren’t mine; they’re Michael Bell’s or Gabriel Bell’s. My hands are full of iPhone. The way the instruction is working is interesting and (I think) about as effective as it can get: Michael demonstrates a bit of “how you’re supposed to do it” and then we try. Then we go to Michael and say “why is this not working?” and he diagnoses and sometimes shows us more, or helps fix it. I’ve always believed that a good learning process for most people looks something like:
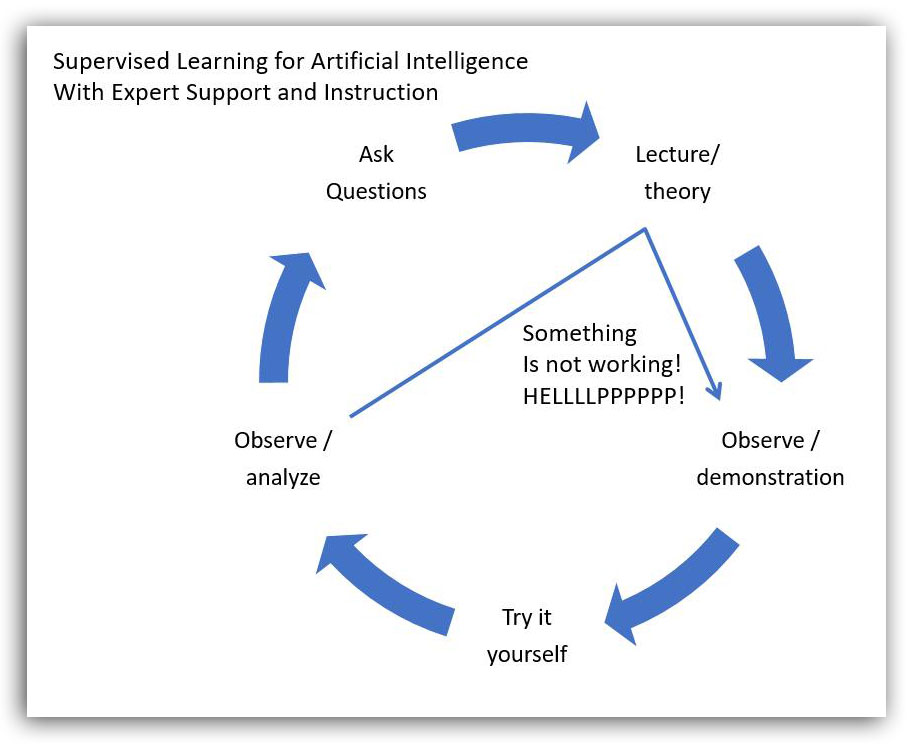
There are some problems that are purely intellectual and require no practice, I suppose, but with a craft/task, if I’m teaching, I try to drop into that cycle more or less automatically. I start with Lecture/Theory and then cycle from there, but I’ve seen other teachers drop right into Observe/demonstrate or even just trying; it depends a lot on the problem. The folks at Dragonfly are really good at working this loop; they’ll let you go off and make mistakes and then help you try to correct them, and they’re respectful about whether or not you want to do all the mistake-making yourself, or let them haul you back in line.
It’s frustrating as hell, for me, since we’re dealing with tools that we aren’t used to dealing with in this particular way. I’ve got plenty of time with angle-grinders but I’ve never tried to do anything more delicate than cutting a lock or a pipe with one; the idea of making a flat bevel with a round wheel makes sense in principle but if you haven’t done it, your “flat” and “samurai sword flat” are not in the same ballpark.
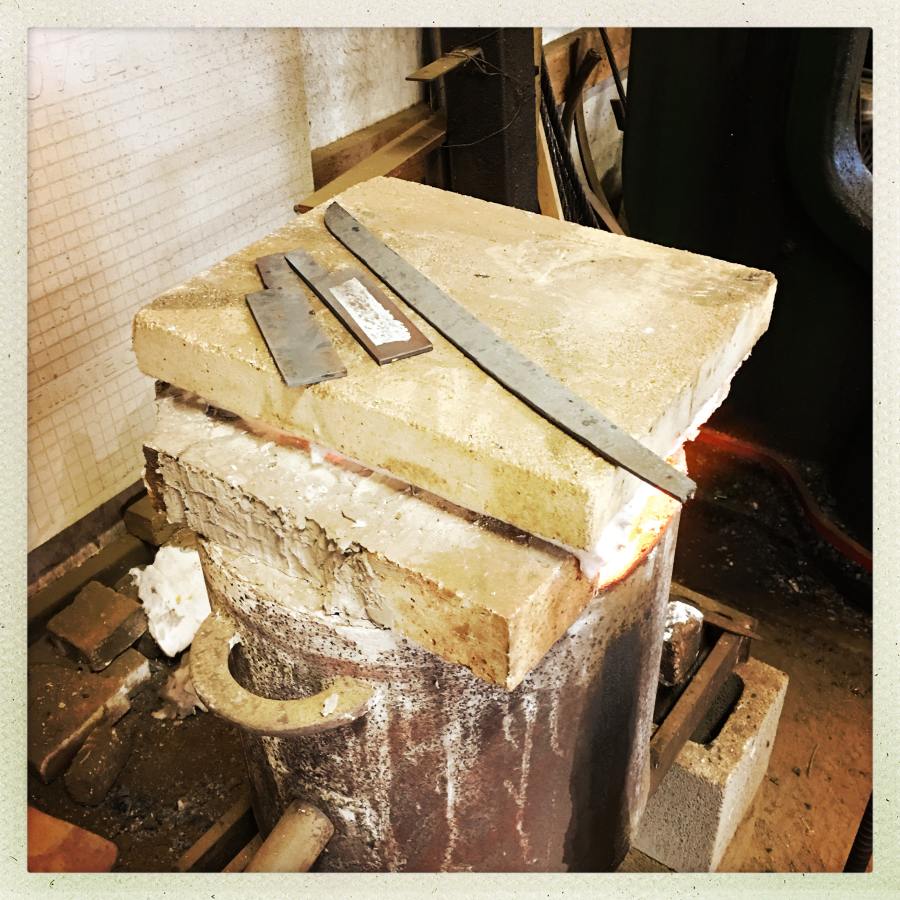
This is my gladius. There are many others kind of like it, but this one is mine.
That’s what it looked like this morning. As I look at it, now, I see that where I ended the day is very different from where I started. But it’s all gradual refinement. It is definitely not a case of “just grind off everything that doesn’t look like a samurai sword” because apparently the curvature of the blade is going to change when it’s quenched, and the ‘edge’ (more precisely: where the edge will be) needs to be about 1/8″ thick. We’re setting up the planes of the blade and trying to make them flat and harmonious because it’s going to be harder to change them once the blade is quenched; the metal will be tougher.
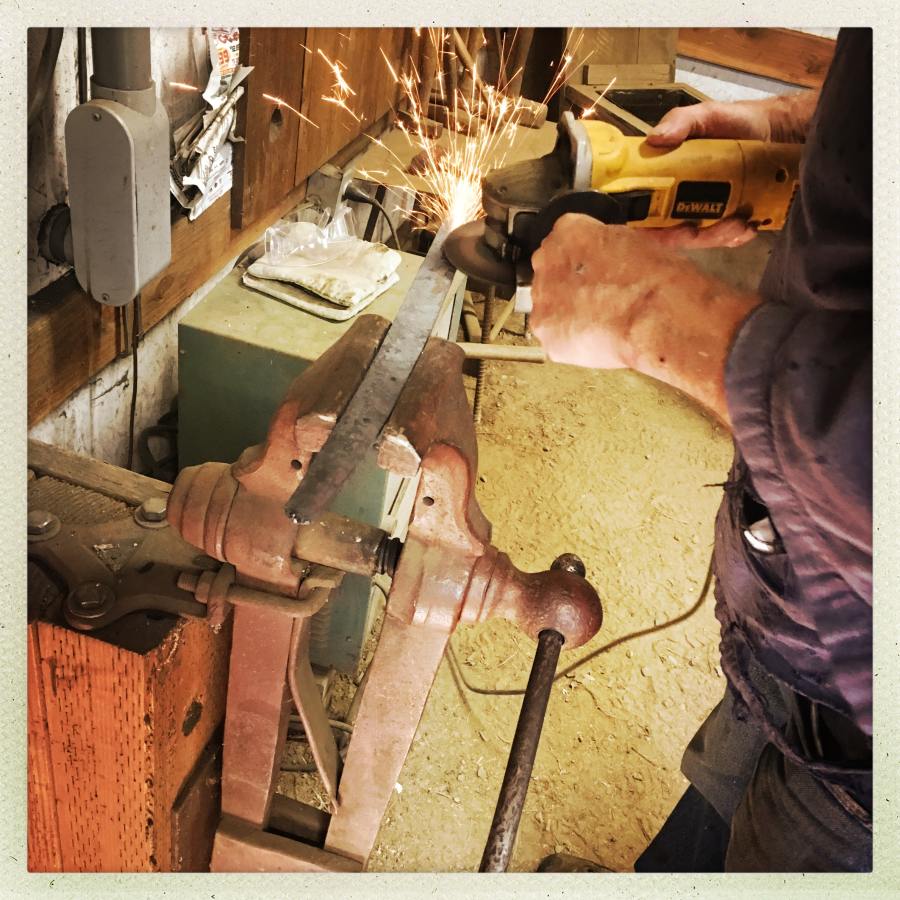
Scale removal with angle grinder
Once the scale is ground down we take it over to the belt sander and start grinding the planes of the sides. There are 6 planes, 2 forming the roof-like angle of the back (Mune), 2 forming the upper sides (Shinogi), and 2 forming the lower sides/cutting edge (Shinogi-Ji).. In principle these are all balanced and symmetrical. In practice, so far, well, it’s a lot of work.
In my house I have some beautiful calligraphed scrolls done by a master calligrapher that I met years ago. Periodically, I get a wild idea and have her do one for me (in my upper hall where I can see it out my office door, is a beautiful piece that is a Japanese translation of a David Attenborough quote: “I burn with unanswered questions”) and while I was working on one part of my blade I thought, “I should have a scroll made that says ‘I have discovered the secret of sword-smithing: hard work.'” Because it’s a lot of staring at the thing and trying to figure out where you need to take metal away to make it straighter. For example, if you get your hand a bit off on one part of the Shinogi-Ji, then you just created a waviness in the cutting edge or in the Shinogi. How do you get that out? You can’t add metal; your blade has to get thinner from that spot toward the tip, which means you just altered the shape of the tip. Repeat after me: “arrrgh!”
38-grit sanding belts remove stock pretty quickly. So, we’re trying to learn how to visualize the contact surface with the belt against the platen and the part of the blade we’re shaping, then keep that contact perfectly even and move the contact patch smoothly and perfectly along the length of the curve. Then you just flip it over and mirror it perfectly on the other side. All this would be hard enough, except that what we started out with was hammer-shaped (by a beginner!) so it wasn’t flat and even to begin with.
It’s very easy to get into the weeds; at one point I screwed up quite badly and hit the belt wrong and flattened a spot, basically removing the transition between the Shinogi and Shinogi-Ji right about 1/3 of the way back from the tip. Bursting into tears and curling up and crying for a while seemed like a good idea, but Michael Bell took over and thinned the whole blade consistently along the sides, basically re-laying out all the lines for me. It was a beautiful thing to watch. Decades of practice pays off, apparently.

About lunchtime
You can see that the lines I’ve ground are wobbly; they’re not crisp and assertive and sharp. It’s frustrating because I’ve done stock removal knife-grinding before, and it’s not this bad, but I’ve never used a vertical belt sander (wow, it’s nice!) and I’ve never tried to visualize grind-lines inside an already uneven surface. It’s compounding error – since I’m a beginner with a hammer, the forged blade-shape was a bit off here and there, which threw off my grinding. At one point, Gabriel Bell noticed that I was throwing the whole layout of the blade off slightly because I was referencing my grinds on the line of the top of the tang, which was a problem because I had forged the tang slightly bent. Just a tiny bit… But that meant if I continued to do that, I wasn’t going to have a tip left by the time I got there.
I like the way they’re teaching this, though; they have figured out what parts of the process are easily remedied, and let us start there (screw up the tang, not the tip!). So toward midafternoon we switch to fine-tuning the shape of the tip (Kissaki) with a file. I was surprised at how fast a file would cut the metal; it was pretty satisfying.

I did that for a while, then Michael Bell came over, took a look at the blade, harrumphed a bit, and walked over to the sander and proceeded to lay down perfect grind-planes. Mine were off, a fair bit off, but pretty close, and with his more experienced hand and eye he could make big, confident, sweeping grinds that made all the difference in the world. That was when I suspected that some of the process is giving us a chance to feel what the tools feel like before we get to a place where we can permanently destroy the blade with a wrong grind.
I’m still pondering how to practice on some of this stuff, if I want to try to do more of this. Let me give you an idea what it’s like: take two blocks of sculpey. They have, what, 3 cut-lines for dividing the block? Anyhow, cut apart two blocks of different colored sculpey, then arrange them into the shape of a thick bar consisting of two layers. Now, take a hammer, let’s say a crab mallet or a leatherworkers’ hammer, and beat that into the shape of a samurai sword. Then, take a straight razor and shave the planes of the blade, flip it over, and shave the other side to match. Something like that. It’s pretty clear to me, I think, that if one is getting serious about this, it’s going to take some willingness to kill a few projects by working fast and loose and trying to develop the feel of the tools and the process. As a beginner, I’m over-thinking and over-controlling everything because that’s all I’ve got right now.
The grinding was not kinetic; it took delicacy and a great deal of thought. So far I am much more brain-tired than anything else. Tomorrow we’ll be doing some more fine-tuning on the shapes, using files, then coating the blades with clay and maybe quenching them before we stop for the day.

I forgot to get a picture of the cable (excuse me, “wire rope”) because, I forgot. Today, we were so busy and jumped right into it, that I forgot to set up my main camera, at all. I’m probably happy about that because I think it’d have a lot of frames of me flipping back between “mighty furrowed brow” and “OMG did I do that?” cringe.
I also forgot to get a picture of the blade at the end of the day; I will try to get one before I screw it up start on it tomorrow morning.
The great scary divot hammer-marks kept throwing me off; I know I was instinctively trying to grind them out, which was throwing everything off. Everyone kept saying, “Don’t worry! It’ll buff out!” and sure enough by the time everything was thinned down and the curve-lines were defined, the divots were gone. I’ve been fascinated by the connection between doing the best you can to shape the blade at forge-time, versus grind-time. Either way, you’ve got to do it, but it sure is easier if you are working with something that’s closer to correct at the beginning. In photography, most of us learn that it’s best to get your lighting and composition right in the camera because it saves you a huge amount of time retouching in photoshop. Forging it right is “getting it right in the camera” and grinding it right is fixing it in photoshop. But there’s no Undo.
It’s looking *great*! Sympathies on the “I have to get this perfect, I spent X on the materials and X amount of time on this” thing. My favorite saying is something like: The man who never made a mistake, never made much of anything. It’s still hard to allow yourself to make those mistakes, though.
Glad to hear the process is not going to destroy the joints. You will be able to make many, many swords.
kestrel@#1:
Thank you!
I’ve managed to mature enough to understand that learning something is a process and comes with built-in timelines (it took me a LOT to learn that understanding!) So now I approach things that way: it’s going to be awkward at first, and the first few will be embarrassing later – but the embarrassment will be limited because later I’ll know “well, yeah, that was my first.” You’re right that it’s a foolish person who expects everything they do to be awesome. When I was working on wet plate photography, I spent 2 years building my darkroom, doing research, and experimenting – deliberately doing projects that forced me to stretch my craft. From what I know of your crafting and art, “I know you know.”
I’m still on the fence about whether I’m going to get into this in a big way; this may just be an exploratory trip. That’s another thing I learned when I was doing the wet plates: go look at someone else’s process and how they set up their work area – then use the knowledge you have acquired to design yours. All this takes time – but buying a bunch of gear you don’t need (or not buying the gear you do) are big time-wasters. I’ve been going around on the knifemaking 101 on facebook telling people, “you need to buy a jeweler’s saw. $25 can change your life.” That kind of thing…
A handsome fellow, that Samson.
Wow, that’s wonderful! Learning so much, that’s grand, and more than worth it, whether you decide to pursue this more or not.
I’m strictly ‘get it right in the camera’. I can’t be arsed to do a million things in photoshop, and that doesn’t feel like photography to me, so I don’t do that. People have told me “consider photoshop to be a darkroom!”, but it doesn’t work for me. If I don’t get it right in camera, I drop it, or go back and do it again until I get it right, if I can.
‘I have discovered the secret of sword-smithing: hard work.’
Same is true for all art.
it’s going to take some willingness to kill a few projects by working fast and loose and trying to develop the feel of the tools and the process.
When I try new things I always expect to mess up the first few projects. That’s just how it happens. I don’t have to show my mistakes to anybody, so that’s fine. Nowadays steel is cheap (same is true for most art/craft materials), so the only thing I lose is time.
In photography, most of us learn that it’s best to get your lighting and composition right in the camera because it saves you a huge amount of time retouching in photoshop.
I learned this the hard way. At first I tried really hard to fix in Photoshop my photos, which were poorly done in camera. I spent hours in Photoshop wondering why the final result just doesn’t look good. Fixing problems in postwork is not only more time consuming, sometimes it is outright impossible. Still, I do not belong to the crowd of “always get everything right in camera” chanting photographers. Some adjustments are actually quicker to do in Photoshop than in camera while shooting. My attitude towards digital adjustments is very pragmatic. If the desired effect is faster/cheaper to get in Photoshop, then that’s how I do it. And vice versa of course.
Pierce R. Butler@#3:
A handsome fellow, that Samson.
Very dignified for a puppy.
Caine@#4:
Wow, that’s wonderful! Learning so much, that’s grand, and more than worth it, whether you decide to pursue this more or not.
It feels very good to be doing this. I’m still on the fence about whether I’ll pursue it, though. It’s a heck of a time-committment.
I’m strictly ‘get it right in the camera’. I can’t be arsed to do a million things in photoshop, and that doesn’t feel like photography to me, so I don’t do that.
Someone once called that “lazy enough to get it right the first time.” I like that approach.
Ieva Skrebele@#5:
[…] so the only thing I lose is time.
I’ve been getting an increasingly creeped-out realization that time is also something that’s getting in shorter supply. When I was a kid I made knives with just a file because I had nothing but time. Now, I find myself more cautious about throwing away something that took more than a couple days of what’s left of my life.