It rained a bit on Wednesday, which was lucky. I did not want to start a charcoal fire when the whole garden was bone dry. And I had to start a charcoal fire because this blade is way too big for my small gas forge. I have managed to quench and harden all that I have set out to (it would not be worth starting the fire for just one blade, so I prepared three more plus a platen for the belt grinder – I will post about those later) but it was extreme pain in the ass. And I finally found out why I have sometimes – but not always – trouble reaching the right temperature with this setup. As the coals burn, they get smaller and smaller and since I am blowing the air in the pile from the sides and from up, the air cannot reach the bottom of the fire anymore and thus I get scorching heat on the surface, but barely any heat just one-two cm below it. It makes perfect sense when one thinks about it. I will probably have to build a bigger gas forge for such big blades or a charcoal forge with air input from below the coal. If I will go through the trouble, I will probably build a gas forge since it is significantly safer than charcoal. The problem is in getting my hands on proper housing for the forge – I do not have any.
Anyhoo, the quenching was such a pain in the ass that I spent several hours with it after which I was dead-tired. I managed one tempering cycle at 150°C in the oven in the evening that same day, and the next day while the knives were in the oven for a second 150°C cycle, I tempered the kukri manually with a propane burner.

© Charly, all rights reserved. Click for full size.
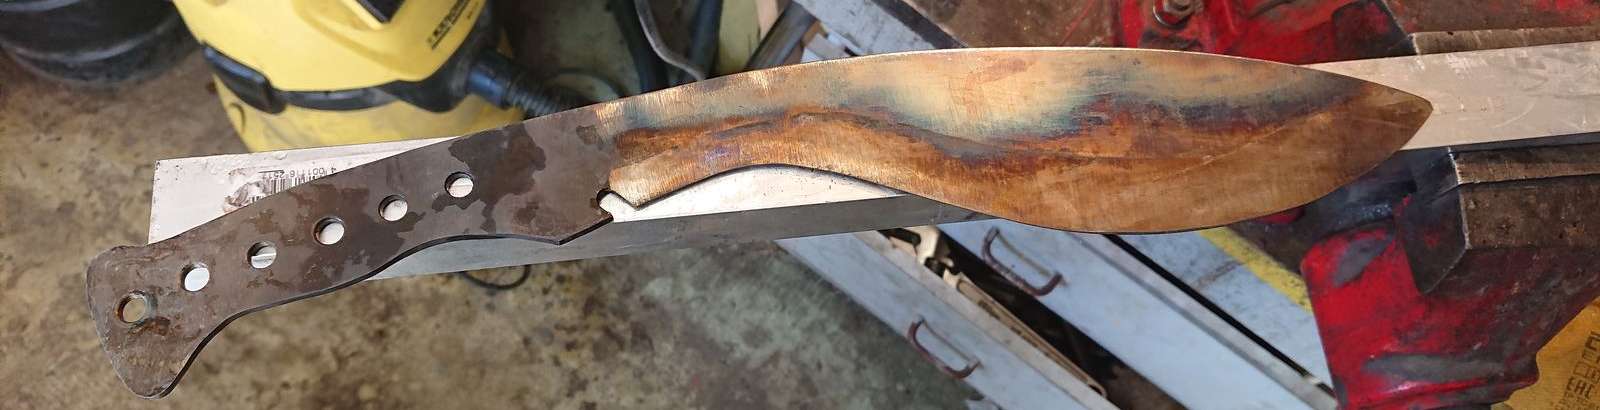
I put water-soaked paper towels on the edge and heated the spine of the blade until the blue color crept almost all the way to the bevels on both sides. The paper towel near the tang is not there to shield the tang, however, just to shield the plastic clamps. Later on, I tempered that area more than the rest of the blade because that is the area where there will be the least cutting action – thus least need for edge retention – but the most stress during chopping – thus most need for toughness. Here you can see the fully tempered blade shining with some of the colors of the rainbow. You can see that after I took the towels off, I tempered the edge a bit too.
© Charly, all rights reserved. Click for full size.
Here is where things got really hard. 54SiCr6 is very tough spring steel. On the spine here it is tempered at 300-400°C, where it is at its toughest. Which is good.
What was not good however was a slight left-leaning bend towards the tip of the blade and a slight wave near the tang. This is 4 mm spring steel, tempered to springiness. It was difficult enough to straighten the blank before work – It broke my unbender so I have reckoned that straightening this will be hell on earth.
I was 100% correct. I tried a clamp and two steel shims, a method that I used to straighten the blank. It did not budge. Then I tried the old method with two screws in the vise. It did not budge, but I was very close to breaking my vise. After over an hour of completely futile effort, I have decided that I have to repair and reinforce my unbender and if that fails, I will have to ask the customer if they accept the bend.
Therefore I took some steel L-profiles from my scrap pile, some flat mild steel, an M10 threaded bar, and some ball bearings and I got to work.

© Charly, all rights reserved. Click for full size.
As you can see, I have replaced the upper connection with two girders from L-steel profiles. What you cannot see is a similar reinforcement under the two rollers on the base. What you also cannot see in this picture is the upper rolling wheel – that one got totally obliterated.

© Charly, all rights reserved. Click for full size.
The axis of the upper roller was completely bent out of shape. It is bent on one of the lower ones too, but not so drastically. I could not easily make a new roller with a thicker axis from materials available to me straightaway so I have just put 6 ball bearings side-by-side on an M10 threaded rod and that’s it. Next week I am taking my parents to a doctor in a nearby district town where I can buy more ball-bearings to make the lower rollers sturdier too. I have decided that buying and using ball bearings directly will be probably easier than trying to find a pipe in which they fit. Sometimes not having a lathe is really a pain in the nether regions, but one cannot have everything.
Thus reinforced unbender – bolted to the table – was finally strong enough to actually do something. I did not get a perfectly straight blade, but instead of the tip straying over 2 mm from the center line it has now just a few small wobbles, under 1 mm. One has to look very close to notice them and some of it will come out in the polish too.
I took the now hardened, tempered, and straightened blade outdoors and I bashed a few things with it – a brick, a stone pavement, and a few ash logs in the firewood pile.

© Charly, all rights reserved. Click for full size.
It is not sharpened yet but it did stick in the end grain of the ash logs already. I was not joking when I said that I have bashed a brick with it. I really did, I wanted to make sure that the blade does not shatter. It will be used as a foresting/garden tool and it must be able to withstand some serious abuse. If it did not, it would be very wrong of me to charge the money that I do.

© Charly, all rights reserved. Click for full size.
I took a picture of the blade stuck in the log so you can see the straightness a bit. It was difficult to align the lens of the phone properly, but I think you can see that it is mostly straight.
Now there will be some grinding and gnashing of teeth. Luckily this blade will not need very high polishing, just to 100 grit. Even so, it will be a hard slog since it is hard, tough material.
I hope your renewed, more sturdy blade straightener has a long useful life!
I don’t know what they call it in the States, but in the UK the L-profile is called “angle iron”, a straight forward description for once. Jolly useful stuff.
We use angle-iron in the states too, at least I do.
But it does make me pause and think that maybe calling it an L-profile is more descriptive. By default angle-iron is bent at 90 degrees, but there is nothing I know of which says it couldn’t be, for example, 60 degrees. Mind you, I don’t know what you would call a piece of angle-iron with a 60 degree bend other than calling it a 60 degree angle-iron.
Anyway, that is a beautiful ugly tool.
Angle-iron has been calqued into Finnish as well. It’s kulmarauta (kulma = angle, rauta* = iron).
It is interesting to follow the process. And one learns not to take well-heat-treated steel for granted.
__
* = itself a Germanic loanword, from rauðr, red.